Pirate Incursion Event Guide


SWTOR Pirate Incursion Heroics Guide
The ultimate and complete guide to every Heroic Mission on Dantooine that are part of the Pirate Incursion event in Star Wars: The Old Republic.
Where to pick up the mission.
You can pick up the event on the fleet (see below). To access the story mission you have to have completed the Jedi Under Siege storyline, but it is not required to participate.
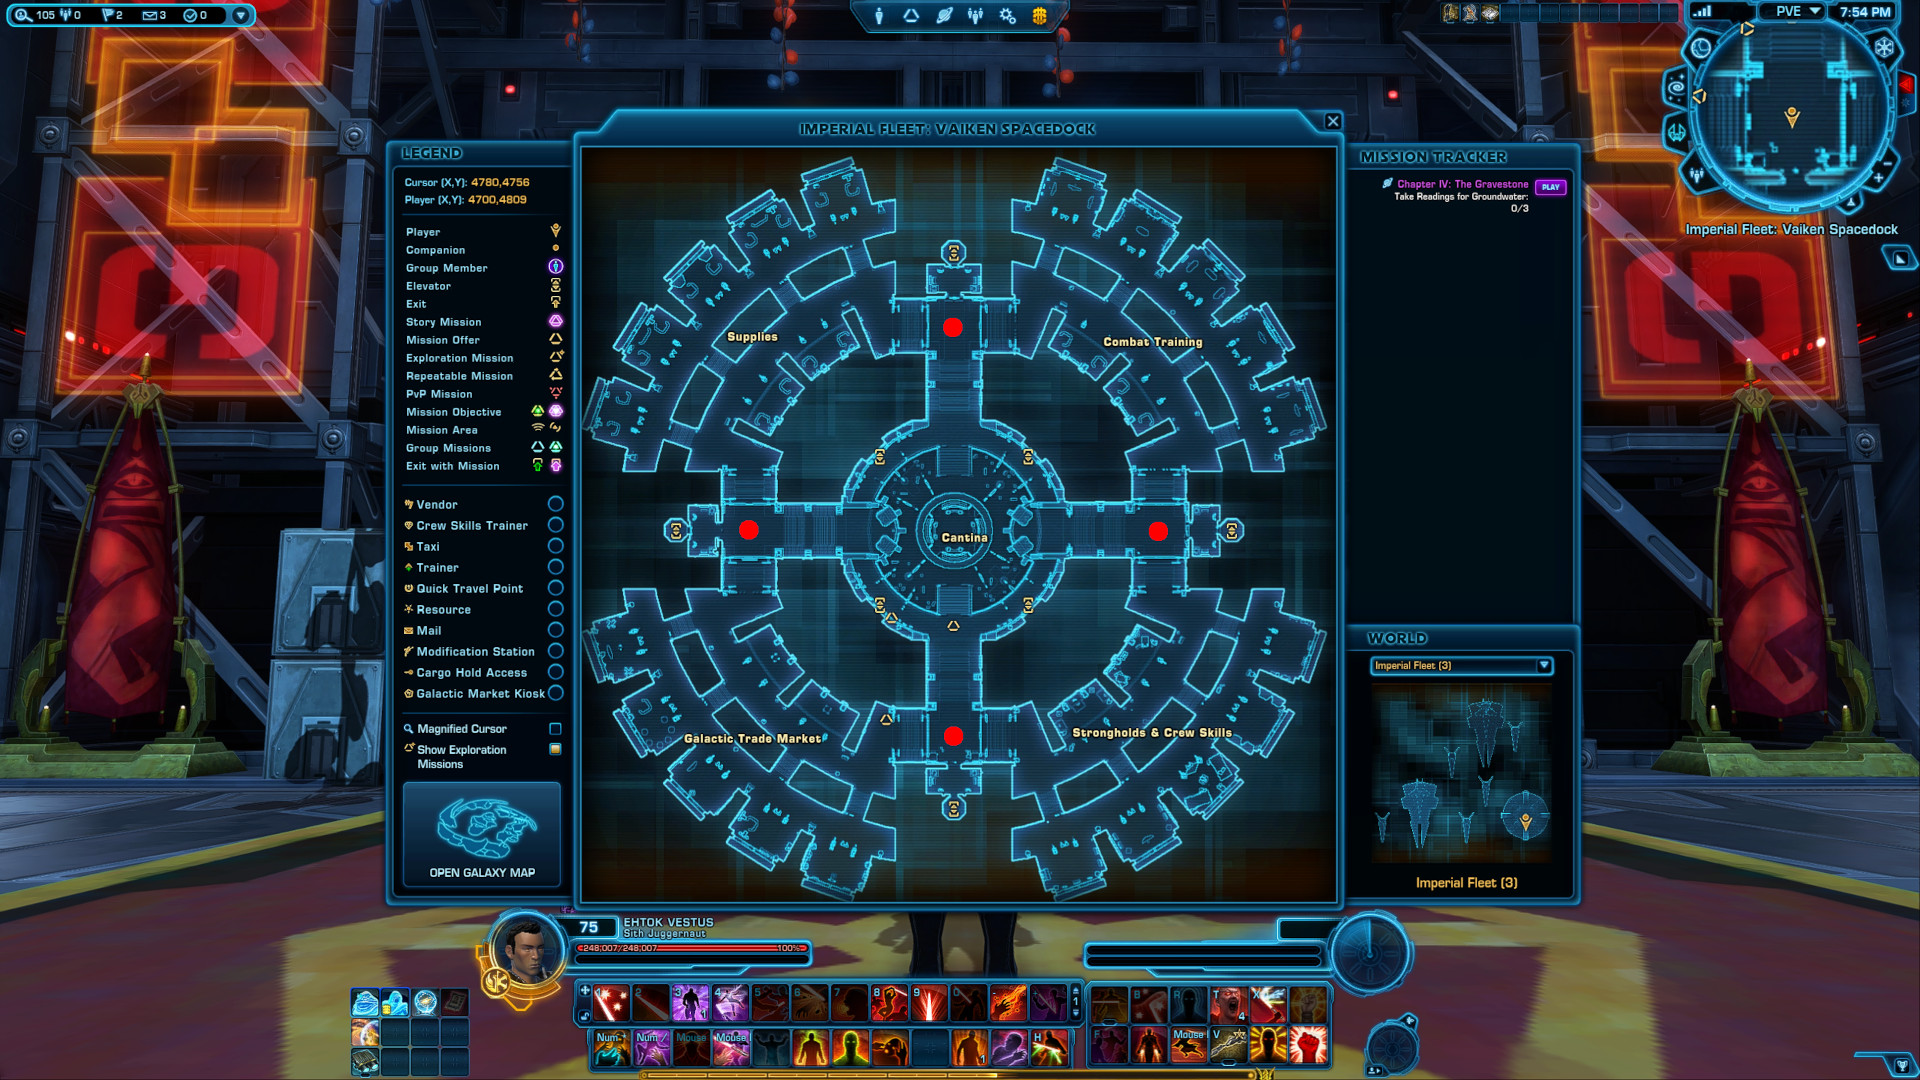
Empire Fleet:

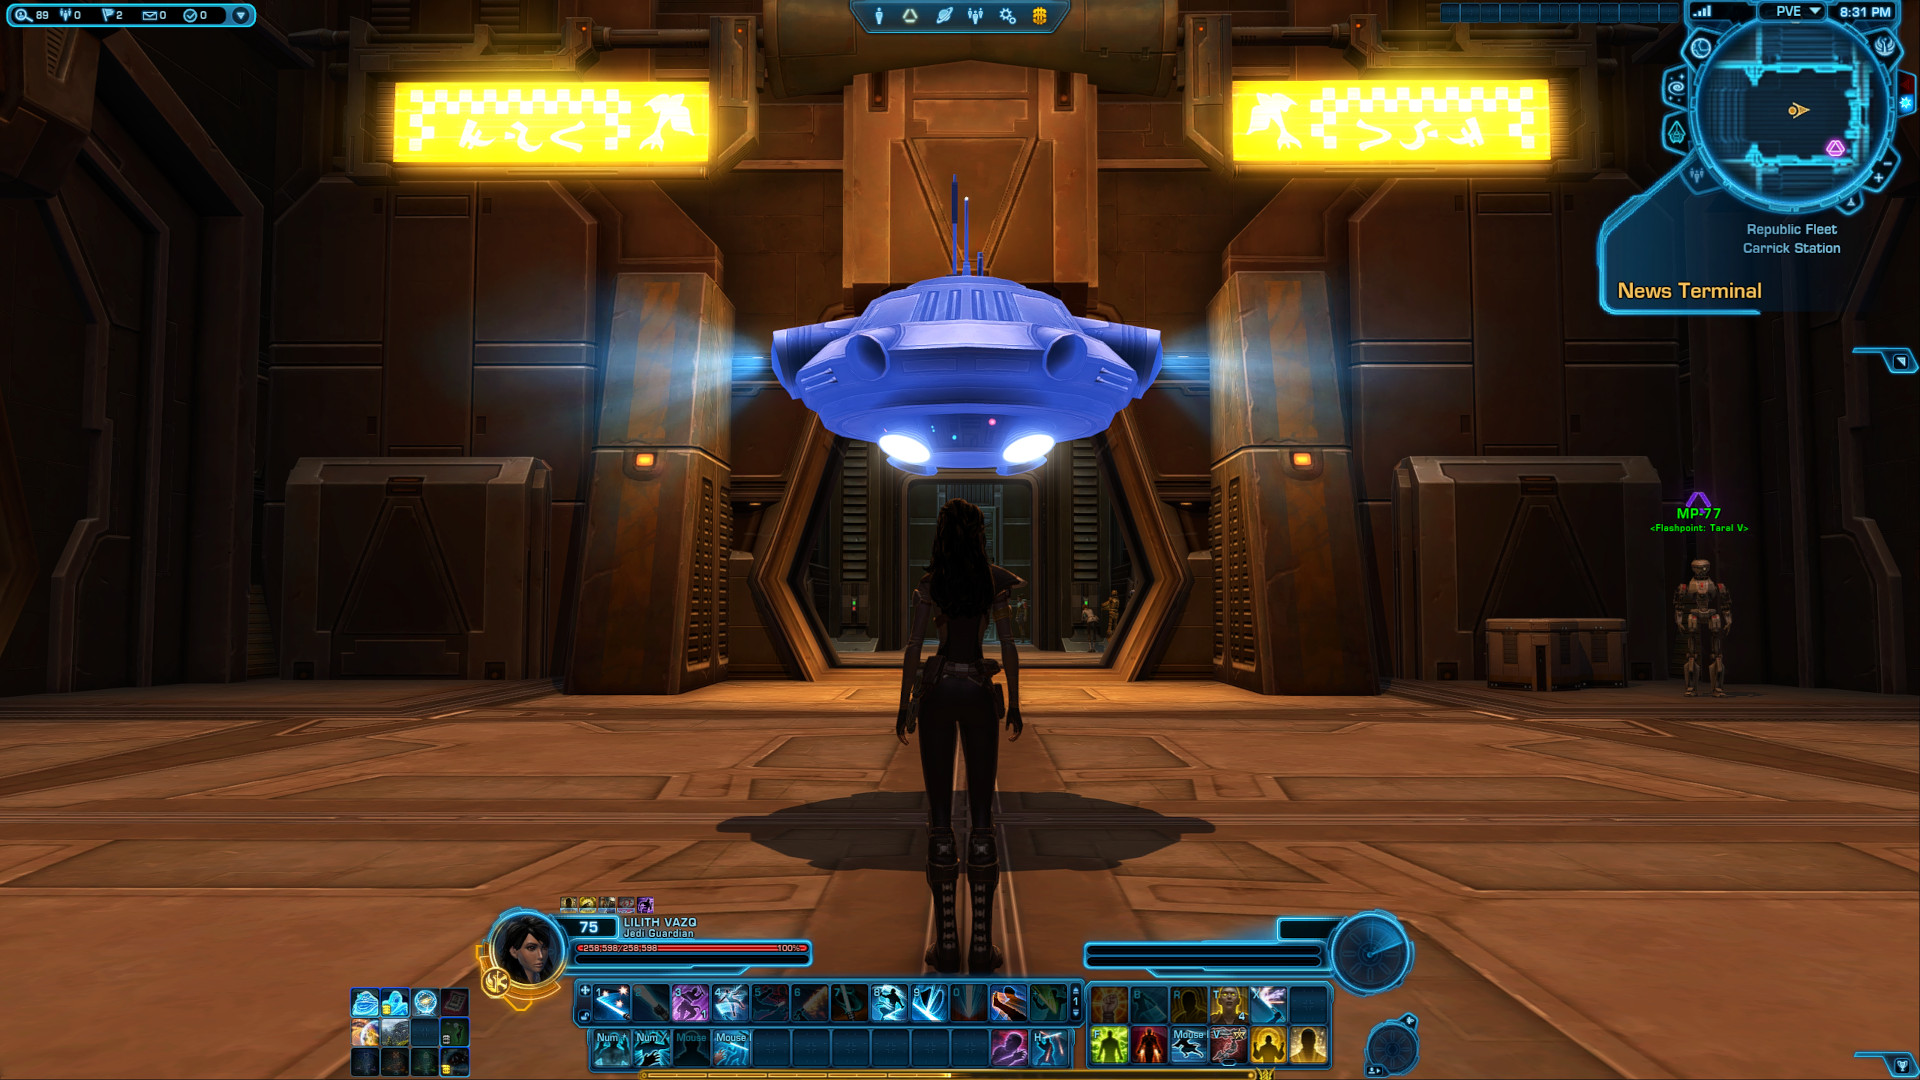
Republic Fleet:
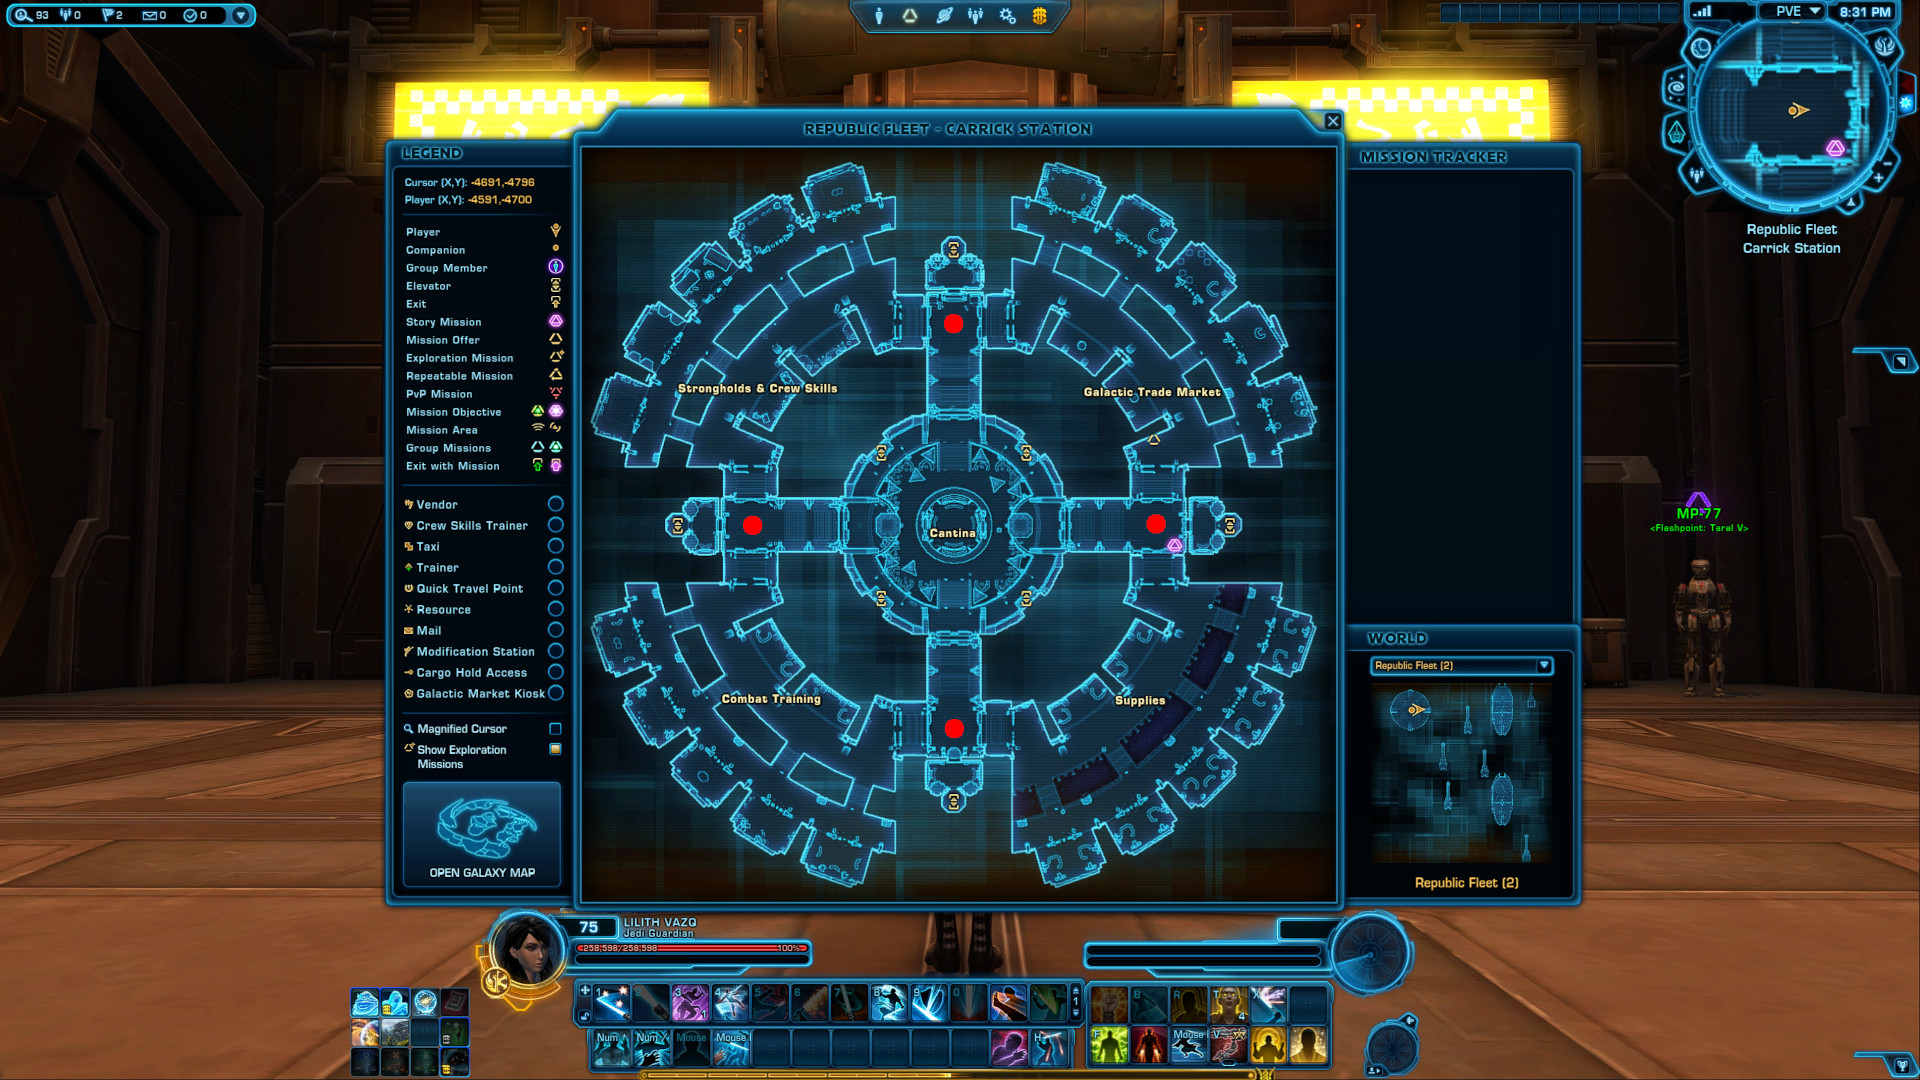
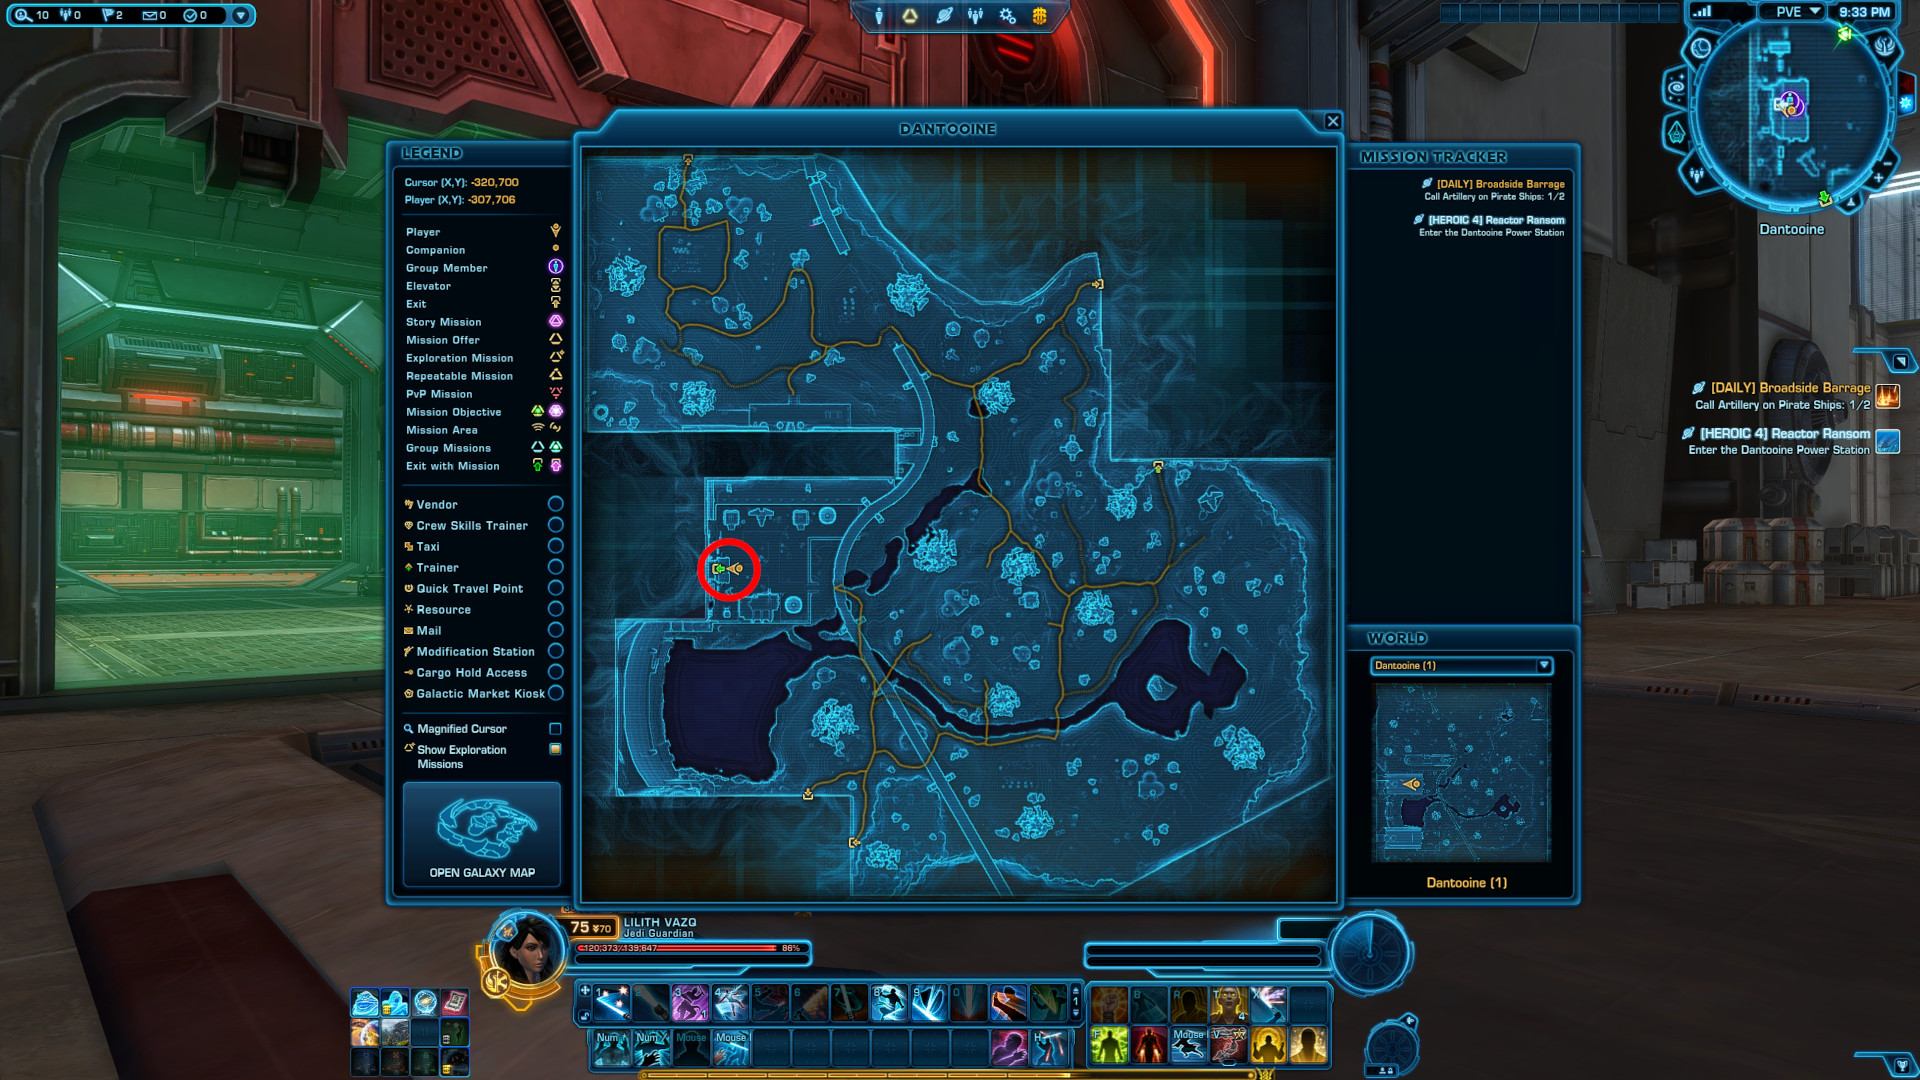
You can travel there manually via the Galaxy Map or you can use the Activity Window to travel there directly and for free.
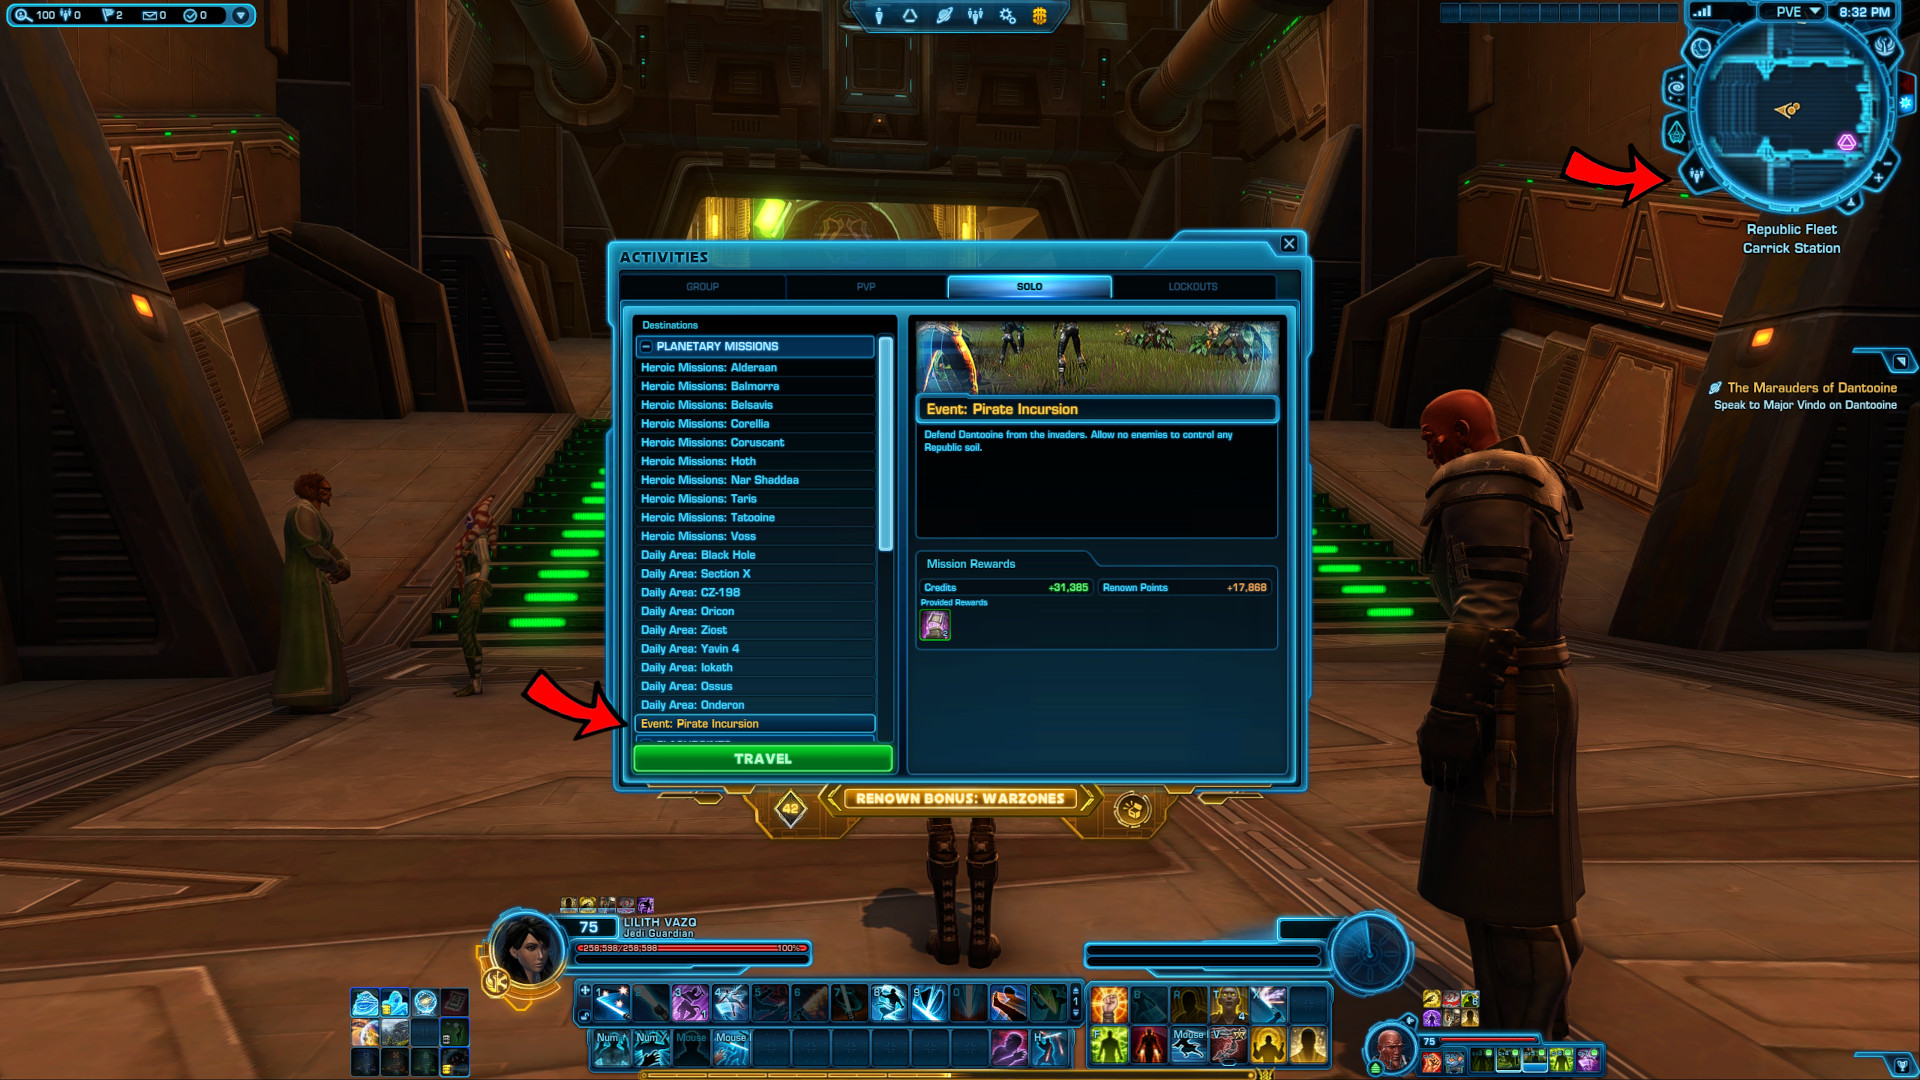
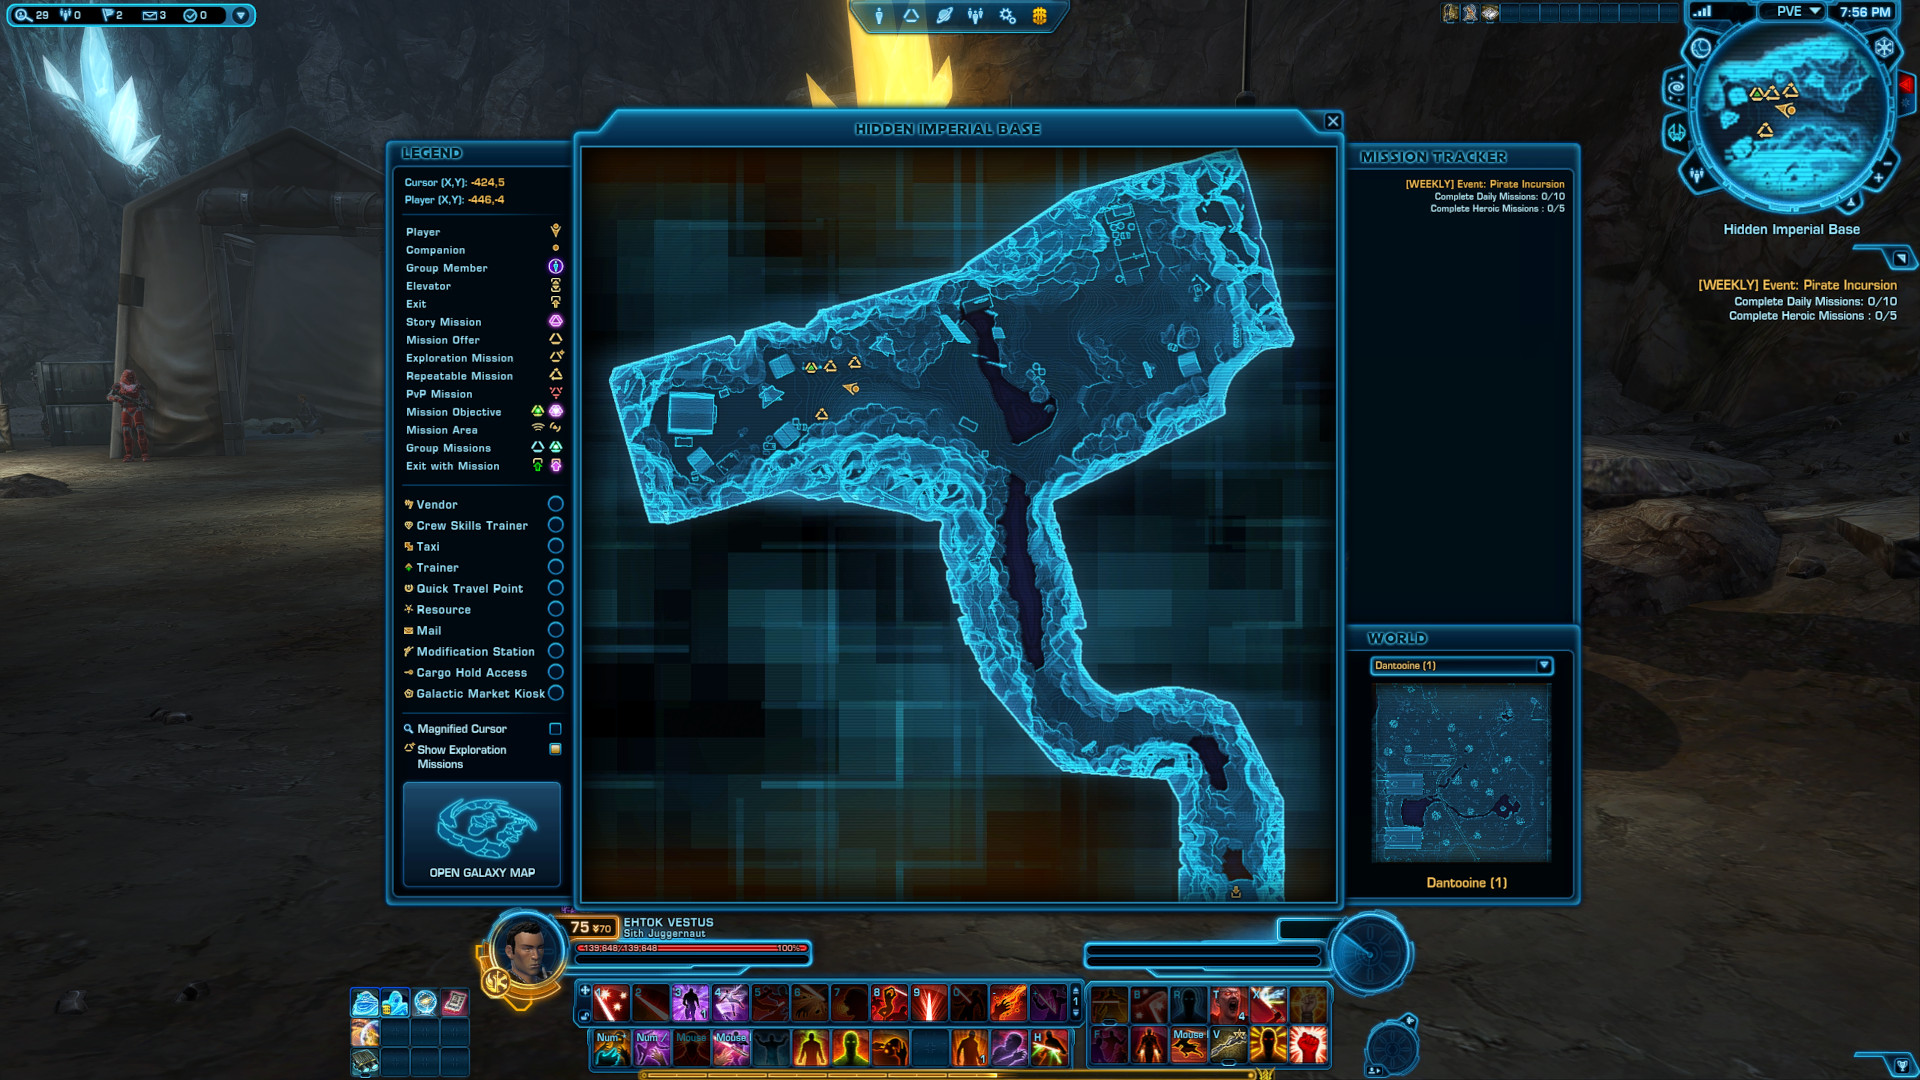
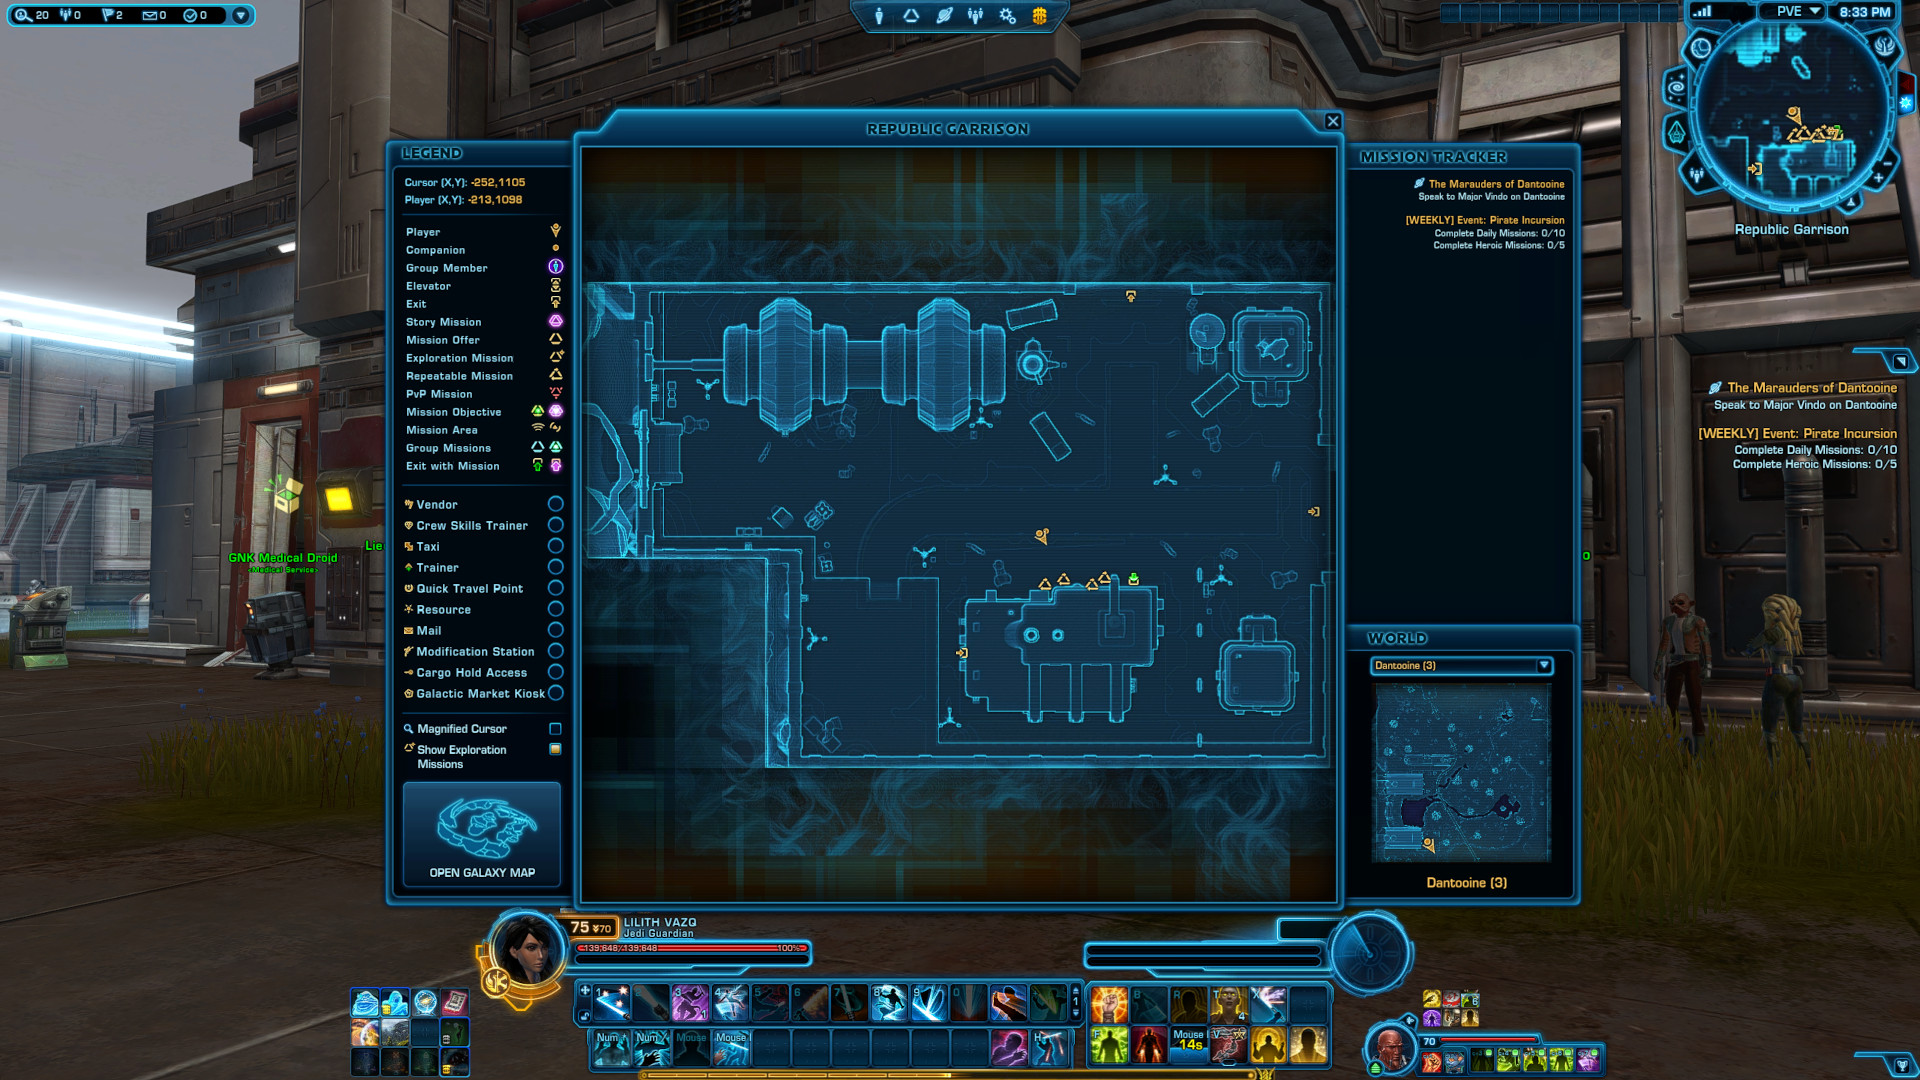
Planetside you can pick up 6 Daily Missions and 3 Heroic Missions, which means if you want to complete the Weekly Mission for the Pirate Incursion, you have to complete your dailies over two separate days.
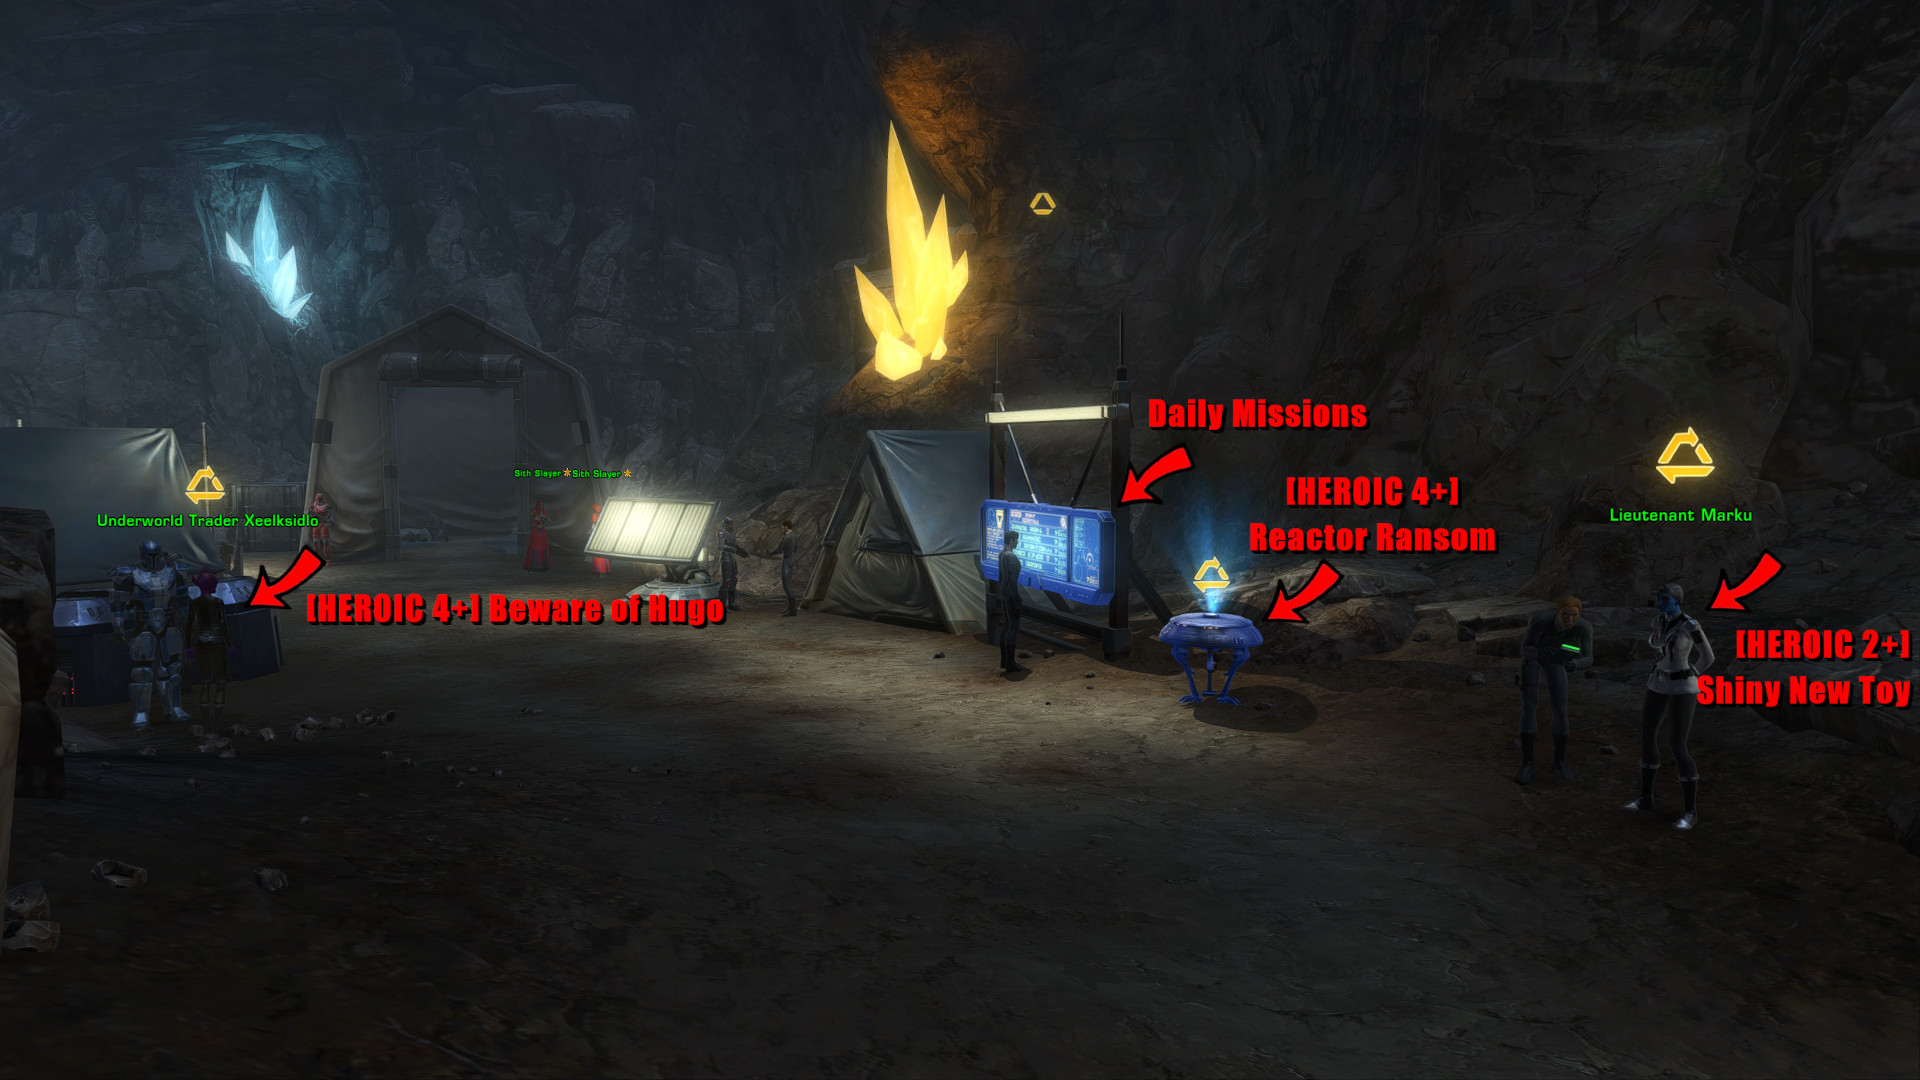
Empire - Hidden Imperial Base
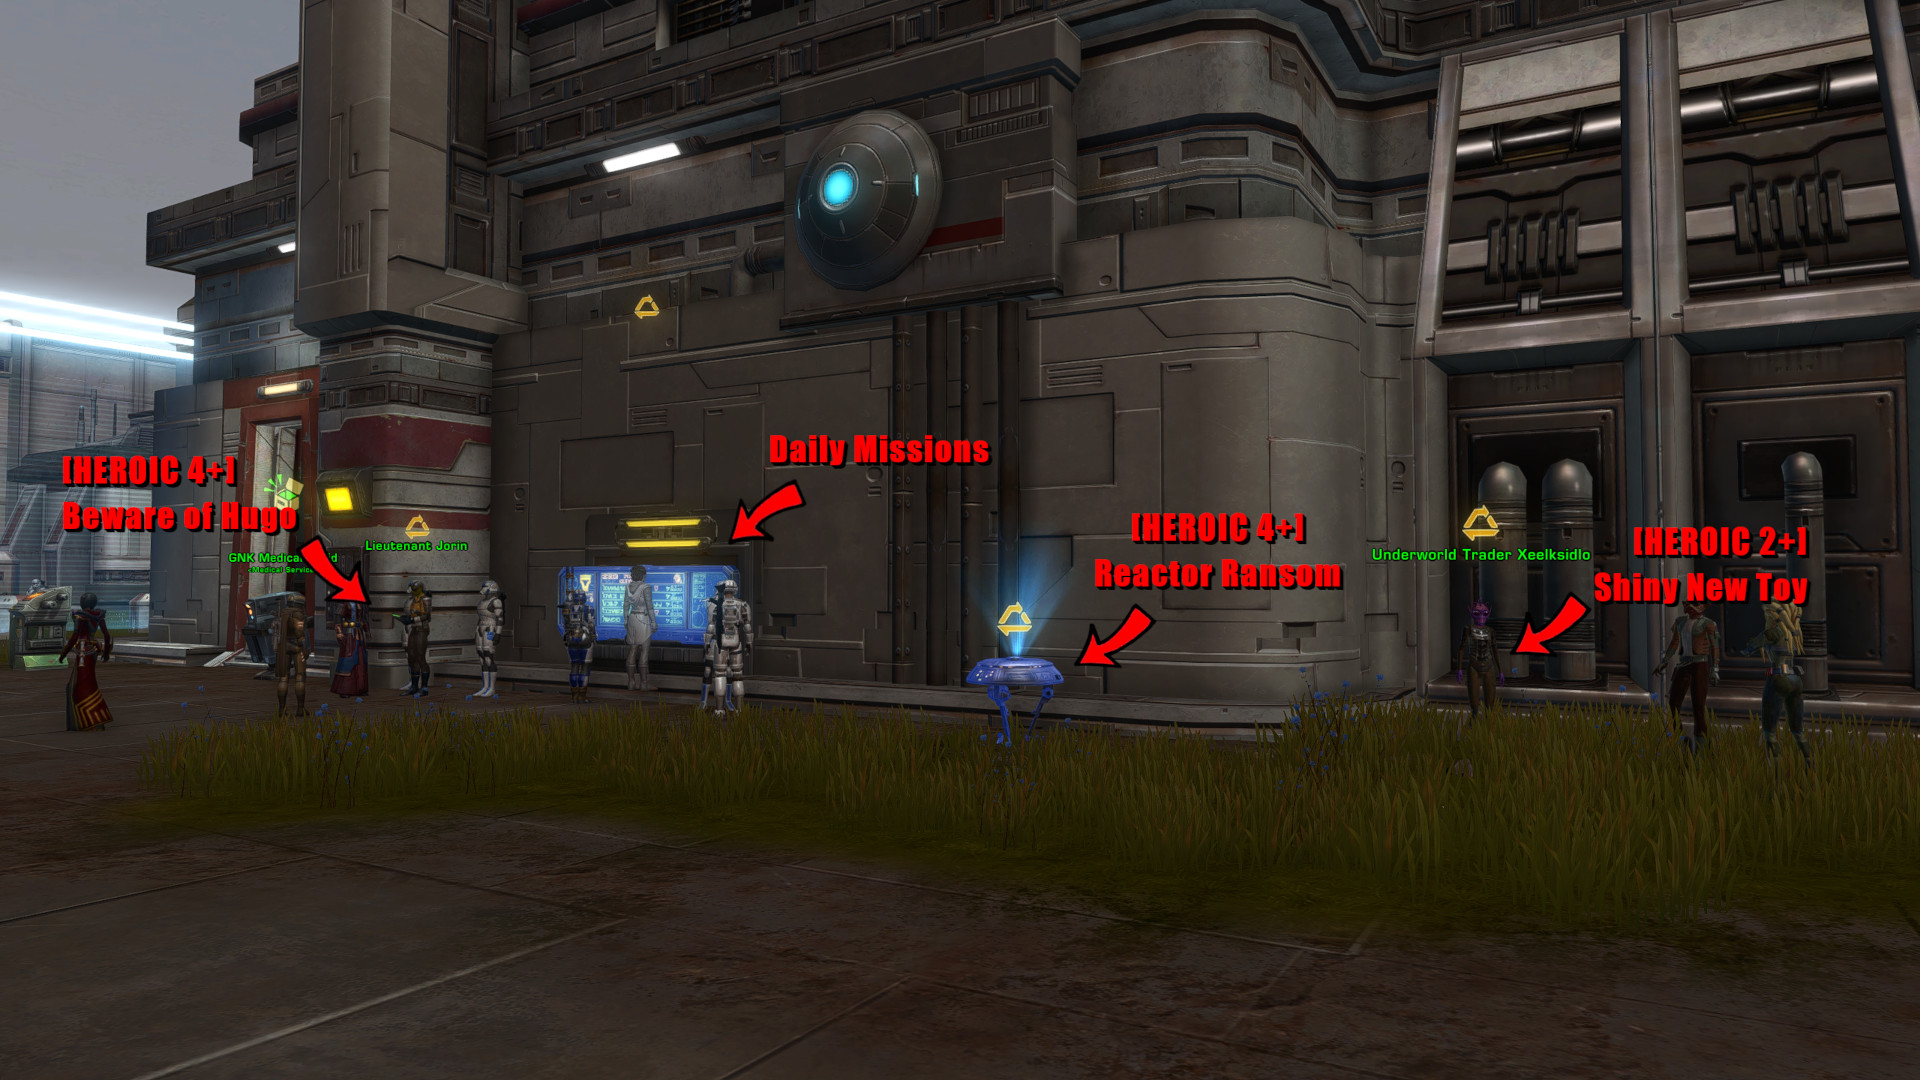
Republic - Reblic Garrison
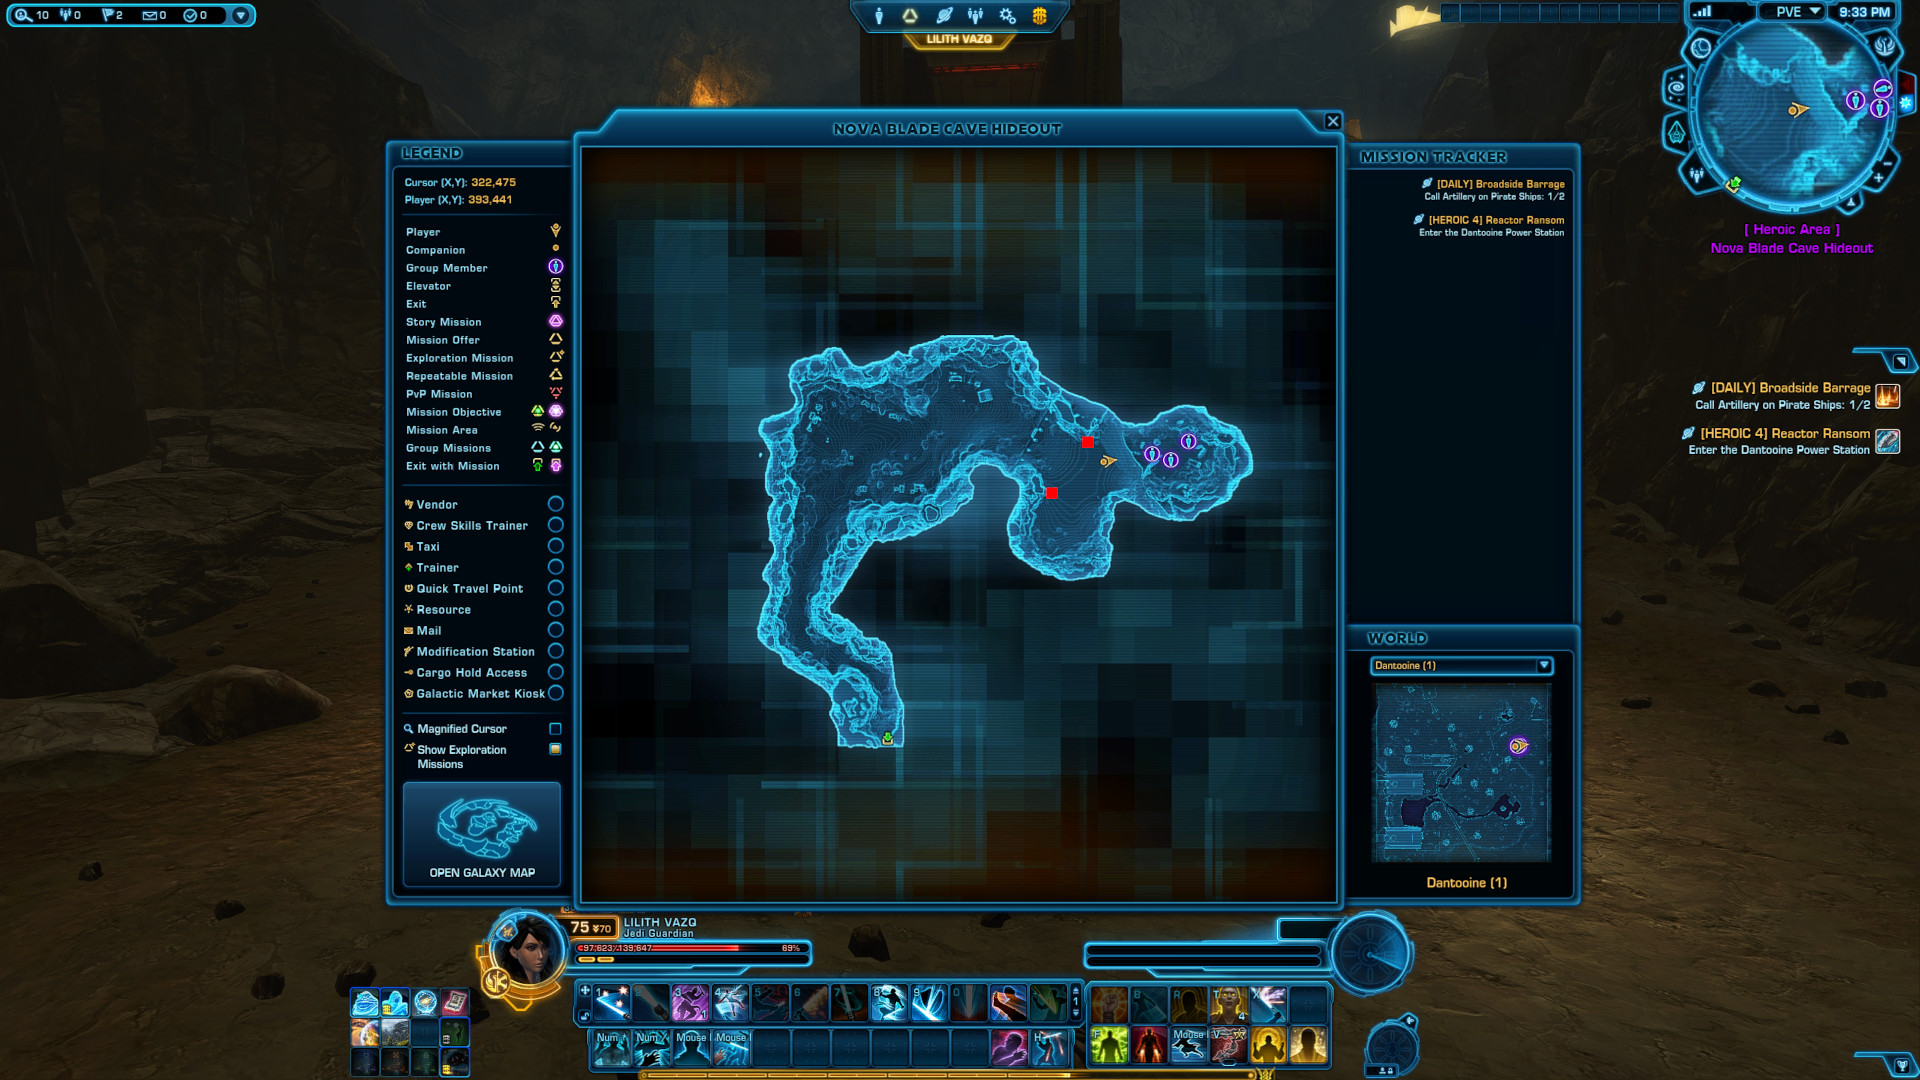
Heroic Missions
Some will claim they are completing the Heroic Missions solo with just a level 50 companion. They might be right, but I recommend bringing at least one friend, or join groups advertised in the General Chat.
Pro tip: Remember to use the Heroic Transport, the clickable icon next to each of your heroic missions, for a quick travel to your destination. Note the 60 min cooldown, so use it wisely.
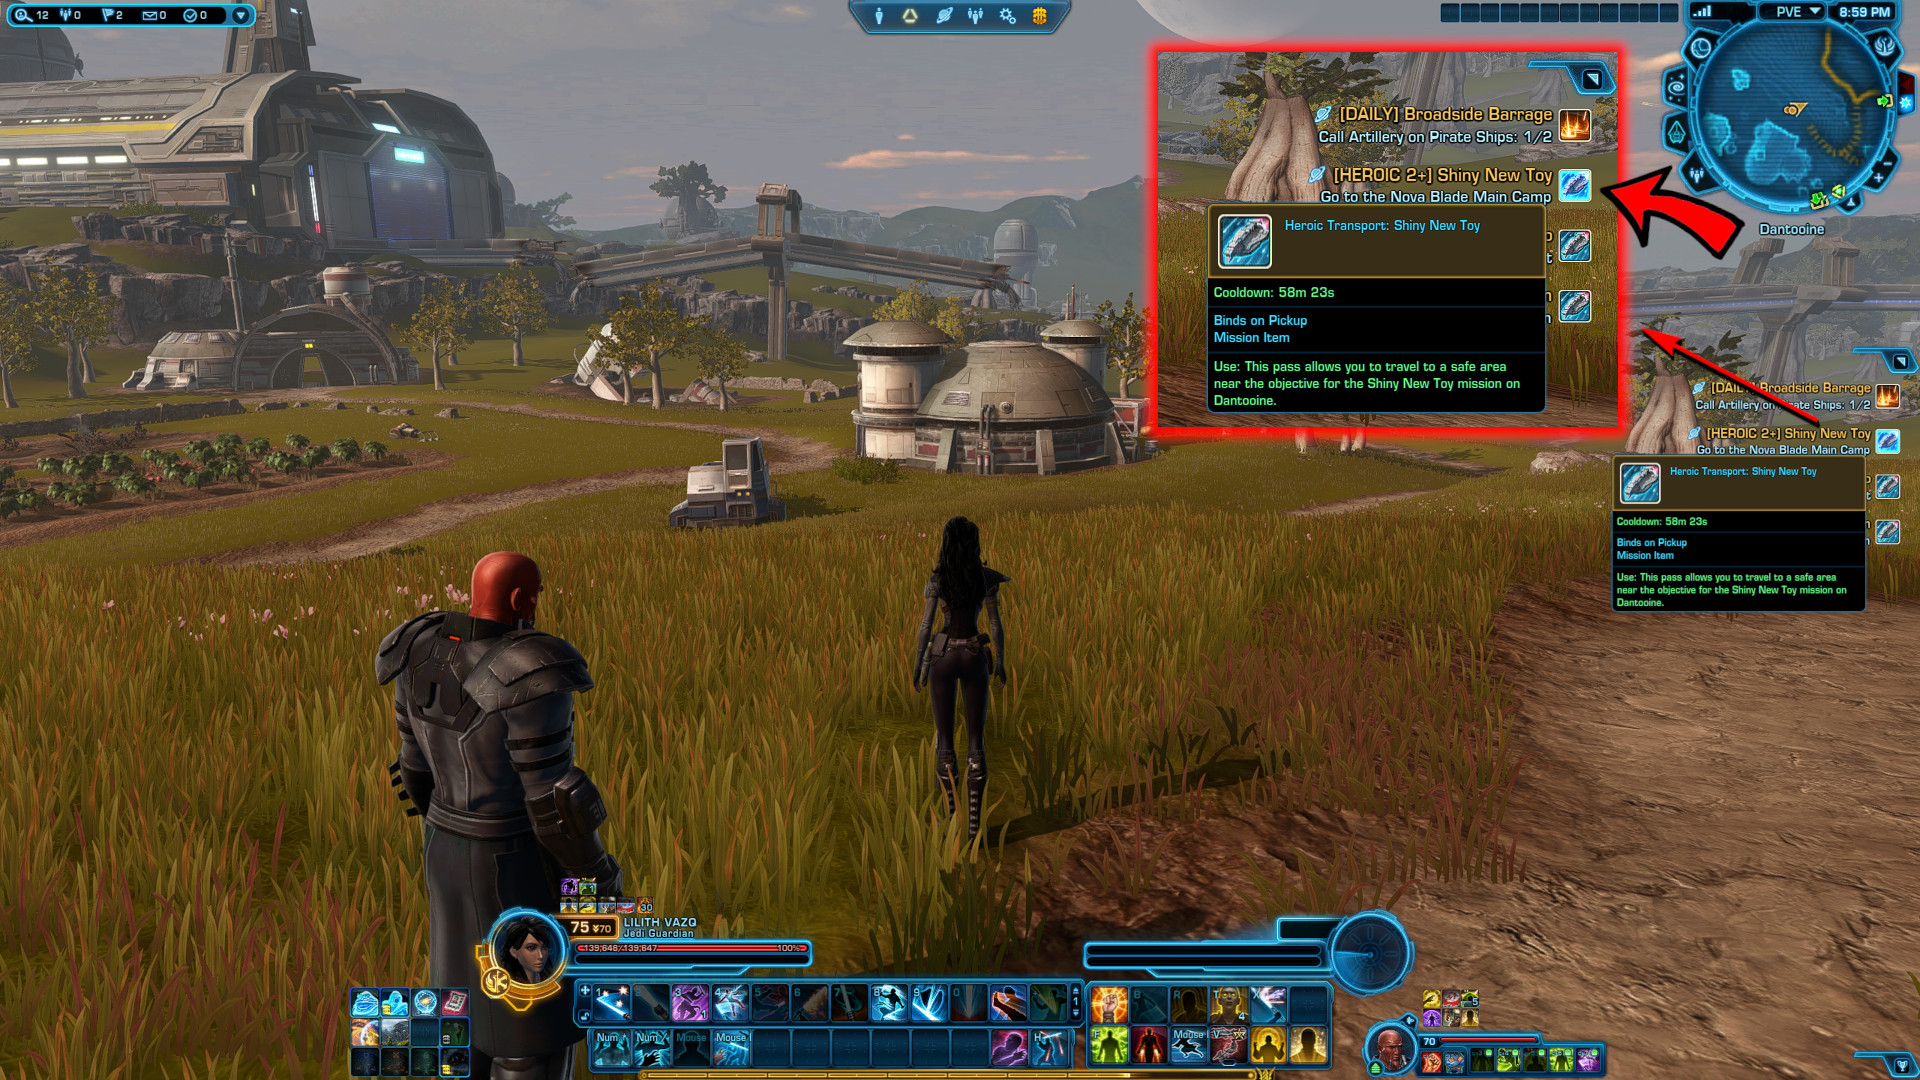
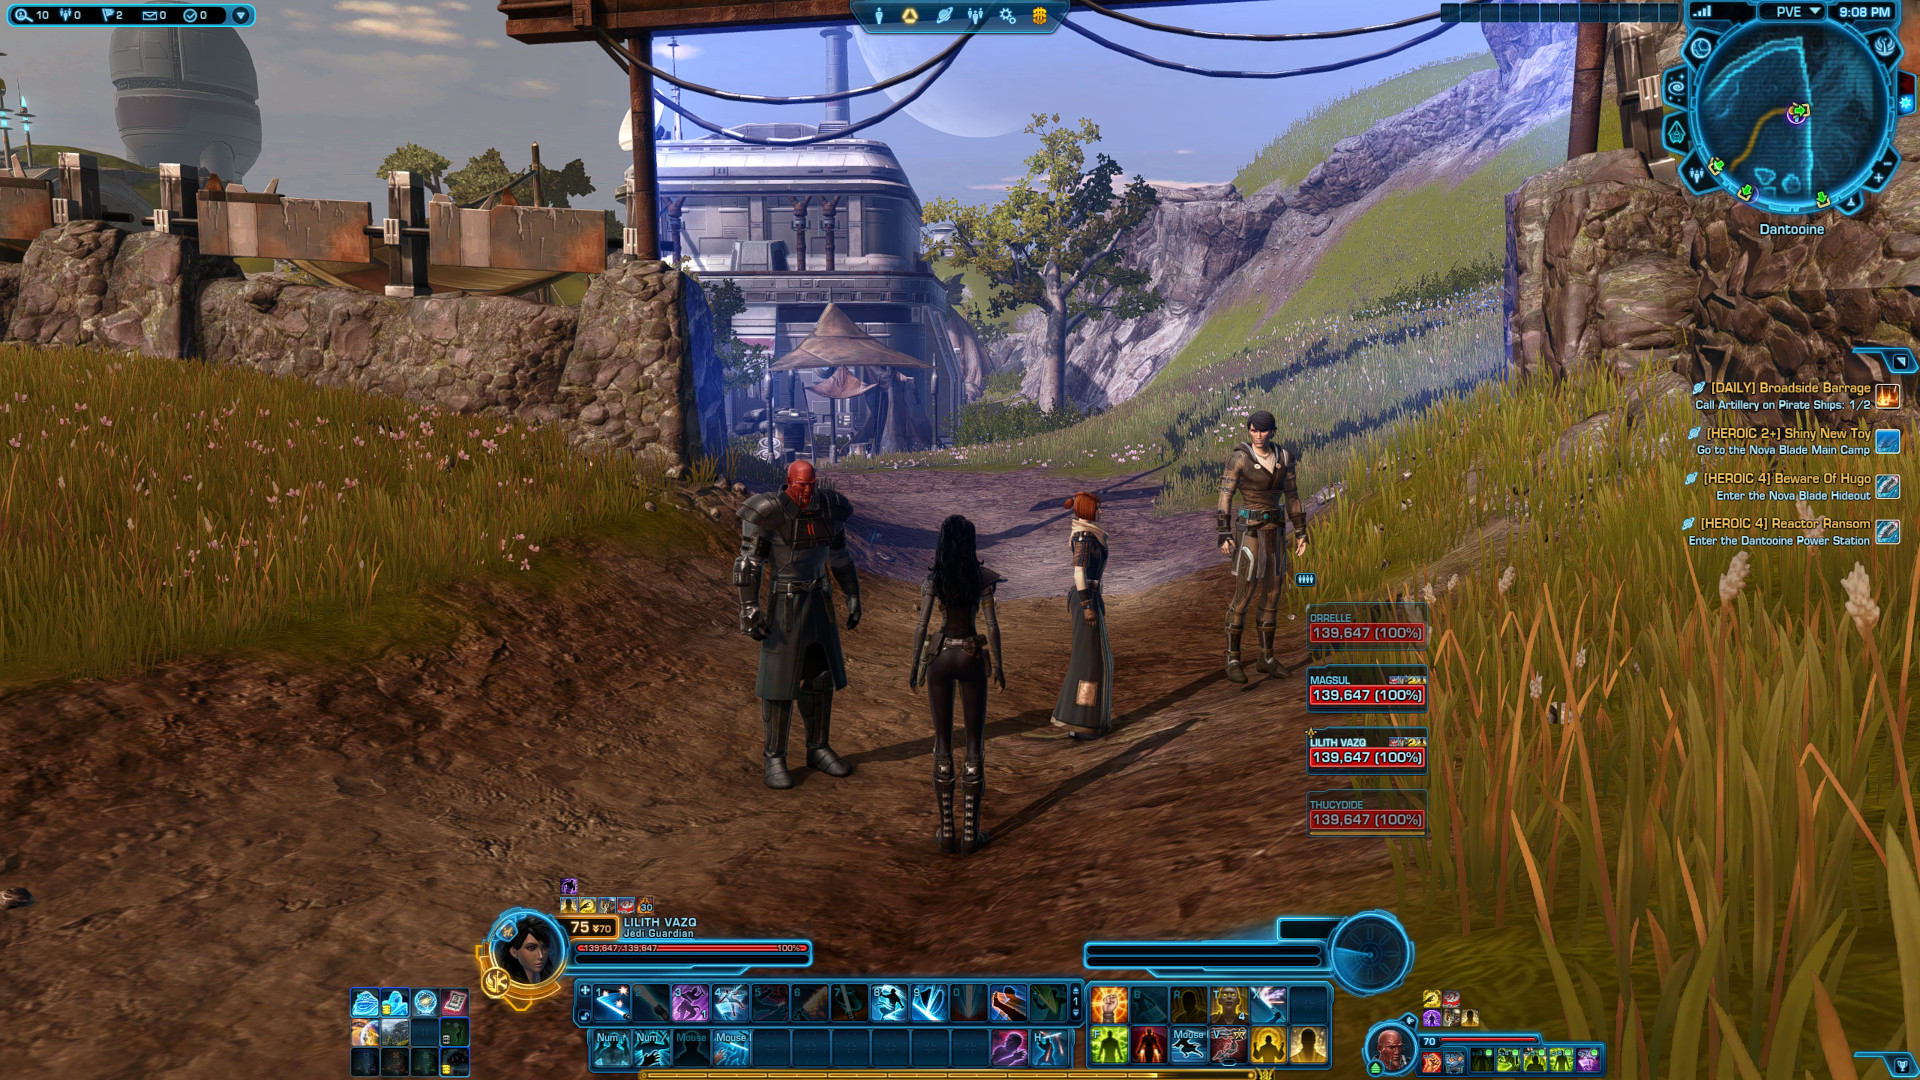
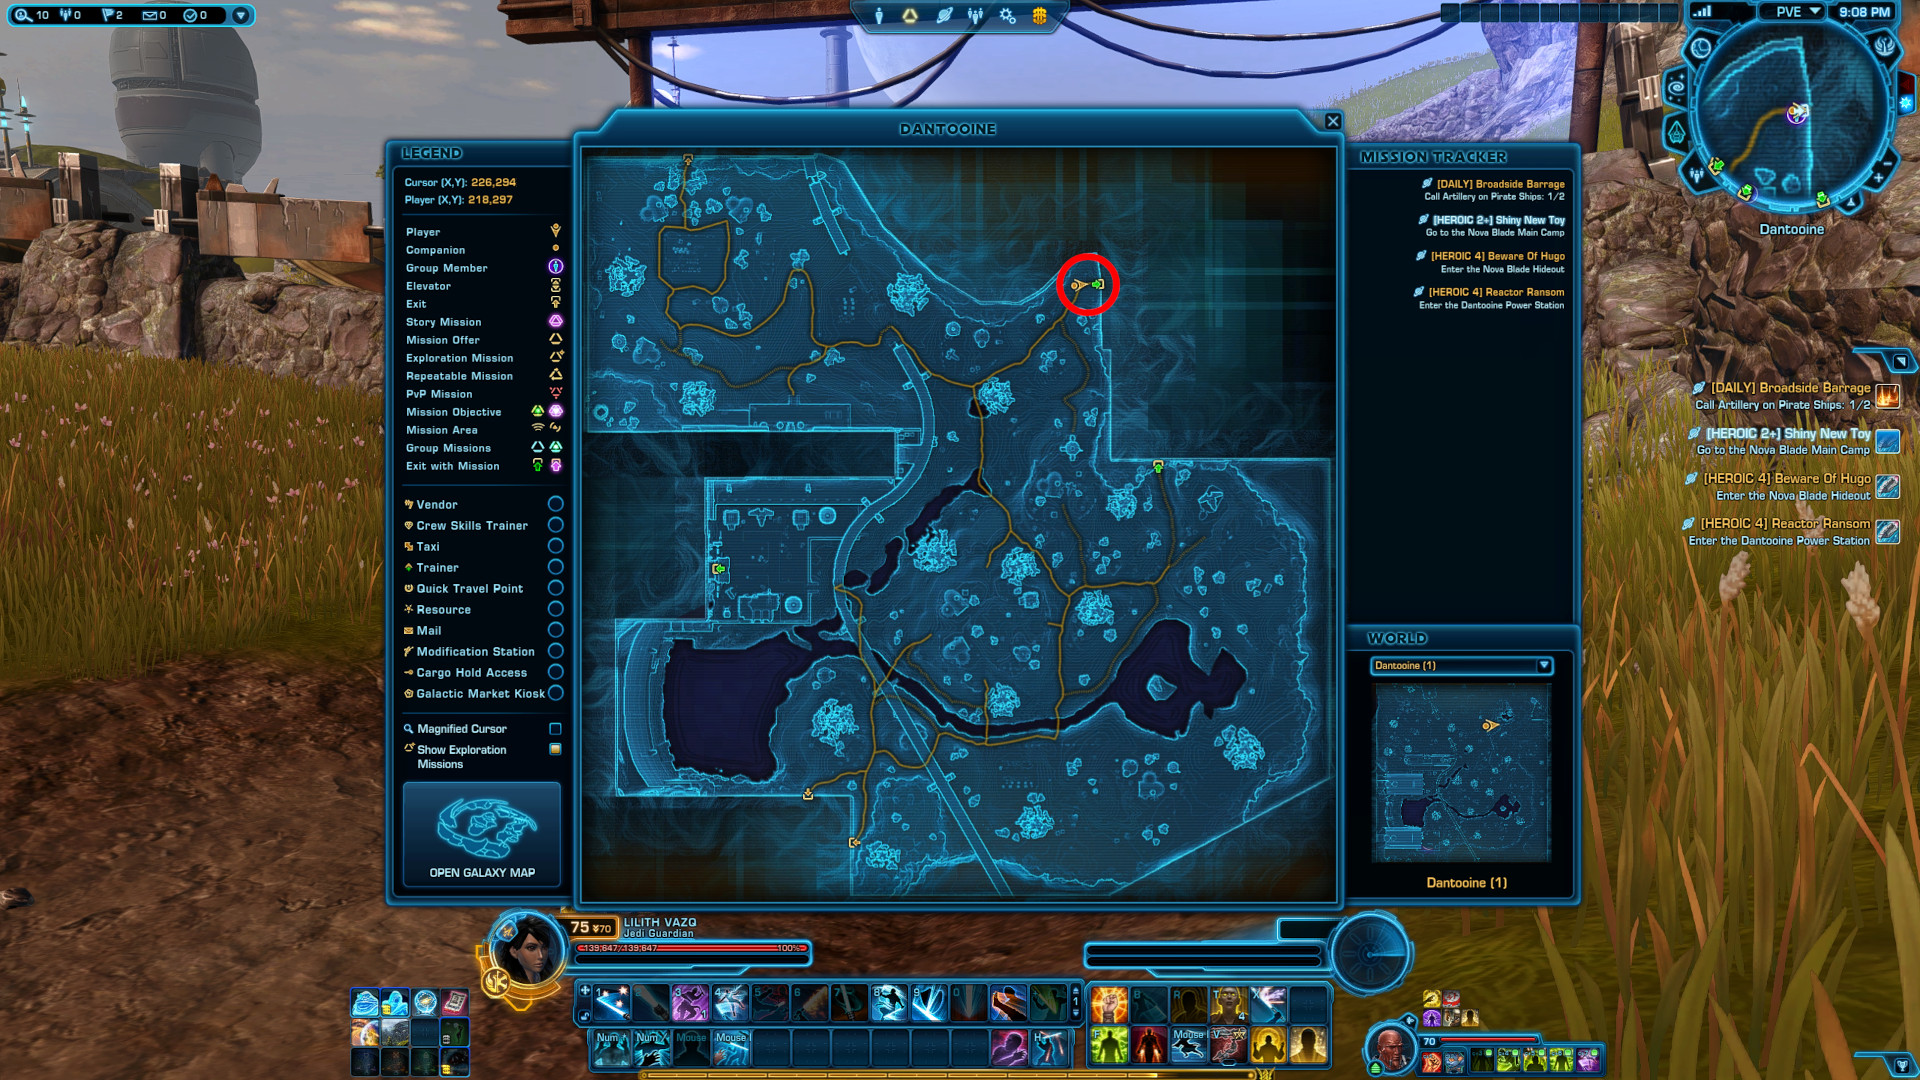
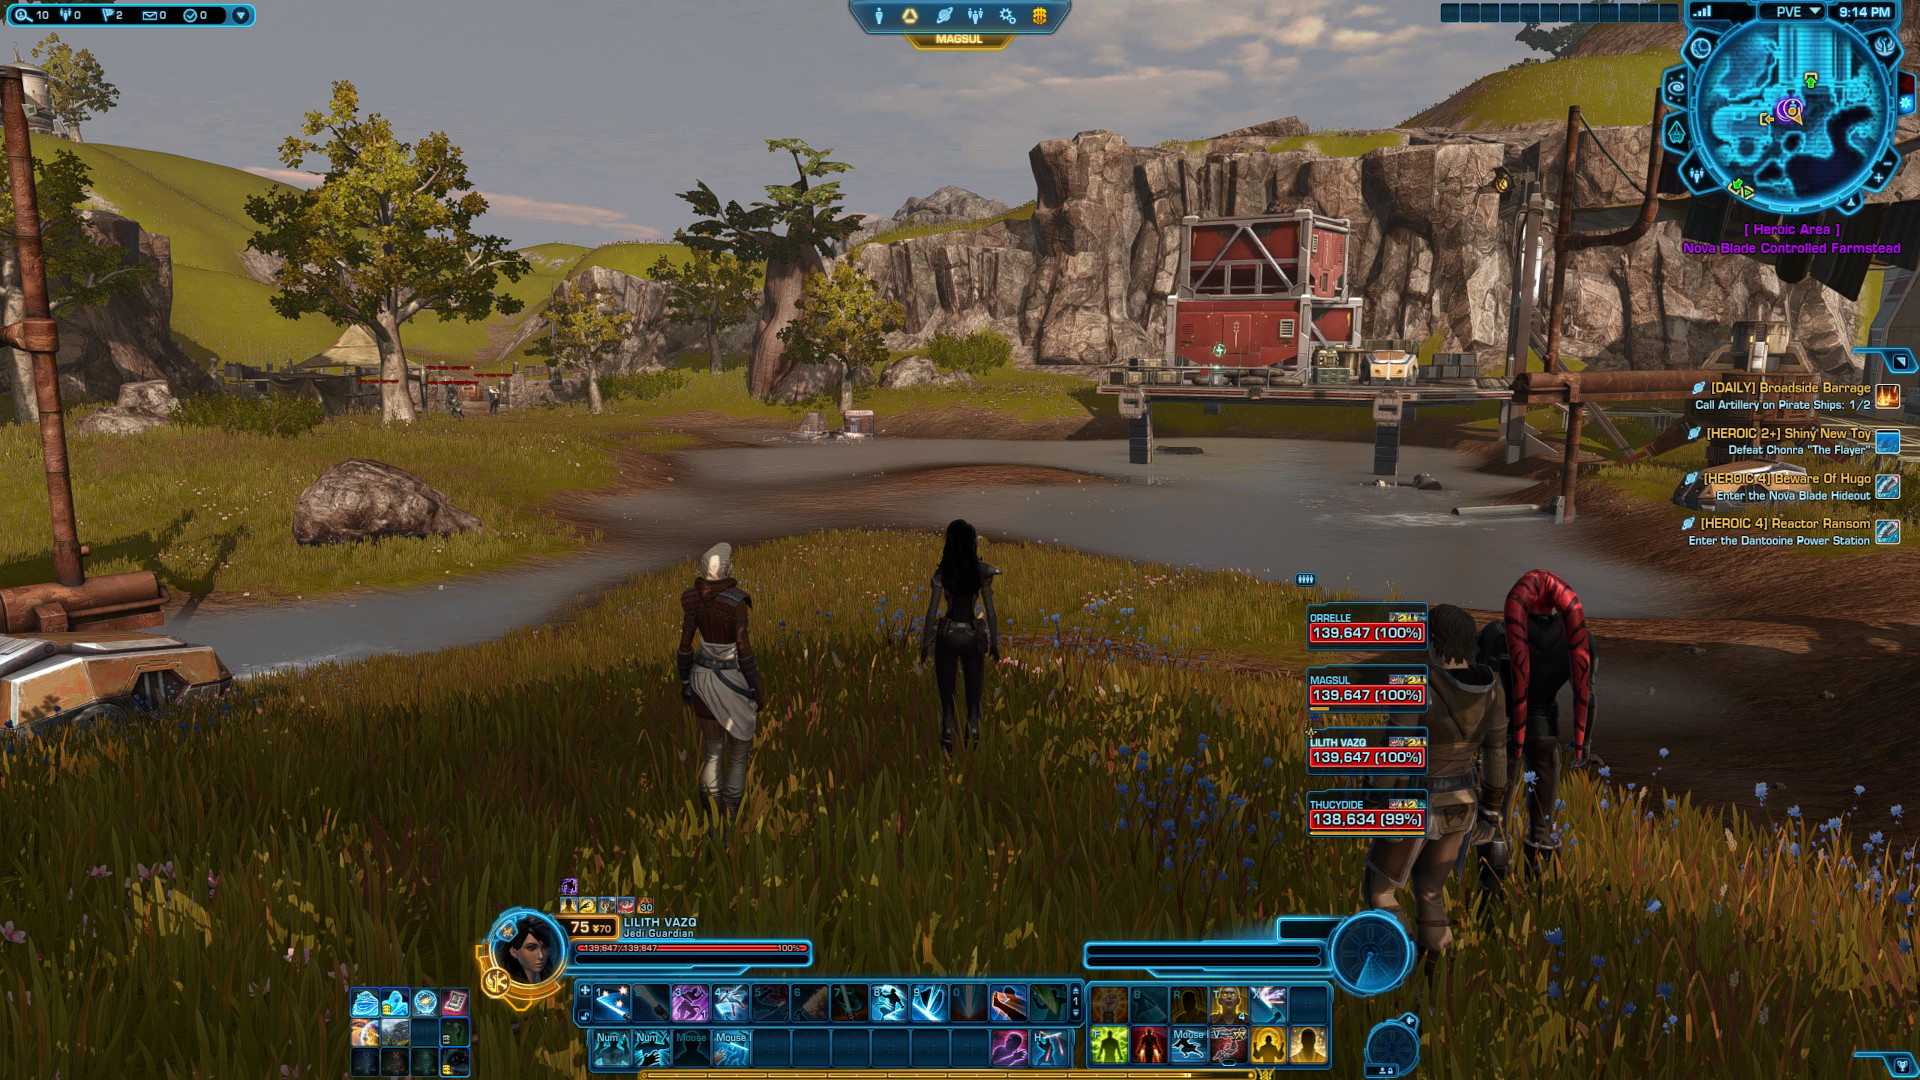
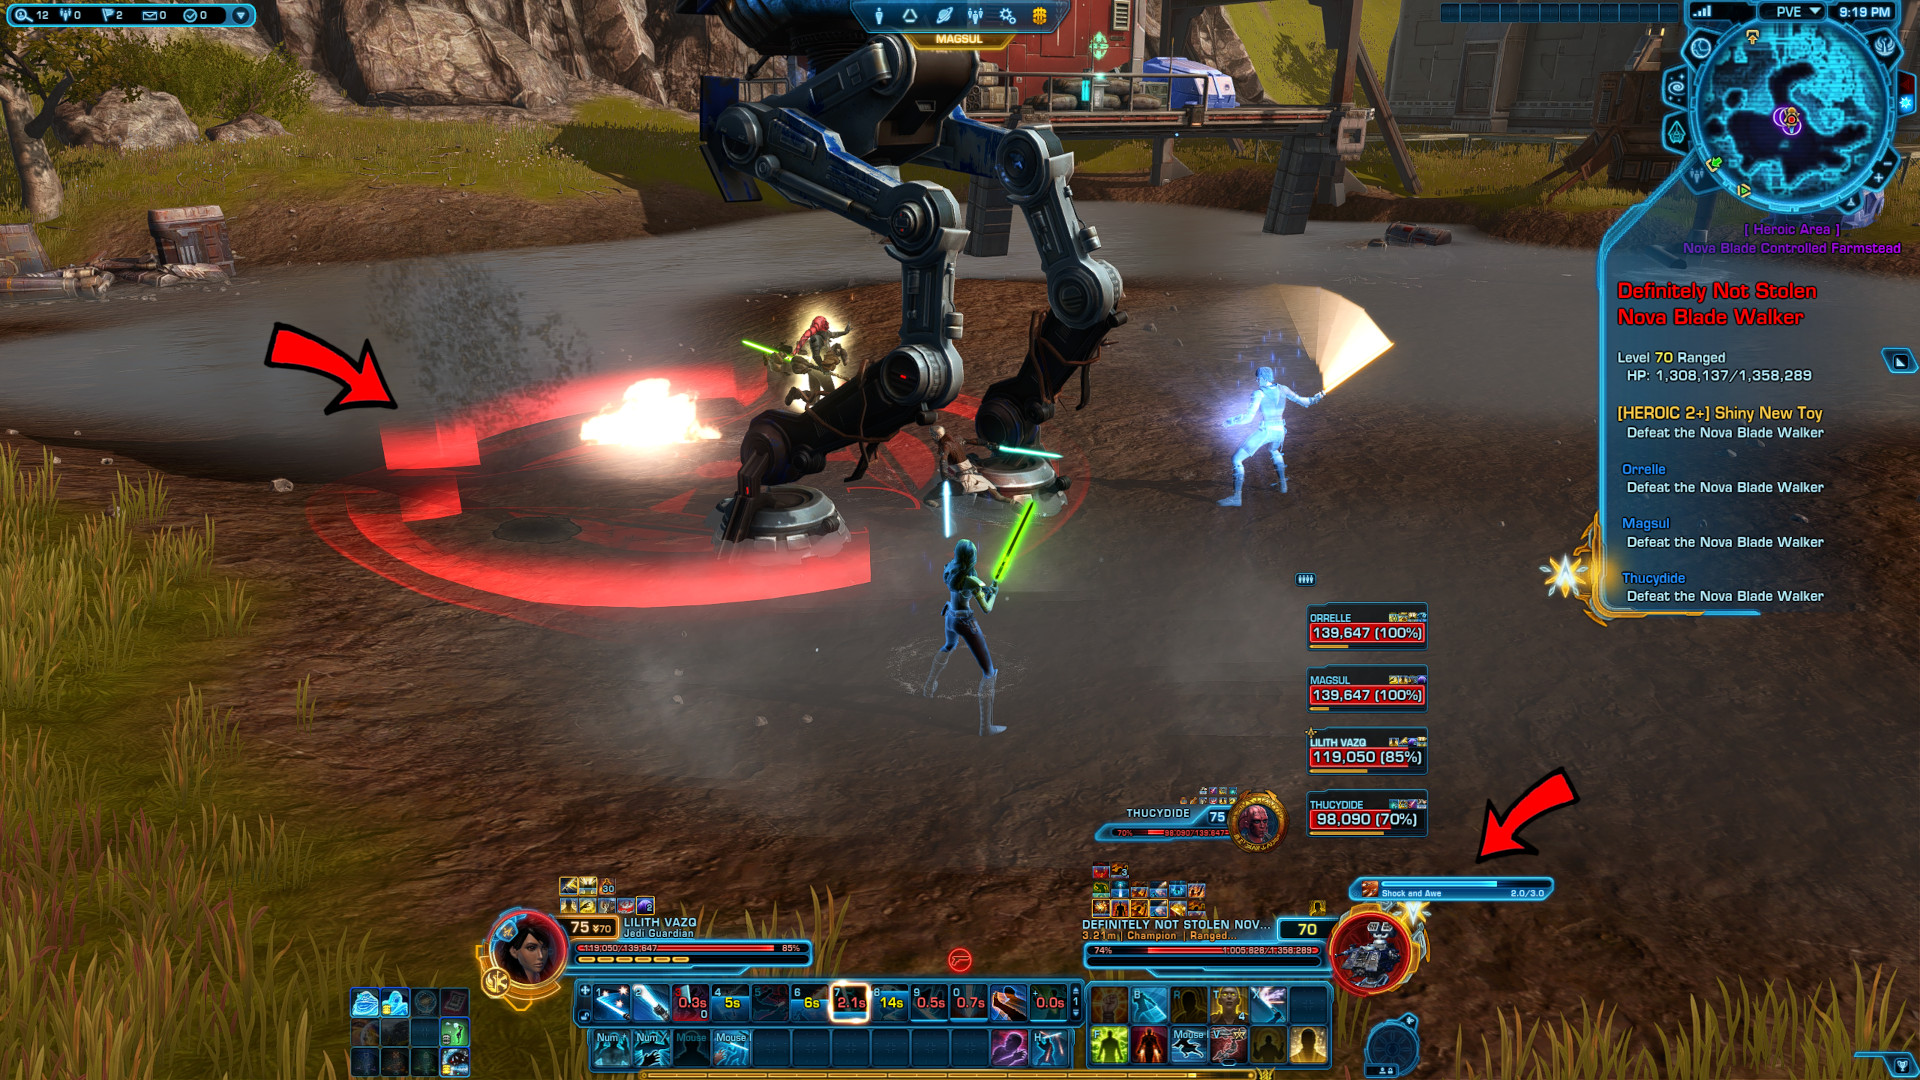
[HEROIC 2+] Shiny New Toy
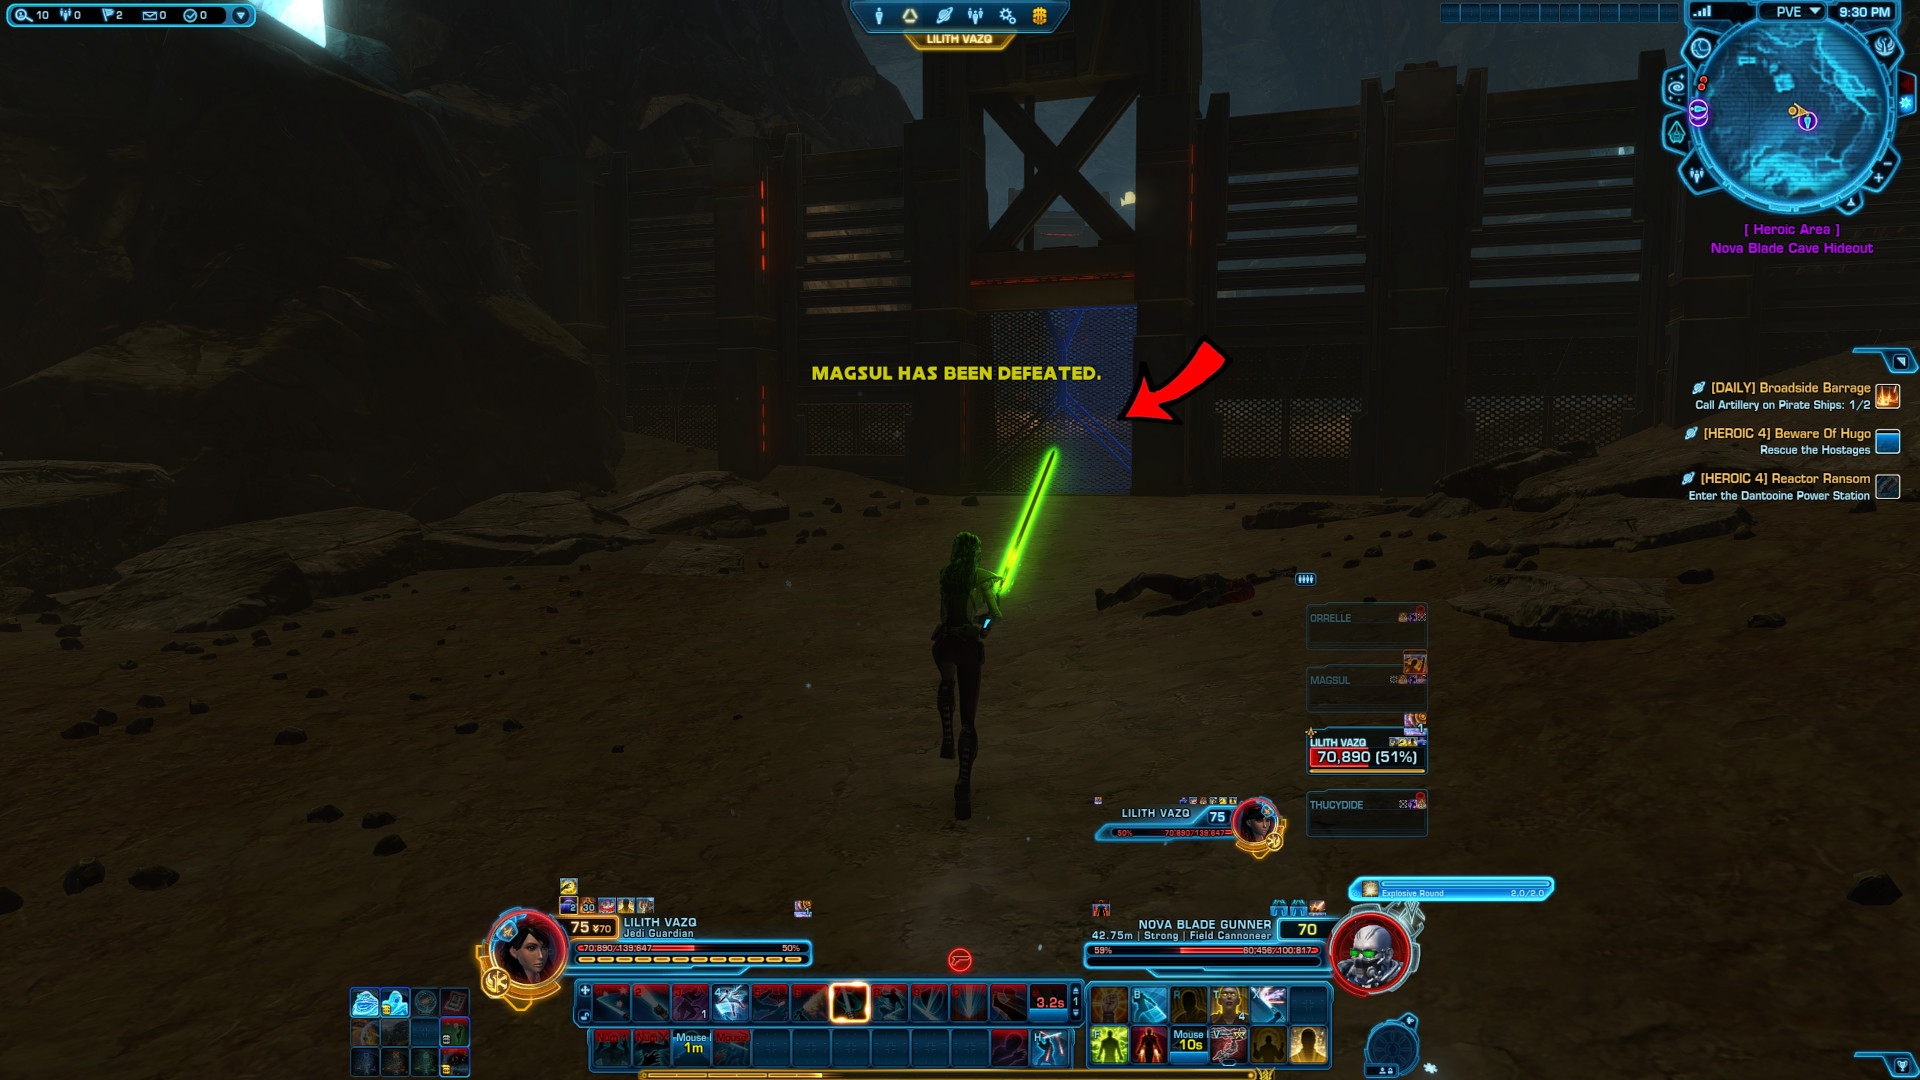
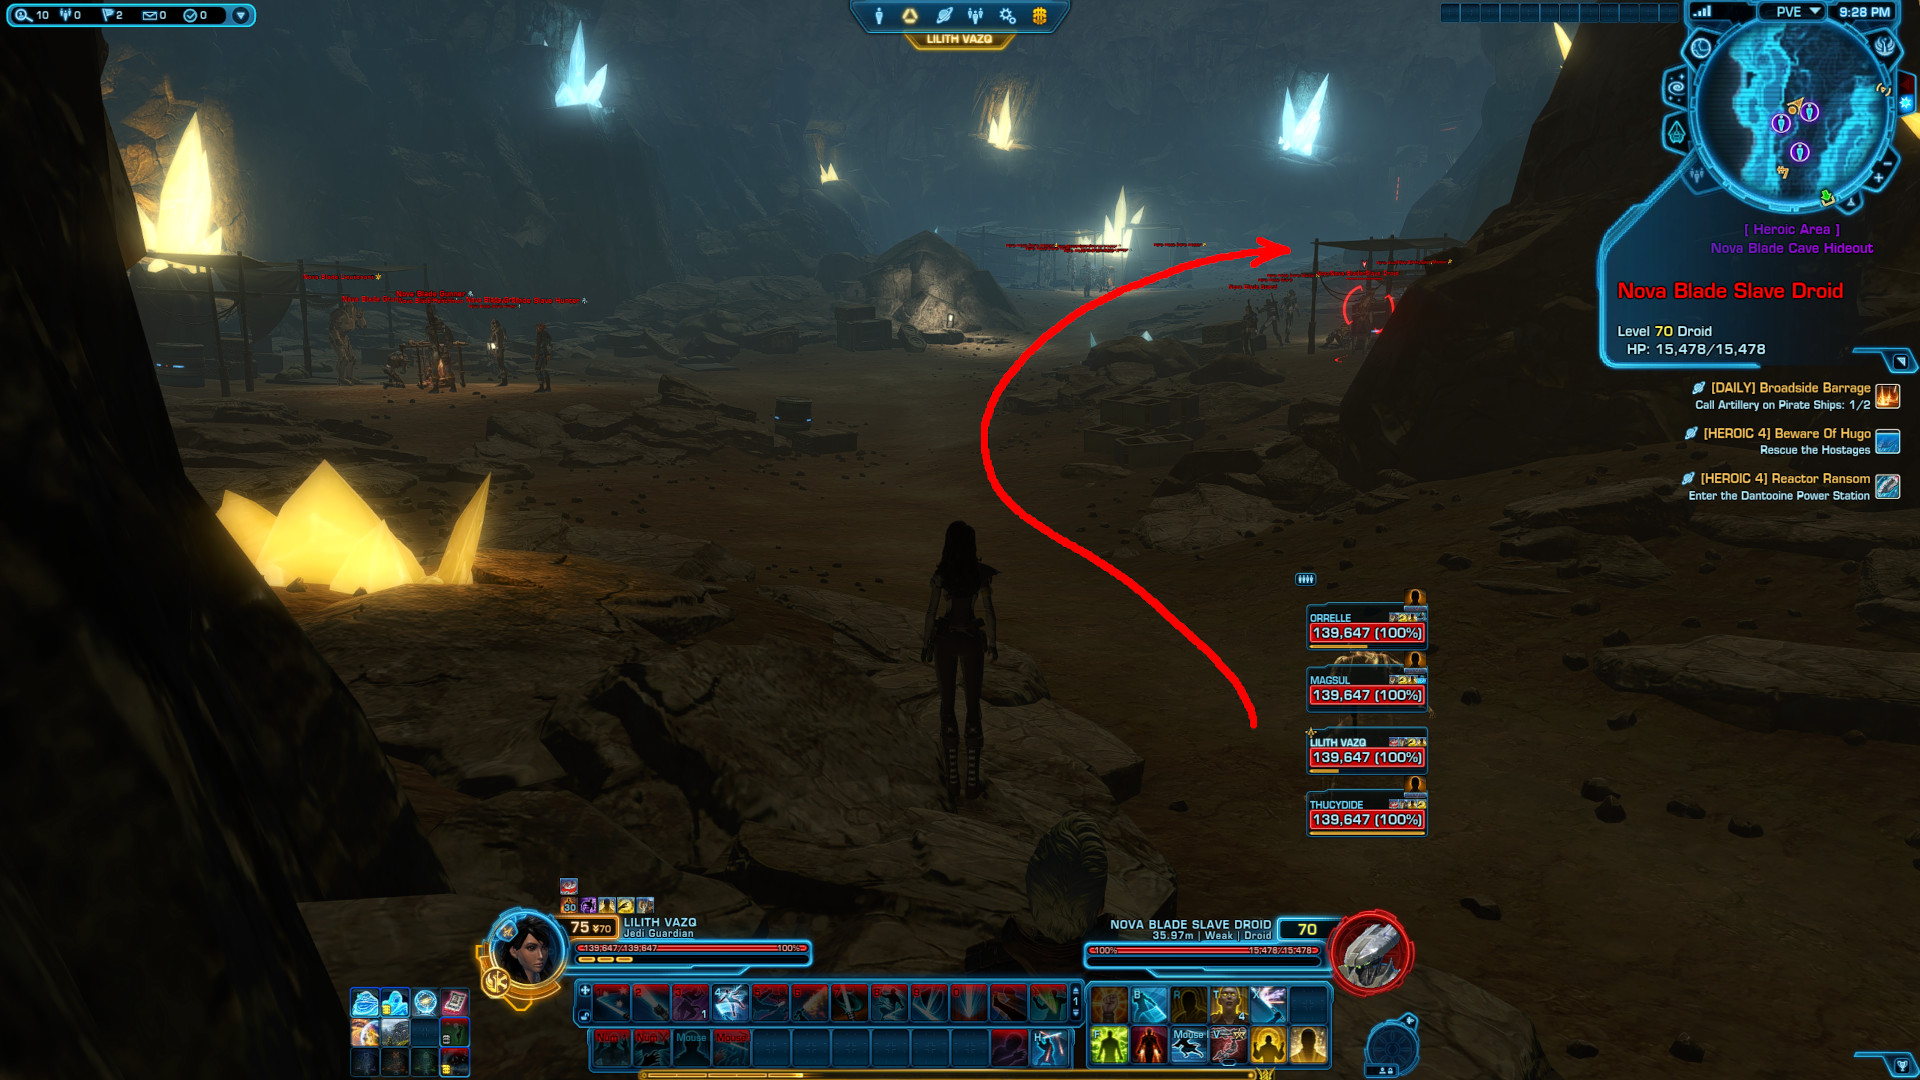
As you walk into this instance, be aware that there's a big group of enemies awaiting you just beyond the barrier.
Clear out the groups of enemies within as well as the three bosses part of the mission, so the area is clear for the final boss encounter.
Once all three bosses have been defeated, a "Definitely Not Stolen Nova Blade Walker" will spawn, as well as four "Definitely Not Stolen Weapons Crates" that can be interacted with.
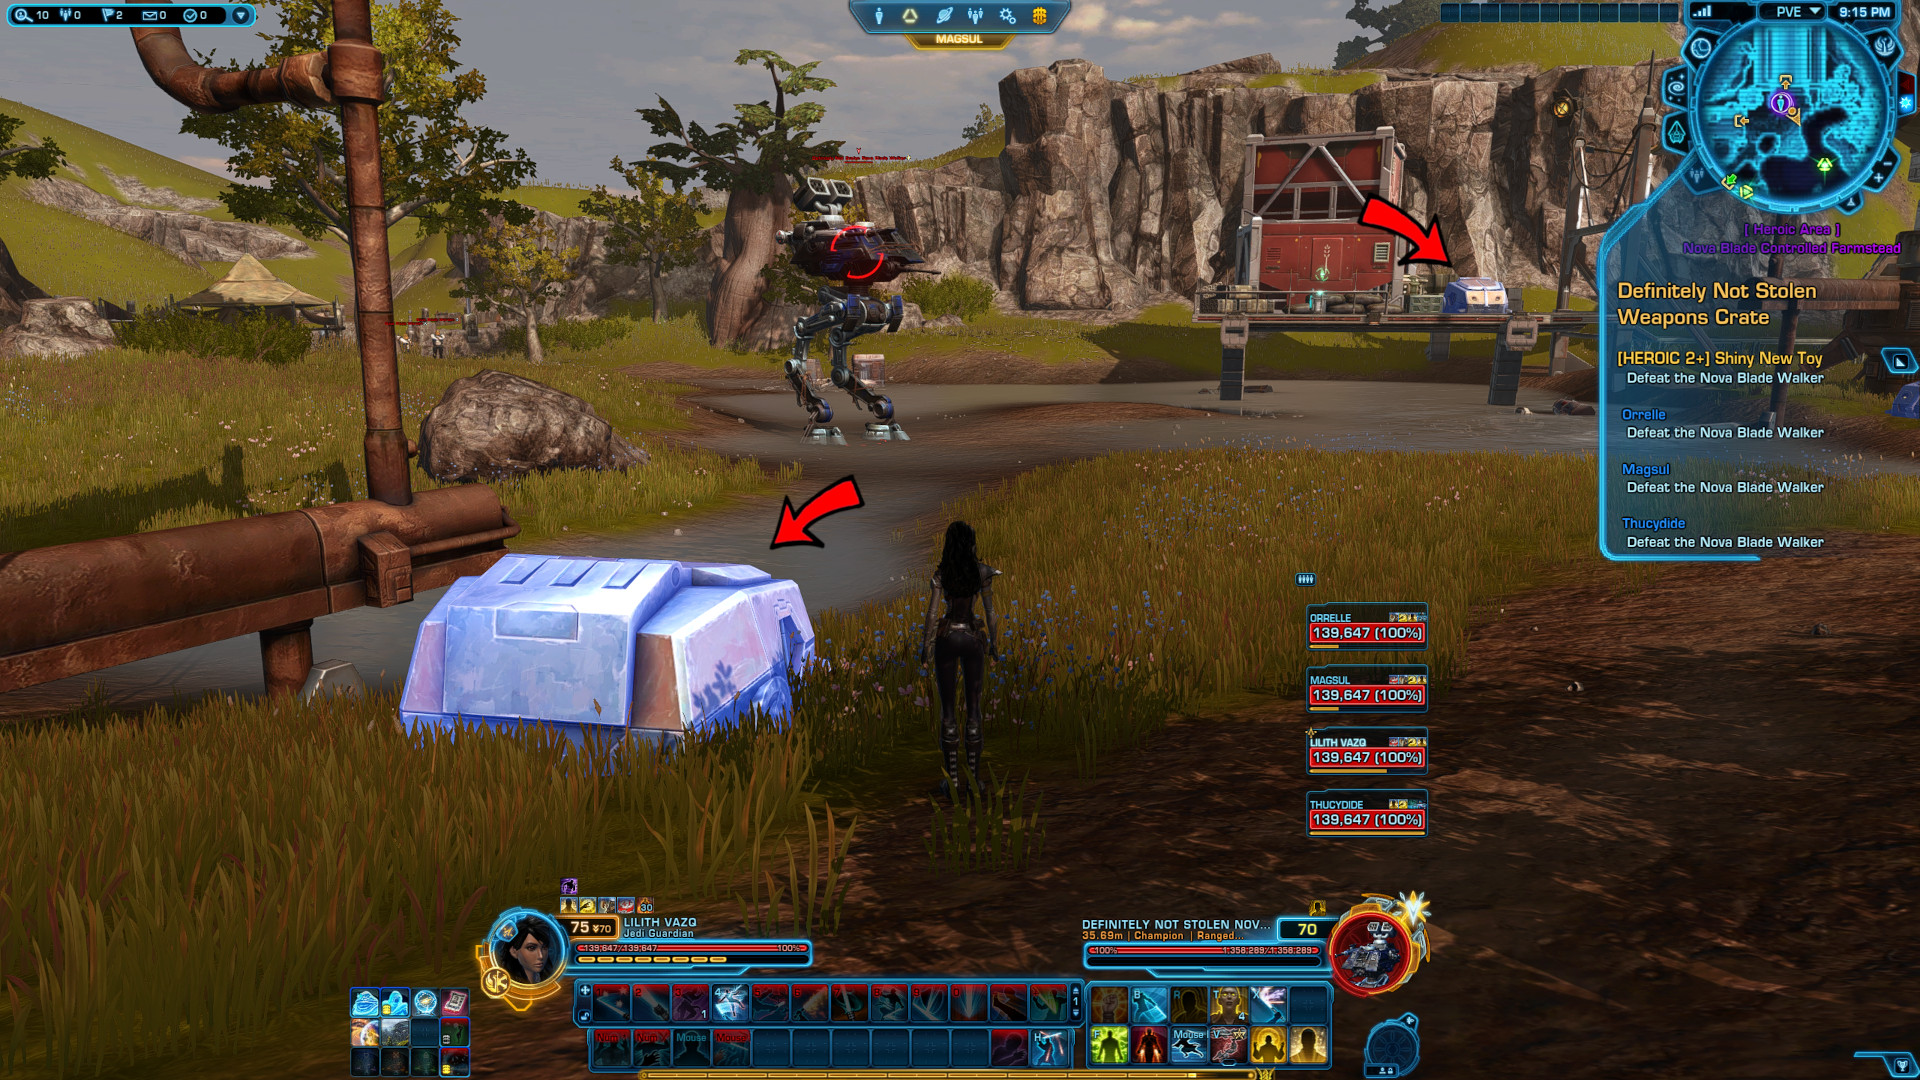
I recommend every team member interact with one of the four crates and pick up the special ability it provides called EMP Missile, before you start the fight.
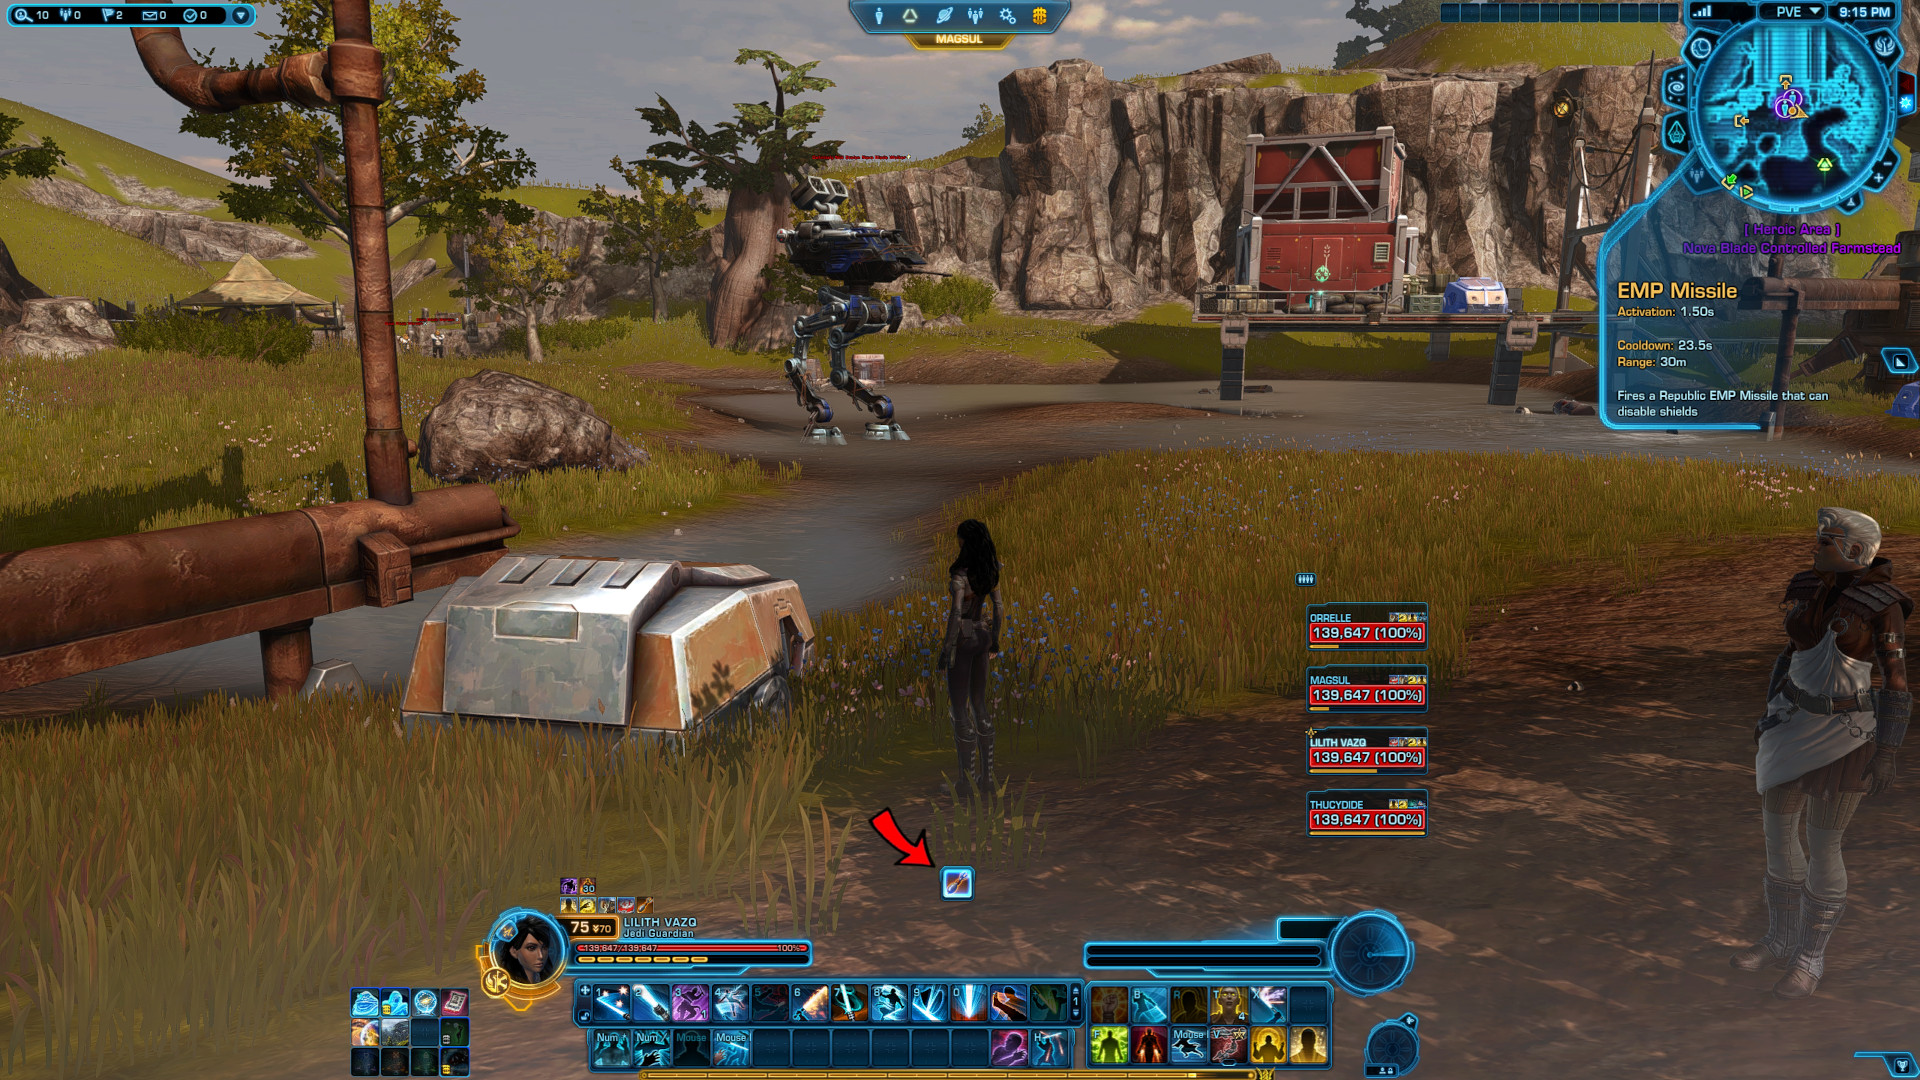
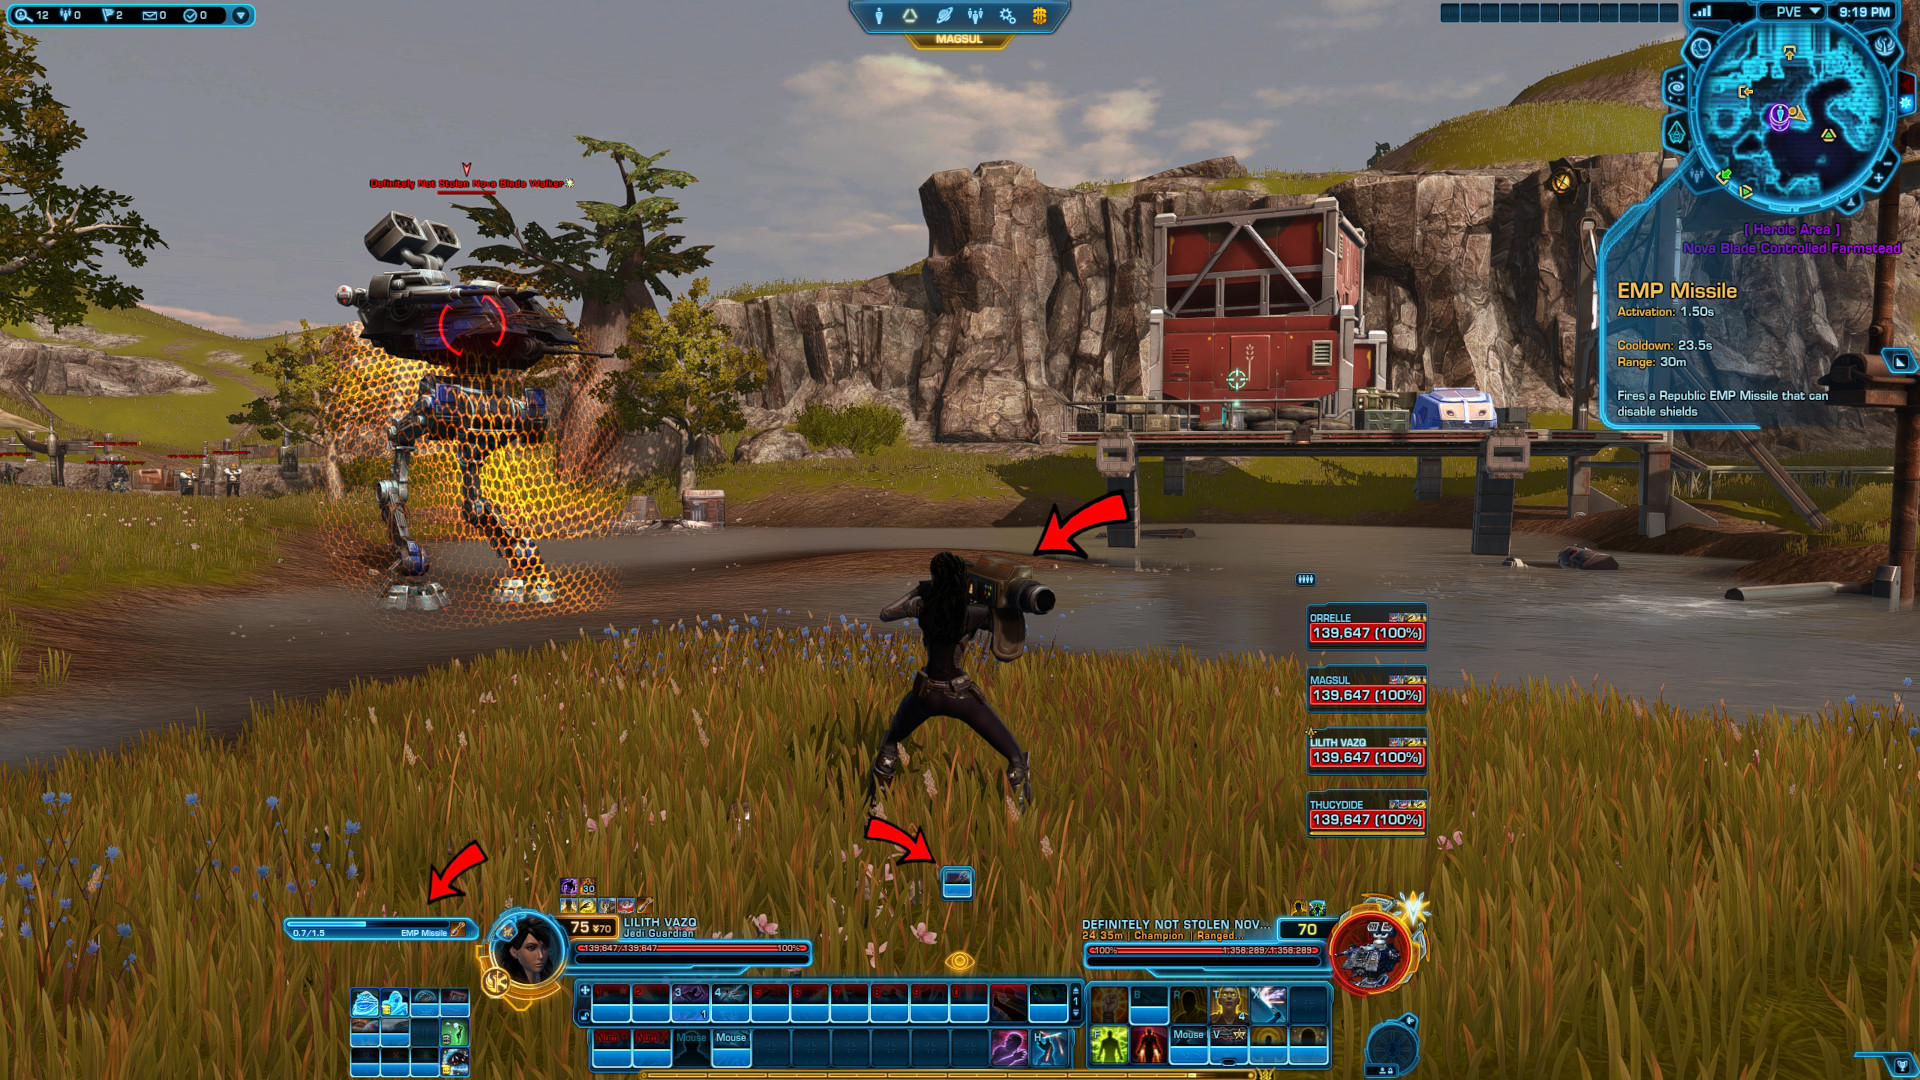
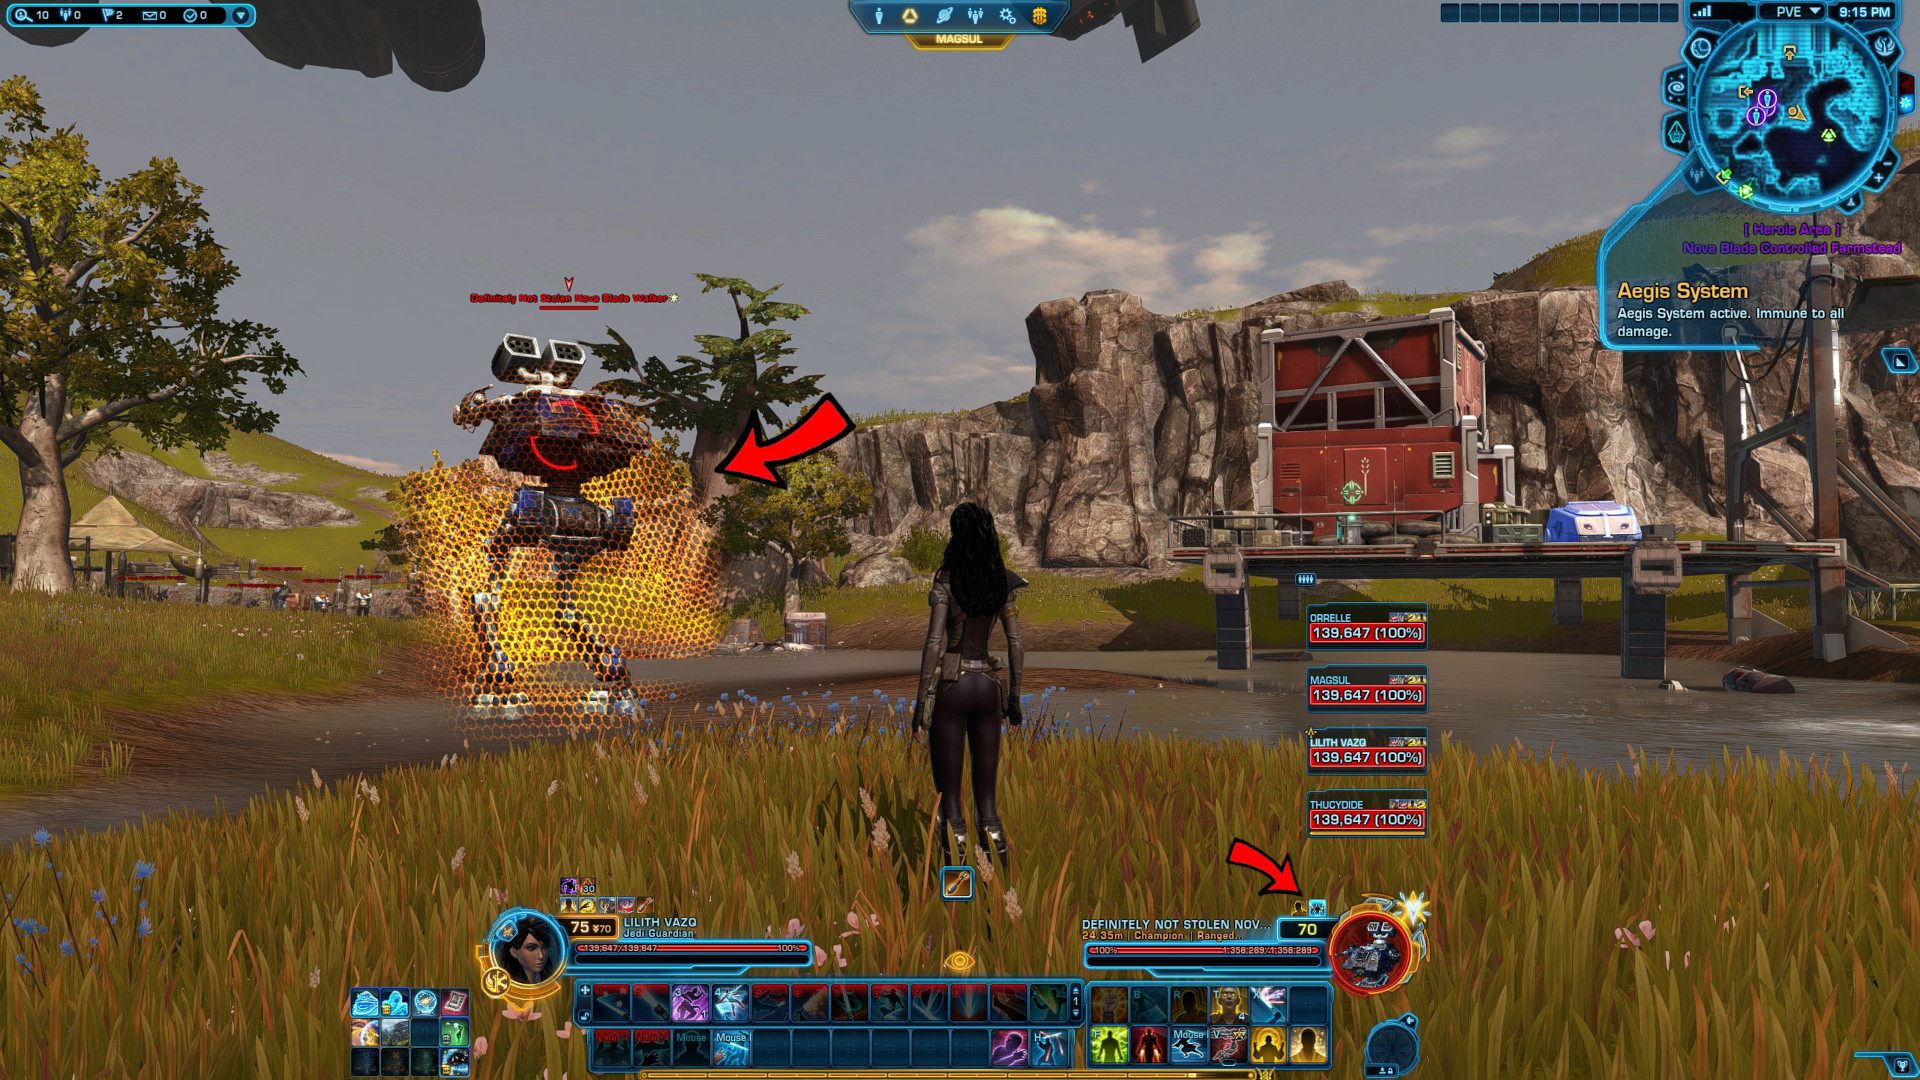
You will need to use this special ability every time the Walker activates its Aegis System, which adds a shield around the Walker granting 100% immunity to all our attacks.
Note: the Aegis System cast can be interrupted, meaning you don't have to use the EMP Missile if you as a group can manage to interrupt every time. Another fact to note is the crates will continuously respawn, so if you need more EMP Missiles, simply pick up a new one.
If you don't have a healer in the group, maybe make a note of the location of the two kolto stations in the area.
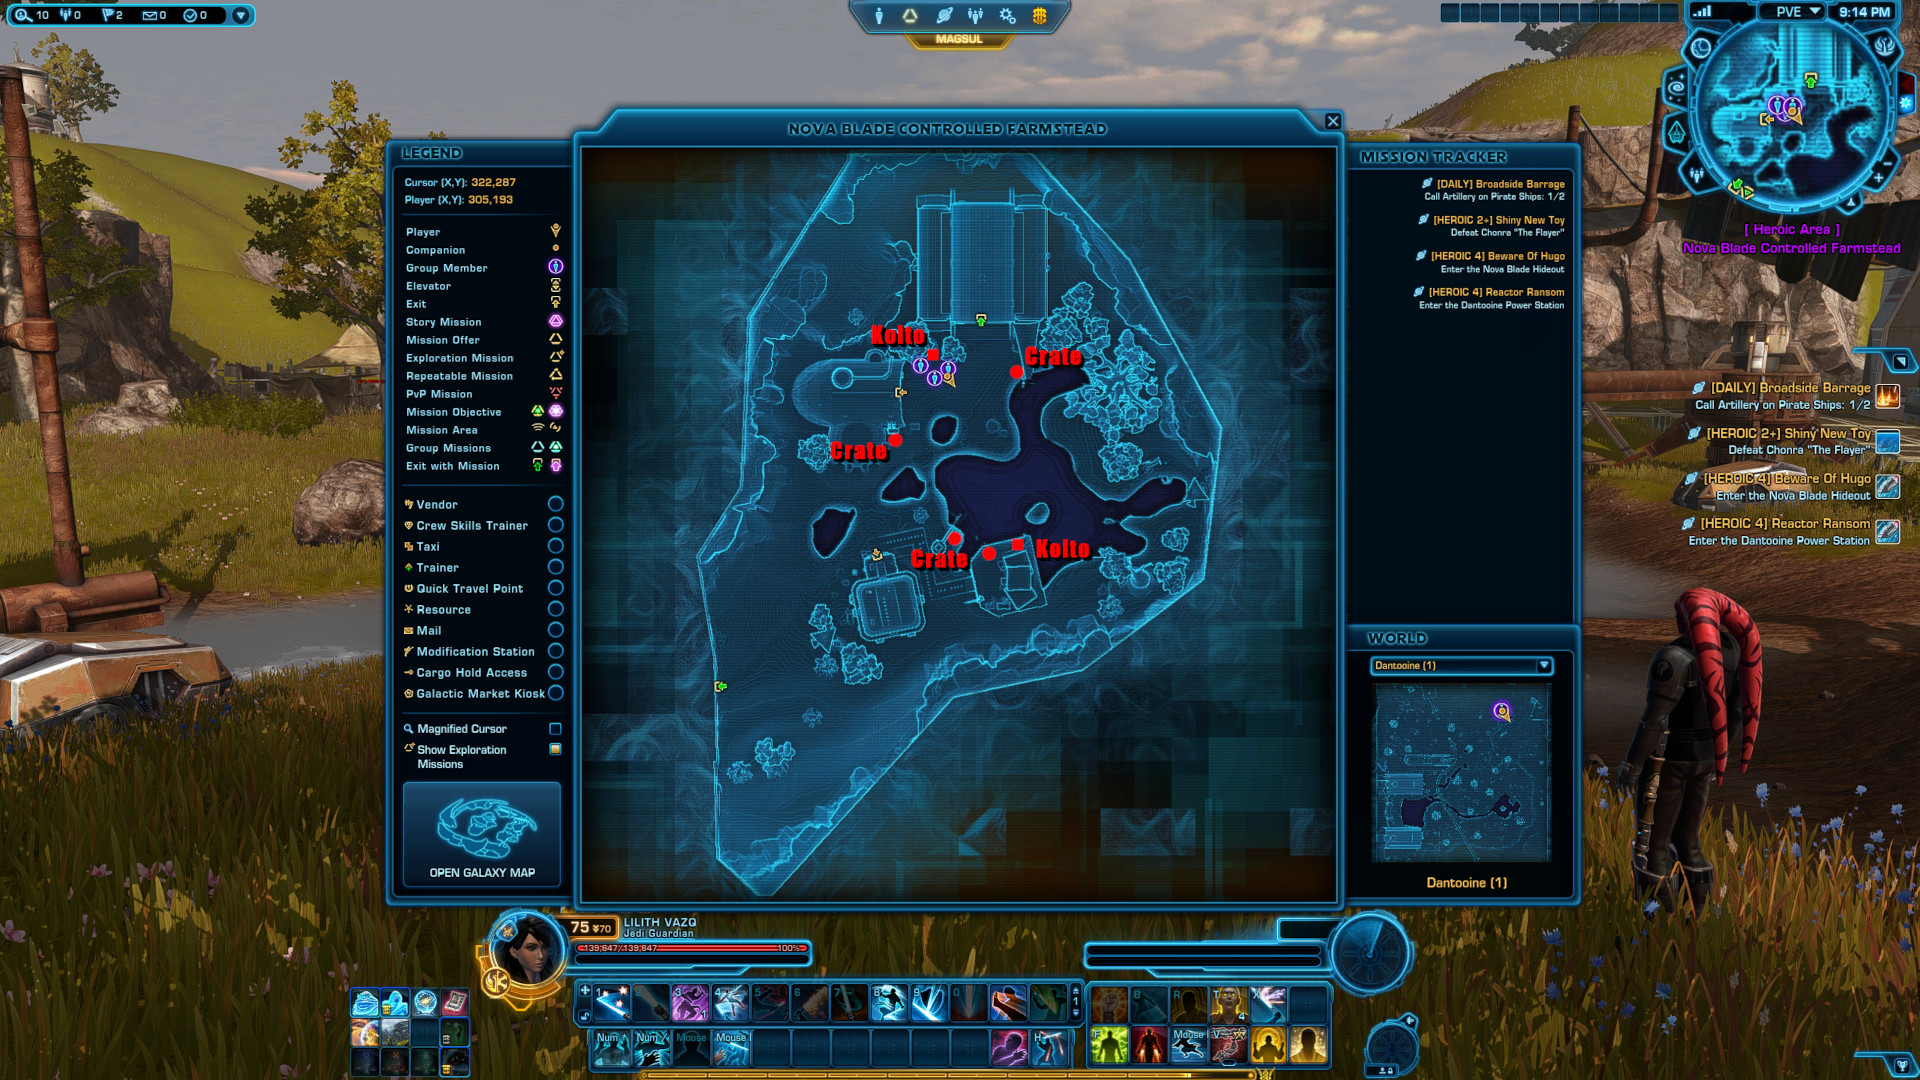
During the fight, there are two abilities casted by the Walker you need to look out - the "Activating Aegis System" and "Shock and Awe", both can be interrupted.
Shock and Awe will be a red circle on the floor usually on the player with the aggro. It will damage you for a very large amount, so it is paramount to move out of the circle the instant you see if. If you linger too long, it will kill you.
Happy hunting!
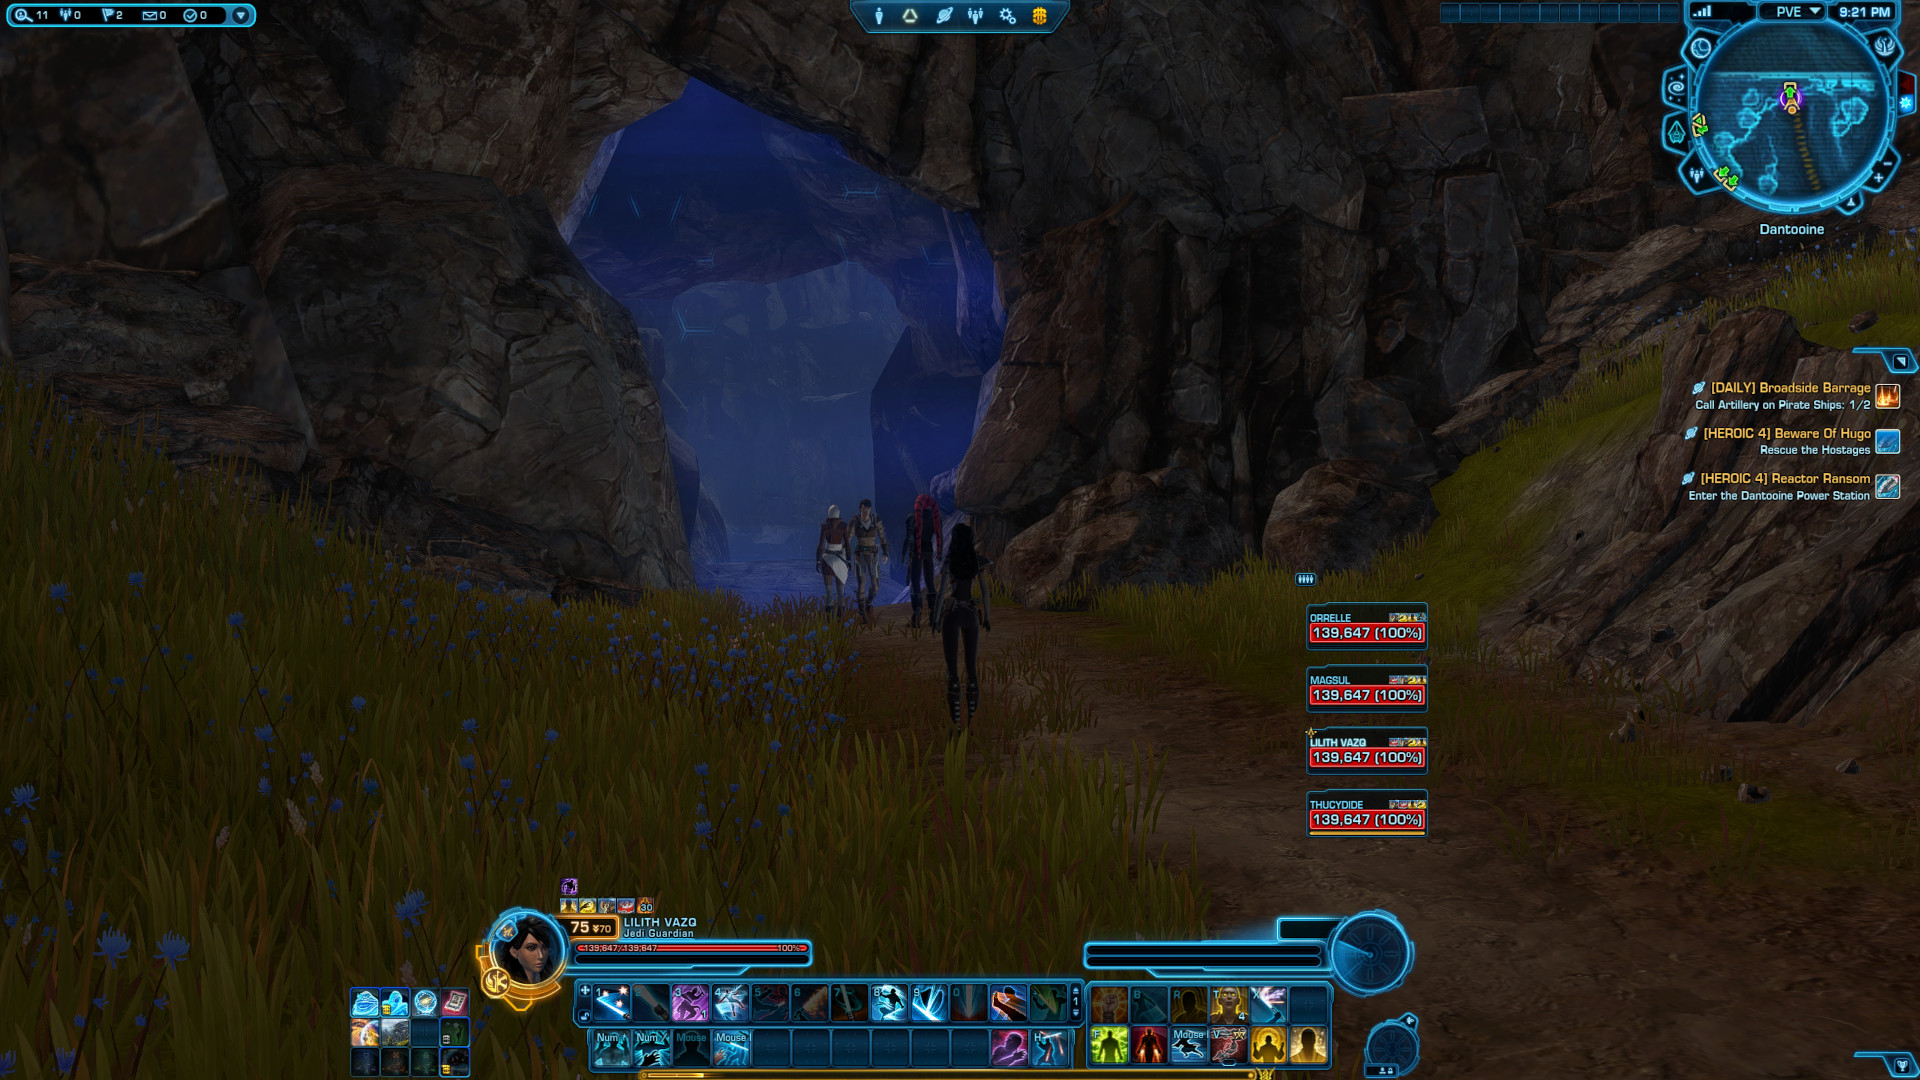
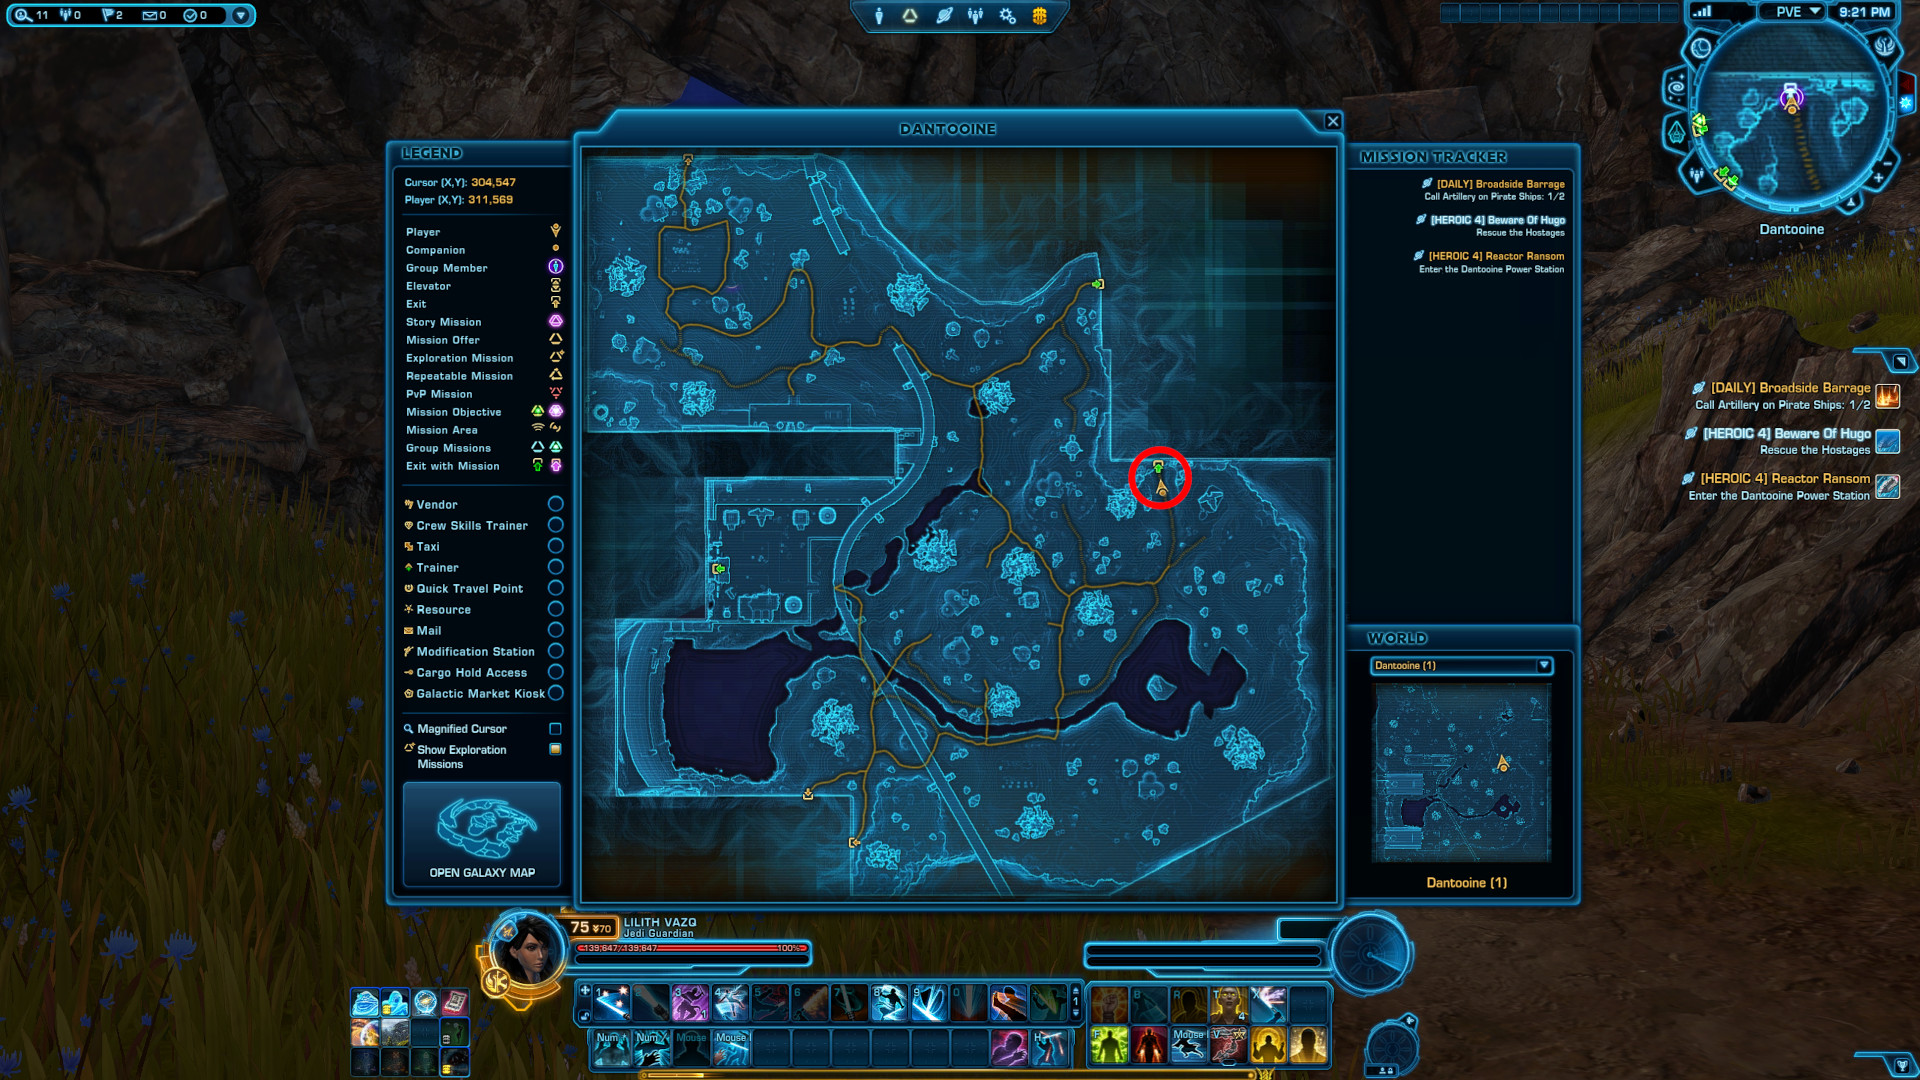
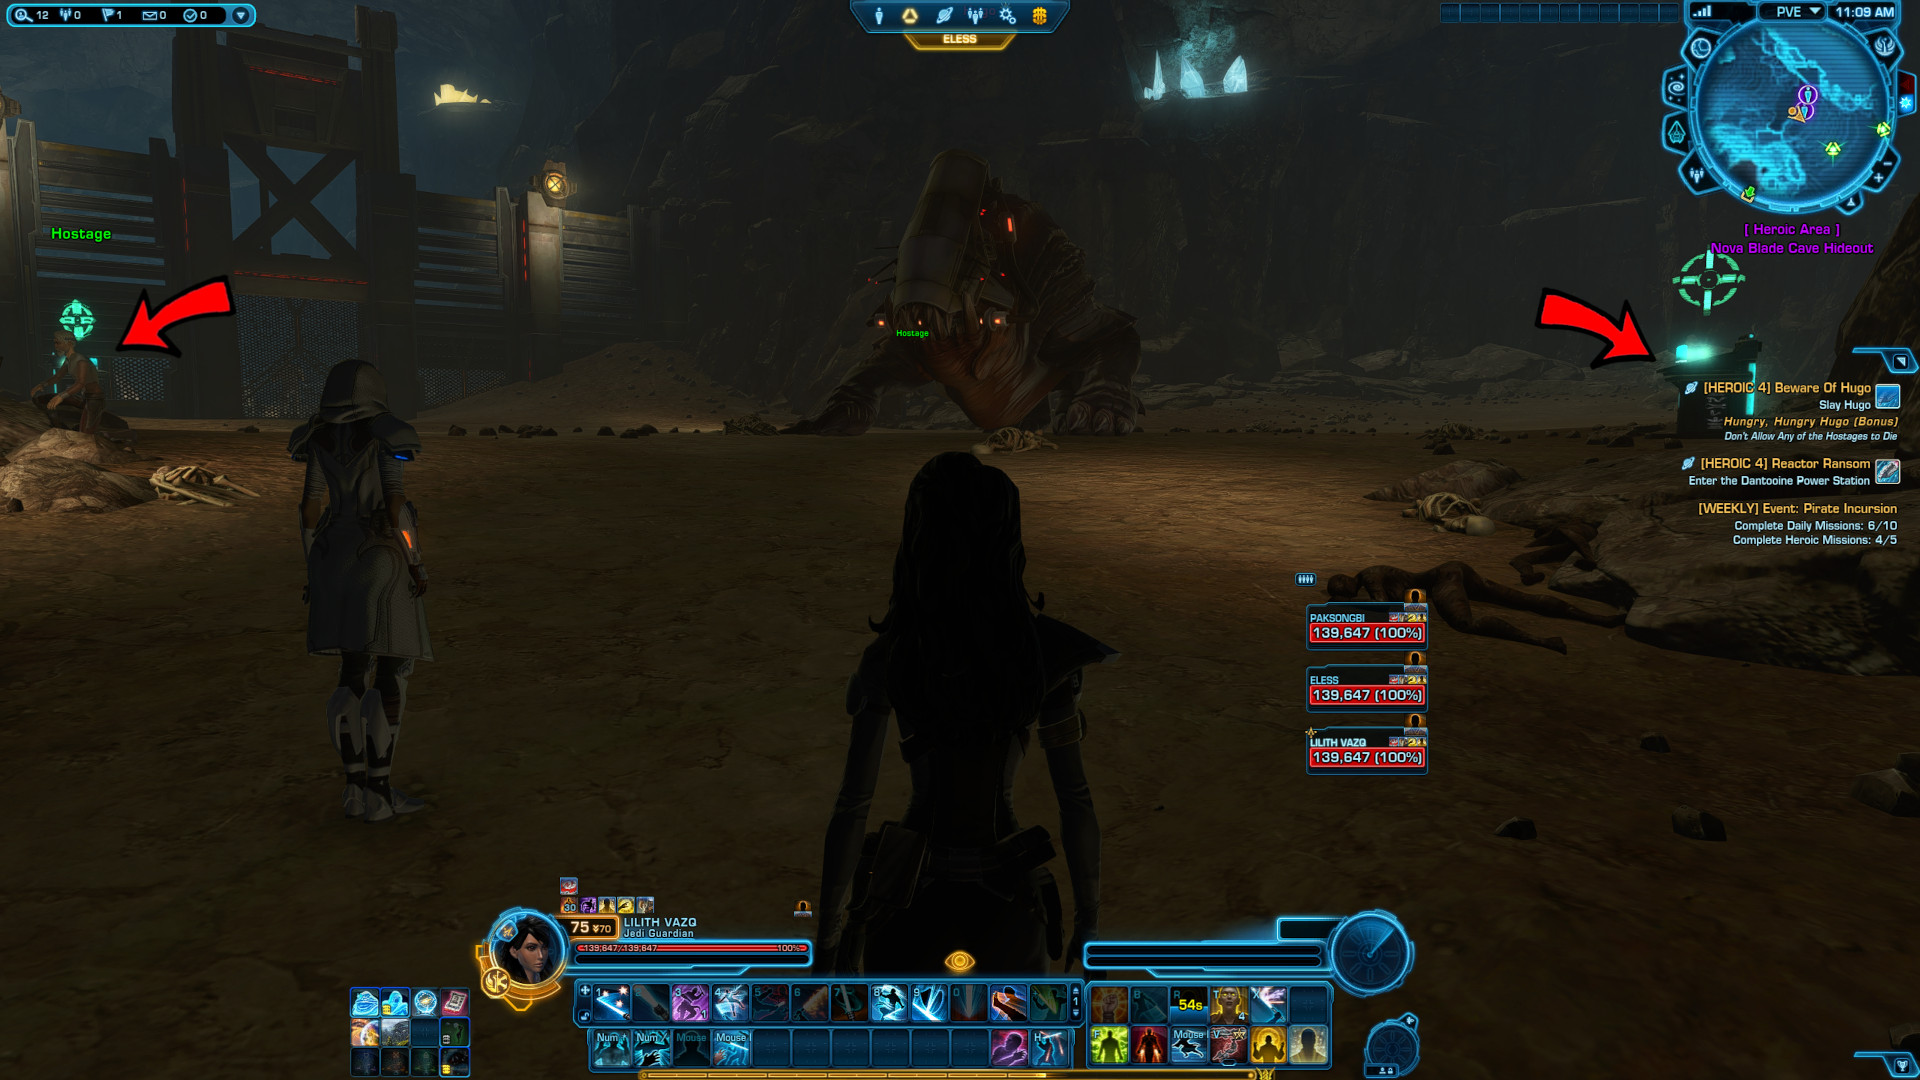
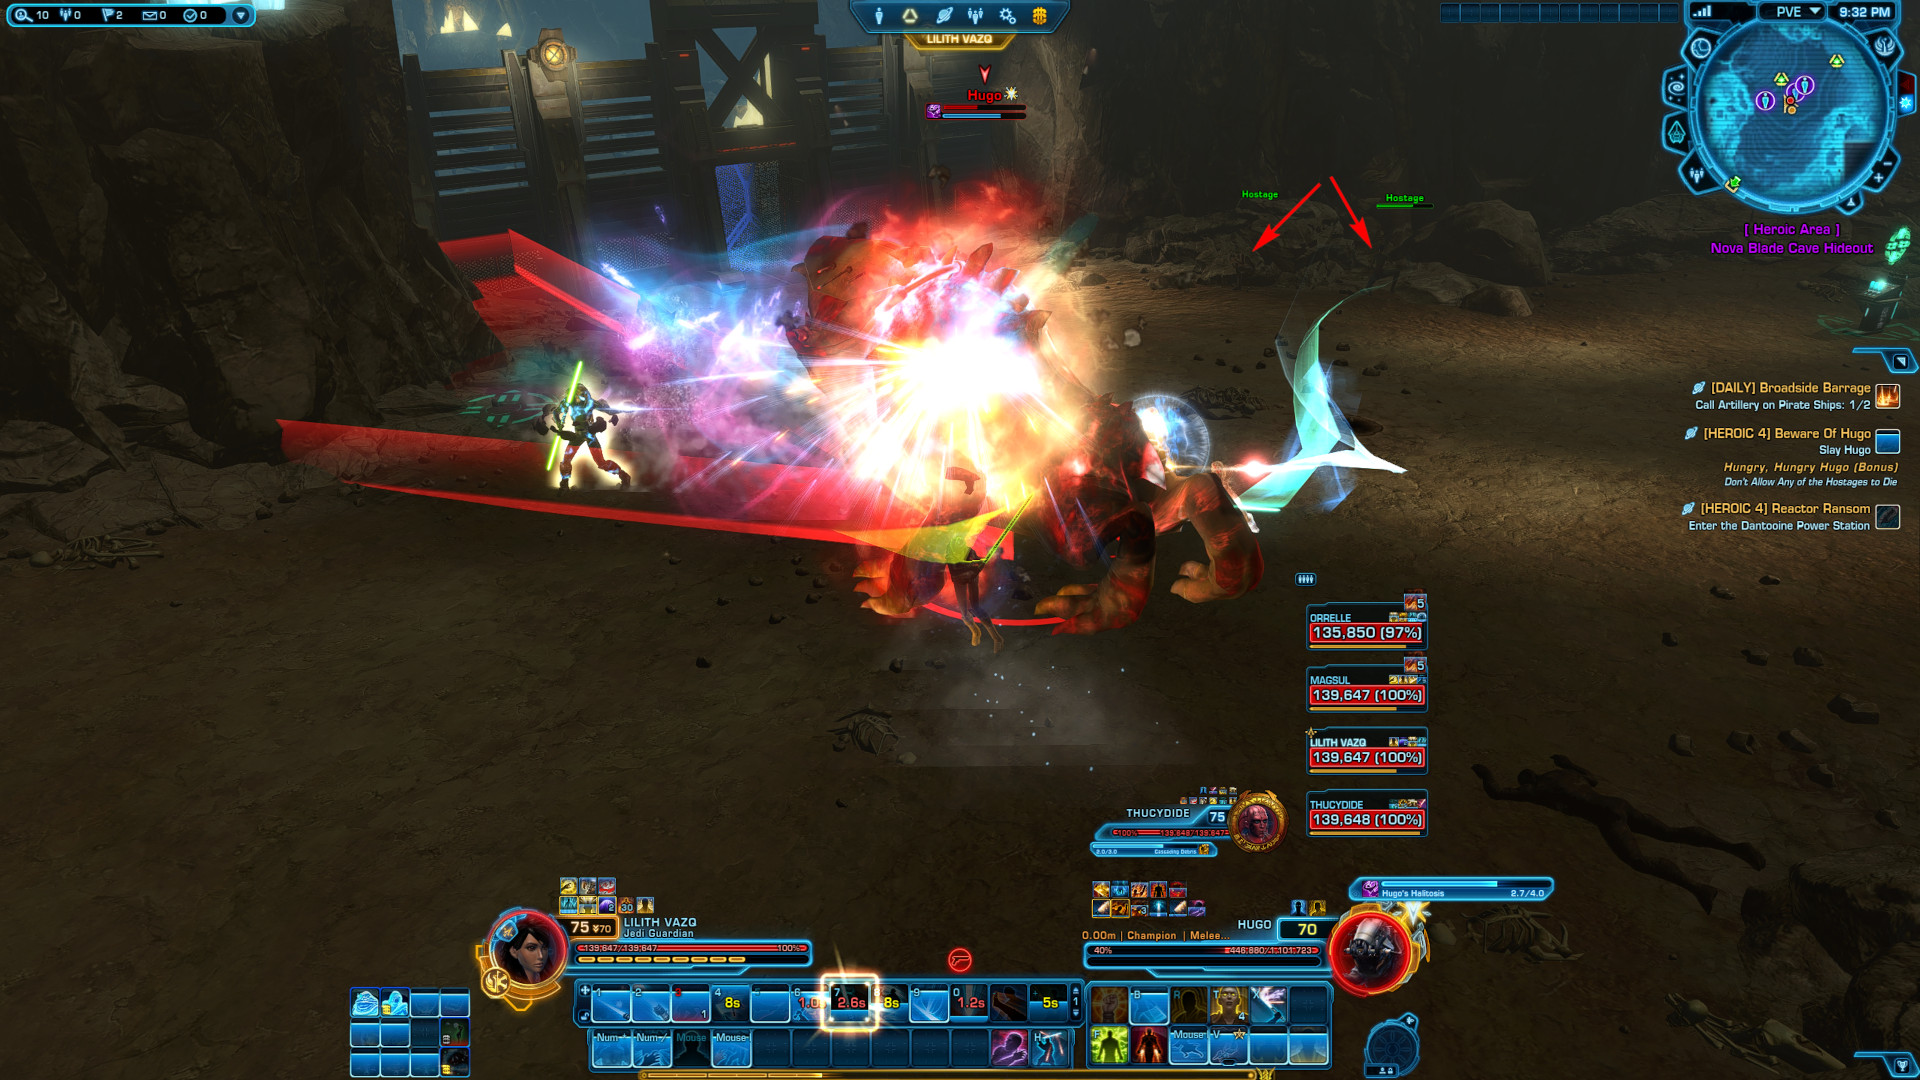
[HEROIC 4+] Beware of Hugo
As you walk into this instance, be aware that there's a small group of enemies awaiting you just beyond the barrier. Important note: Many advertised groups will use the stealth tactic here. What that means is, one person from the group (preferably a stealth class or a tank) will run in alone, interact with the door at the end, which will despawn all the enemies for everyone else in the group to go in safely.
If you choose to fight your way as intended, then you will be faced with large groups of enemies, the final two having stealth detection as well.
Once inside the holding pen, you are met by Hugo - a large exoboar. If you do not have a healer with you, make note of where the two kolto stations are located. You only have two, so use them wisely.
With Hugo there are two things to be aware of - if you have the aggro, do not face him towards anyone else, because he does a frontal attack that will add a stack on whoever gets hit, called Bleeding that will damage you periodically, which will also increase per stack (up to 5 stacks). If you do not have the aggro, it is your responsibility you attack Hugo from behind.
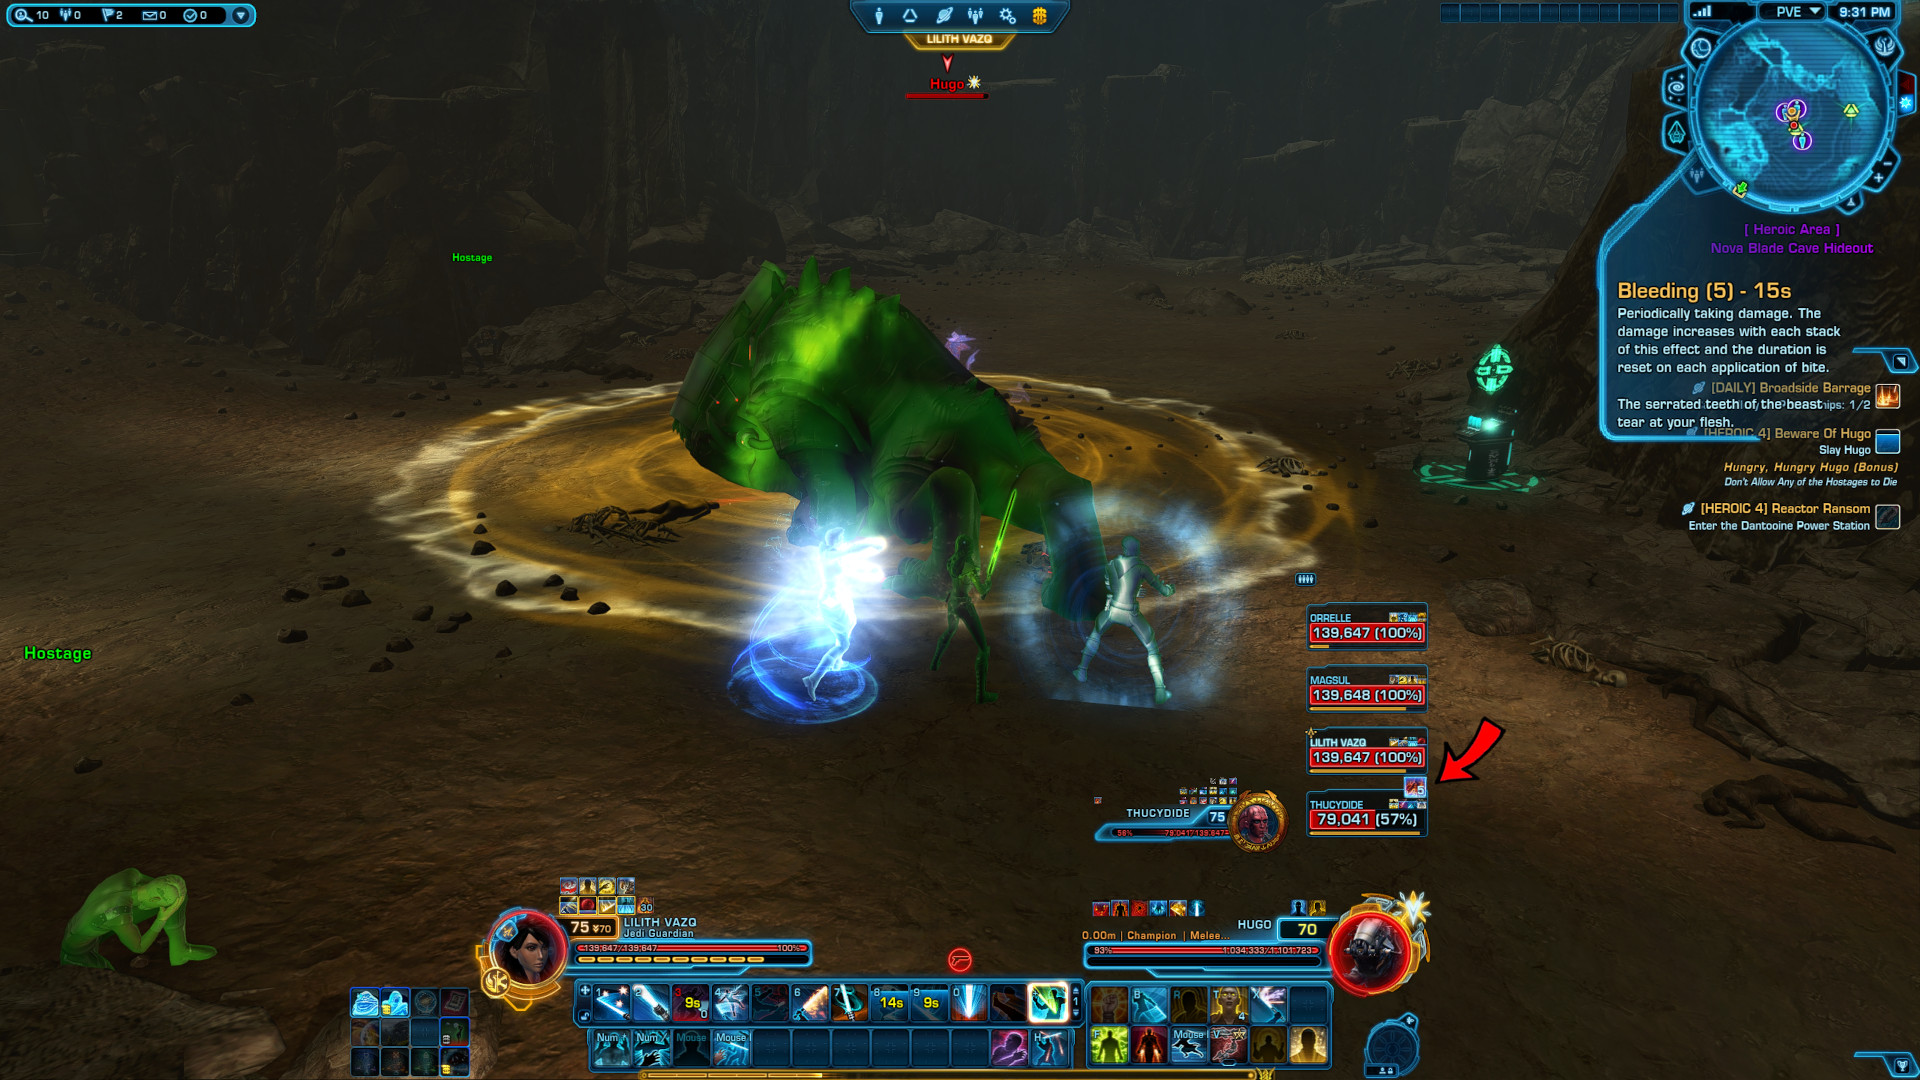
The other thing to be aware of, is a cast called "Hugo's Halitosis", which is a coned attack in front of Hugo that can't be interrupted. If he attacks you with this ability, simply move out of it.
If you want the bonus as well, be sure to face Hugo's frontal attacks away from the Hostage NPC's as well.
Happy hunting!
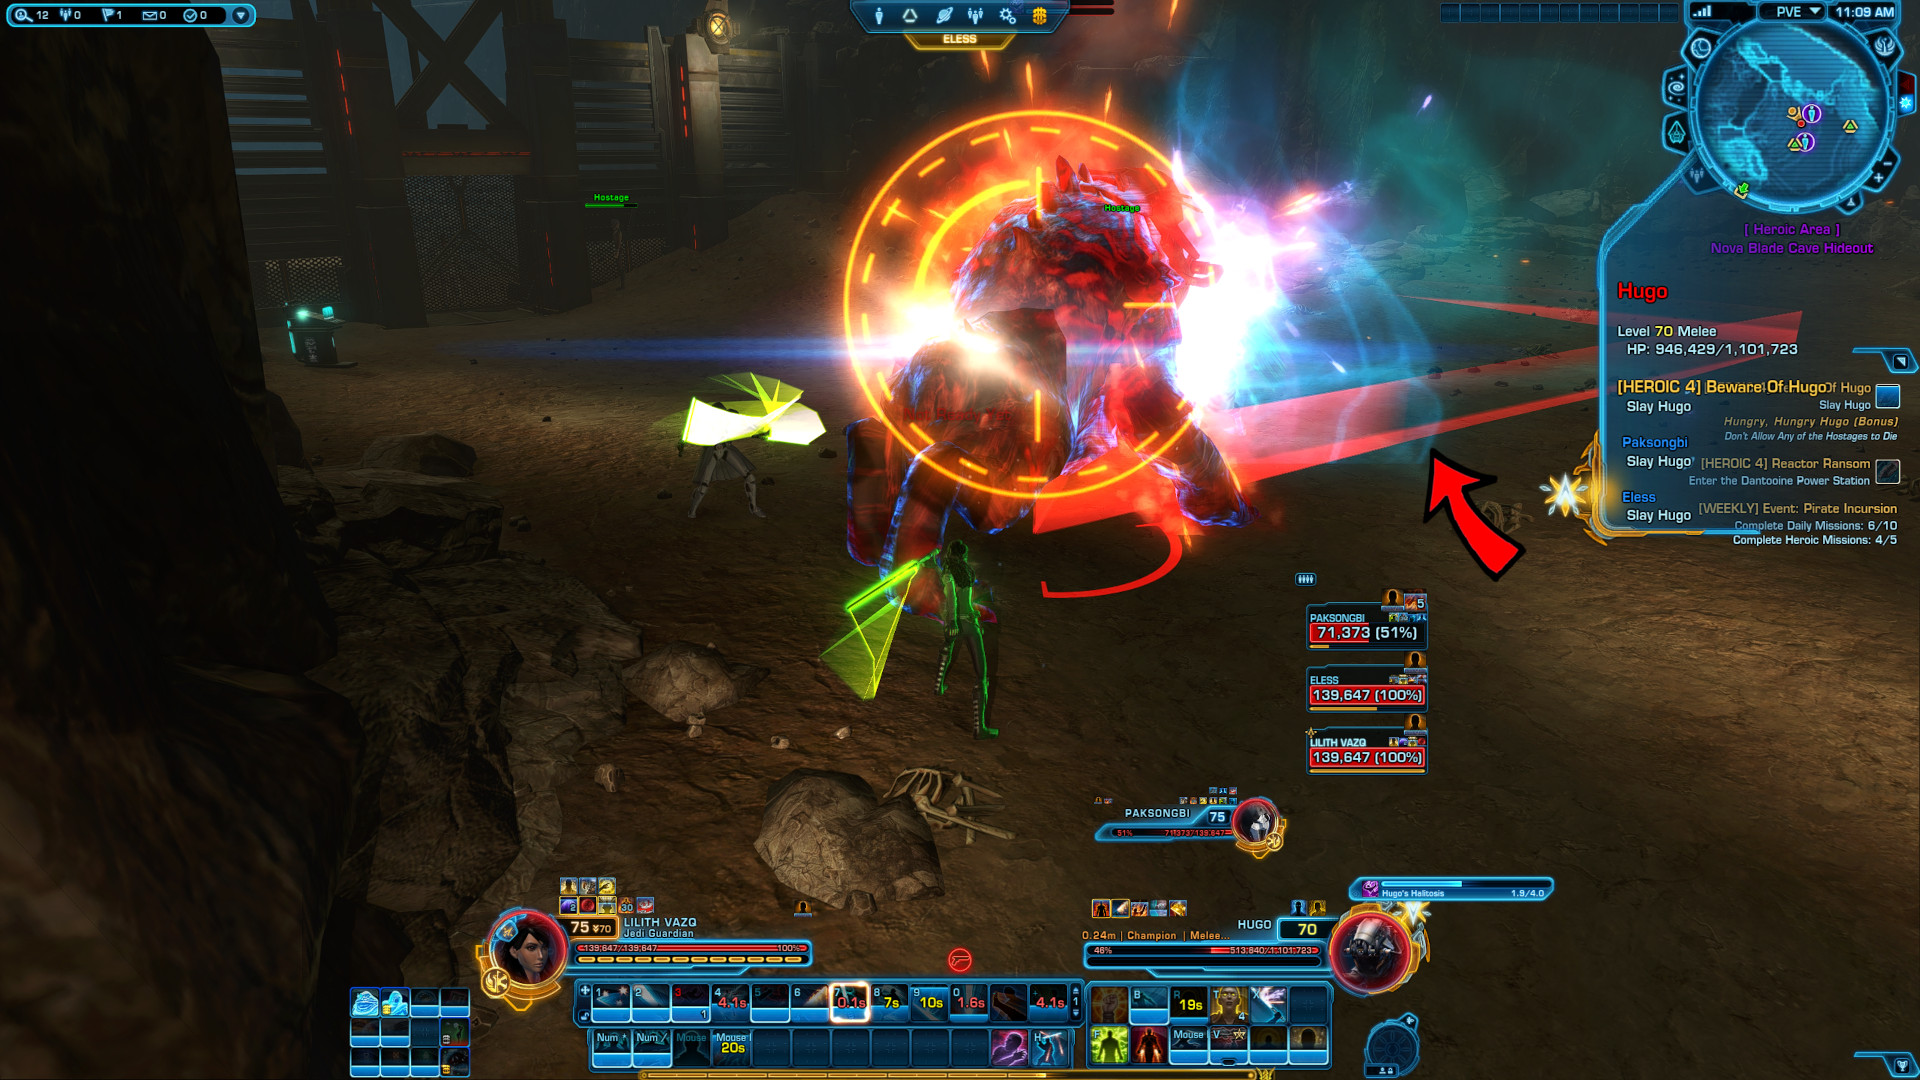
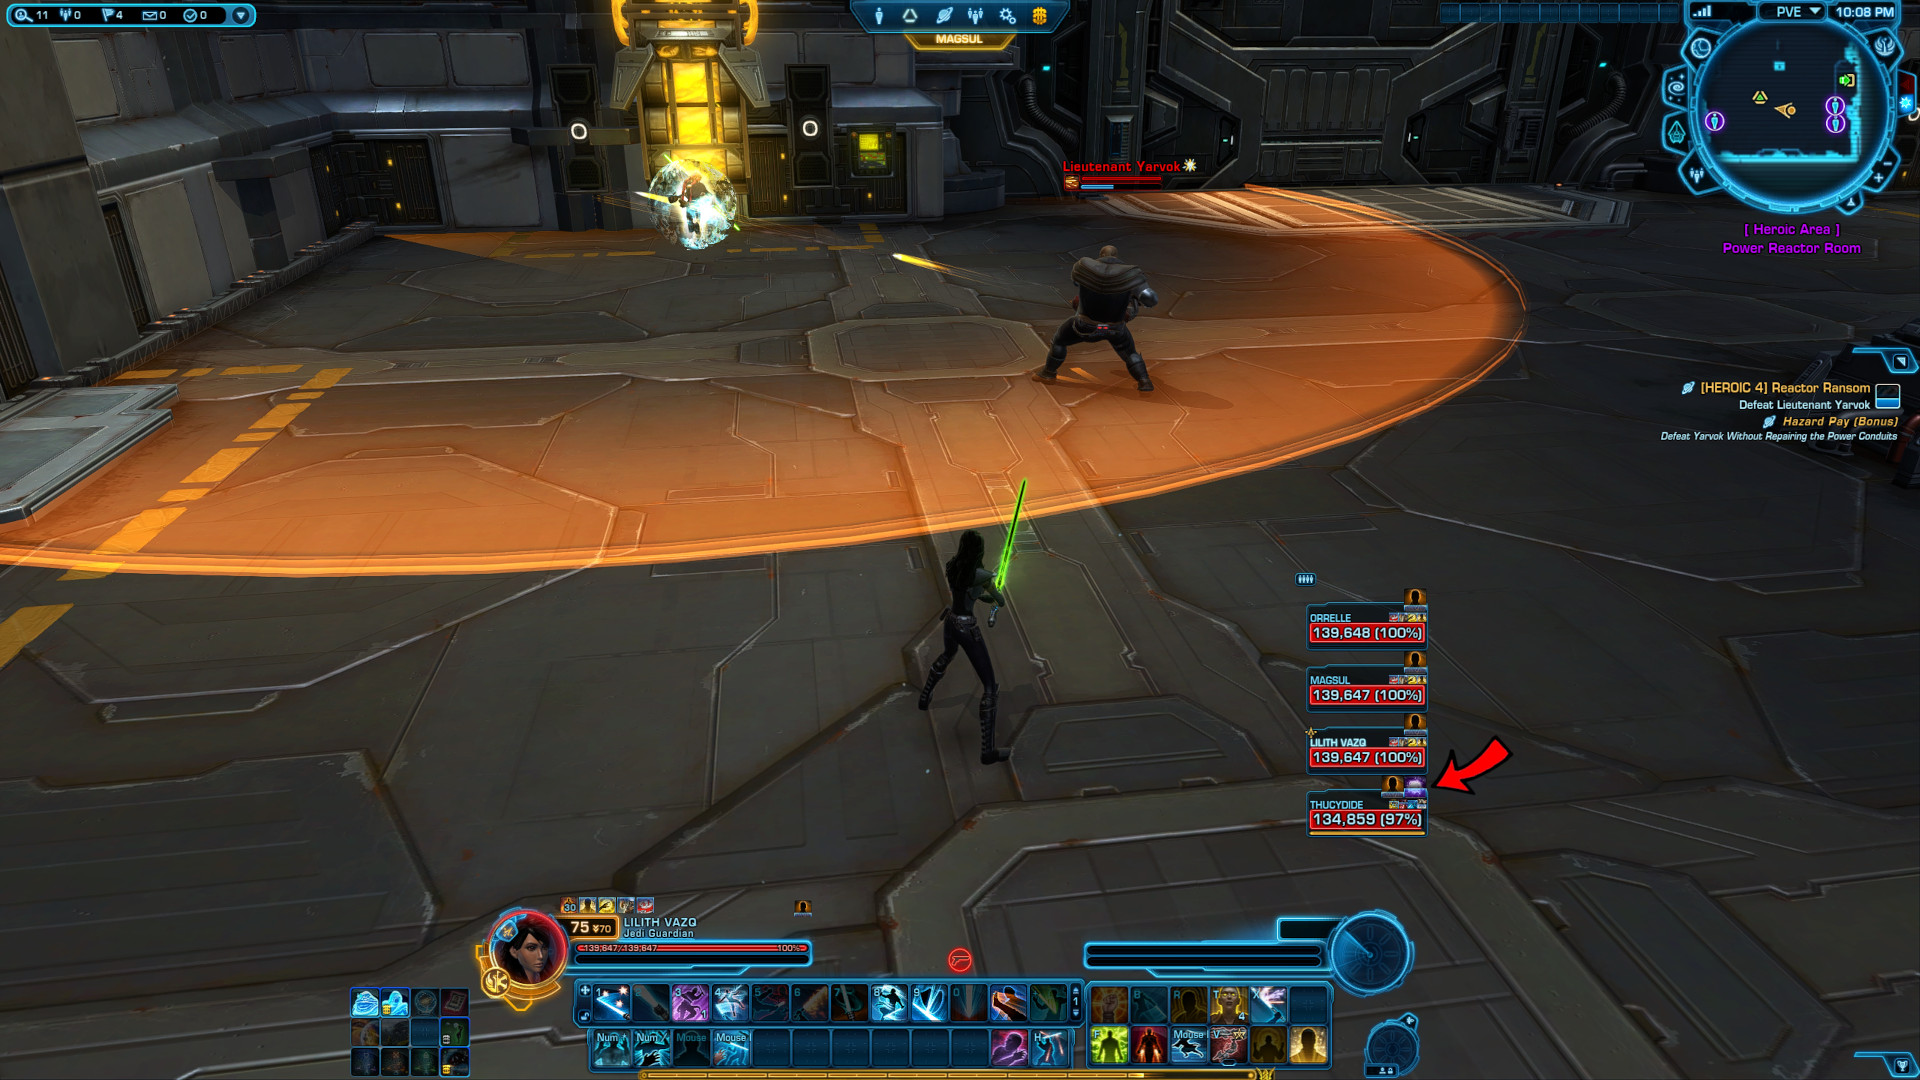
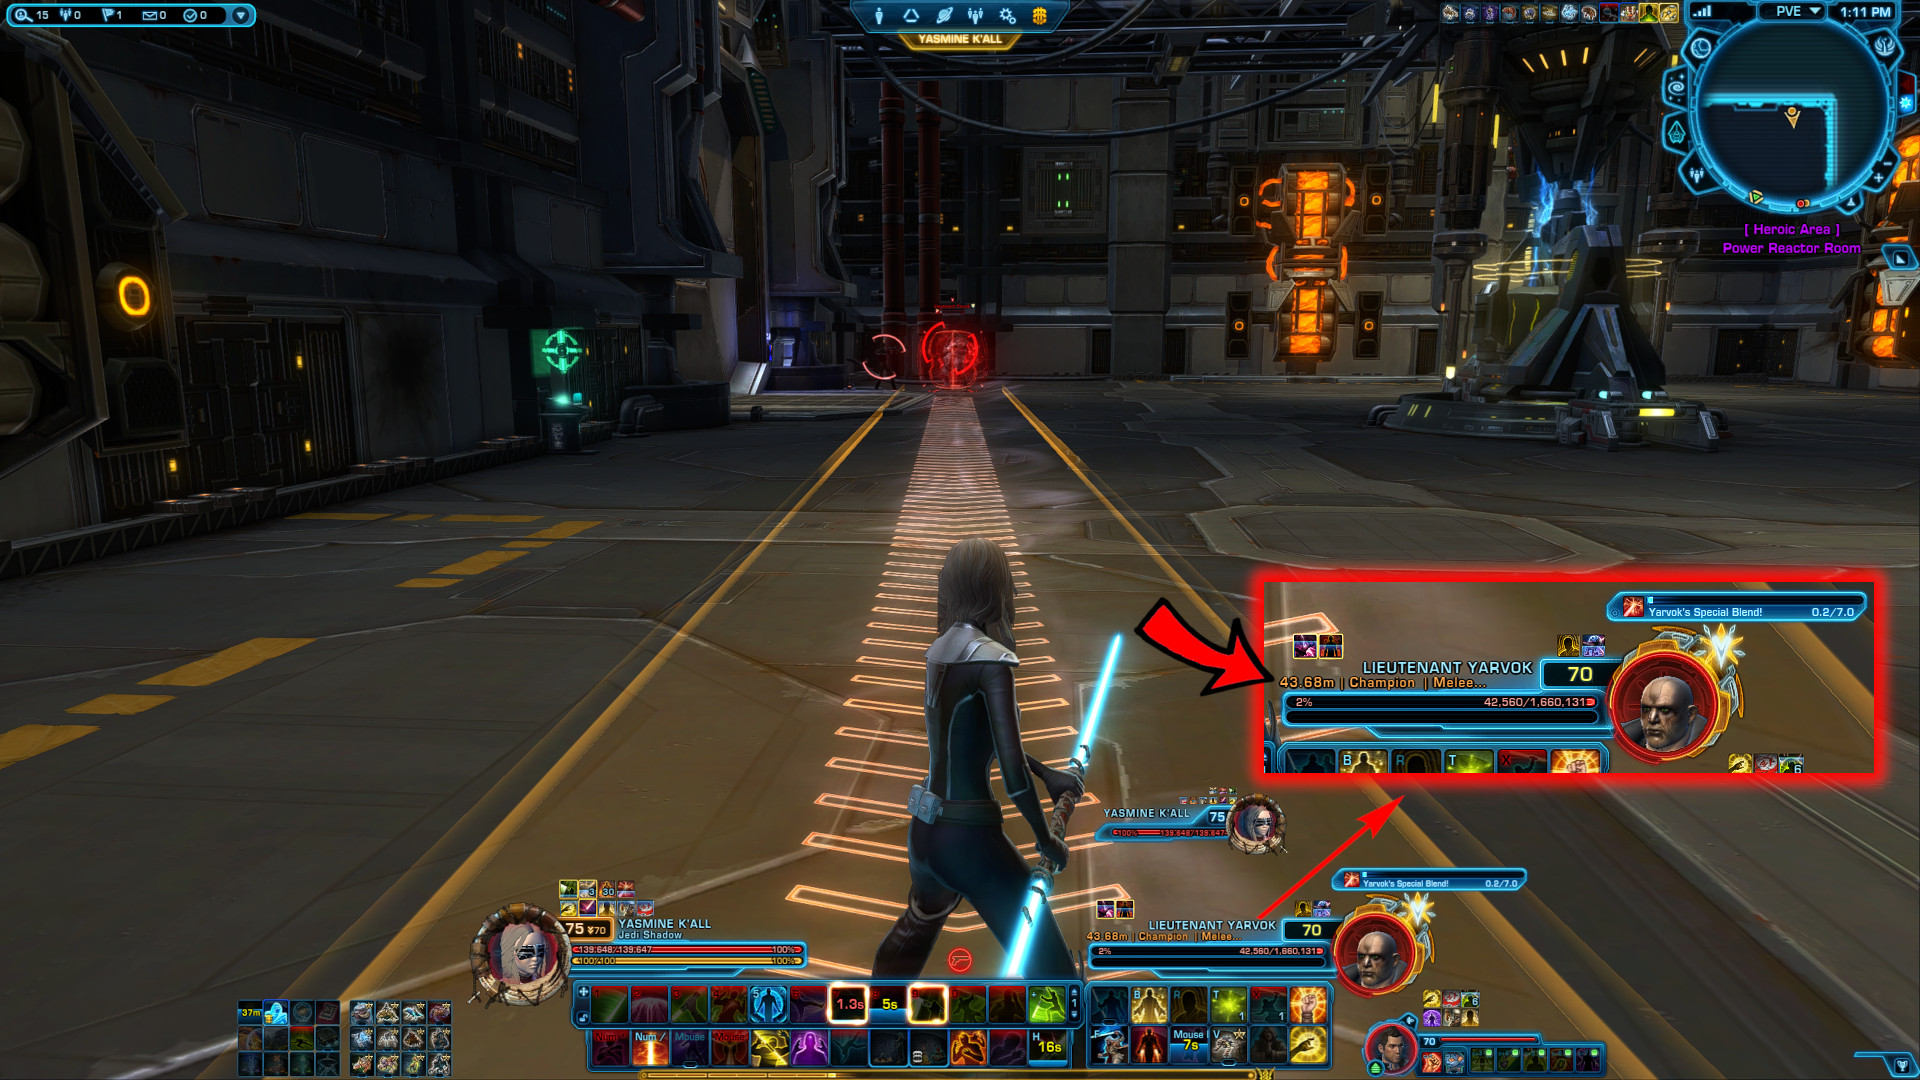
[HEROIC 4+] Reactor Ransom
This Heroic has two different outcomes. One is easy, but expensive. The other is tough, but free.
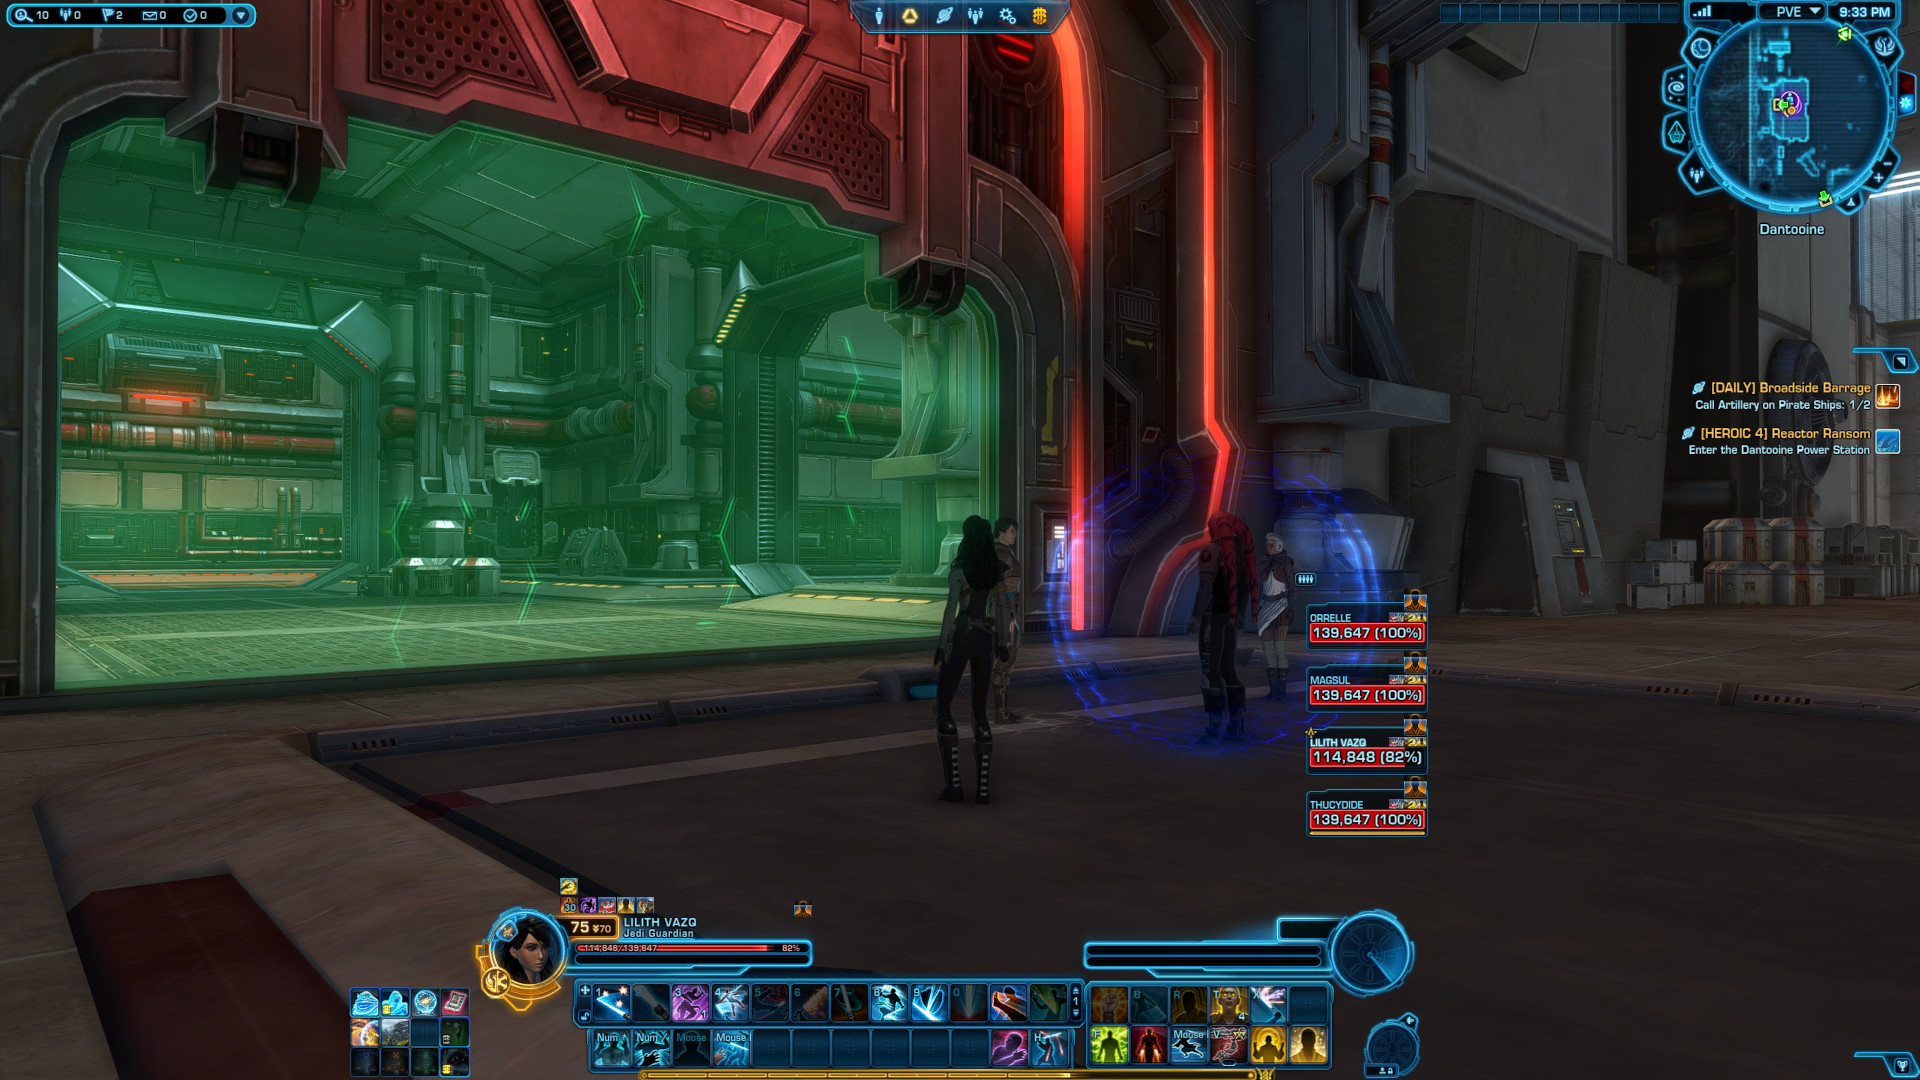
As you enter the instance, you will see an astromech named R0-B5U. You can purchase an item called "Convert Credits to Pay Ransom" for 15 million credits. If you choose to buy and consume this item, you circumvent the entire Heroic for your group, by paying Yarvok what he wants, who will come out and talk to you.
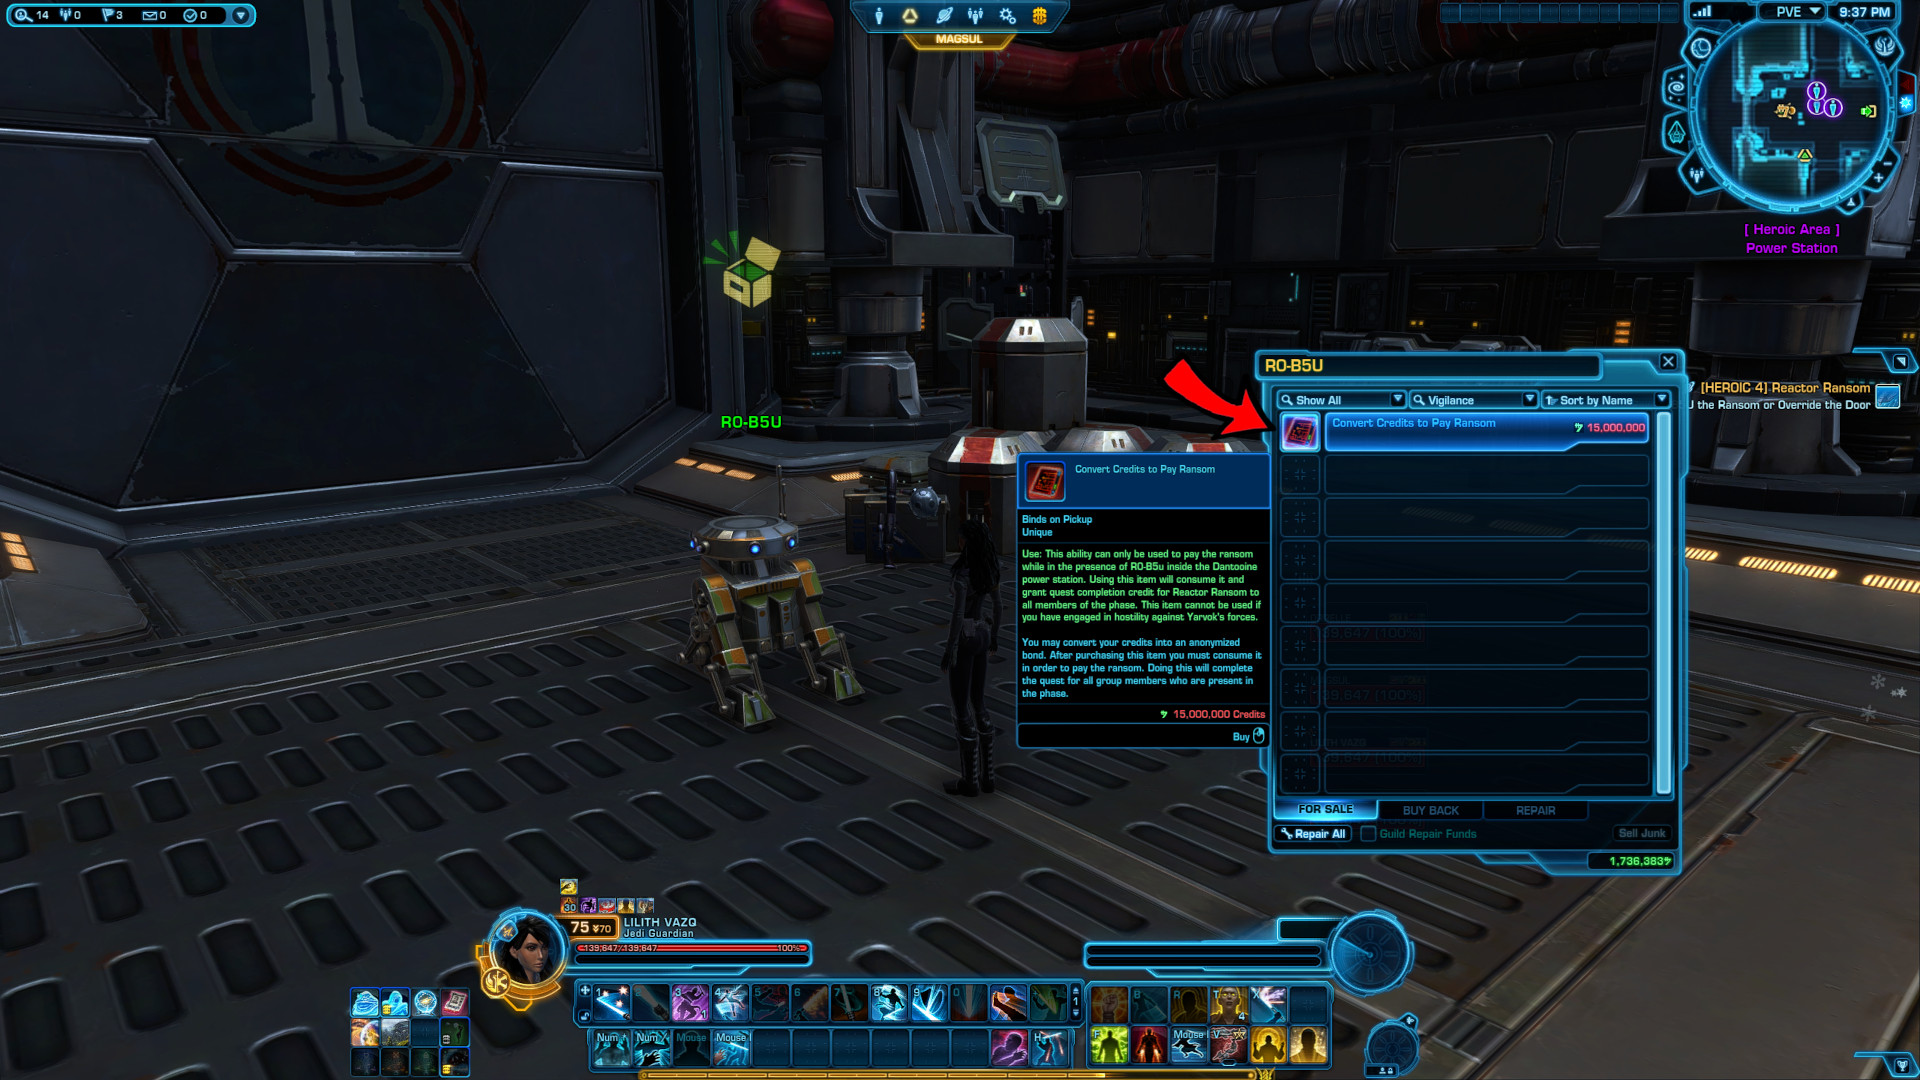
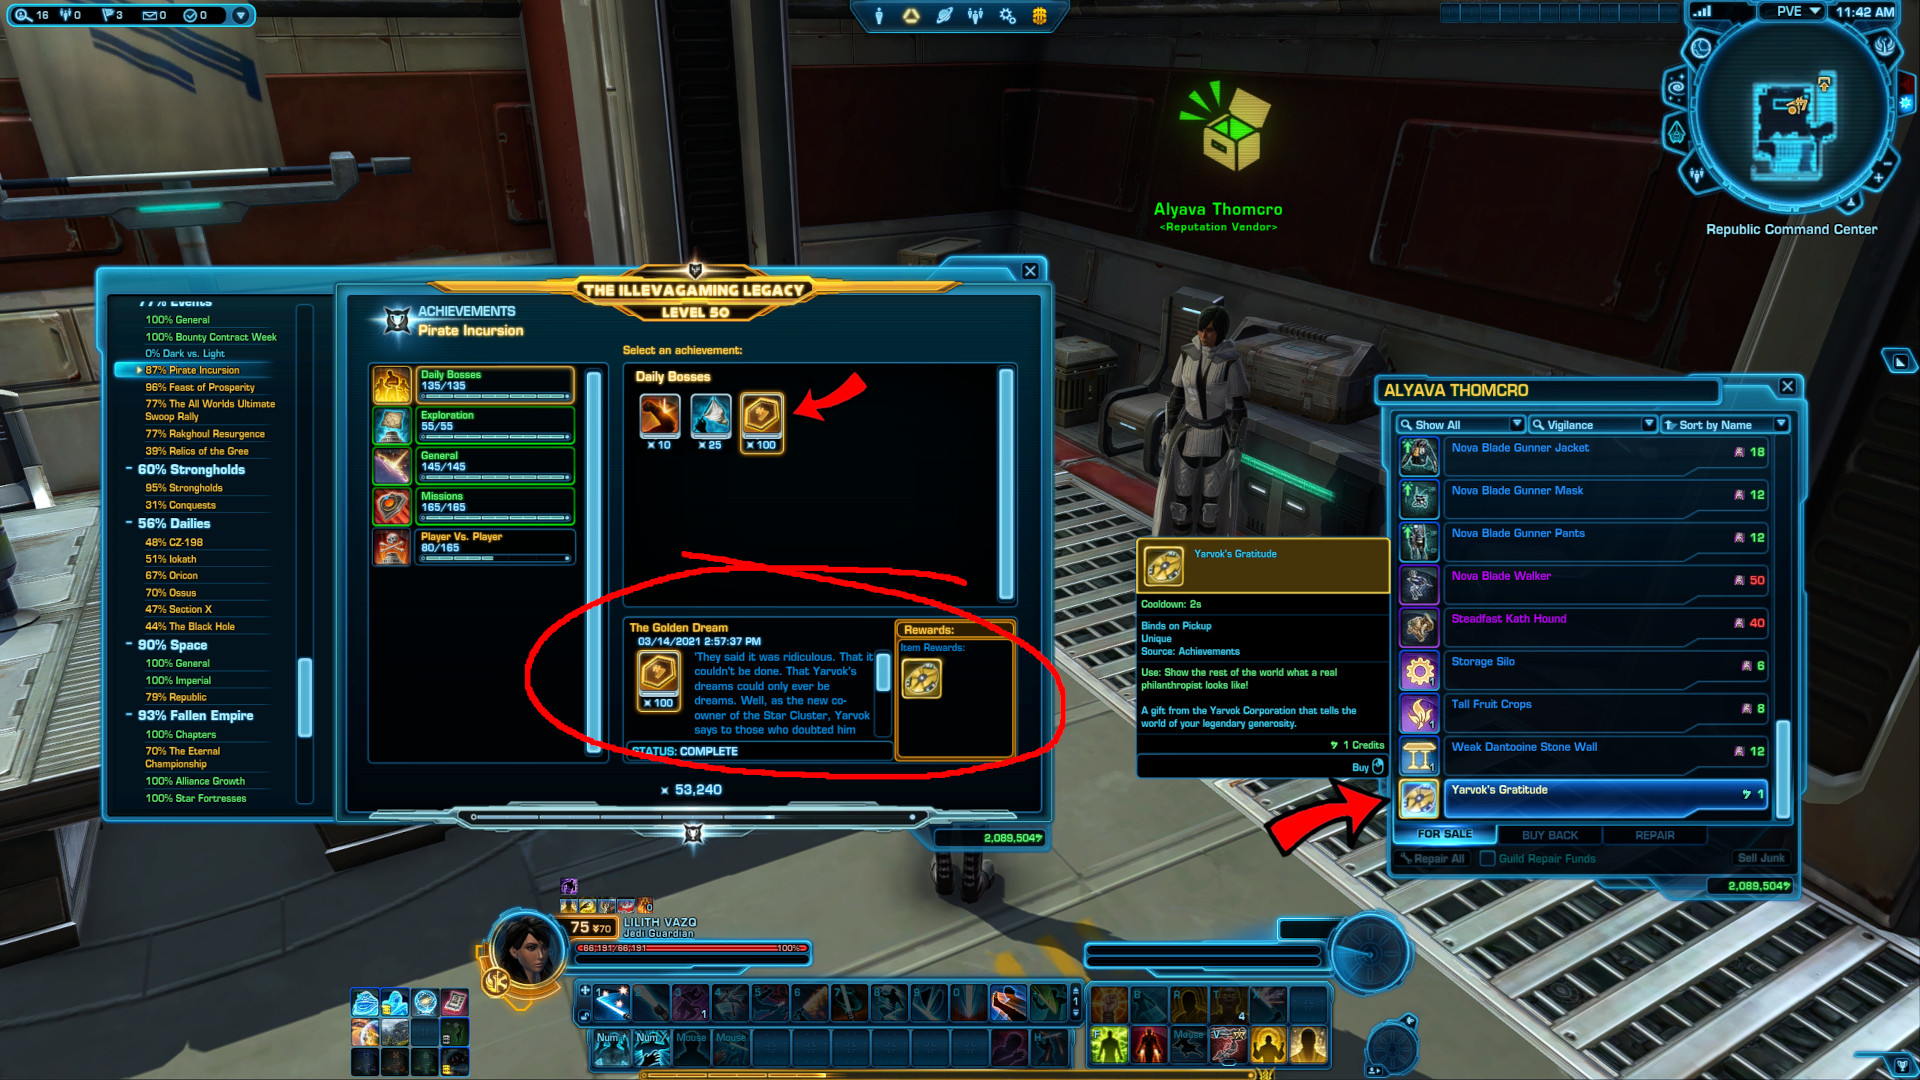
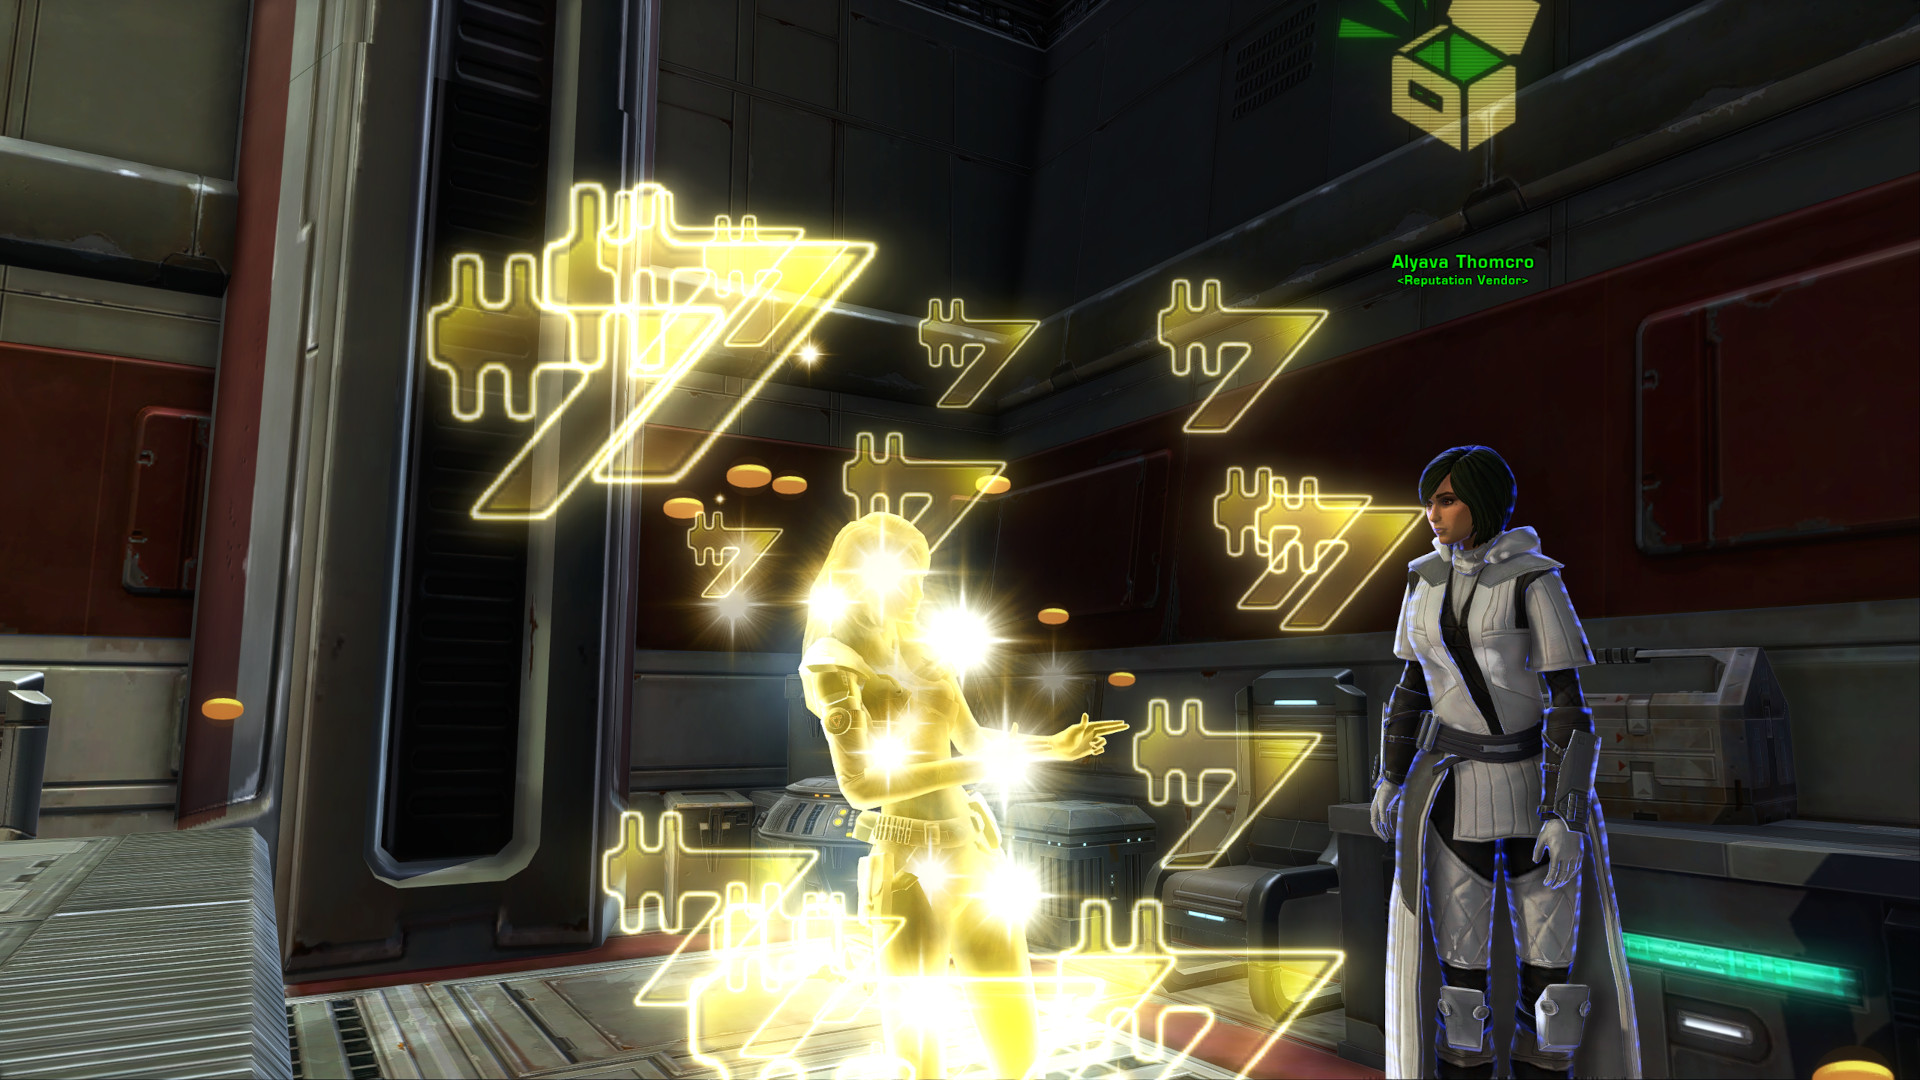
This is also part of an achievement. You have to pay him 10 times (a total of 150 million credits), which only counts for the one paying. Once you unlock the achievement, you can purchase "Yarvok's Gratitude" at your local Reputation Vendor for 1 credit, that will grant a temporary visual "buff" to show off.
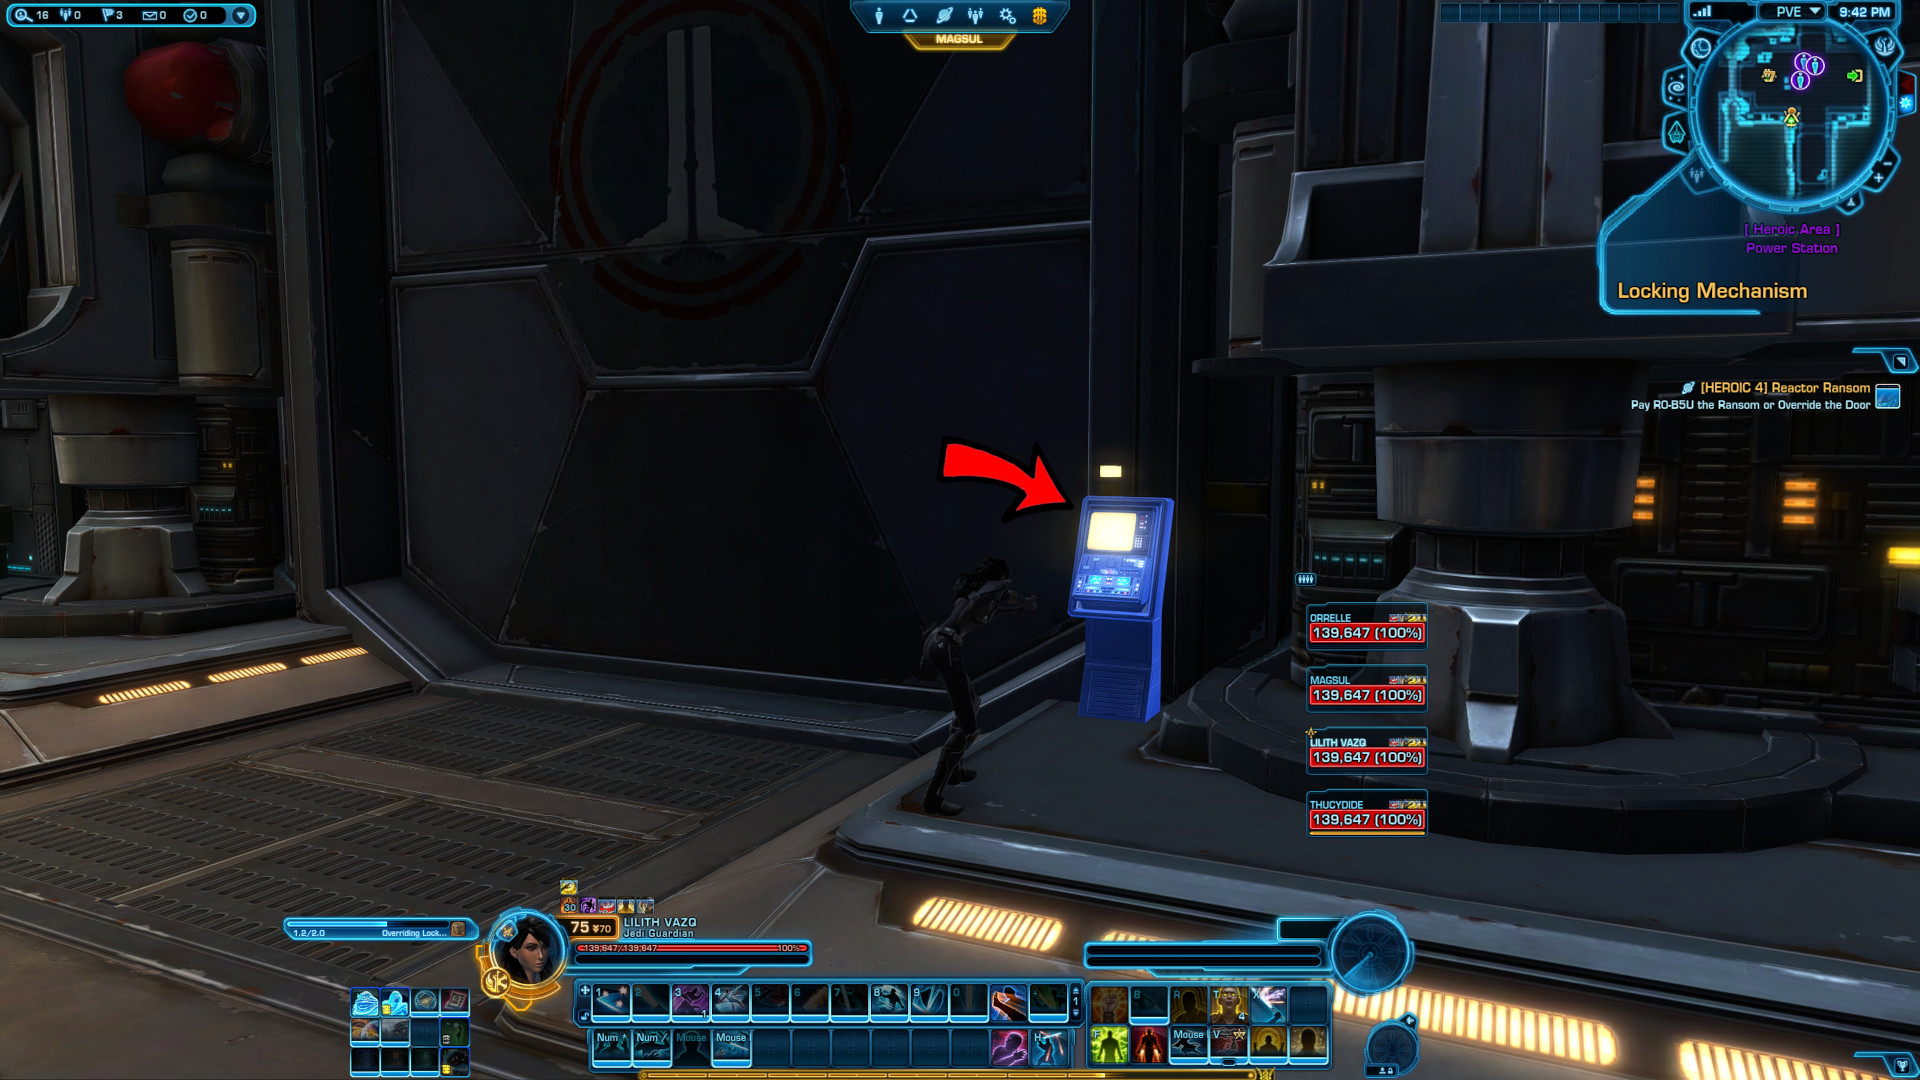
If you refuse to pay, you have to fight your way through and defeat him personally. Leave the astromech and click the panel at the door to the left.
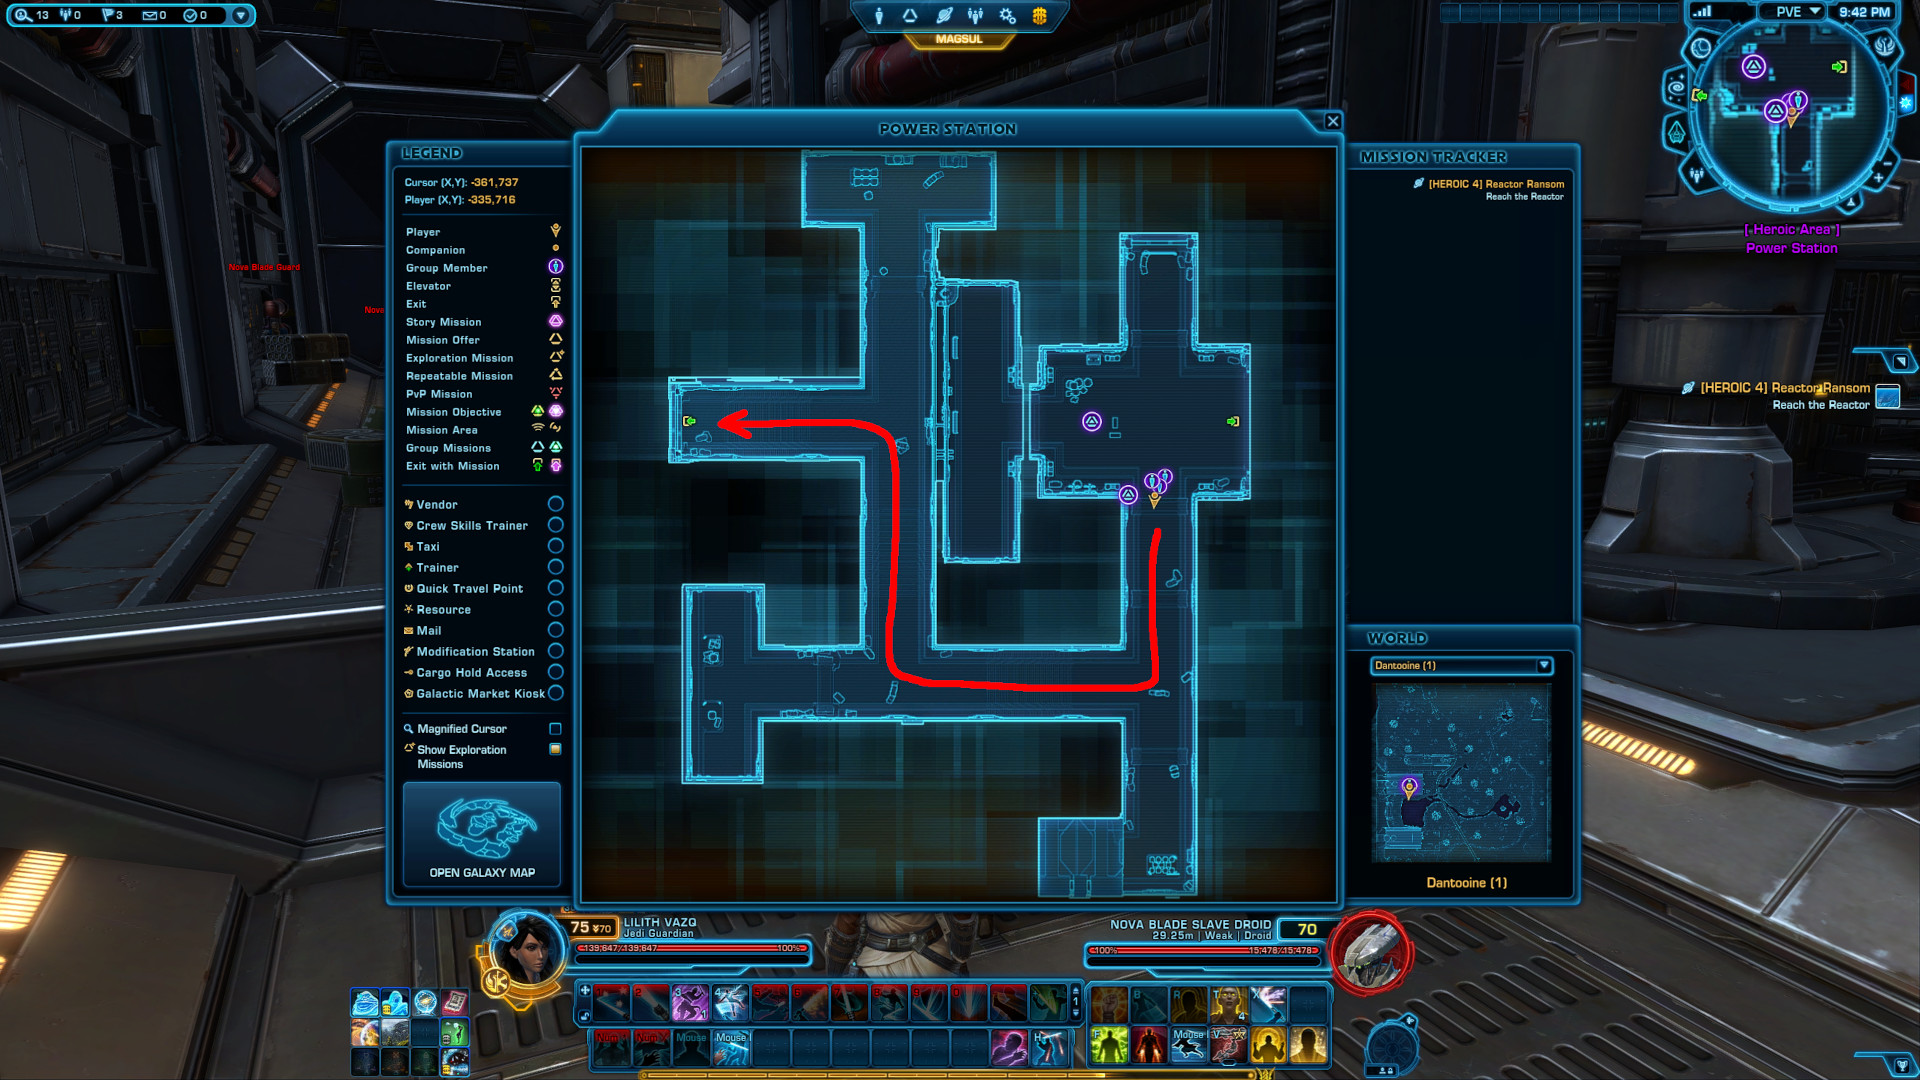
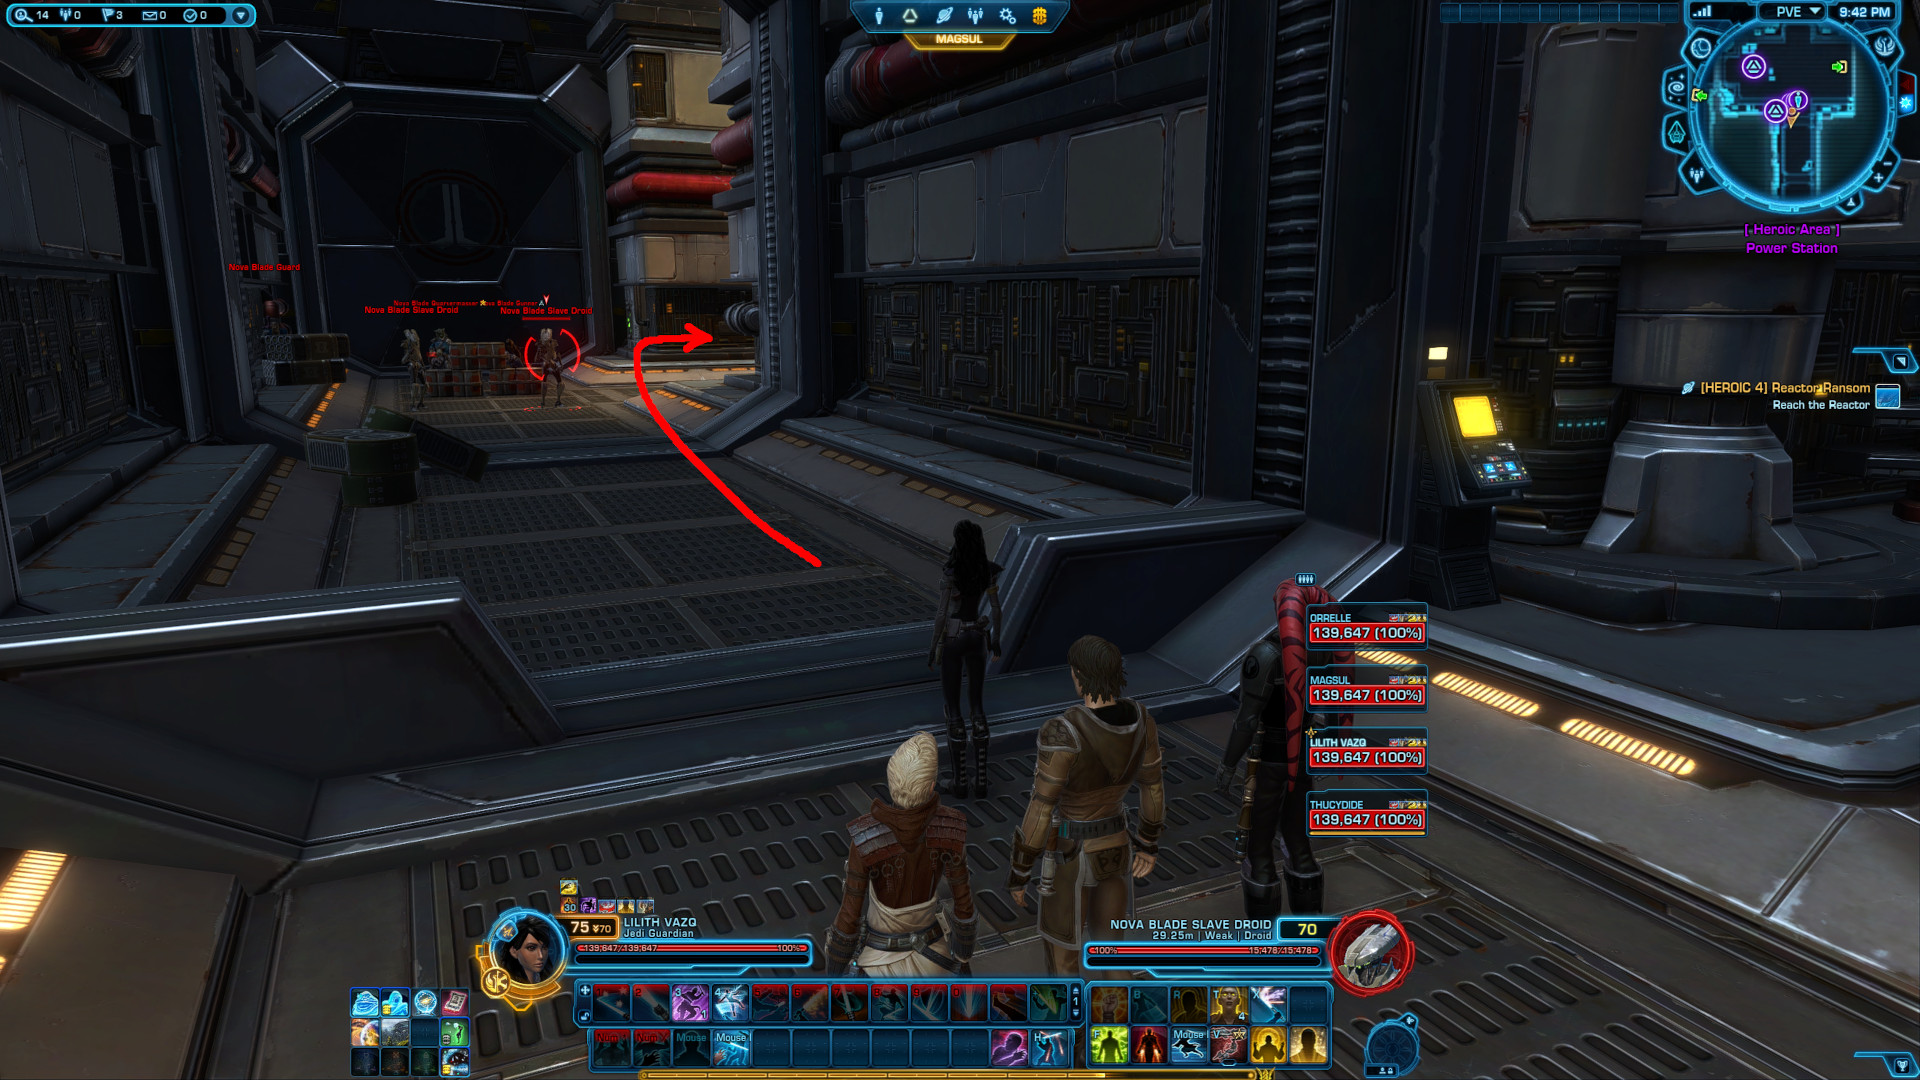
Important note: Many advertised groups want to use the stealth tactic. To be able to succeed in this, you'll have to be fast. Open the door, Force Speed/Roll towards the enemies that will be moving into position, stealth out right before you reach their location, then use Rocket Boost to get away from the first group as fast as possible, because they do have stealth detection. Reach the door and enter the Power Reactor Room and step forward to trigger the mission to change from "Reach the Reactor" to "Defeat Lieutenant Yarvok", which will despawn all the enemies and let the rest of your group enter safely. (See video for demonstration)
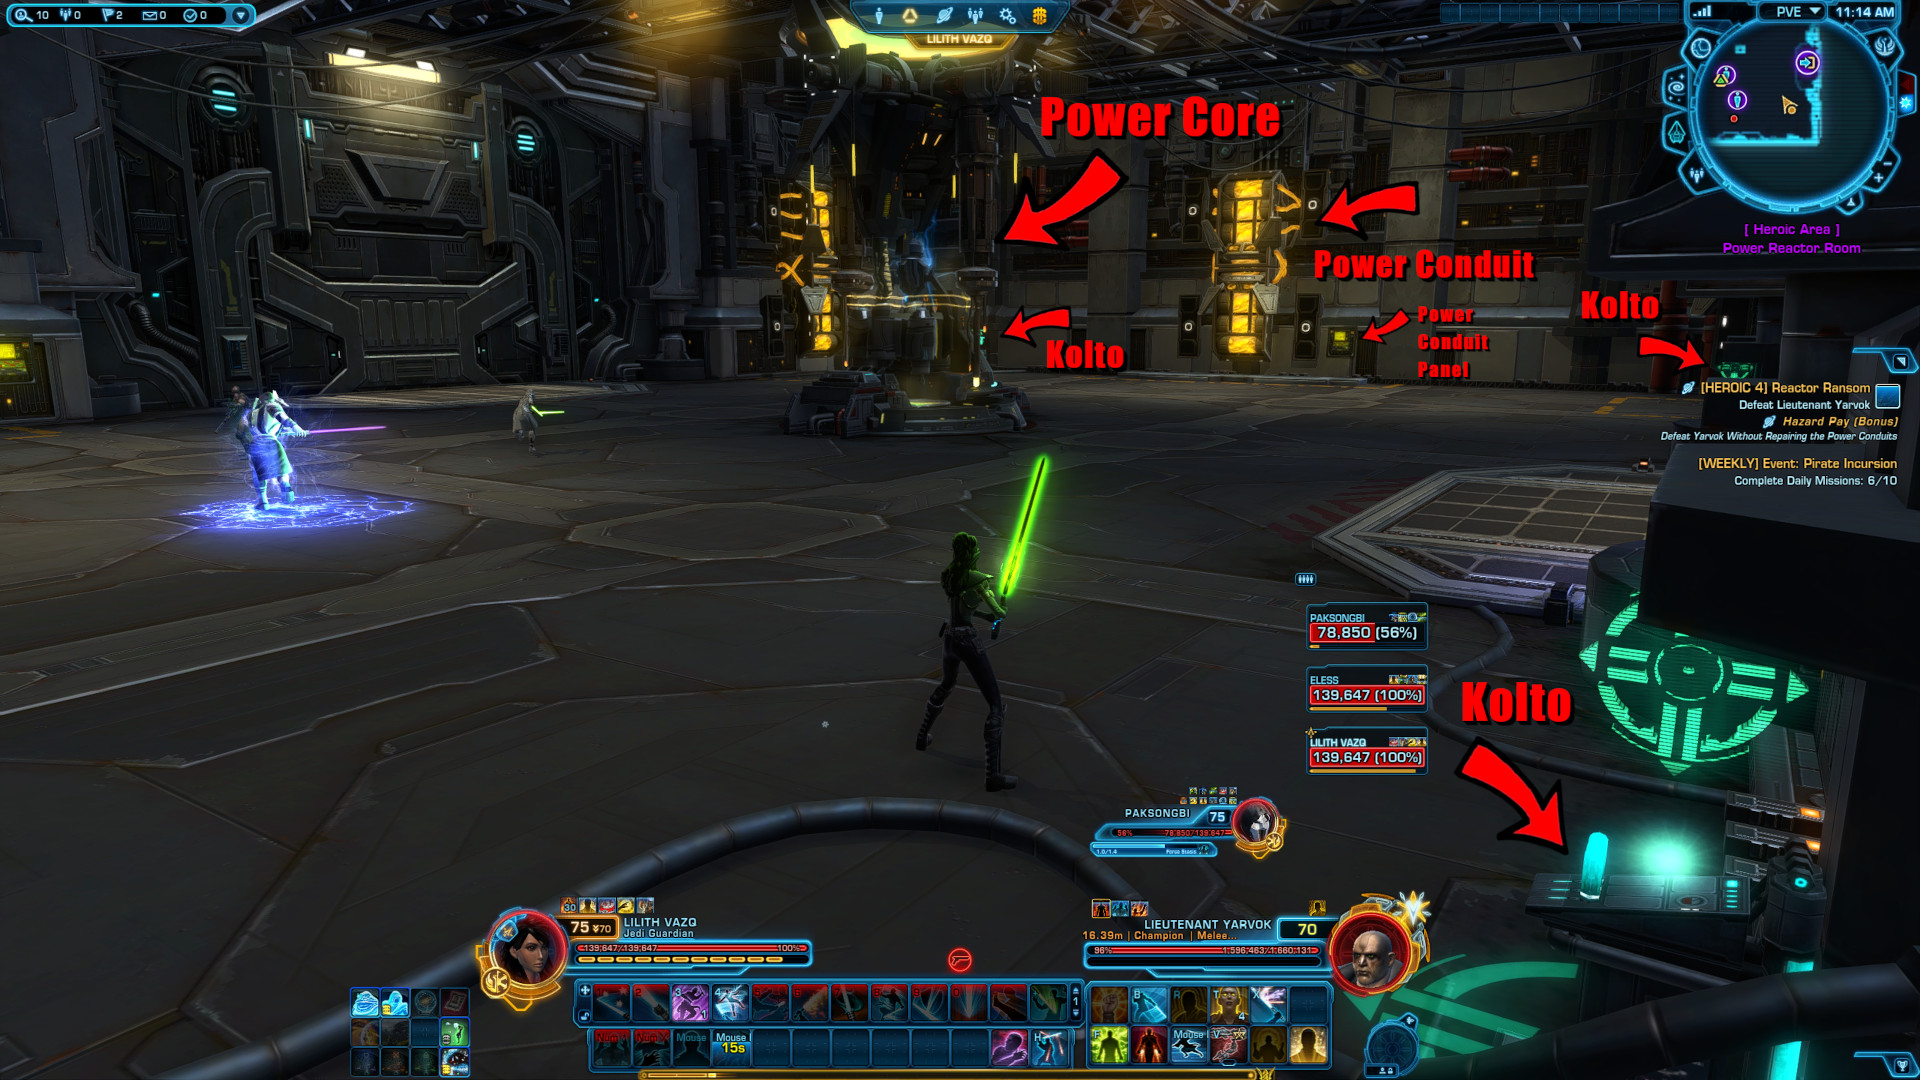
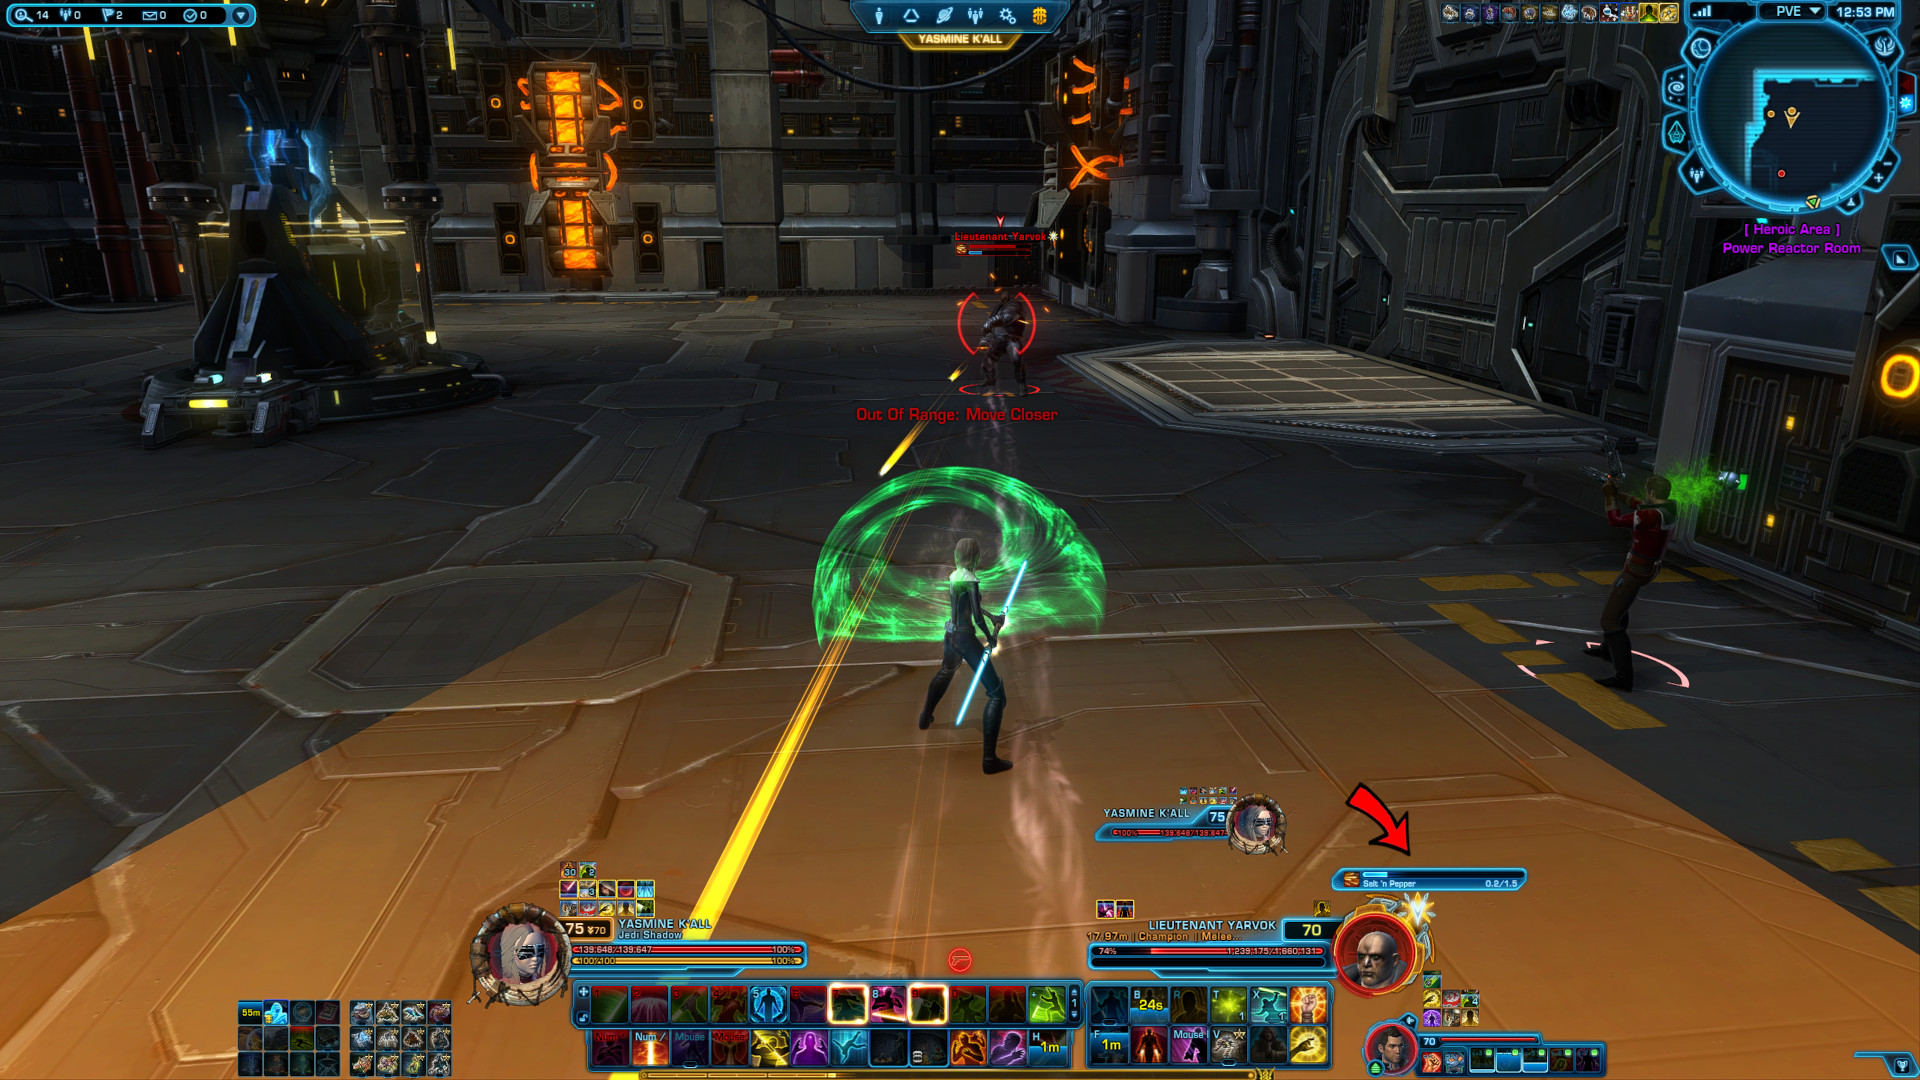
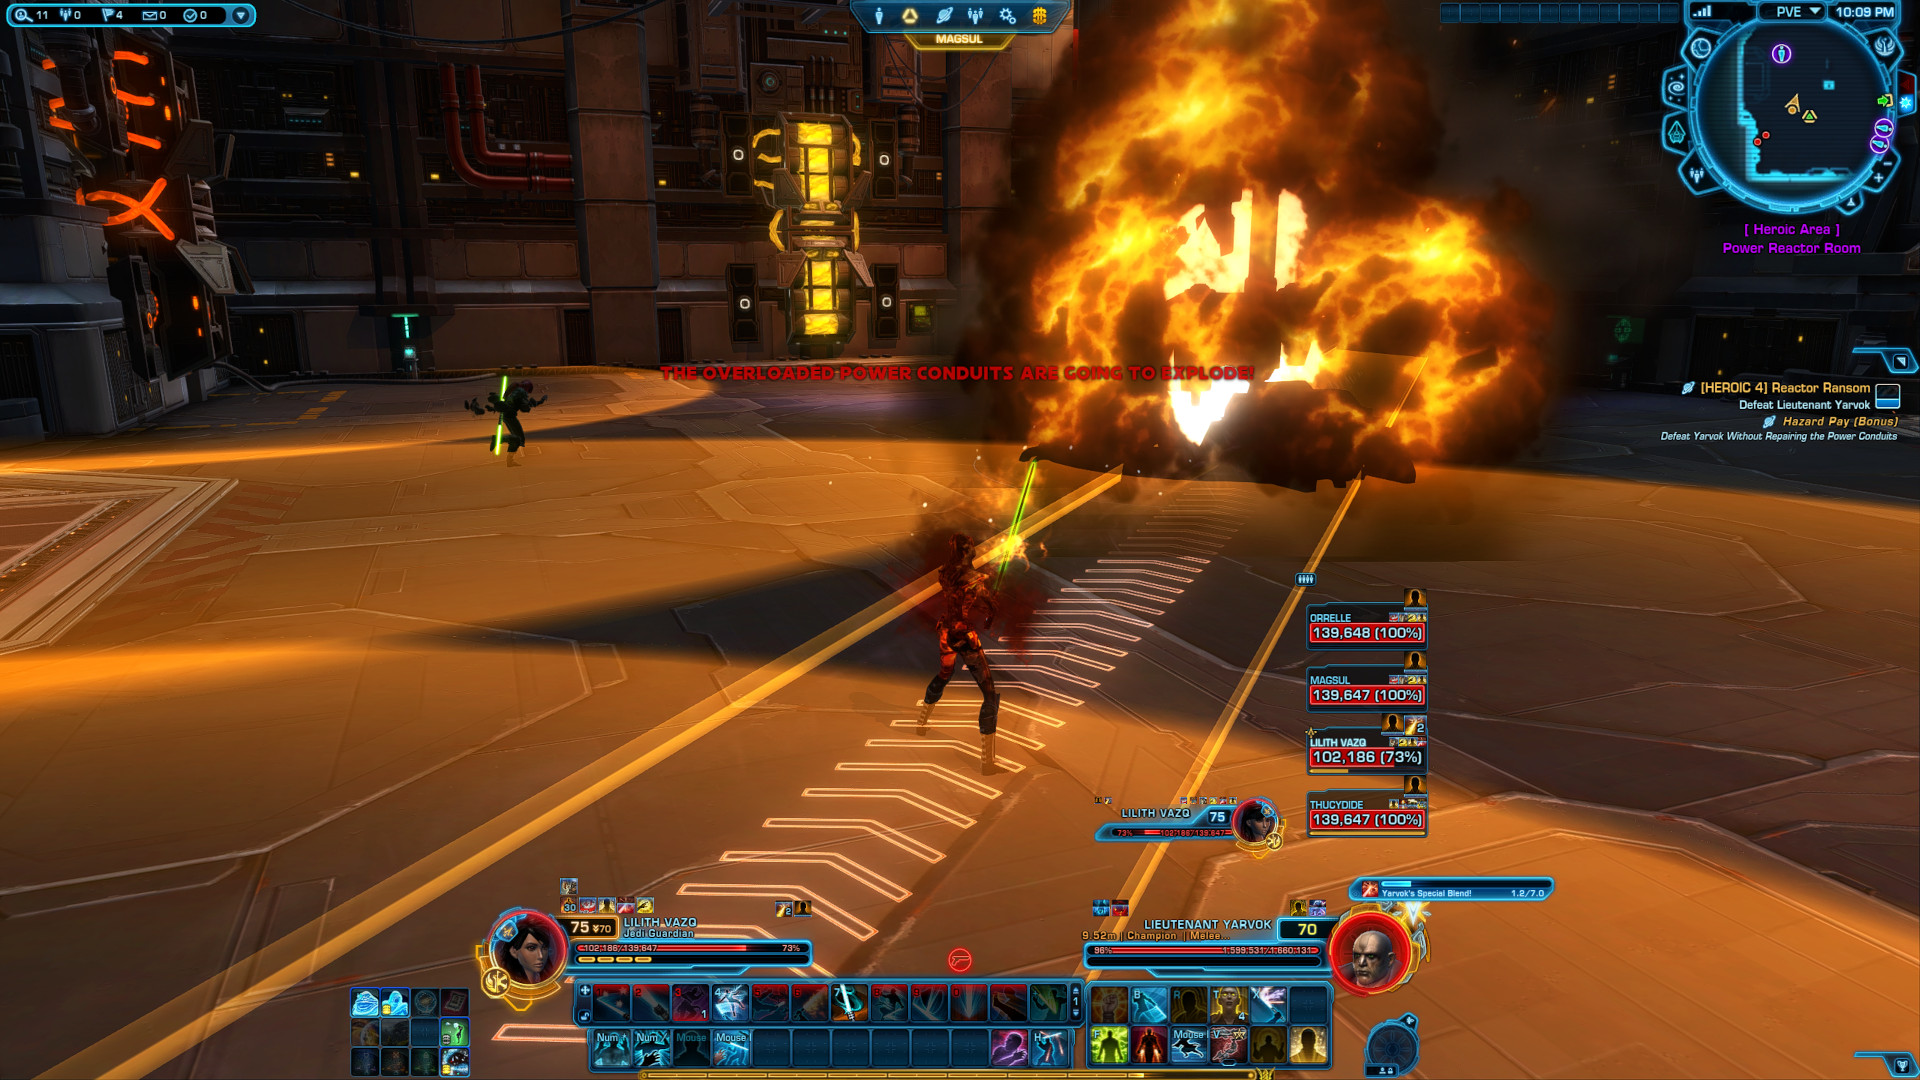
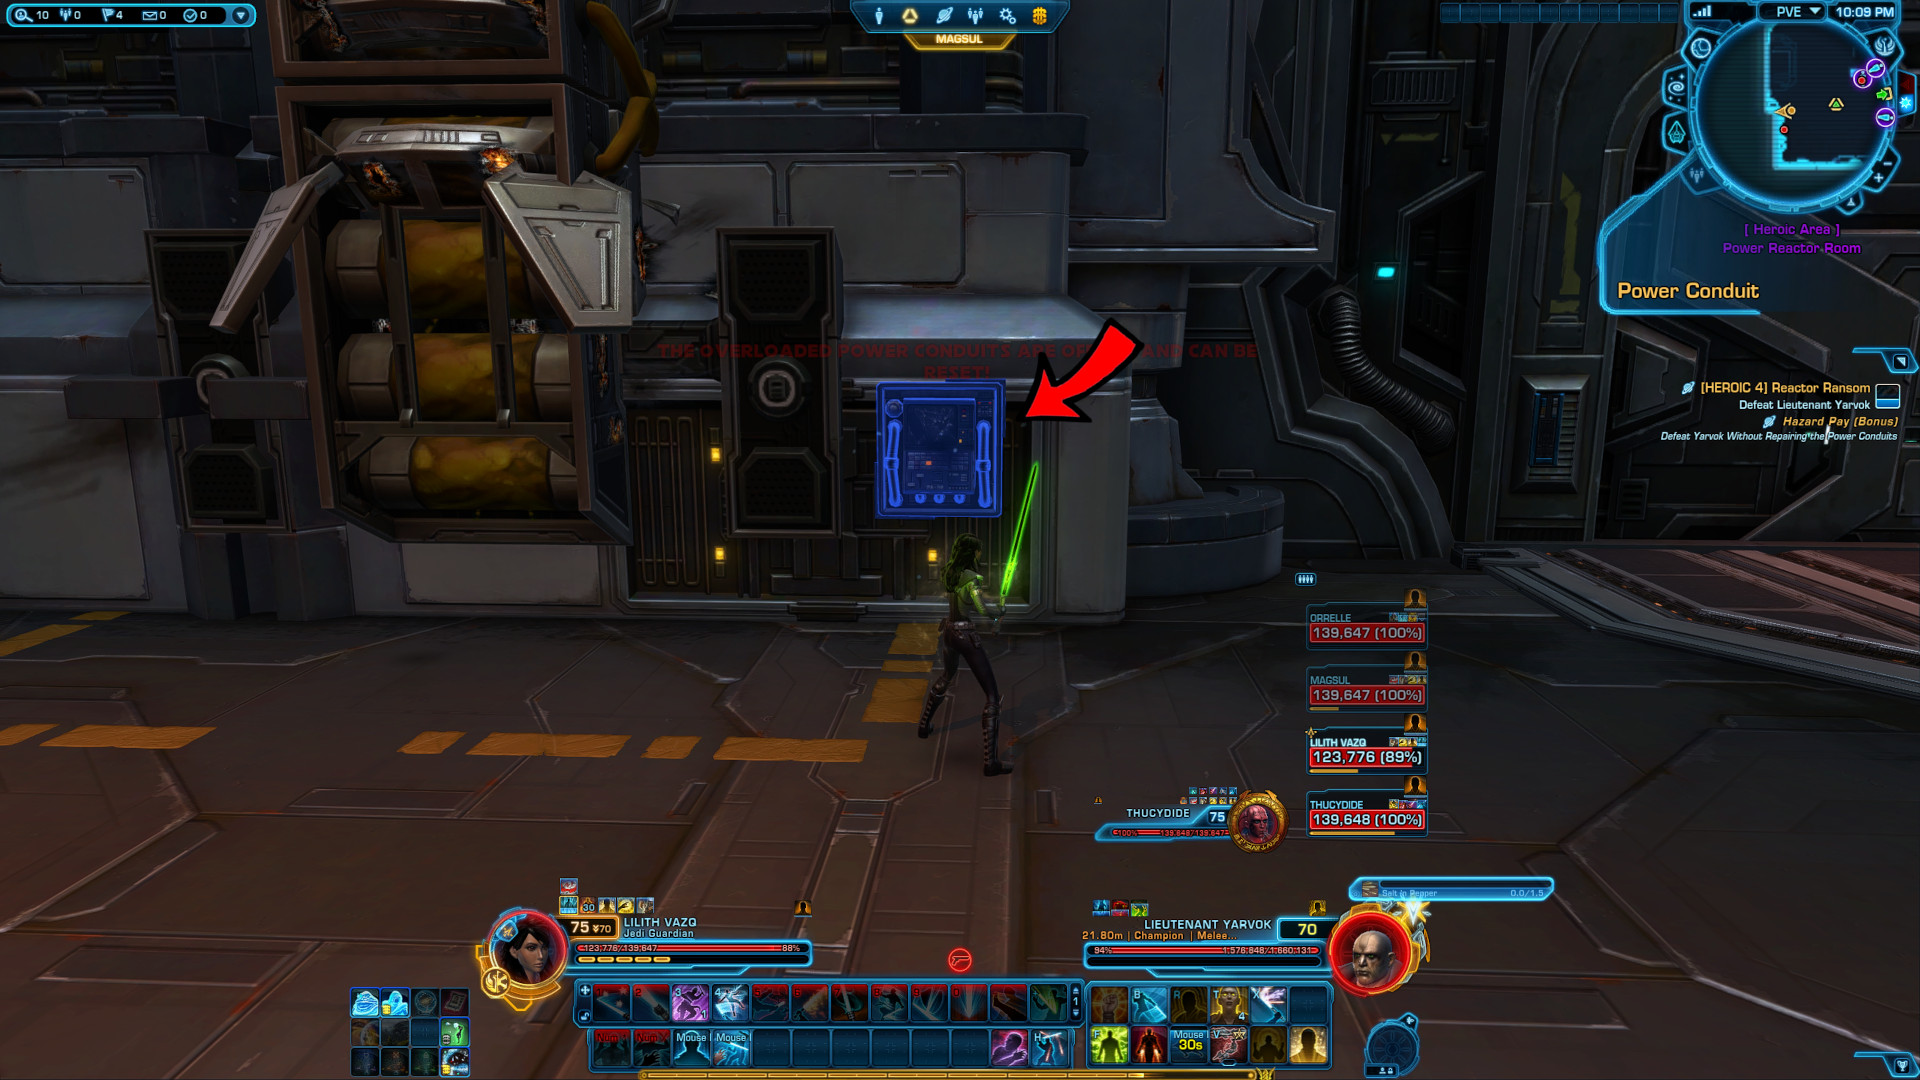
Once inside the Power Reactor Room, there's a few things to be aware of. In the centre of the room is the Power Reactor itself, around the walls are Power Conduits, as well as three kolto stations. Take special note of the location of the kolto stations, especially if you do not have a healer in your group.
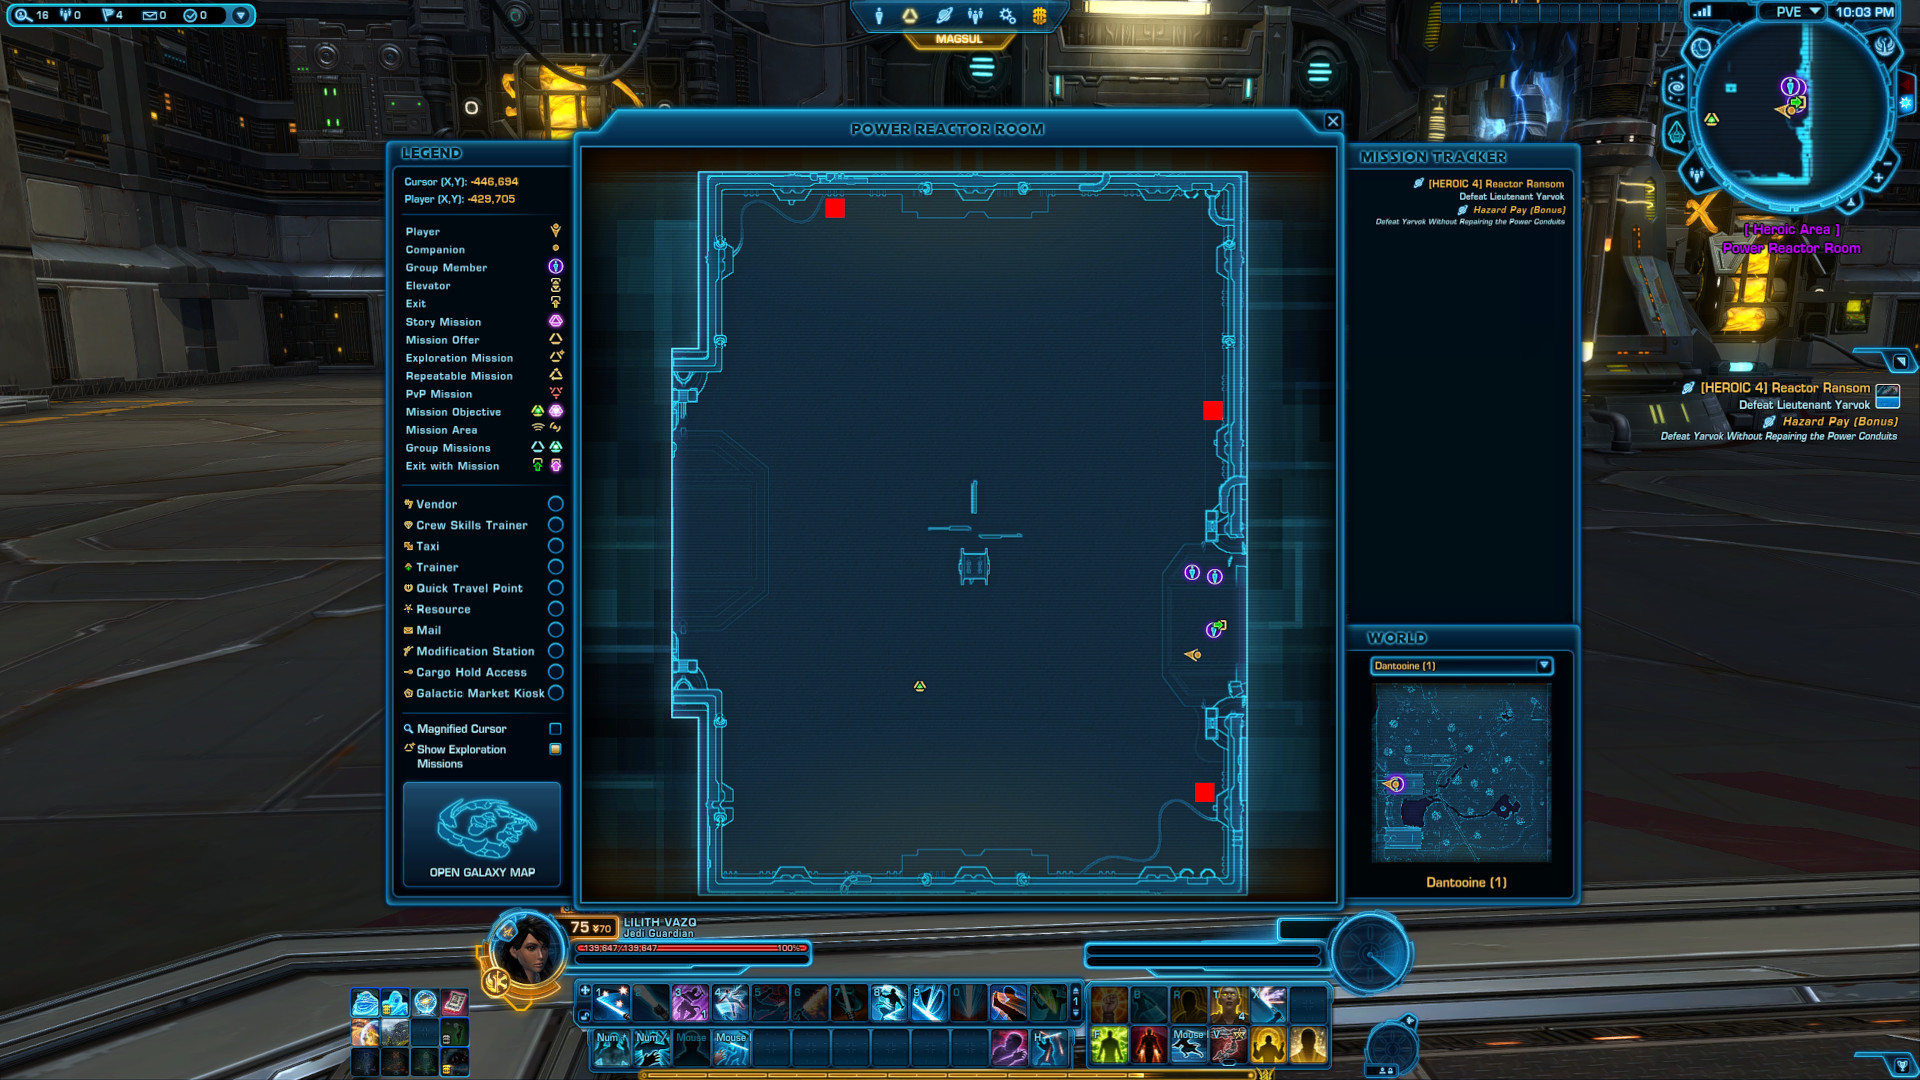
Yarvok will have a series of casts that cannot be interrupted.
Sticky Situation:
An EMP Grenade attached to one of the players in the group, which causes a 20m AOE blast. If you are the recipient of this attack, move close to a wall away from the Power Core and let your teammates move away.
Salt 'n Pepper:
A coned attack, usually on the one who has the aggro, does minimal damage. If you have the aggro, be kind to your teammates, and face him away from others, for example towards a wall. Be sure to not aim it towards the Power Core.
Yarvok's Special Blend!:
This 7s cast is tied to his buff called "Bolted Under Nuclear Kinetic Energy Deflector". This buff reduces all ranged damage done to Yarvok, which means all non-target teammates should get behind him and attack him from melee range. The one targeted by Yarvok however, should make sure to aim this long line away from other players, as well as the core and then run to the opposite end of the room. By doing this, his shots won't penetrate you and give you a 3 stack debuff called "Smouldering Shrapnel" that causes severe damage every 2s. Your healer will thank you!
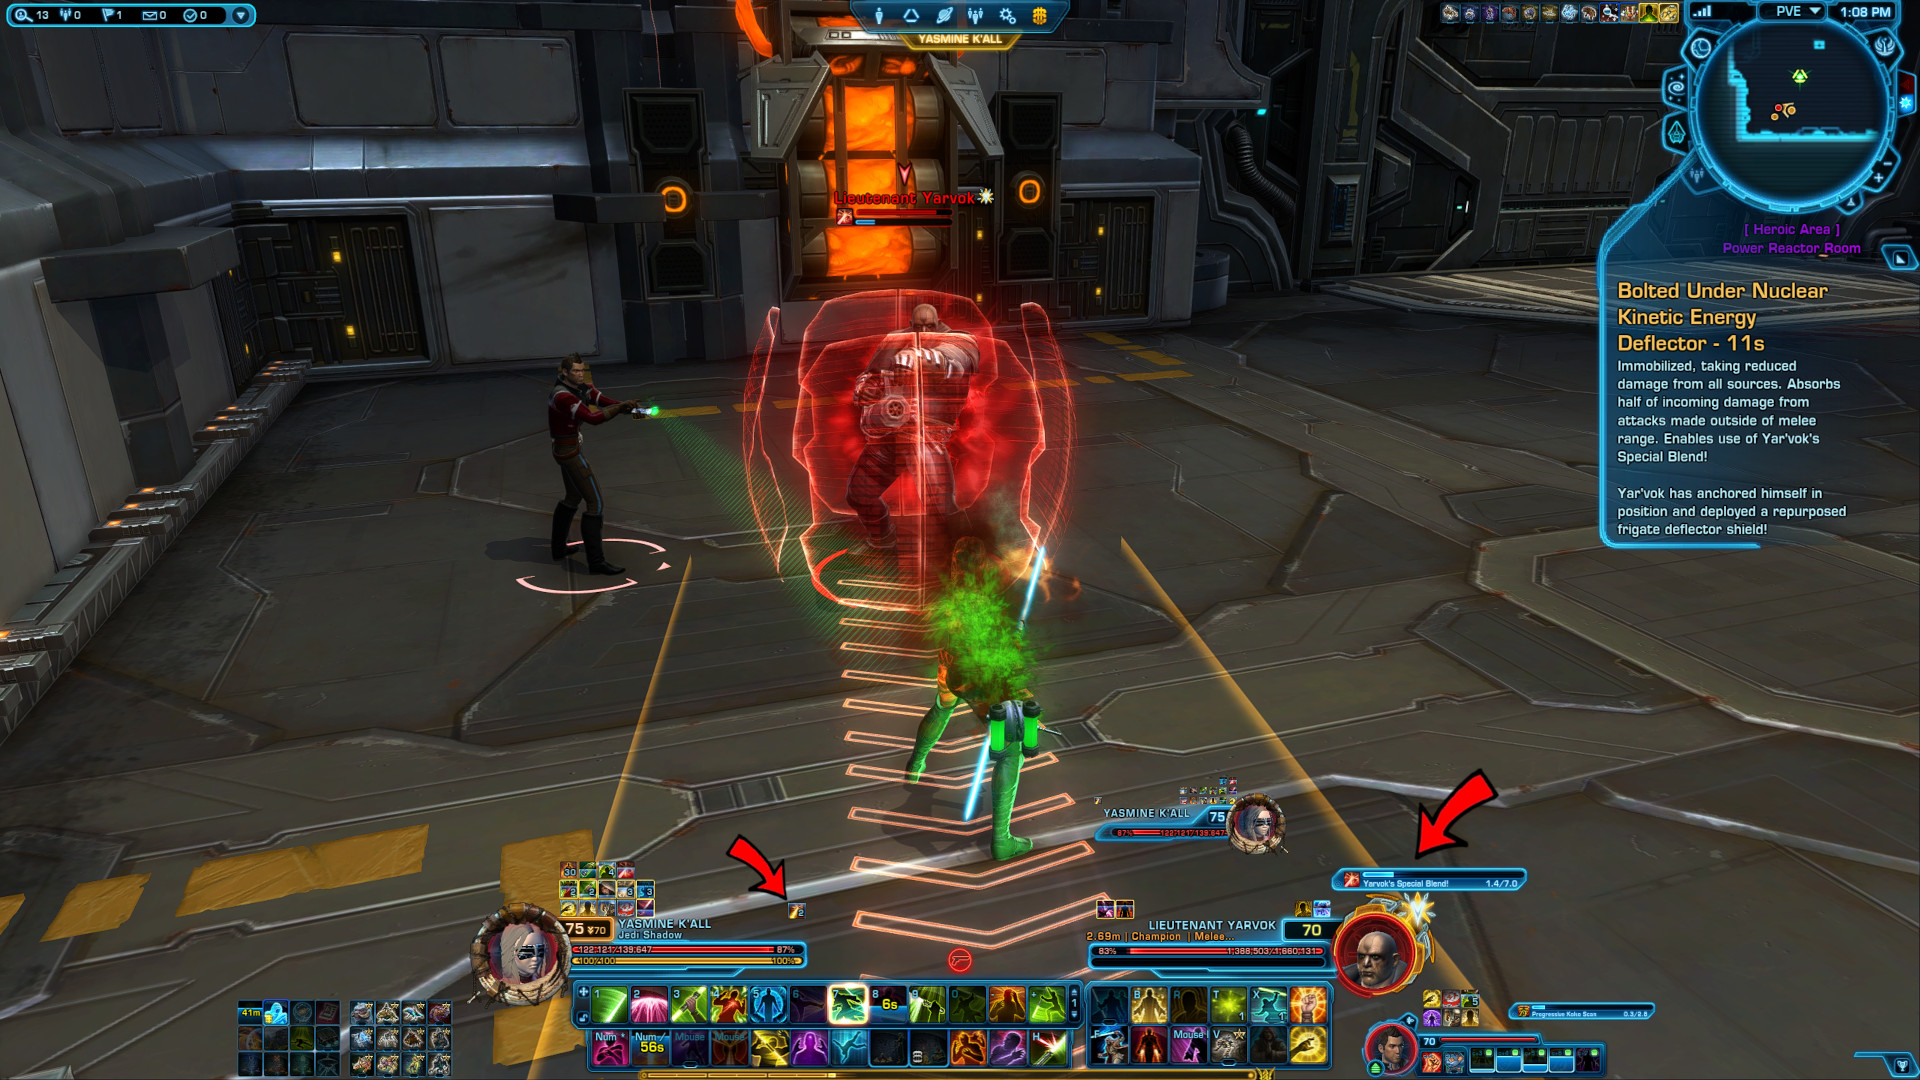
If you are unlucky enough to damage the Power Core, several orange circles will form to indicate damage, the lights will be dimmed and one of you will have to repair the Power Conduit. If the Core gets hit twice, it's Game Over!
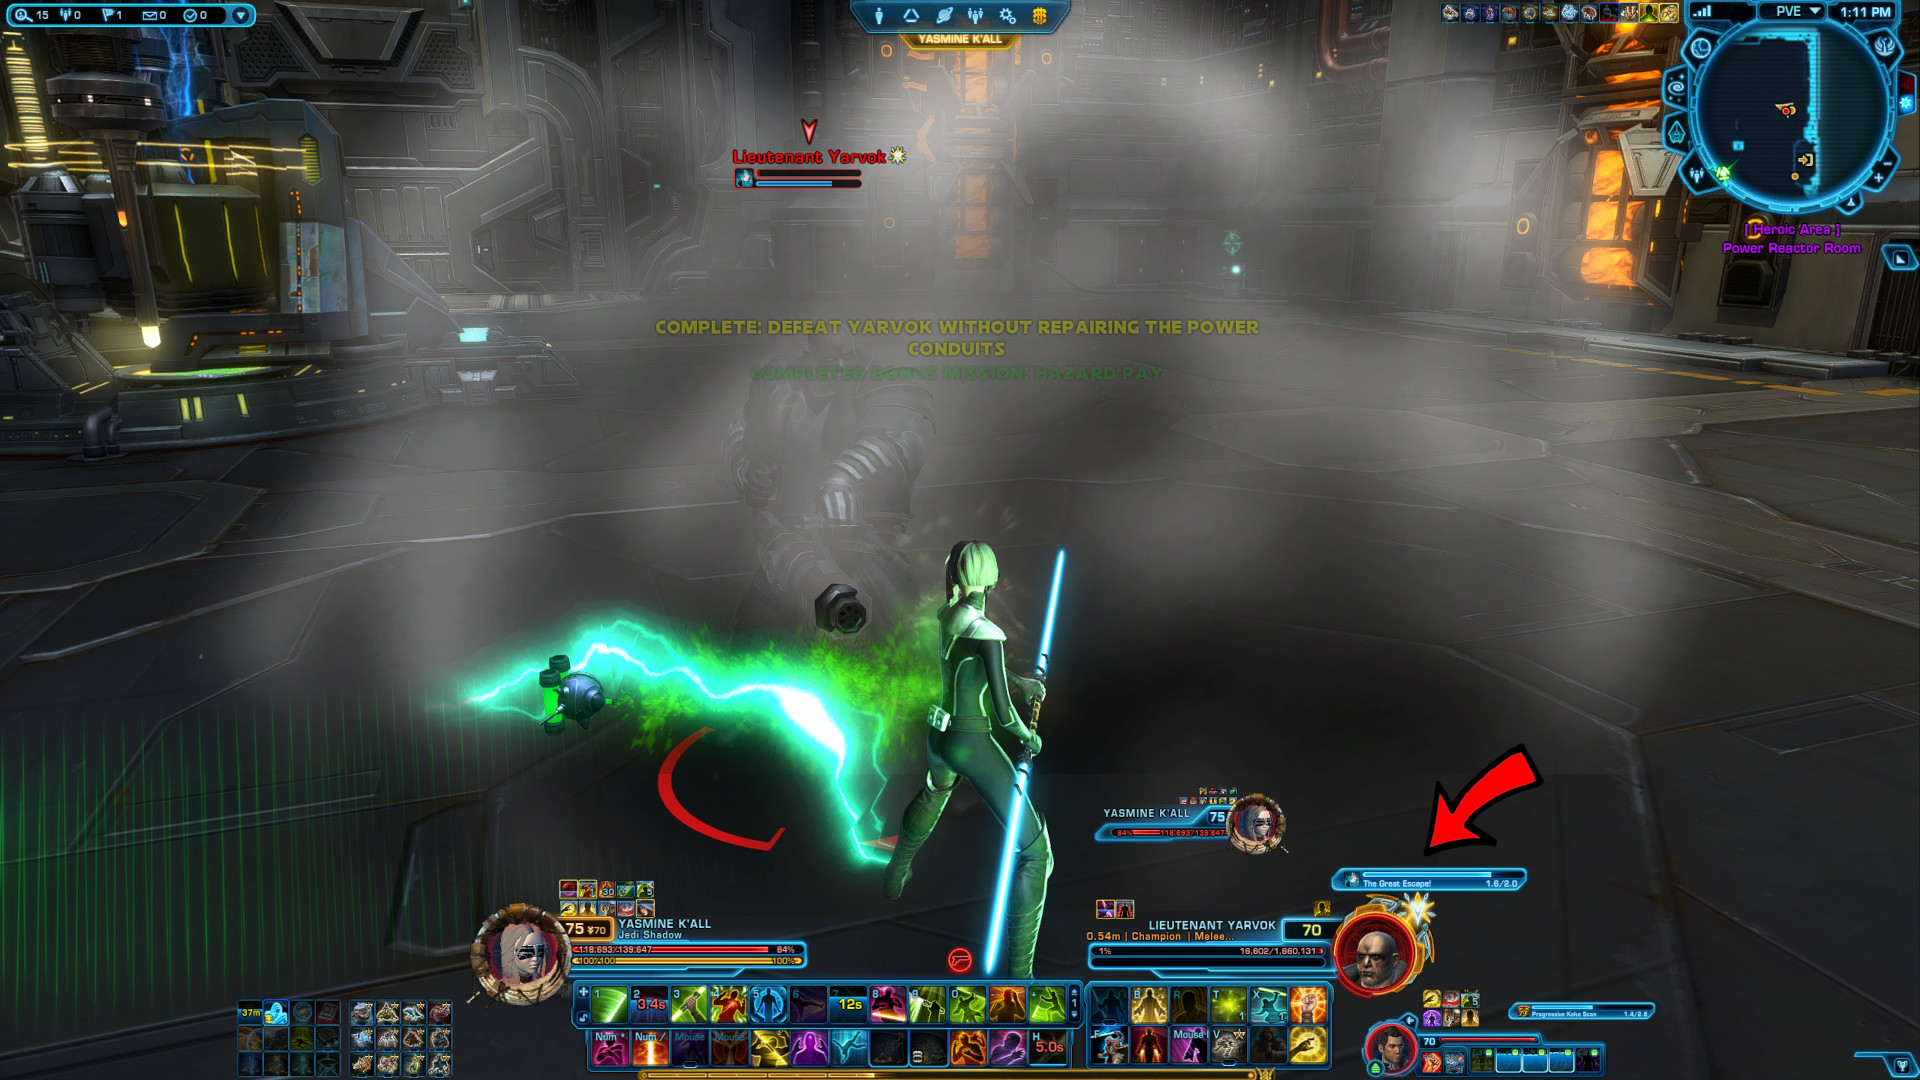
When he reaches 1% health, he will cast "The Great Escape!", which will incapacitate all players. He will escape and you will have succeeded.
Happy hunting!