Ruhnuk Datacron Master
SWTOR Datacron Locations and Guides
- Alderaan Datacron Master
- Balmorra (Empire) Datacron Master
- Balmorra (Republic) Datacron Master
- Belsavis Datacron Master
- Corellia Datacron Master
- Coruscant Datacron Master
- Dromund Kaas Datacron Master
- Fleet Datacron Master
- Hoth Datacron Master
- Hutta Datacron Master
- Ilum Datacron Master
- Kessan's Landing Datacron Master
- Korriban Datacron Master
- Makeb Datacron Master
- Mek-Sha Datacron Master
- Nar Shaddaa (Empire) Datacron Master
- Nar Shaddaa (Republic) Datacron Master
- Onderon Datacron Master
- Ord Mantell Datacron Master
- Ossus Datacron Master
- Quesh Datacron Master
- Rishi Datacron Master
- Ruhnuk Datacron Master
- Taris (Empire) Datacron Master
- Taris (Republic) Datacron Master
- Tatooine Datacron Master
- Tython Datacron Master
- Voss Datacron Master


SWTOR Relic Hunt: Repulser Unit Achievement Guide

This is a guide on how to initiate the "Relic Hunt: Repulser Unit" mission that is part of the Ruhnuk Datacron achievement in SWTOR.
Datacrons are collectables scattered around the galaxy in Star Wars: The Old Republic. Each Datacron contributes towards your Legacy's passive stats permanently. Furthermore, they also provide interesting Lore and Codex Entries about the Old Republic era.
After you complete the Critical Storyline from Game Update 7.2 Showdown on Ruhnuk a new series of missions will be made available called Relic Hunt. These Side Quests will enable the possibility for the use of planetary buffs that will both be useful for the Daily Area missions, as well as necessary to be able to reach the Datacron on Ruhnuk.
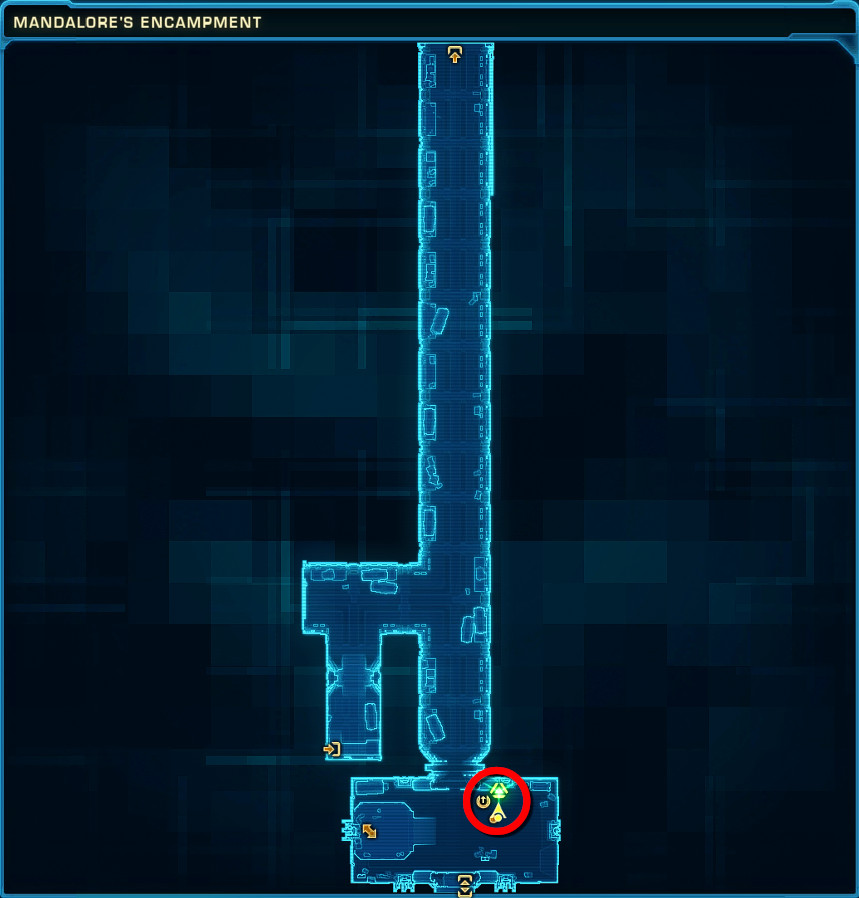
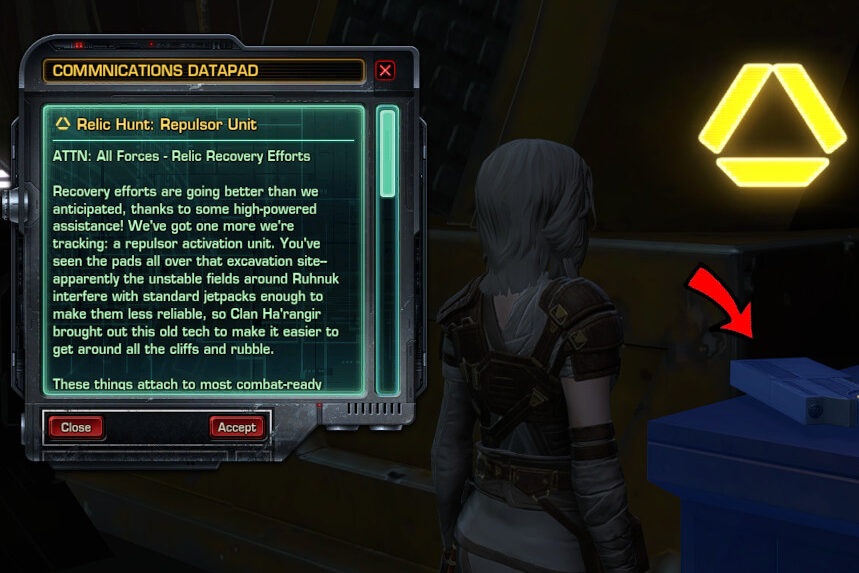
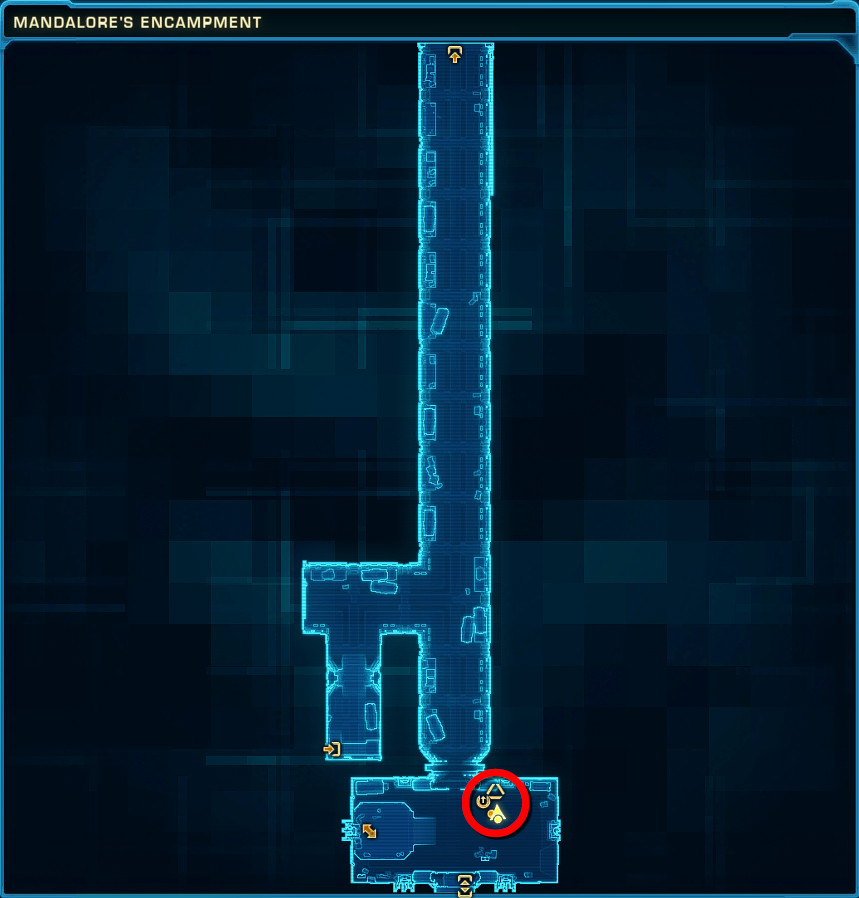
Pick up Relic Hunt: Repulser Unit from a Communication Datapad next to the Quick Travel point in Mandalore's Encampment. Completing this mission is necessary to be able to reach the Datacron!
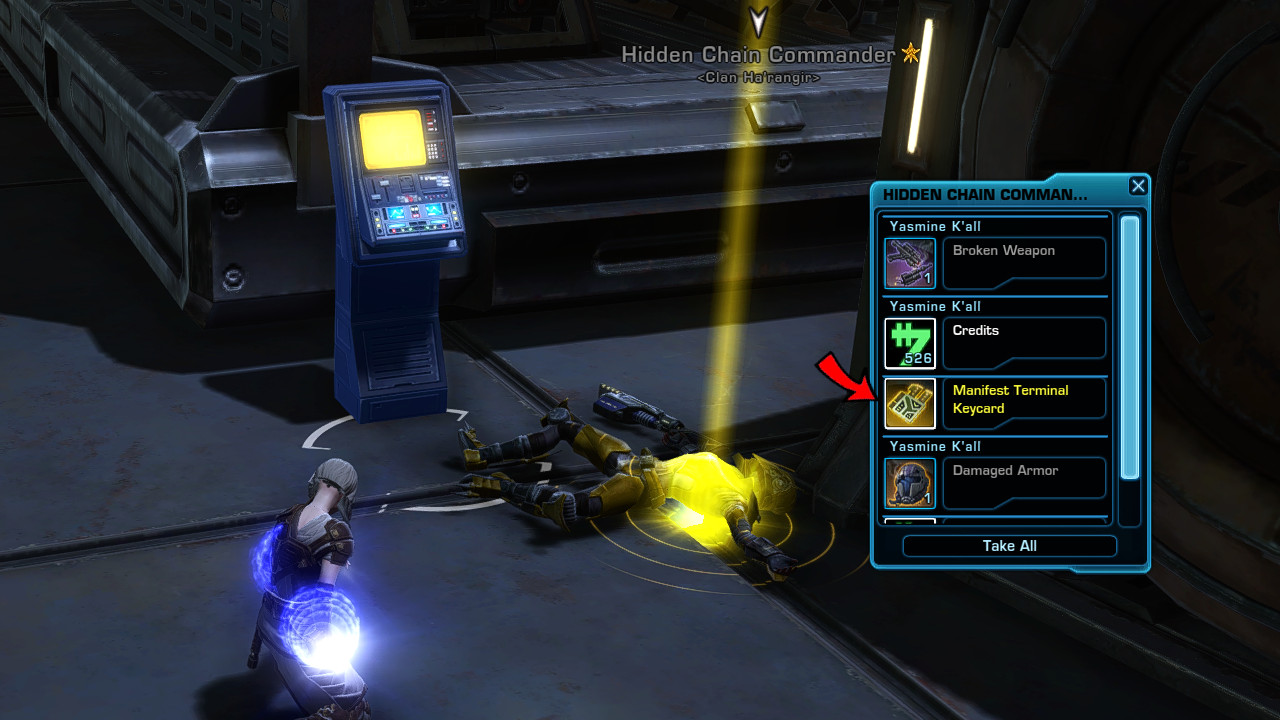
Prepare yourself for a long journey. First of, you have to recover 5 different Manifest Data, by searching 5 different Manifest Terminals at 5 different locations. Before you can access any of the terminals, you have to defeat and loot a Manifest Terminal Keycard of an Elite Hidden Chain member, who you will find near every terminal. You only have to loot one Keycard.
I will list the Terminals in Alphabetic Order, but this is not necessarily the easiest order for you to search.
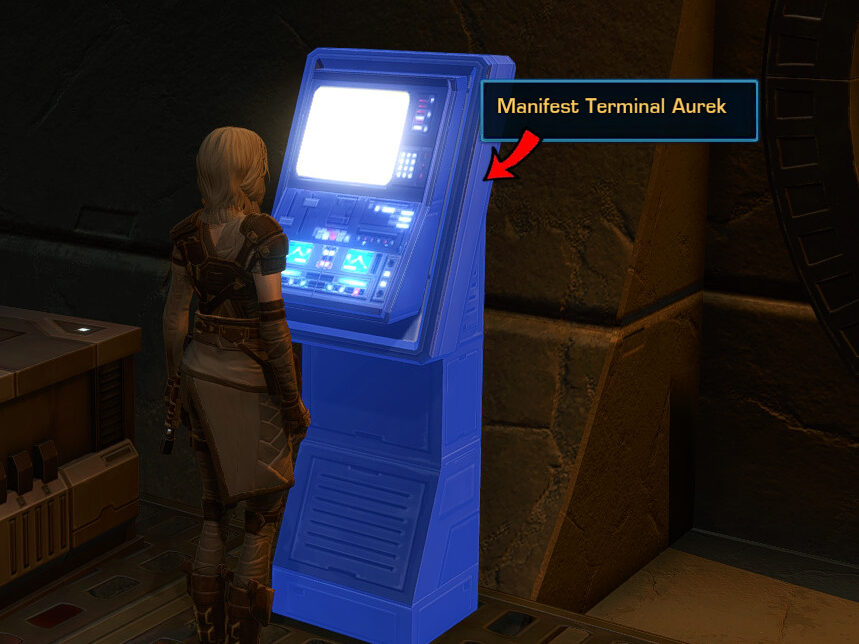
Manifest Terminal Aurek
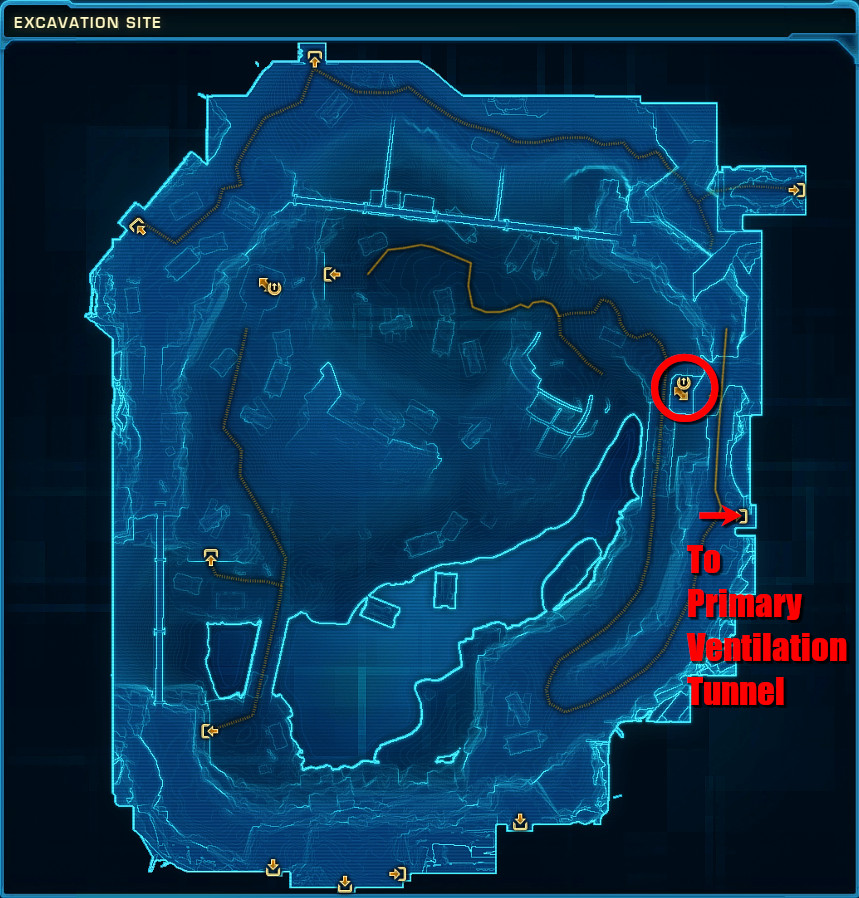
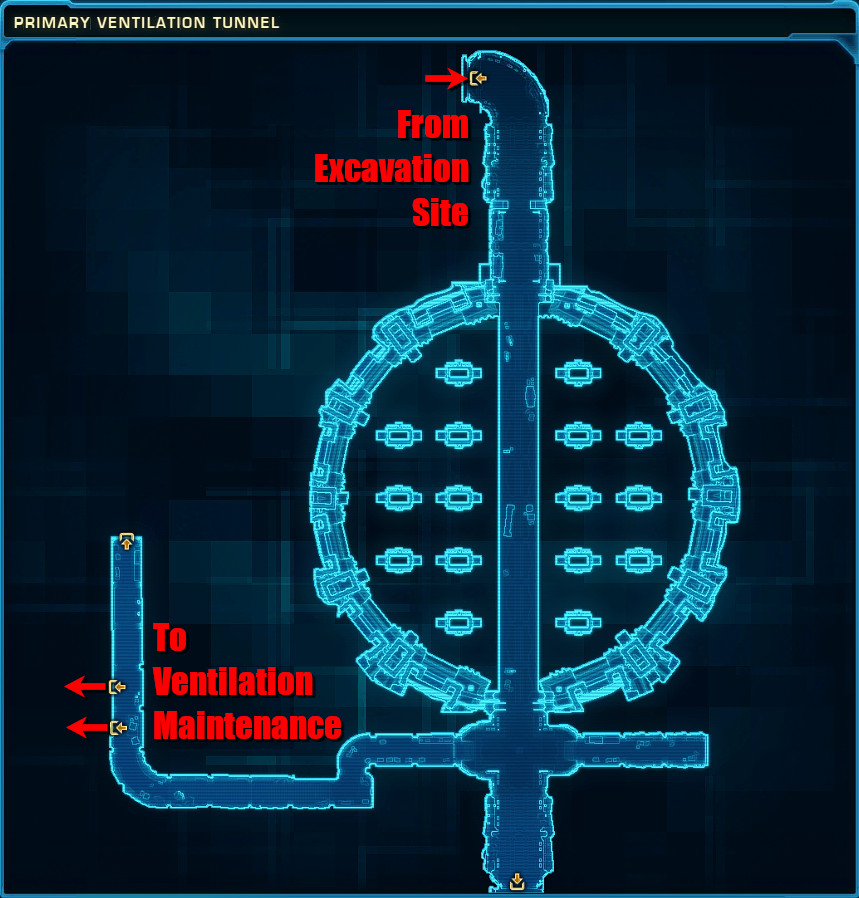
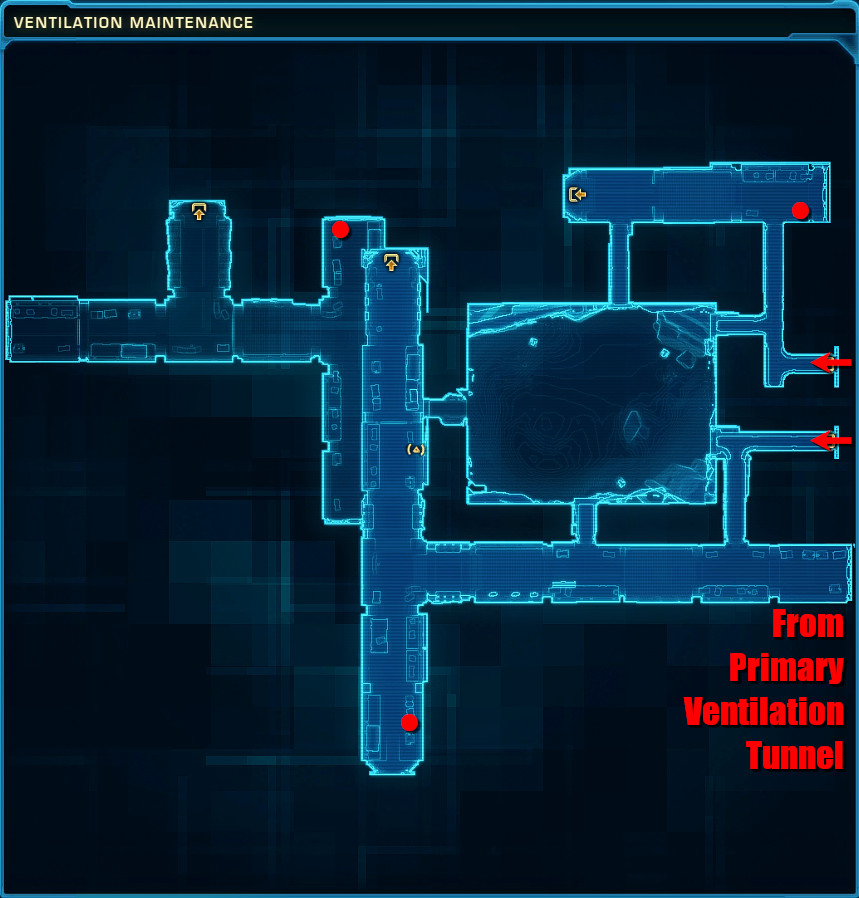
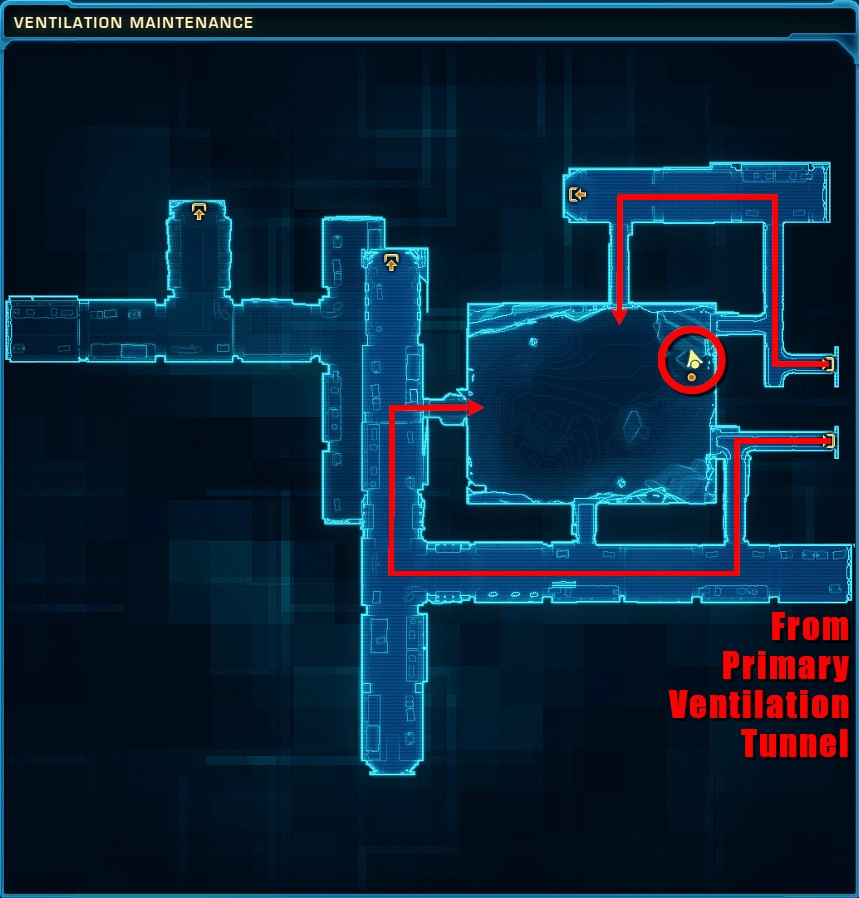
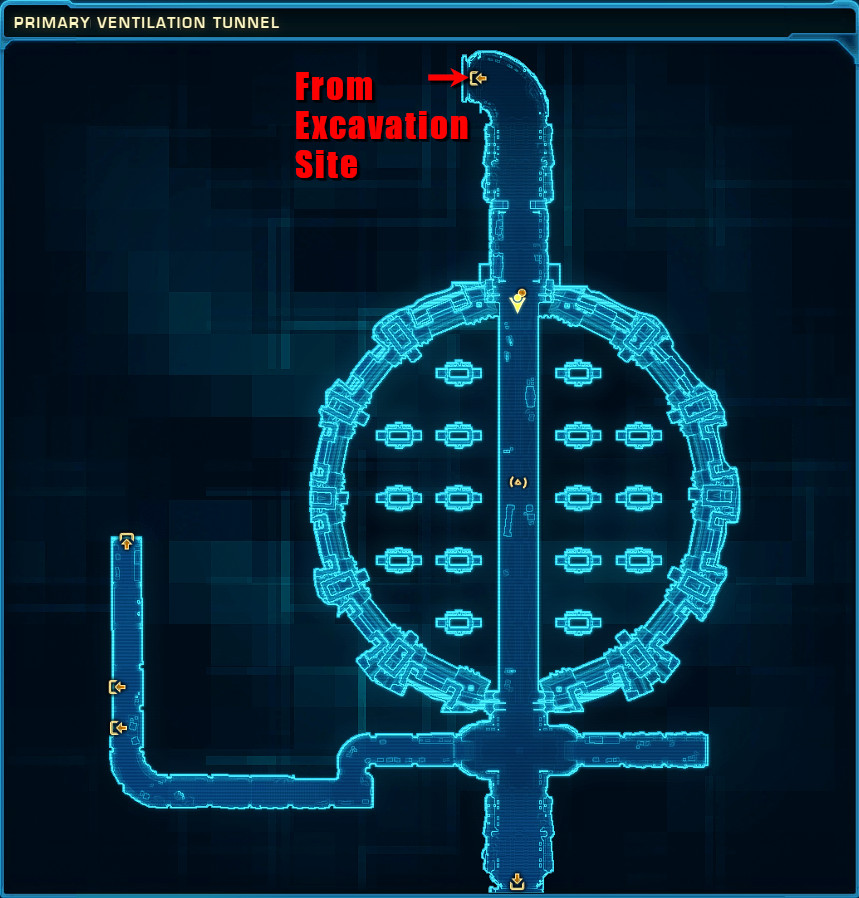
Find one of several Manifest Terminal Aurek inside the Ventilation Maintenance area. The easiest way to get to the Ventilation Maintenance is by travelling to the Excavation Overlook in the Excavation Site, go south and take the first entrance to your left to Primary Ventilation Tunnel and take one of the two entrances to the Ventilation Maintenance.
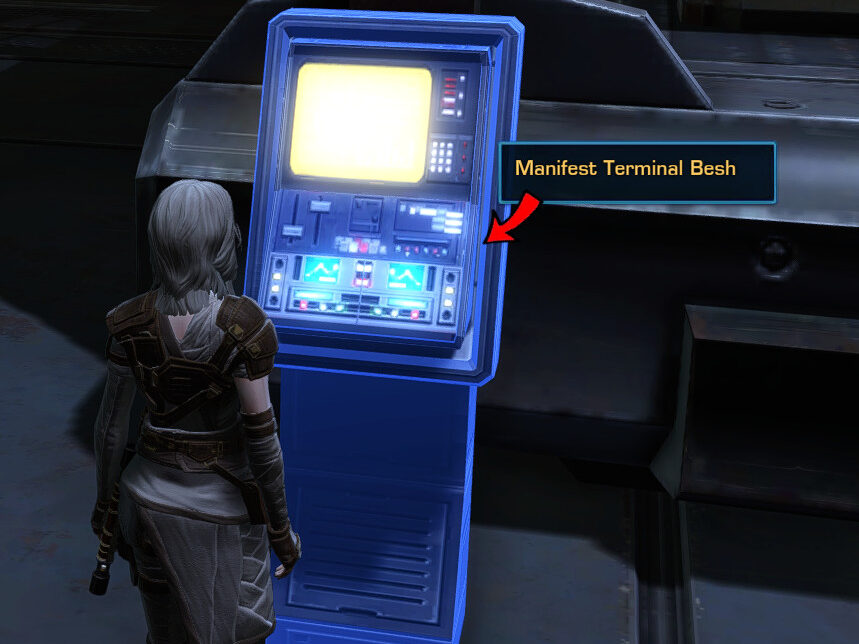
Manifest Terminal Besh
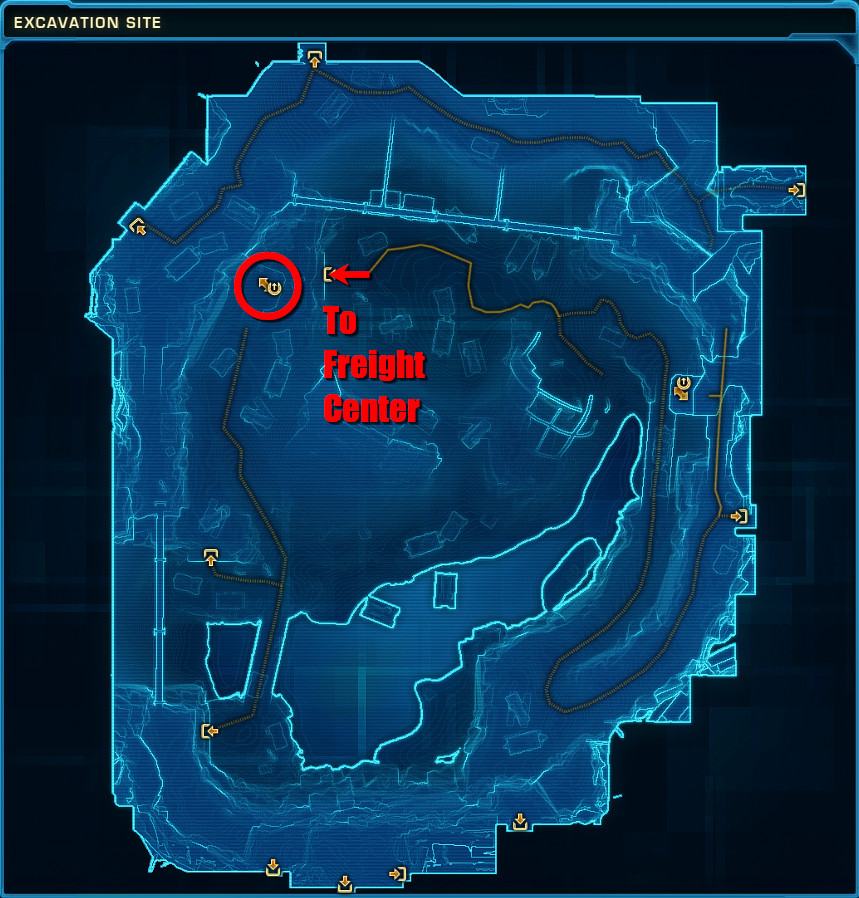
Find one of several Manifest Terminal Besh inside the Freight Center area. The easiest way to get to the Freight Center is by travelling to the Machine Scrapyard in the Excavation Site and then take the entrance just below into the Freight Center.

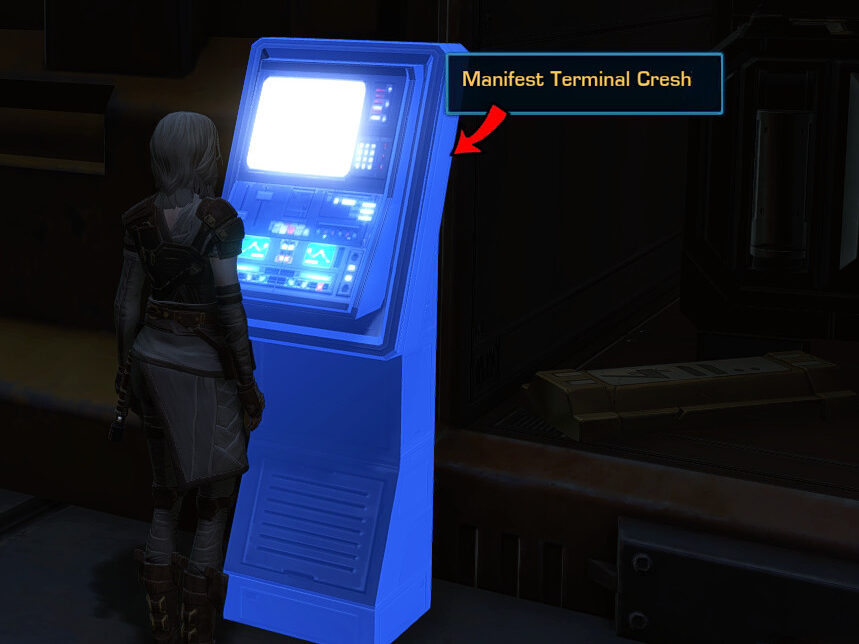
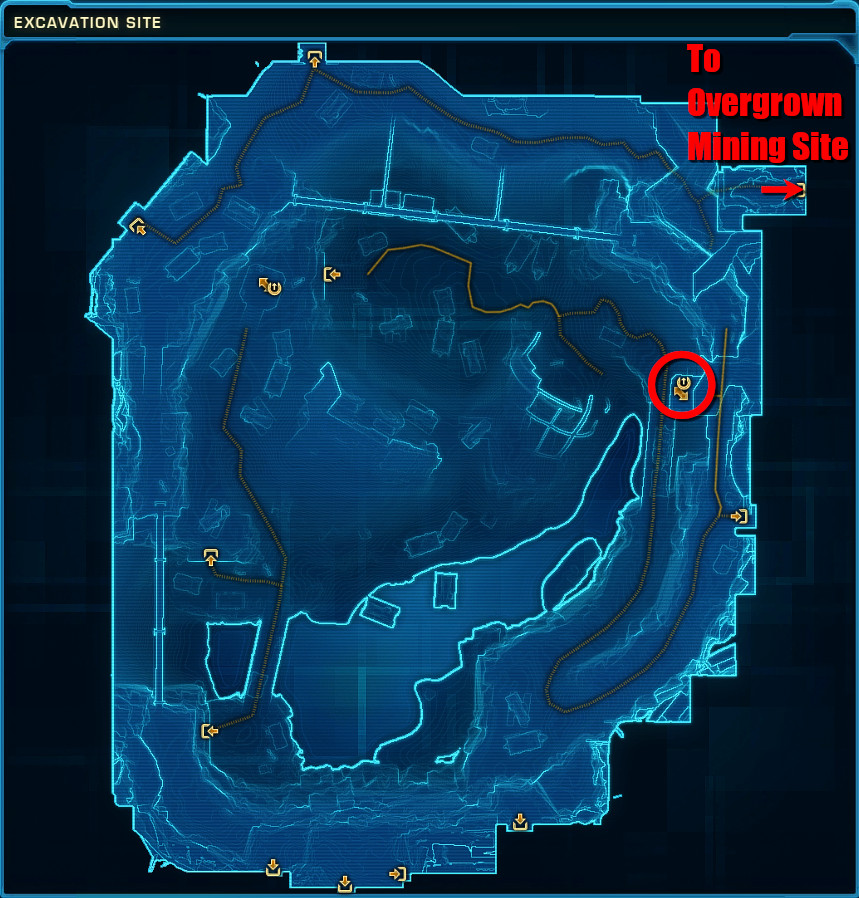
Manifest Terminal Cresh
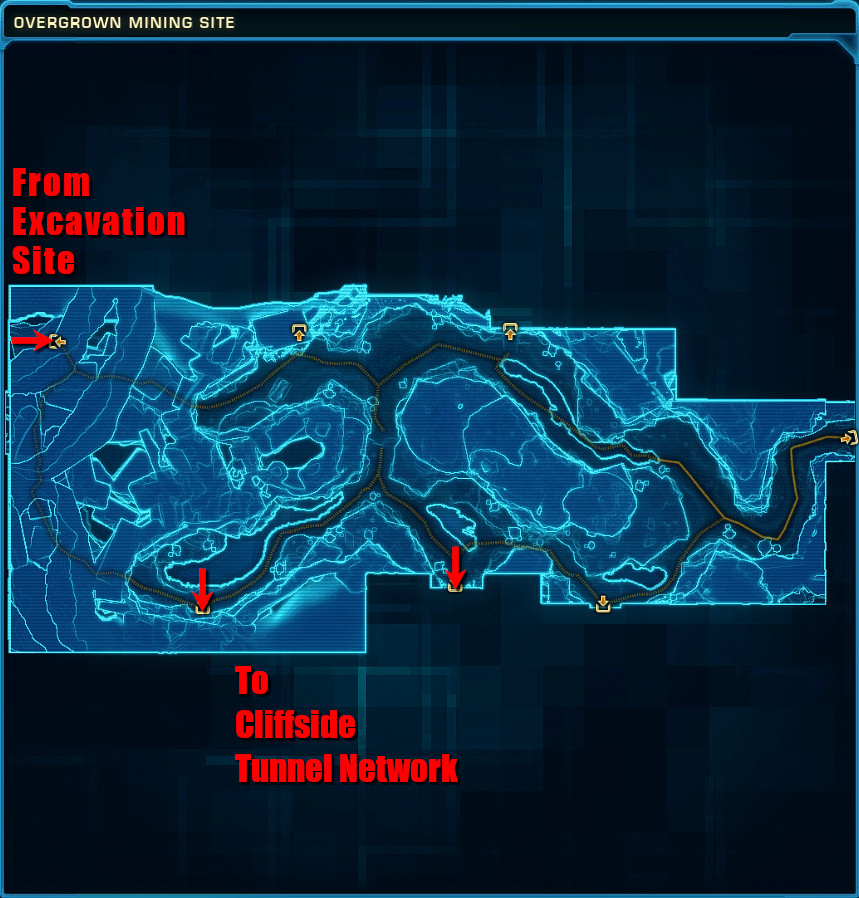
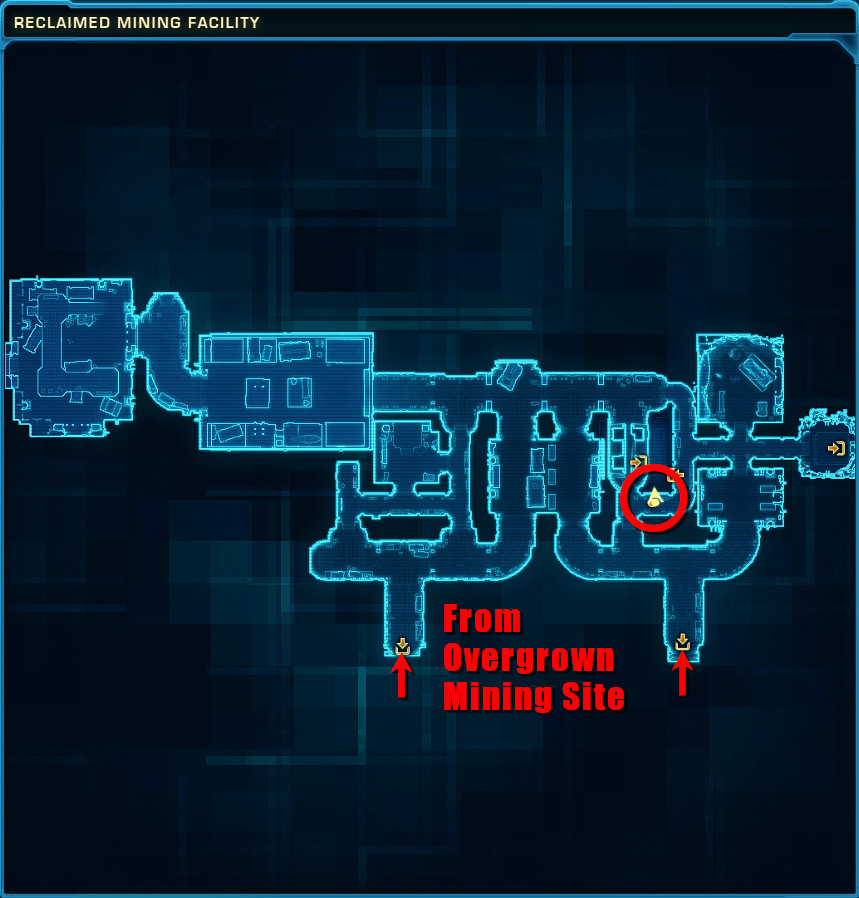
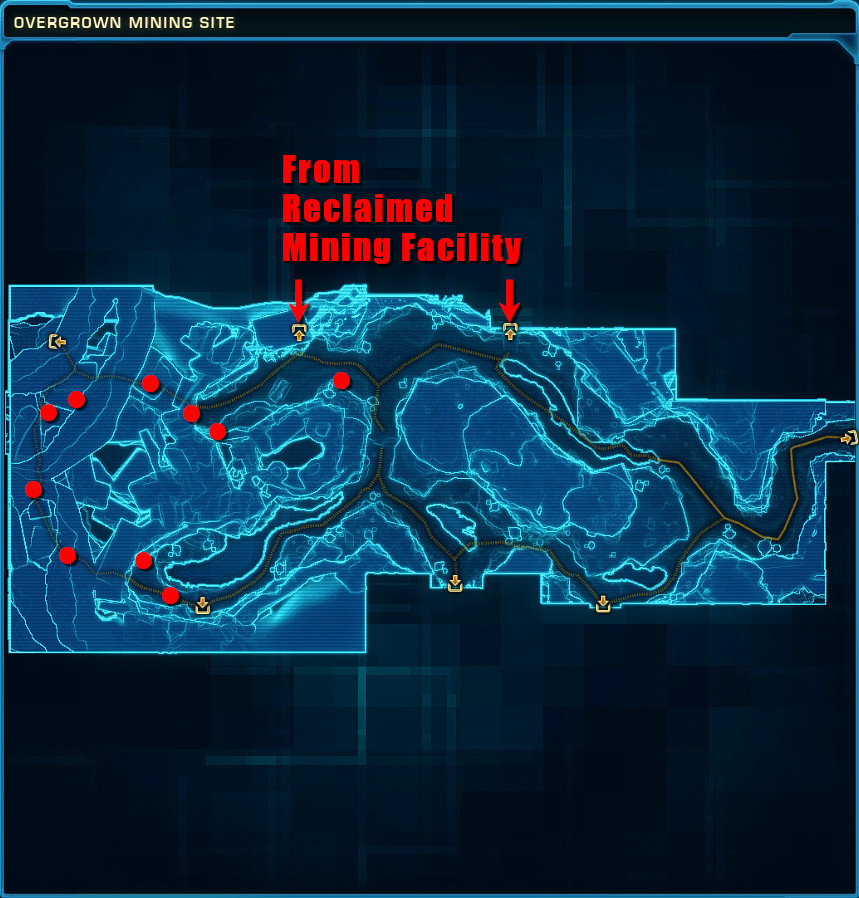
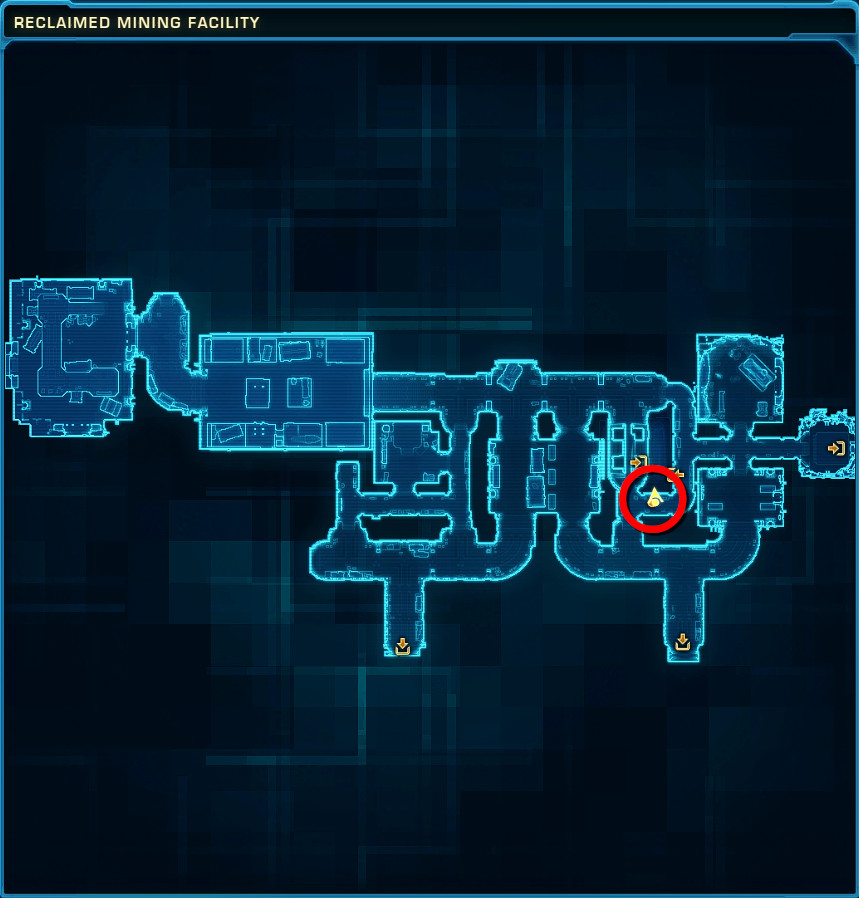
Find one of several Manifest Terminal Cresh inside the Reclaimed Mining Facility area. The easiest way to get to the Reclaimed Mining Facility is by travelling to the Excavation Overlook in the Excavation Site, go north and then take the entrance to your right into Overgrown Mining Site and then take one of the two entrances on your left into the Reclaimed Mining Facility.


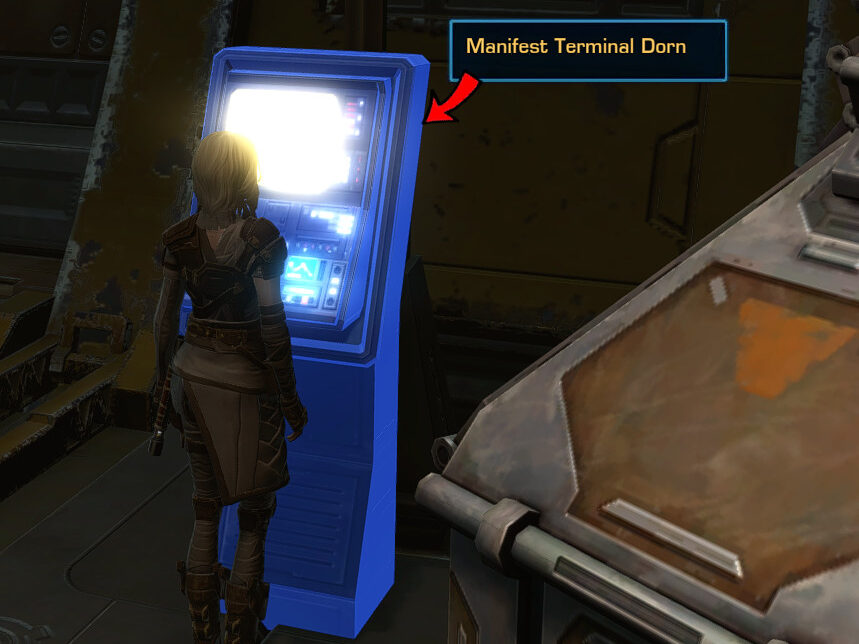
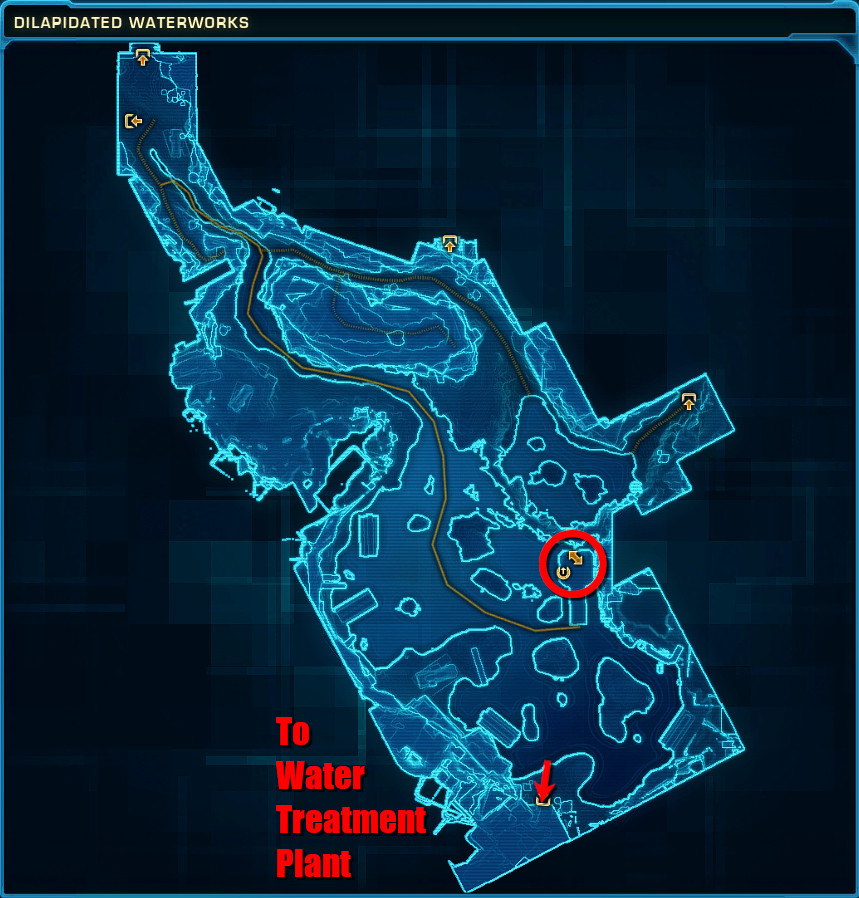
Manifest Terminal Dorn
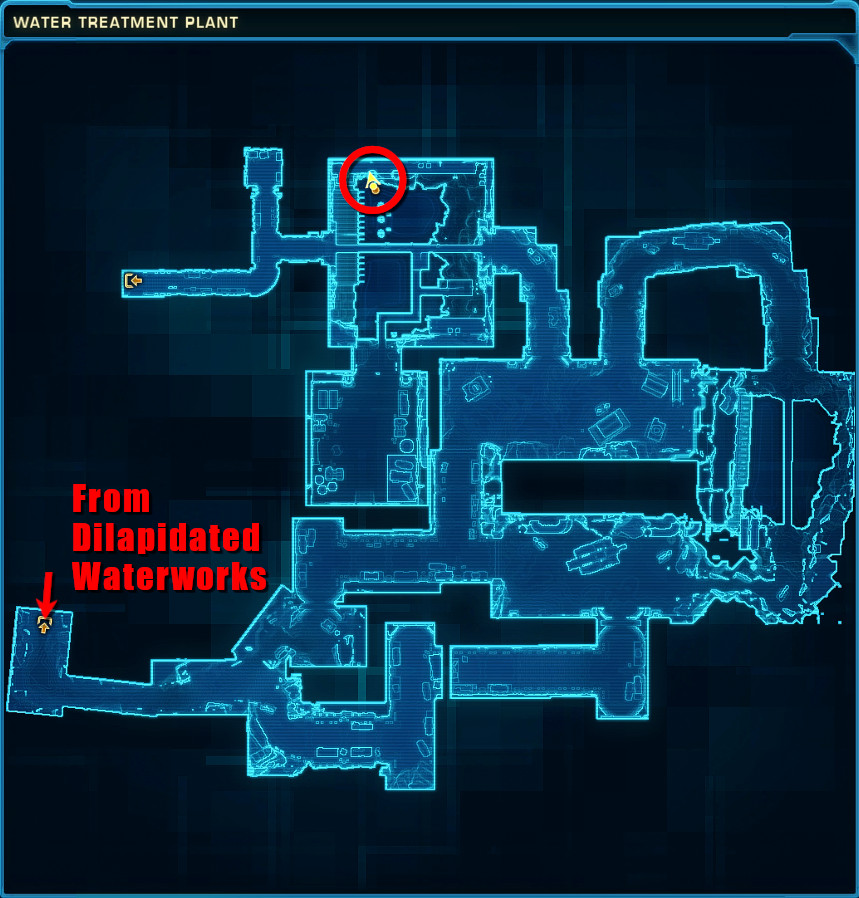
Find one of several Manifest Terminal Dorn inside the Water Treatment Plant area. The easiest way to get to the Water Treatment Plant is by travelling to the Dilapidated Waterworks, go south to the entrance to the Water Treatment Plant.

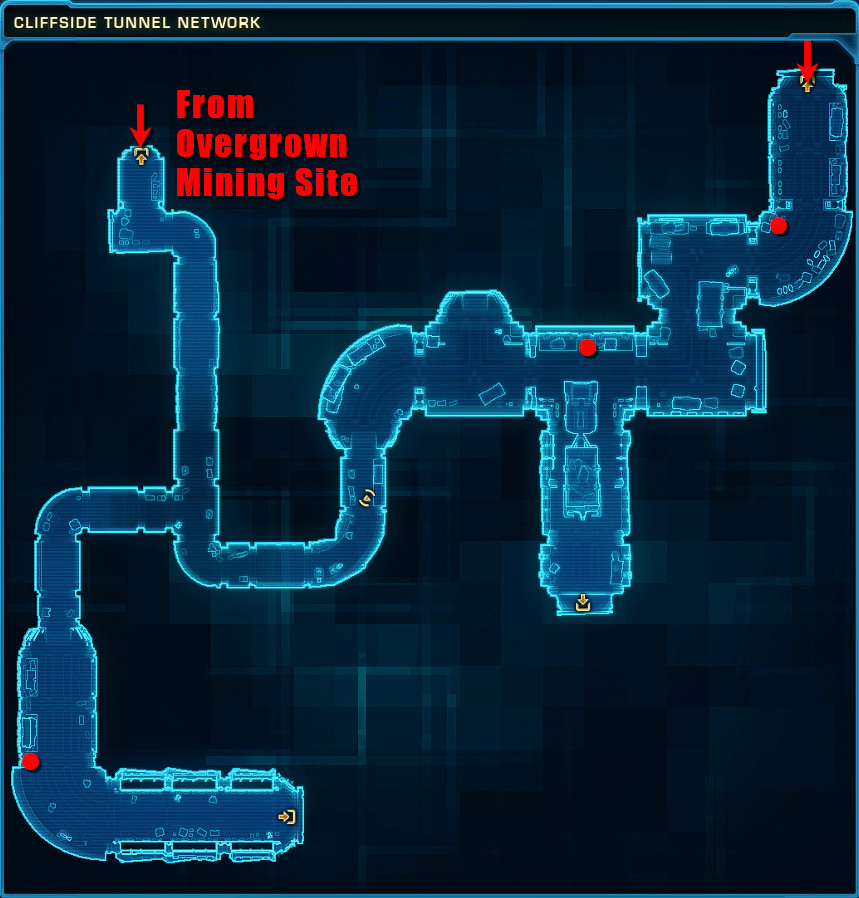
Manifest Terminal Cherek
Find one of several Manifest Terminal Cherek inside the Cliffside Tunnel Network area. The easiest way to get to the Cliffside Tunnel Network is by travelling to the Excavation Overlook in the Excavation Site, go north and then take the entrance to your right into Overgrown Mining Site and then take one of the two first entrances to the south into the Cliffside Tunnel Network.


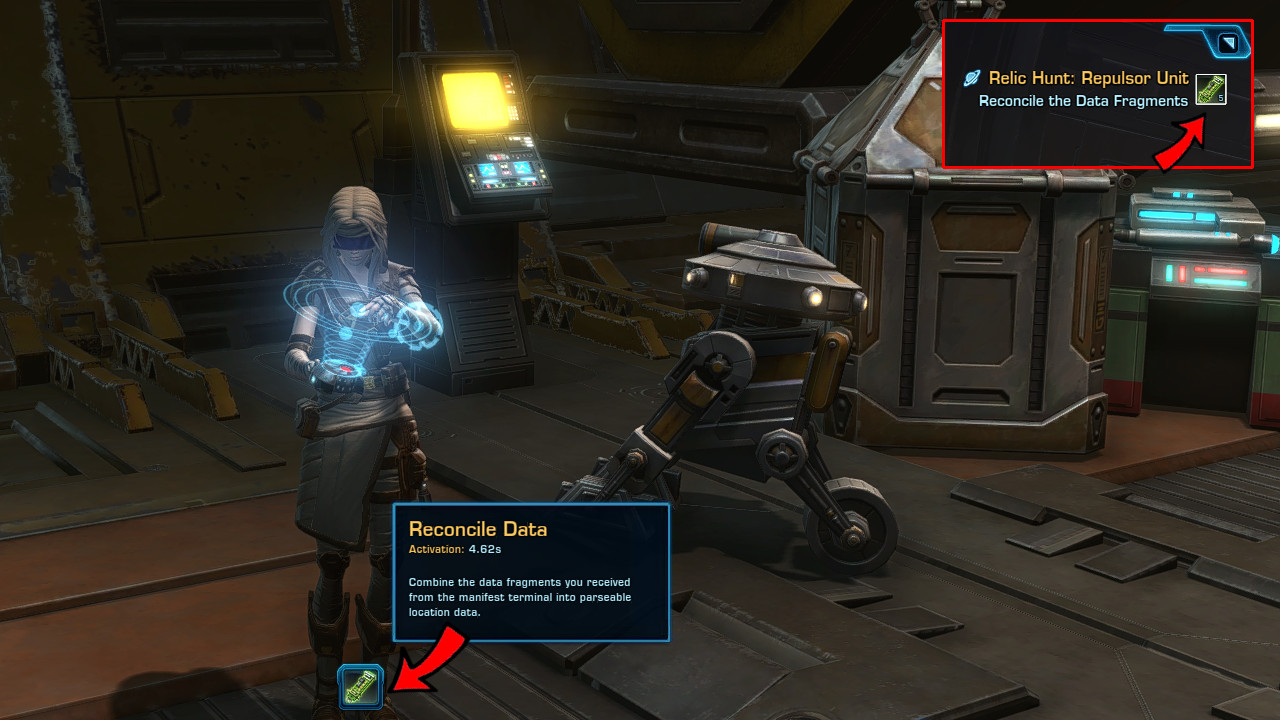
Once you've recovered all five Manifest Data, click the Reconcile Data.
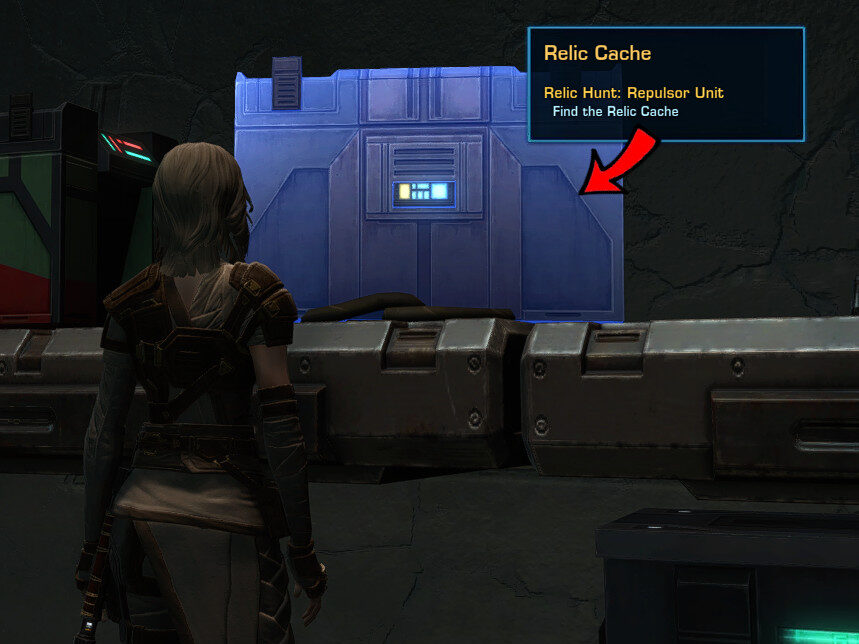
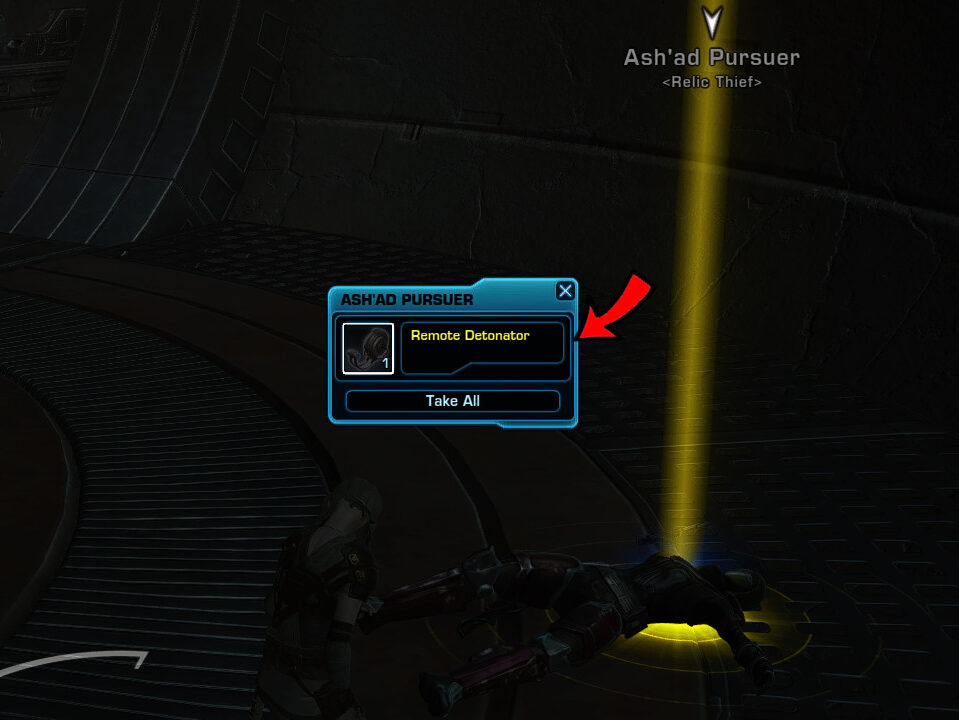
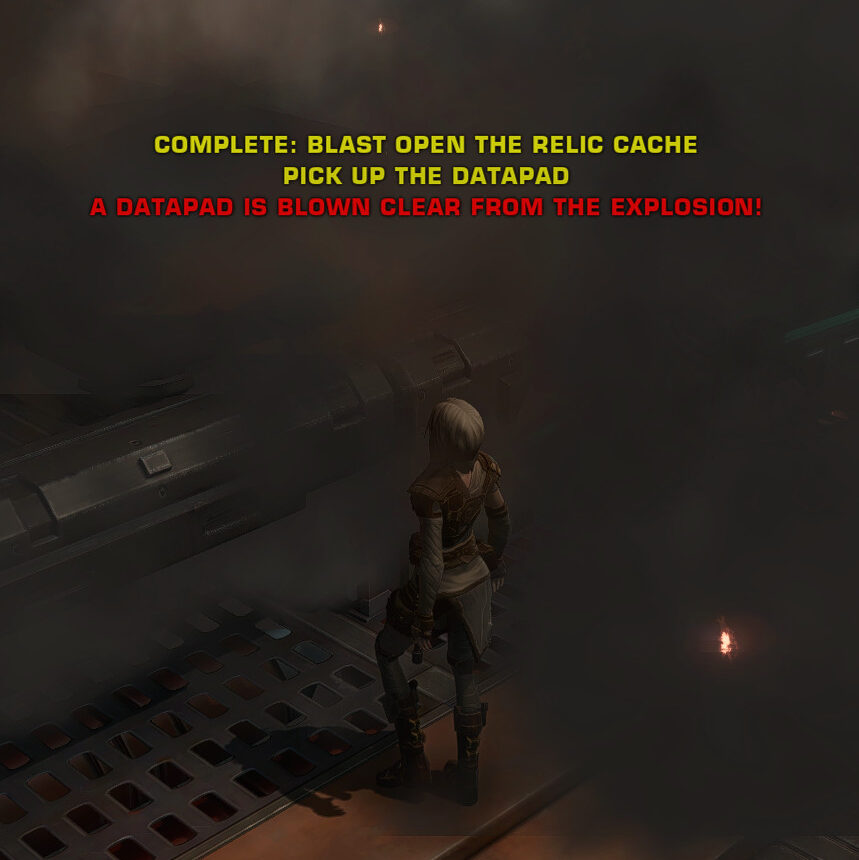
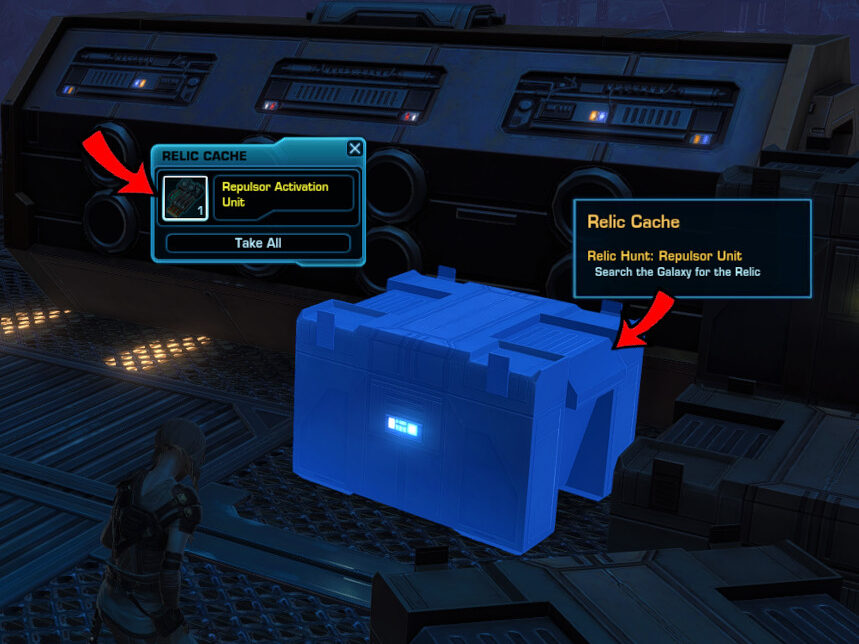
Next up, you have to Find the Relic Cache inside the Reclaimed Mining Facility. Following interacting with the locked cache, a weak Relic Thief will ambush you. Defeat him and loot the Remote Detonator he carries.
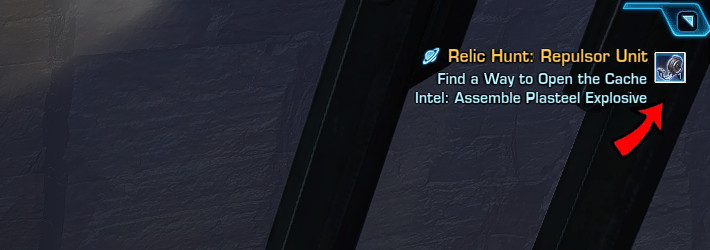
In order to open the cache, you have to assemble some Wiring, Payload Casing and Explosive Compound along with the looted Remote Detonator into a Plasteel Explosive.
You can find the Wiring from one of the Wiring Junctions inside the Reclaimed Mining Facility.


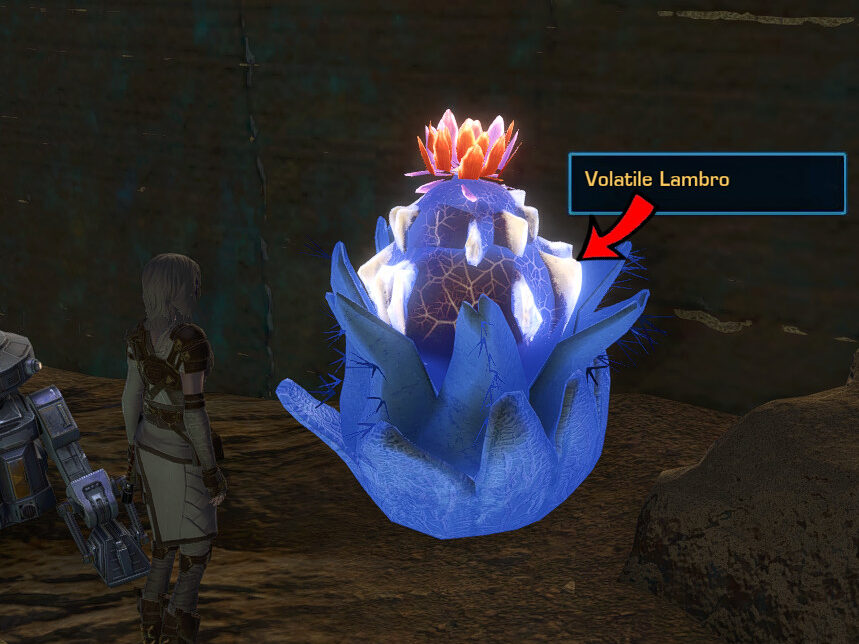
You can find the Explosive Compound from one of the Volatile Lambros growing in the western Overgrown Mining Site right outside the Reclaimed Mining Facility.
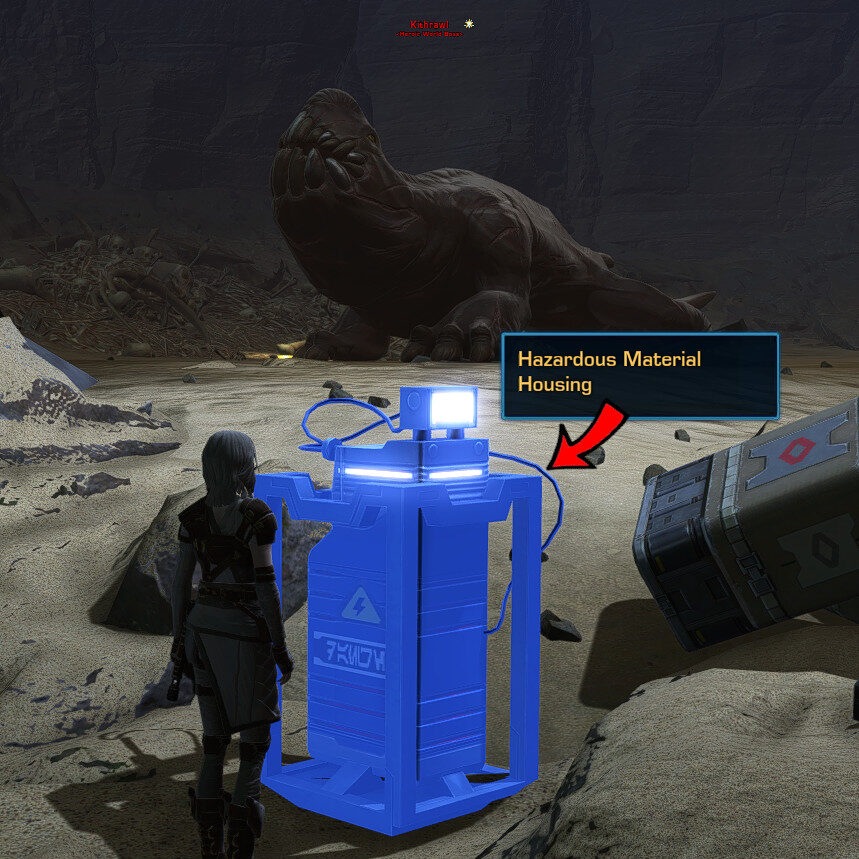
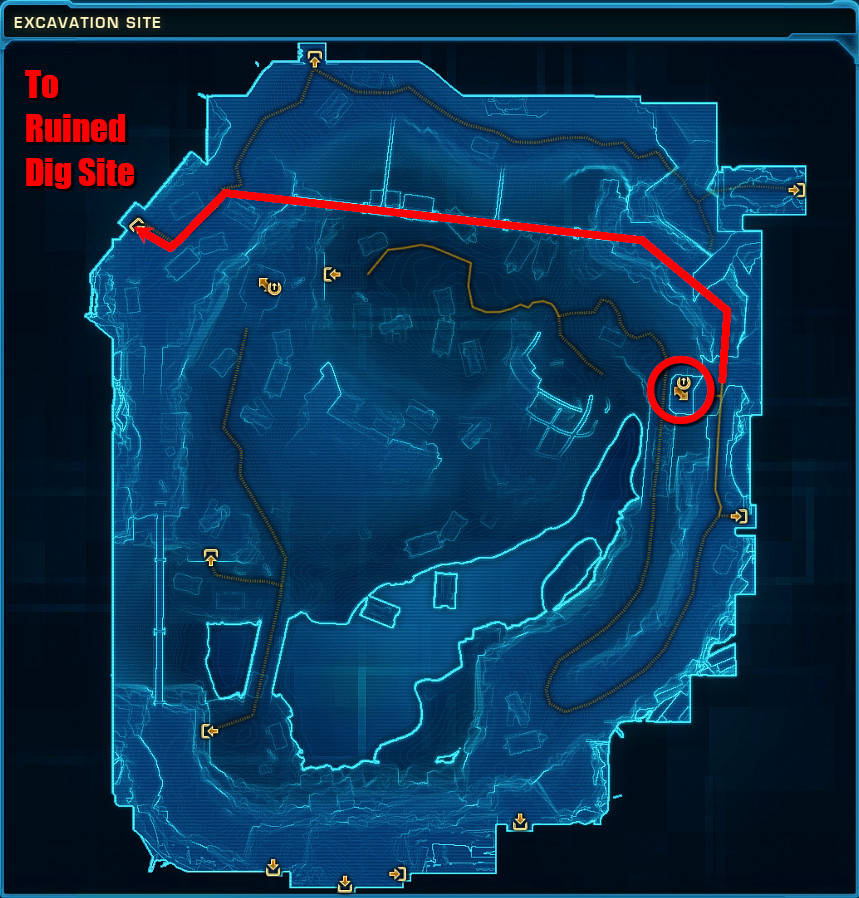
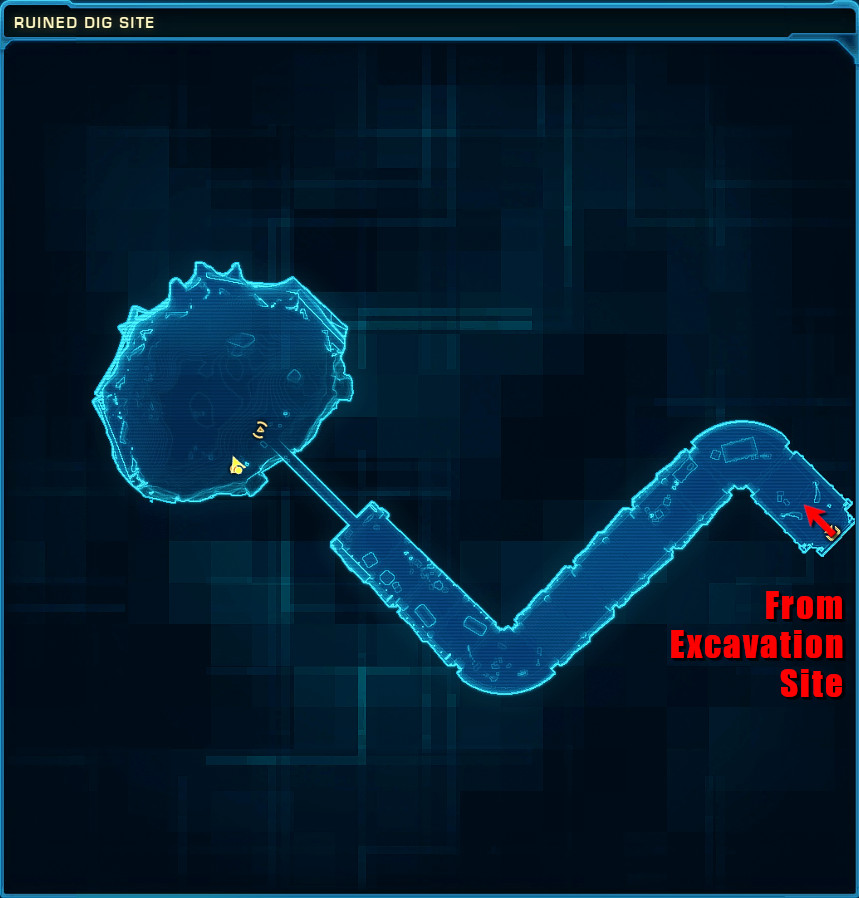
And you can find the Payload Casing from one of the Hazardous Material Housing in Kithrawl's Nest inside the Ruined Dig Site in the northern Excavation Site.
Once you have all the components, click the Remote Detonator icon at your mission log to assemble a Functioning Explosive Device.
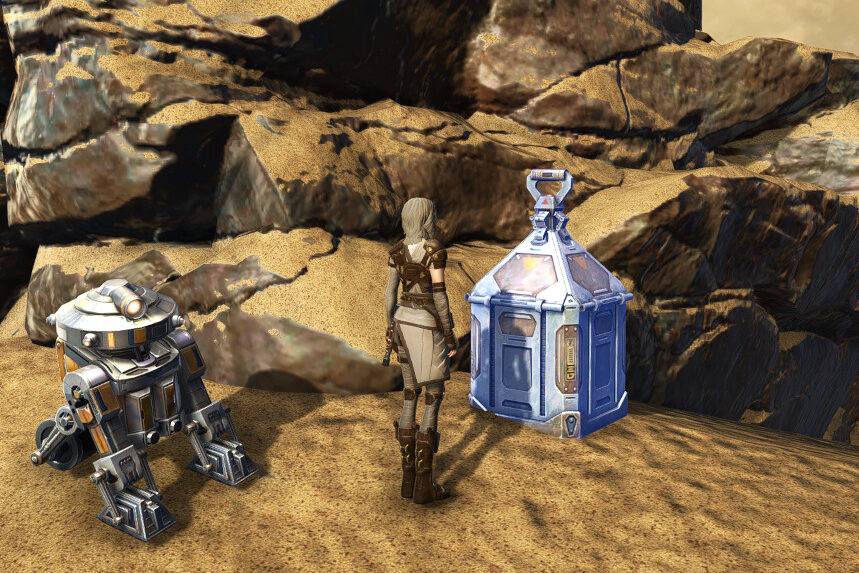
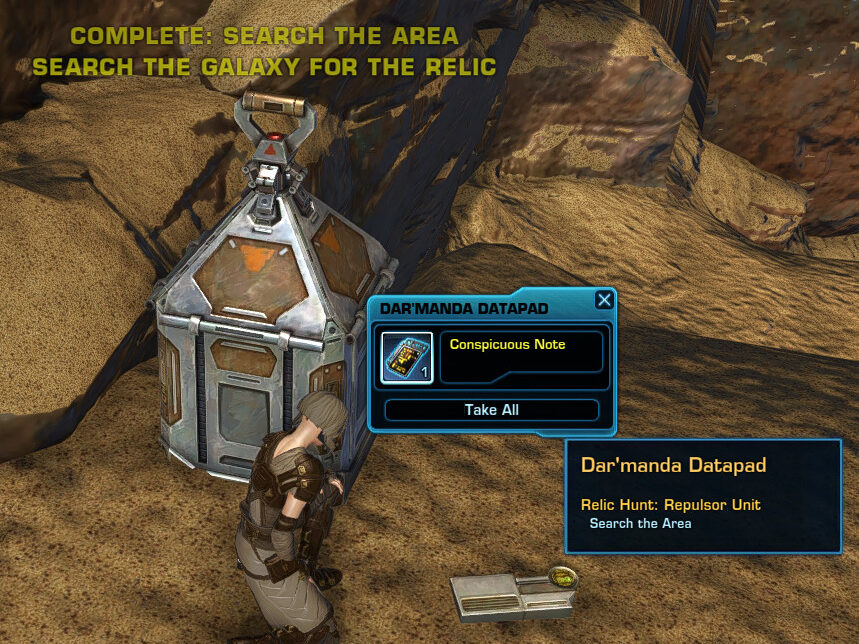
Return to the Relic Cache in the Reclaimed Mining Facility, click it and a Dar'manda Datapad will appear on the floor next to you. Loot the Datapad to begin the next stage.

The Datapad will inform you about 3 Hidden Stashes that you have to locate.
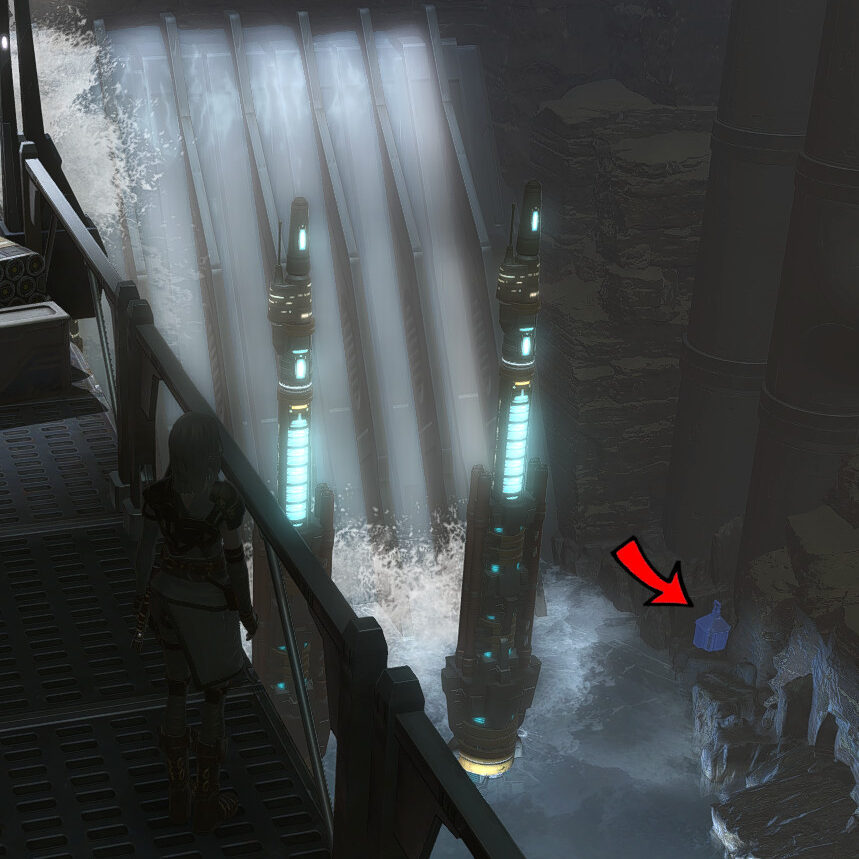
1/3 stash is located in The Pit inside the Ventilation Maintenance. The easiest way to get to the Ventilation Maintenance is by travelling to the Excavation Overlook in the Excavation Site, go south and take the first entrance to your left to Primary Ventilation Tunnel and take one of the two entrances to the Ventilation Maintenance.

2/3 stash is located in the Water Treatment Plant. The easiest way to get to the Water Treatment Plant is by travelling to the Dilapidated Waterworks, go south to the entrance to the Water Treatment Plant.
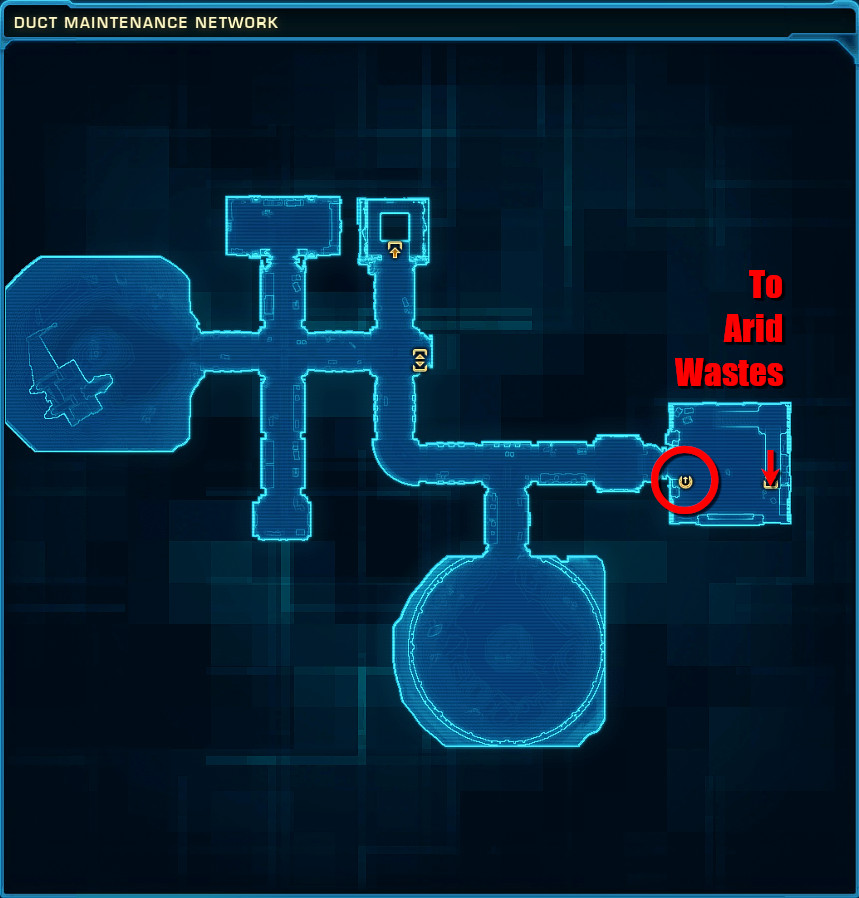
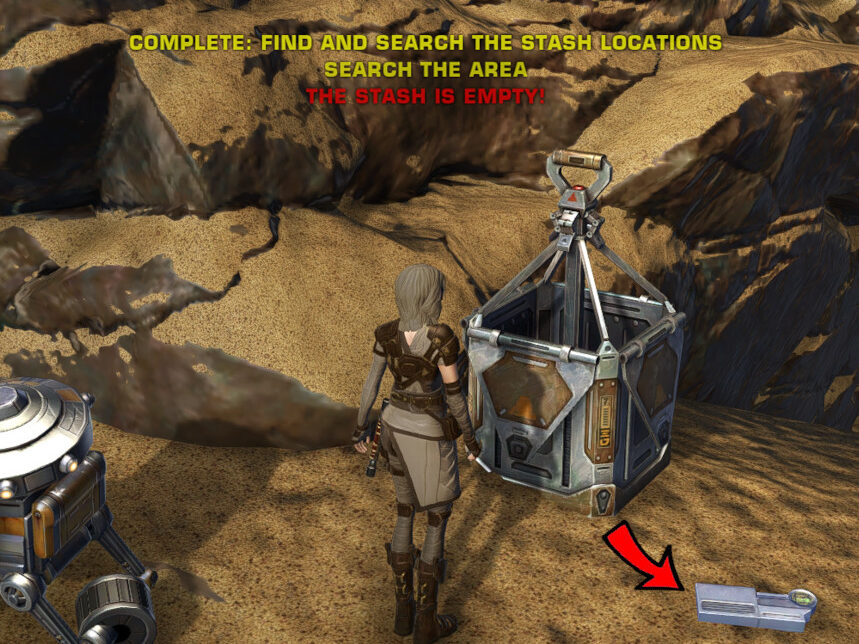
3/3 stash is located in the Arid Wastes. It's hidden in the south-east corner behind some rocks.
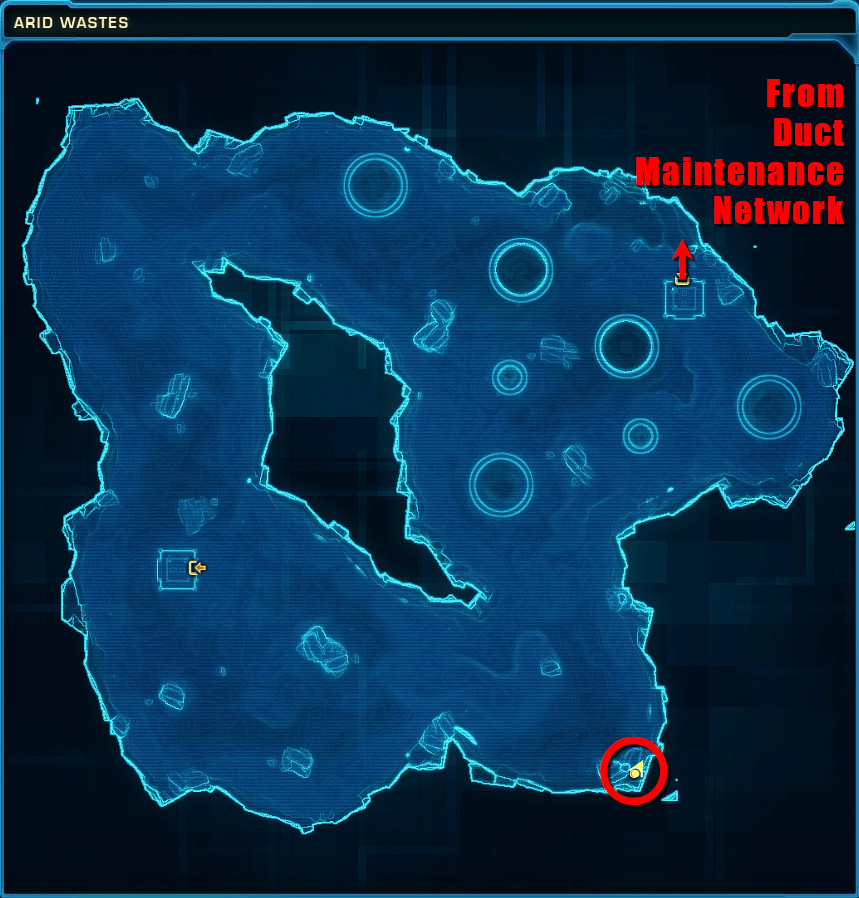
All three stashes were empty, but the final stash (it doesn't matter what order you search) will drop a Datapad containing a Conspicuous Note. It's a seemingly dead end and tells you to Search the Galaxy.
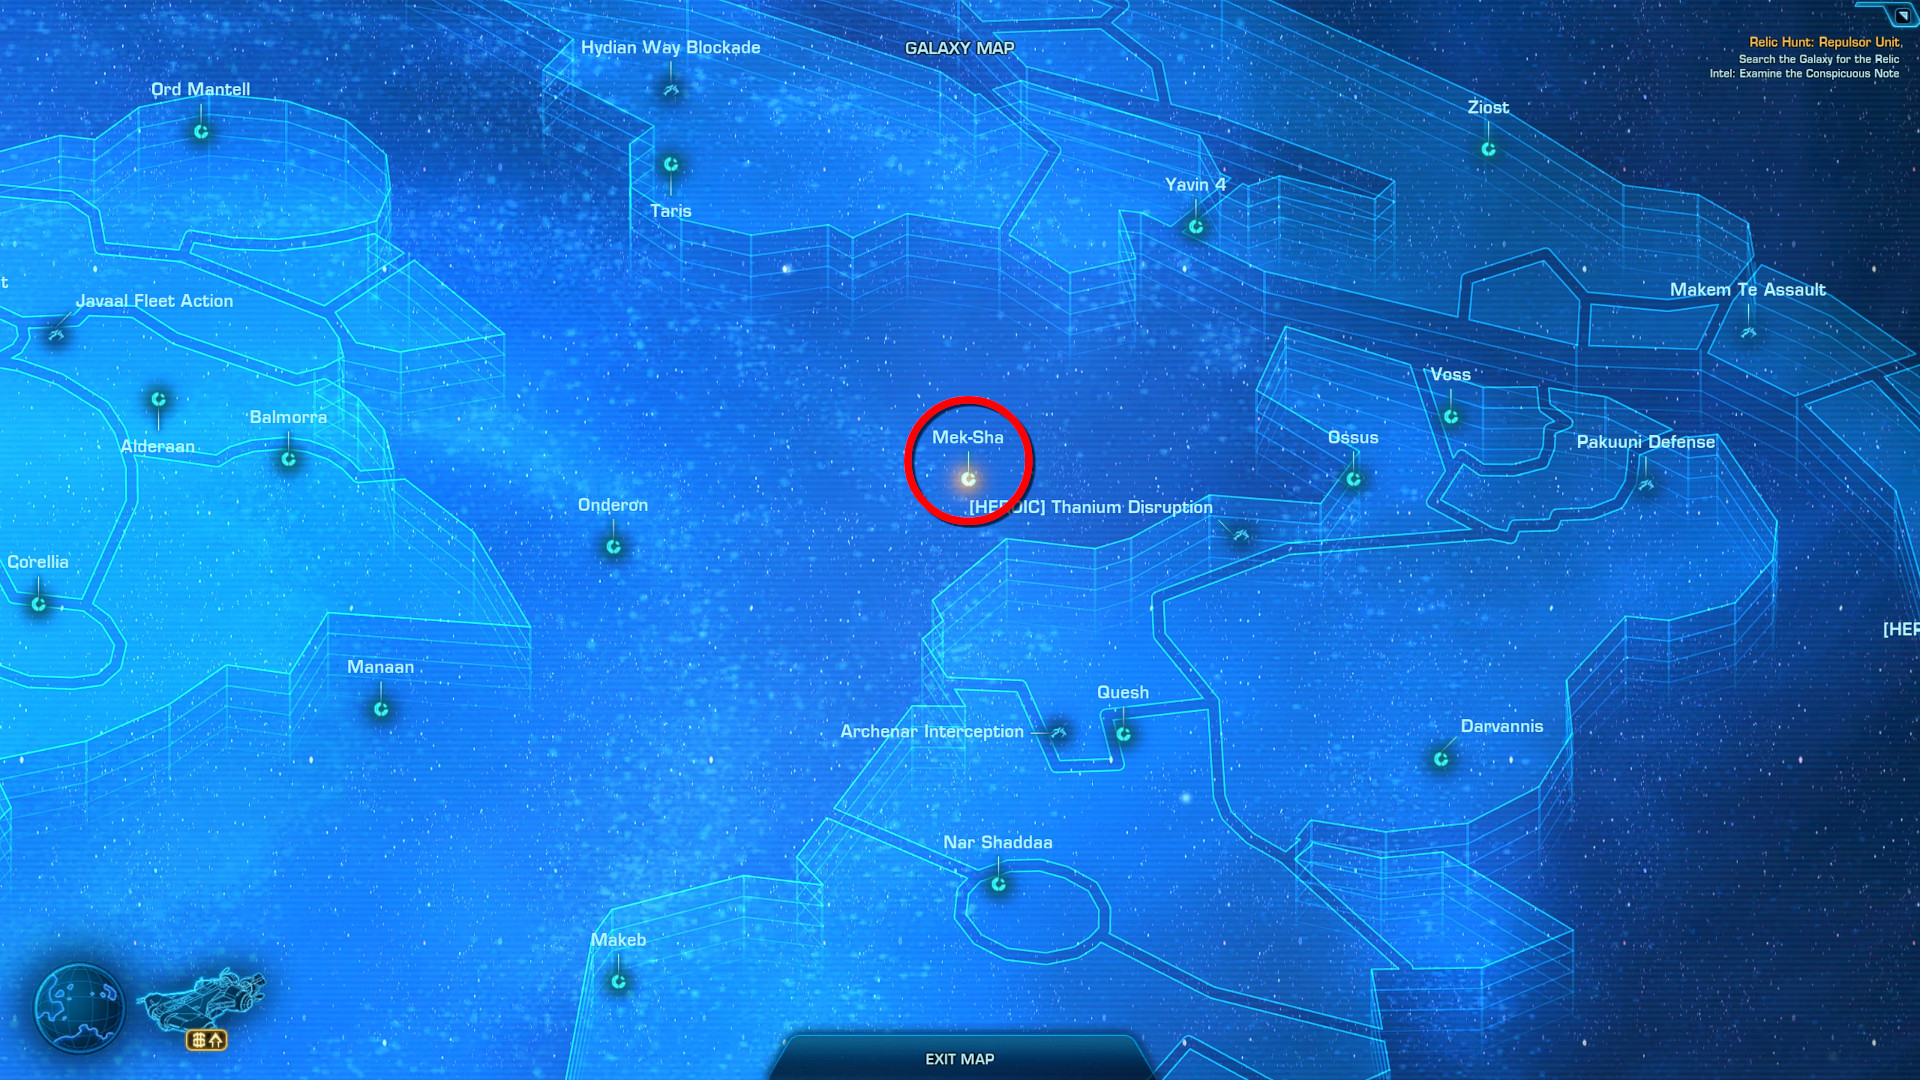
Since it's a Dar'manda Datapad talking about a Compound, it narrows the search down to Mek-Sha.
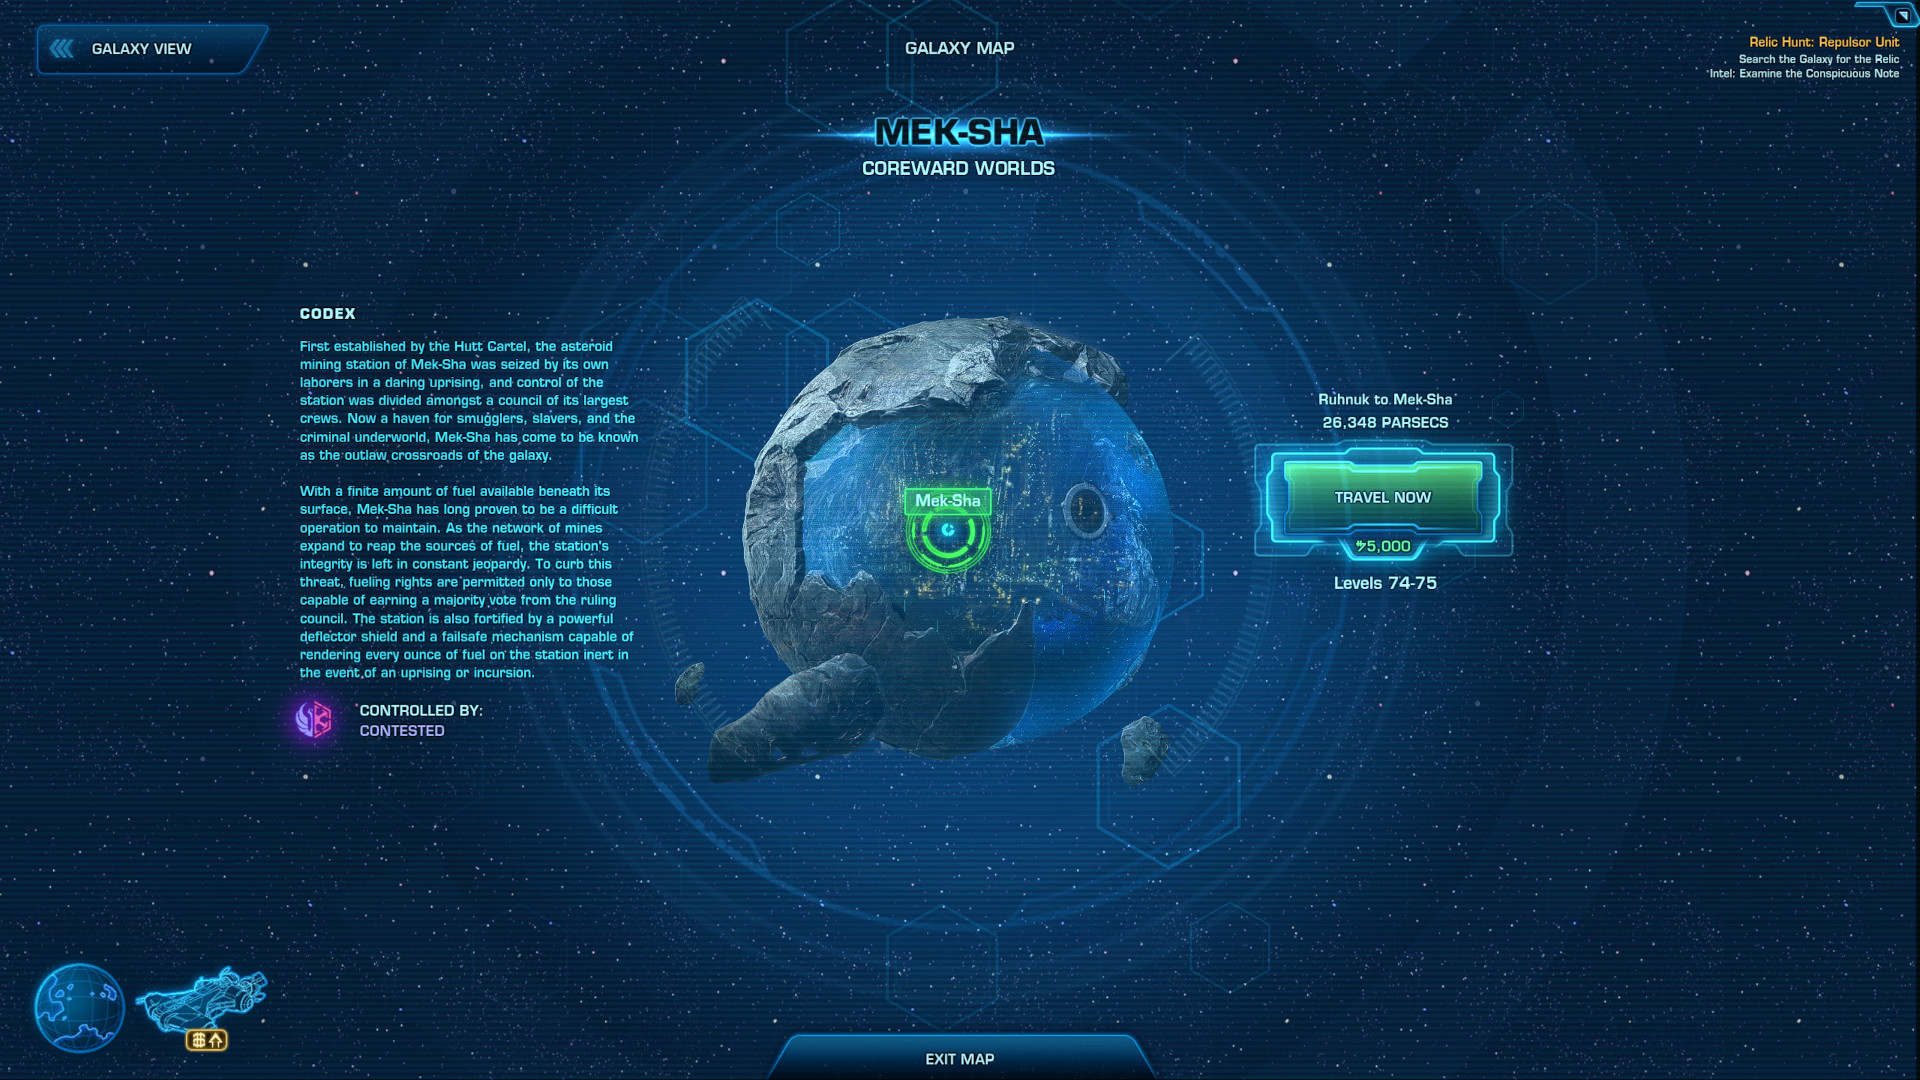
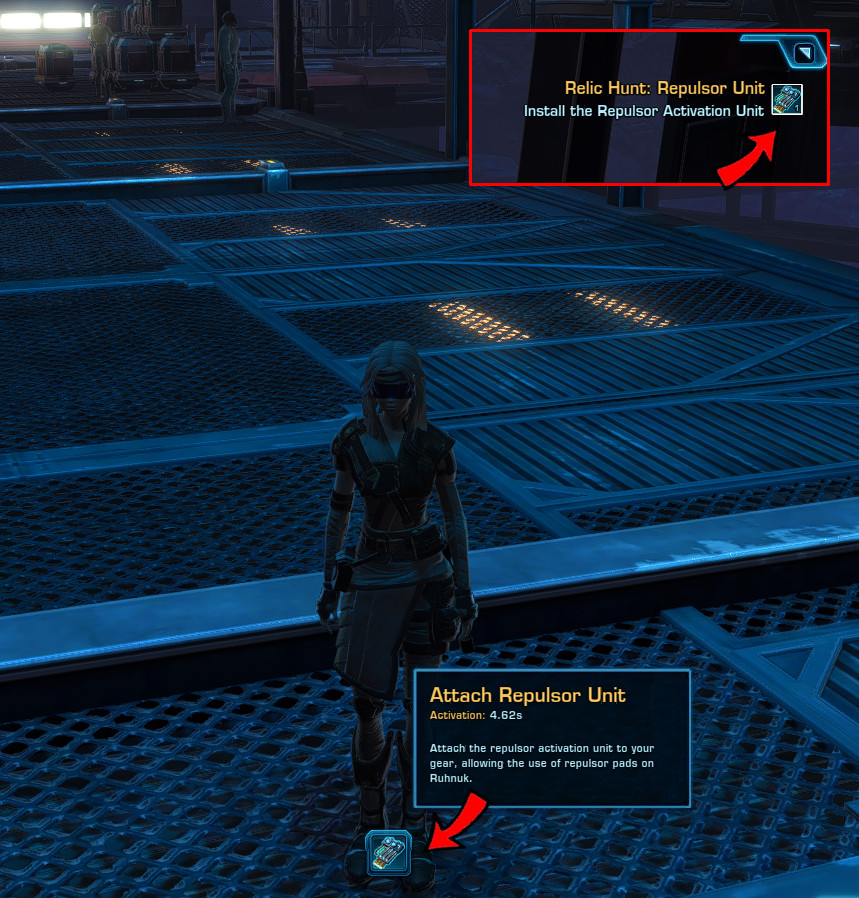
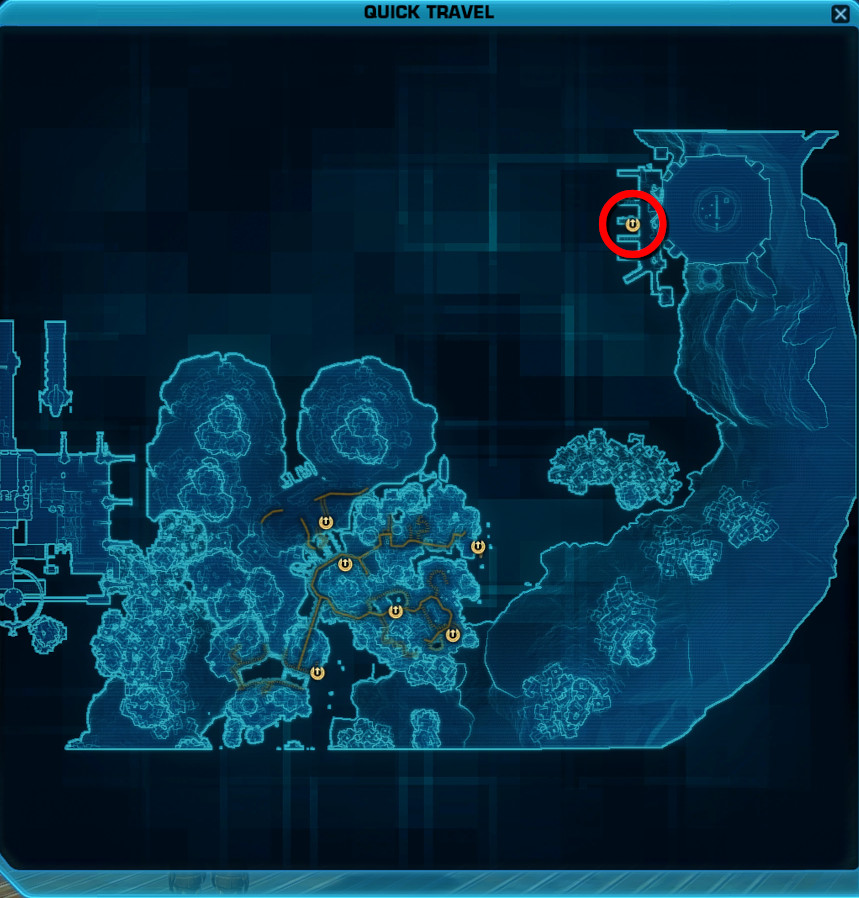
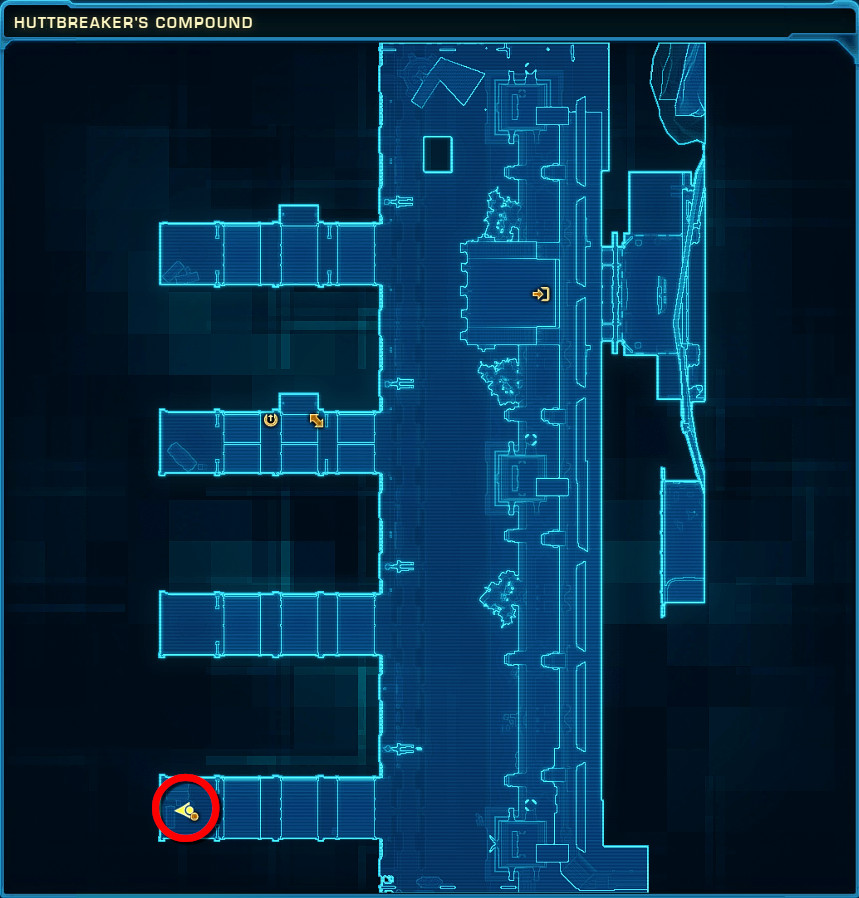
You will find the real Relic Cache on the pier furthest to the south at Huttbreaker's Compound in the the north-east area of Mek-Sha that contains a Repulser Activation Unit. Defeat the ambushers, then click the Attach Repulser Unit icon at either your Temporary Ability Bar or at your mission log.
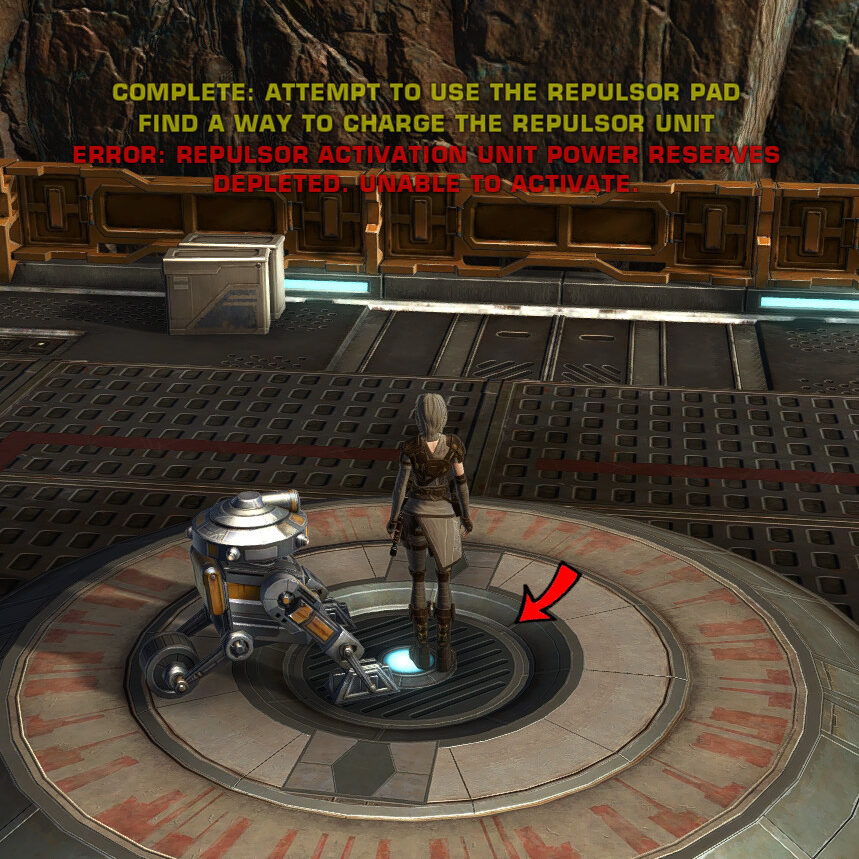
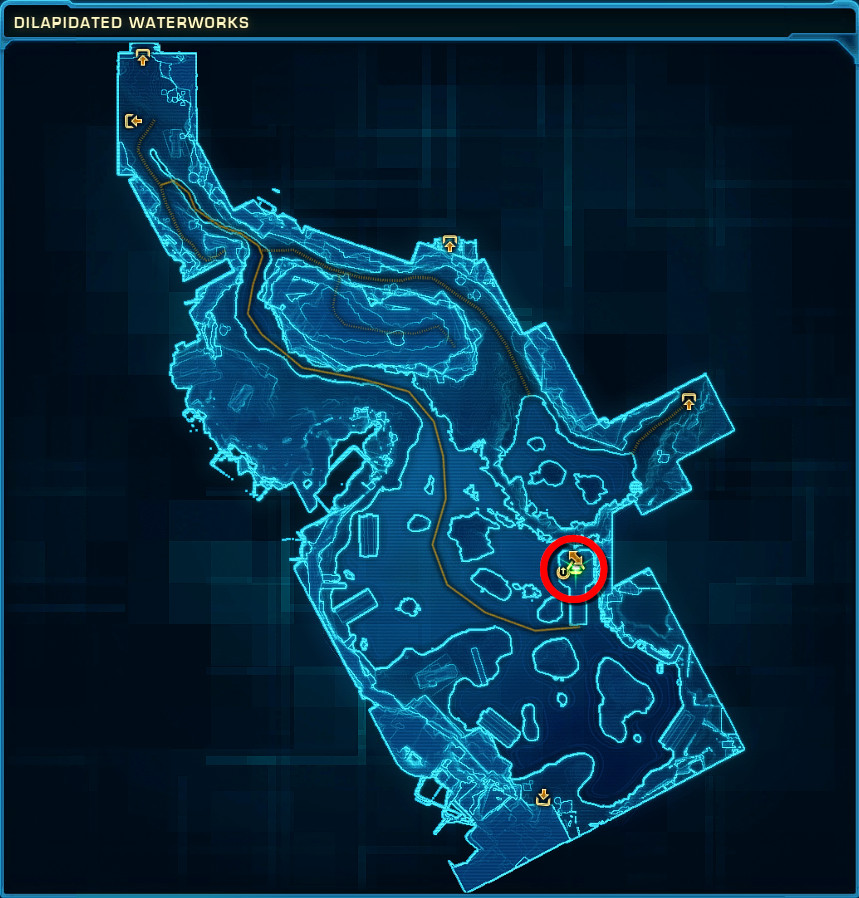
Return to Ruhnuk and travel to the Dilapidated Waterworks and test your Repulser Unit at the Travel Point which will fail due to lack of power.
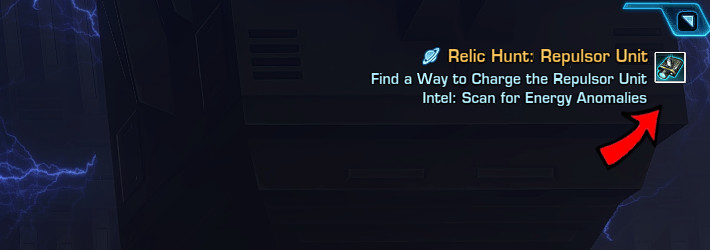
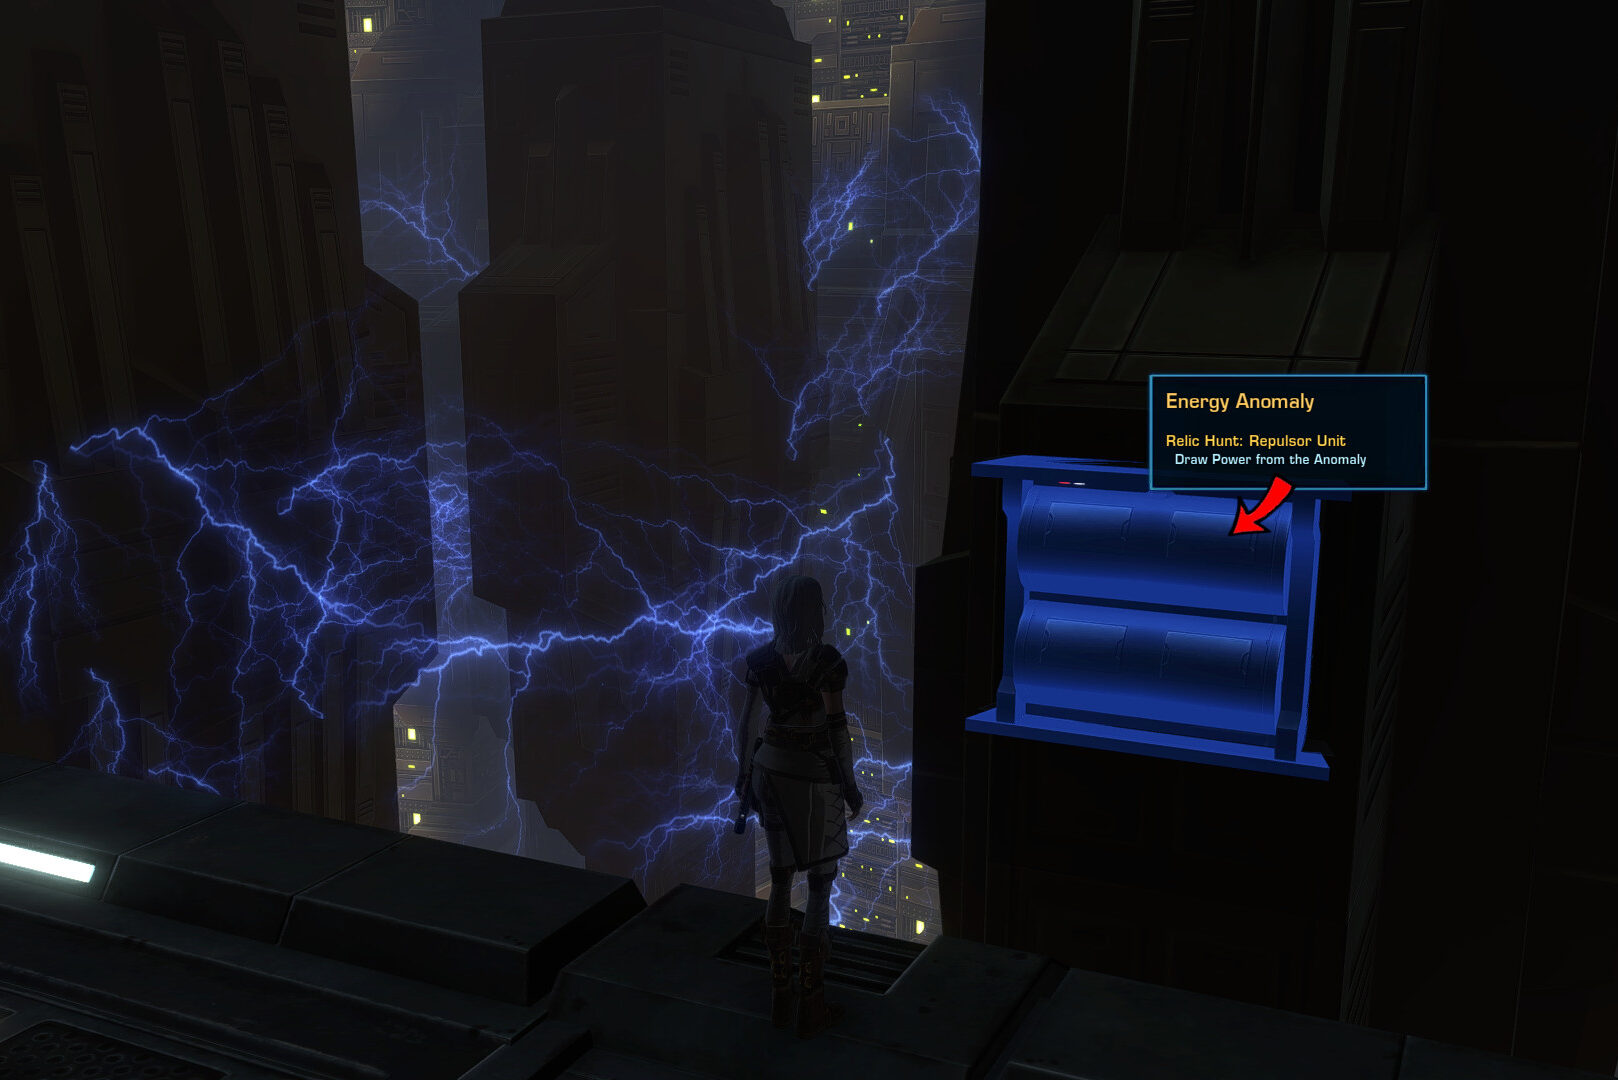
Travel to the Primary Ventilation Tunnel and scan for Anomalies. The easiest way to the Primary Ventilation Tunnel is by travelling to the Excavation Overlook in the Excavation Site, go south and take the first entrance to your left.
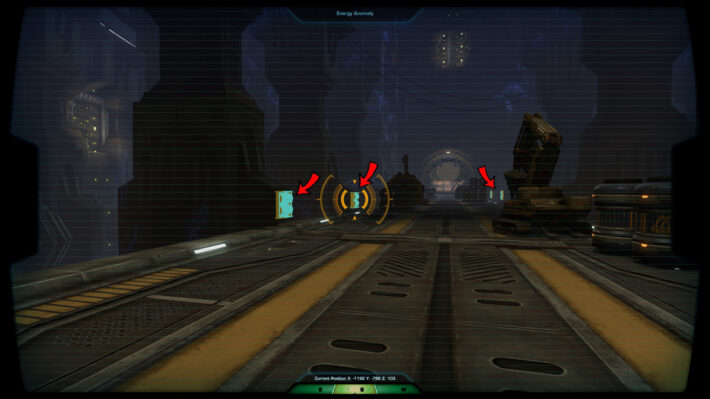
Then simply click one of the panels to Draw Power from the Anomaly.
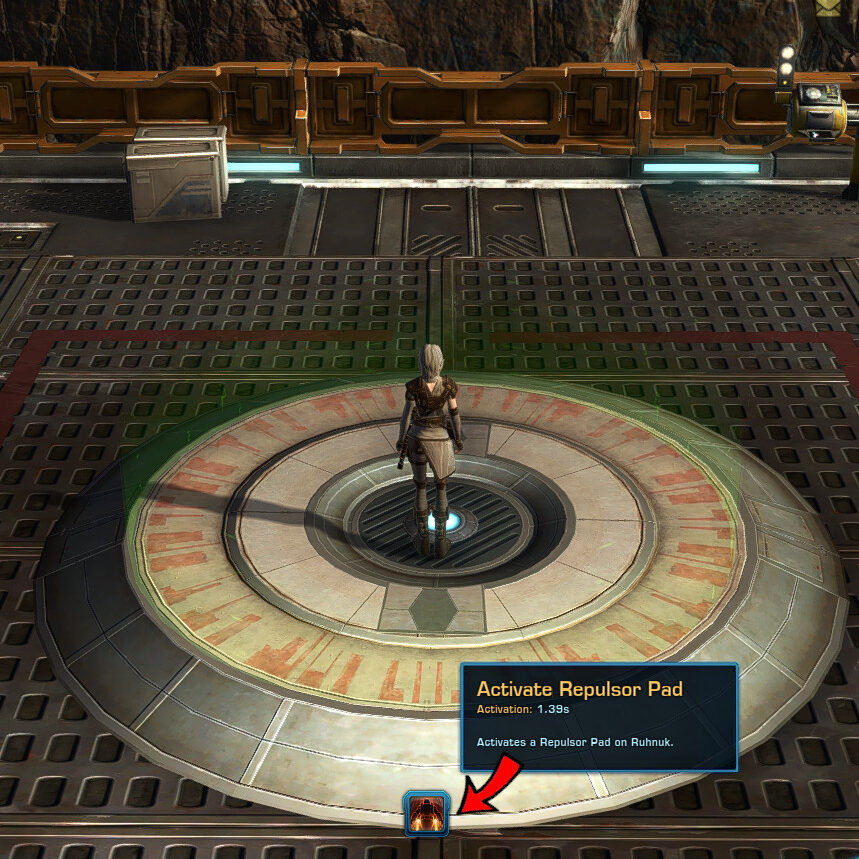
Return to the Repulser Pad at the Travel Point in the Dilapidated Waterworks and test the Repulser Unit.
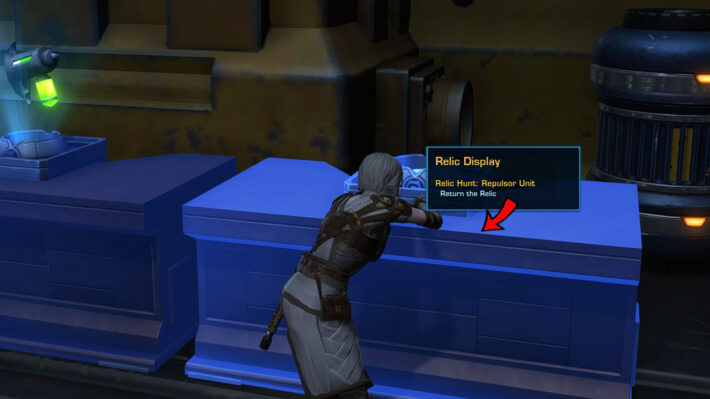
You can now return to Mandalore's Encampment and hand in the Relic at the clickable mission table.
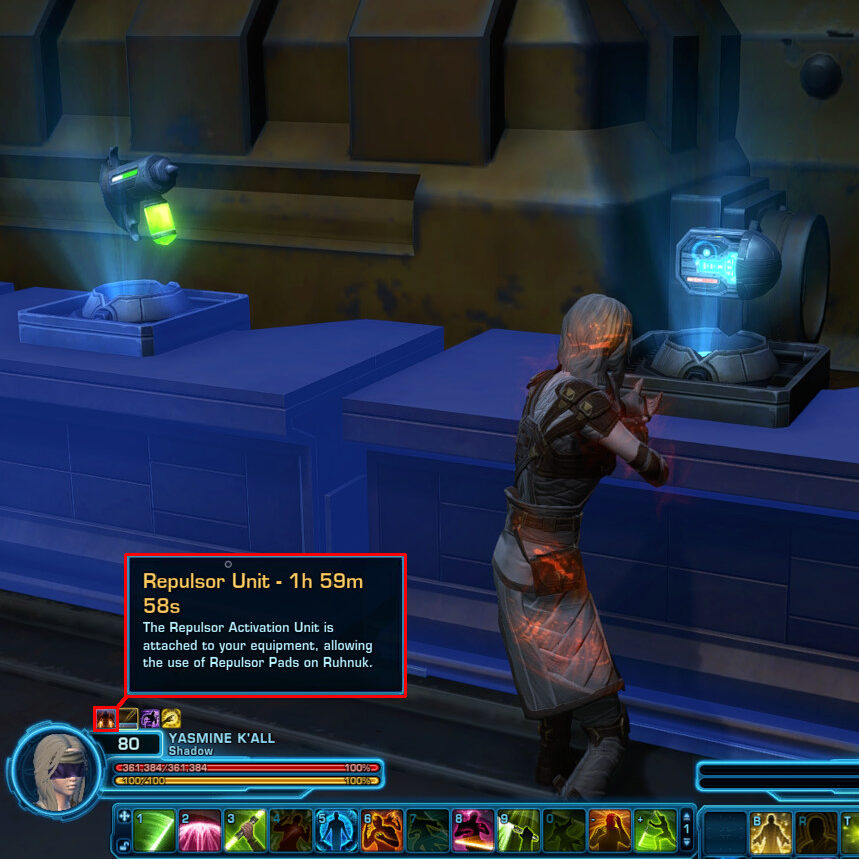
This will enable the opportunity to click this table as often as you want to gain a Repulser Unit buff that lasts for 2 hours, which while "attached to your equipment, allowing the use of Repulser Pads on Ruhnuk." The buff will only work on Ruhnuk and you will lose it if you die, travel to your personal Stronghold or switch instance.