Ossus Datacron Master
SWTOR Datacron Locations and Guides
- Alderaan Datacron Master
- Balmorra (Empire) Datacron Master
- Balmorra (Republic) Datacron Master
- Belsavis Datacron Master
- Corellia Datacron Master
- Coruscant Datacron Master
- Dromund Kaas Datacron Master
- Fleet Datacron Master
- Hoth Datacron Master
- Hutta Datacron Master
- Ilum Datacron Master
- Kessan's Landing Datacron Master
- Korriban Datacron Master
- Makeb Datacron Master
- Mek-Sha Datacron Master
- Nar Shaddaa (Empire) Datacron Master
- Nar Shaddaa (Republic) Datacron Master
- Onderon Datacron Master
- Ord Mantell Datacron Master
- Ossus Datacron Master
- Quesh Datacron Master
- Rishi Datacron Master
- Ruhnuk Datacron Master
- Taris (Empire) Datacron Master
- Taris (Republic) Datacron Master
- Tatooine Datacron Master
- Tython Datacron Master
- Voss Datacron Master


SWTOR Ossus Endurance Datacron Location Guide
The Endurance Datacron increases the amount of damage you can suffer by increasing your max health. It will grant you Endurance +2 to your permanent stats along with codex: Ood Bnar. There are 3 Datacrons in total located on the planet of Ossus.
Datacrons are collectables scattered around the galaxy in Star Wars: The Old Republic. Each Datacron contributes towards your Legacy's passive stats permanently. Furthermore, they also provide interesting Lore and Codex Entries about the Old Republic era.
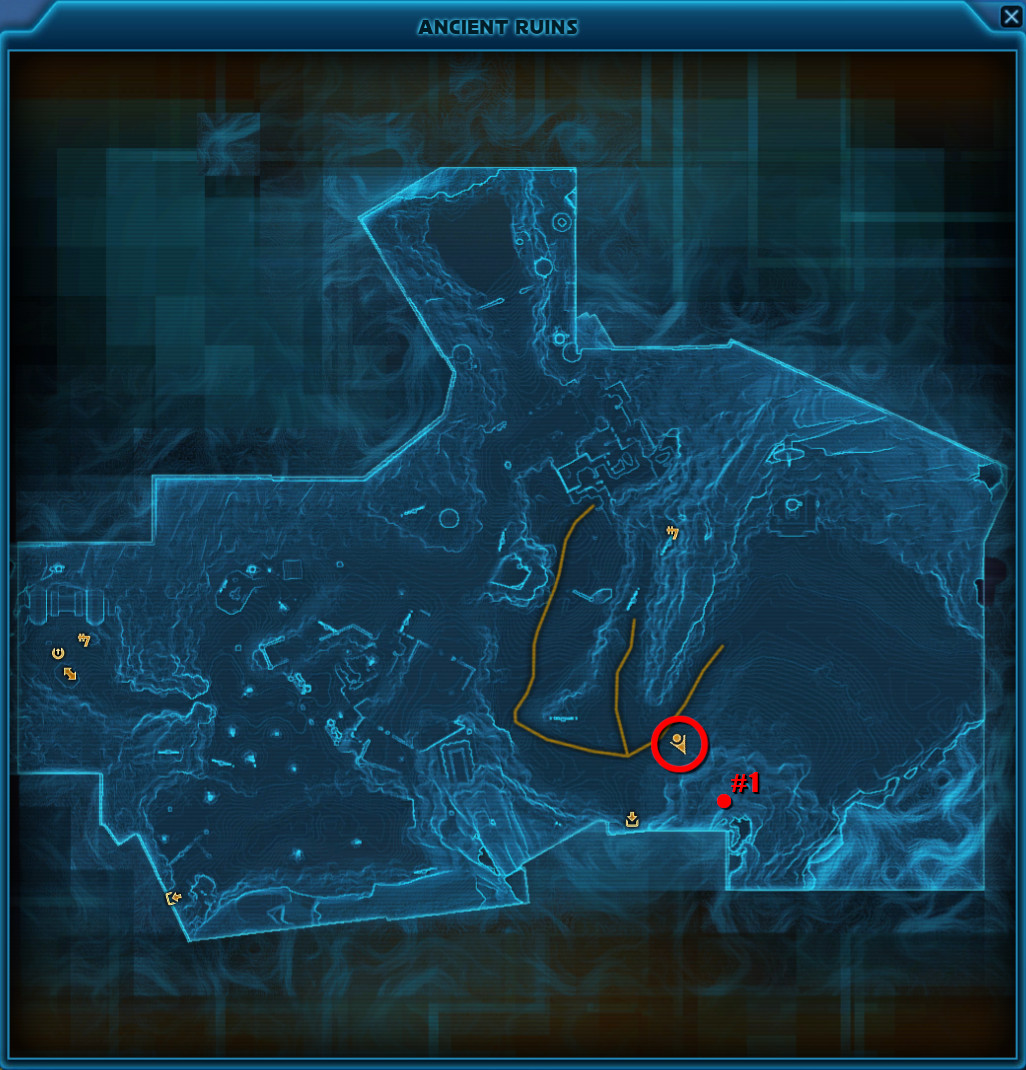
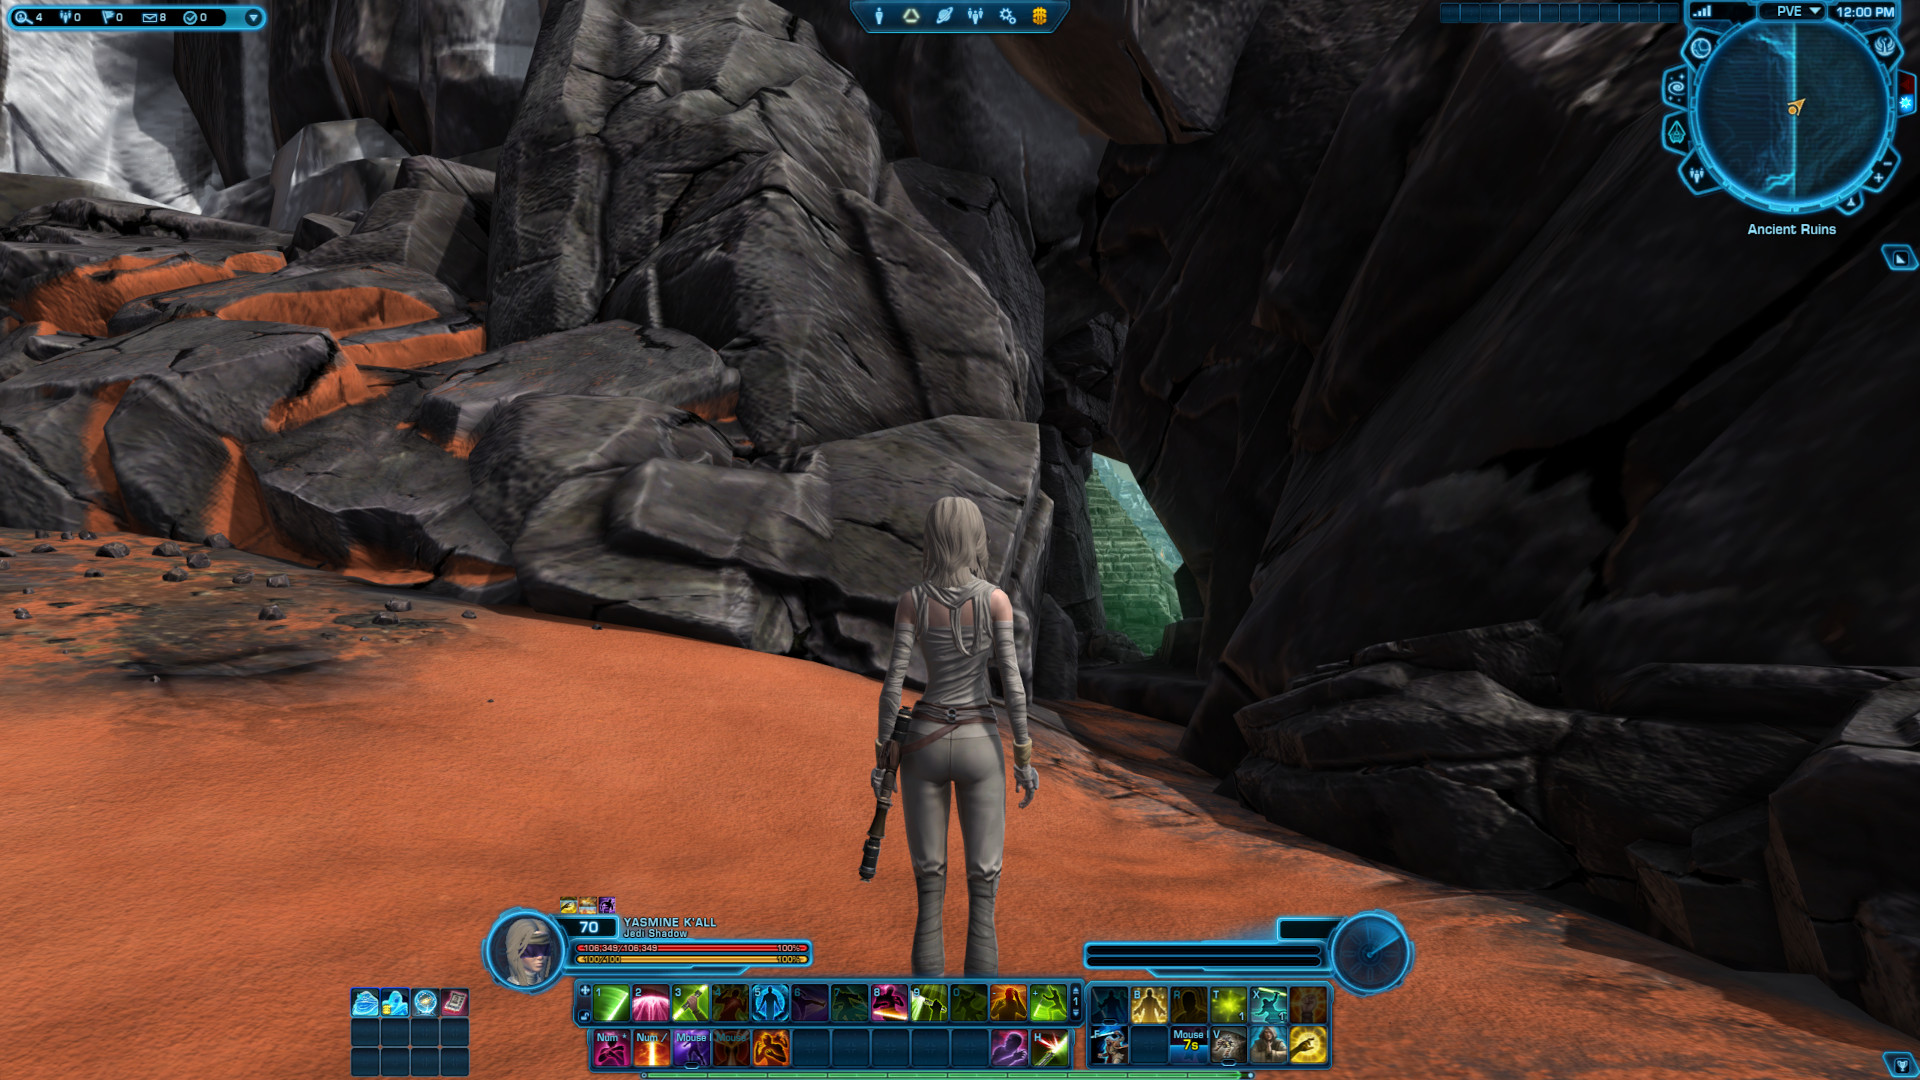
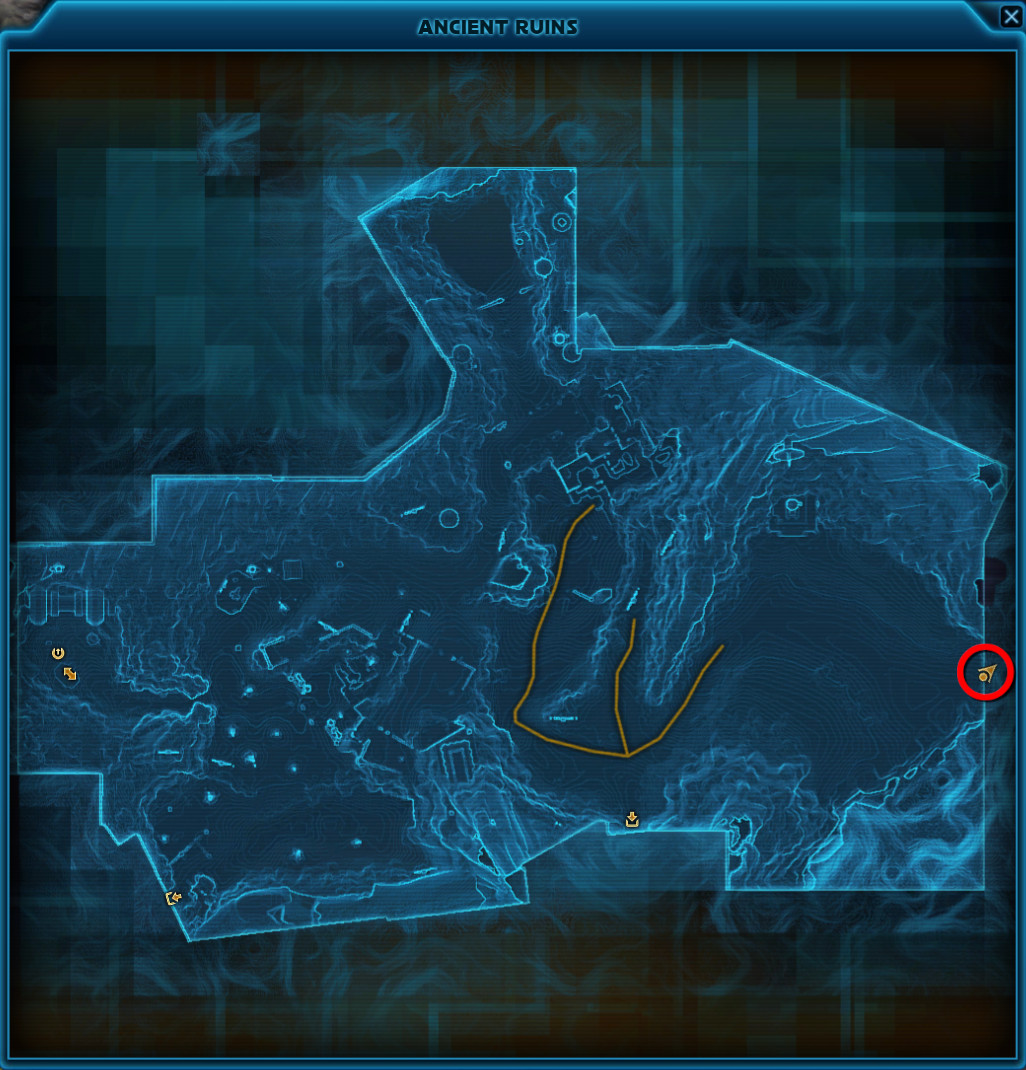
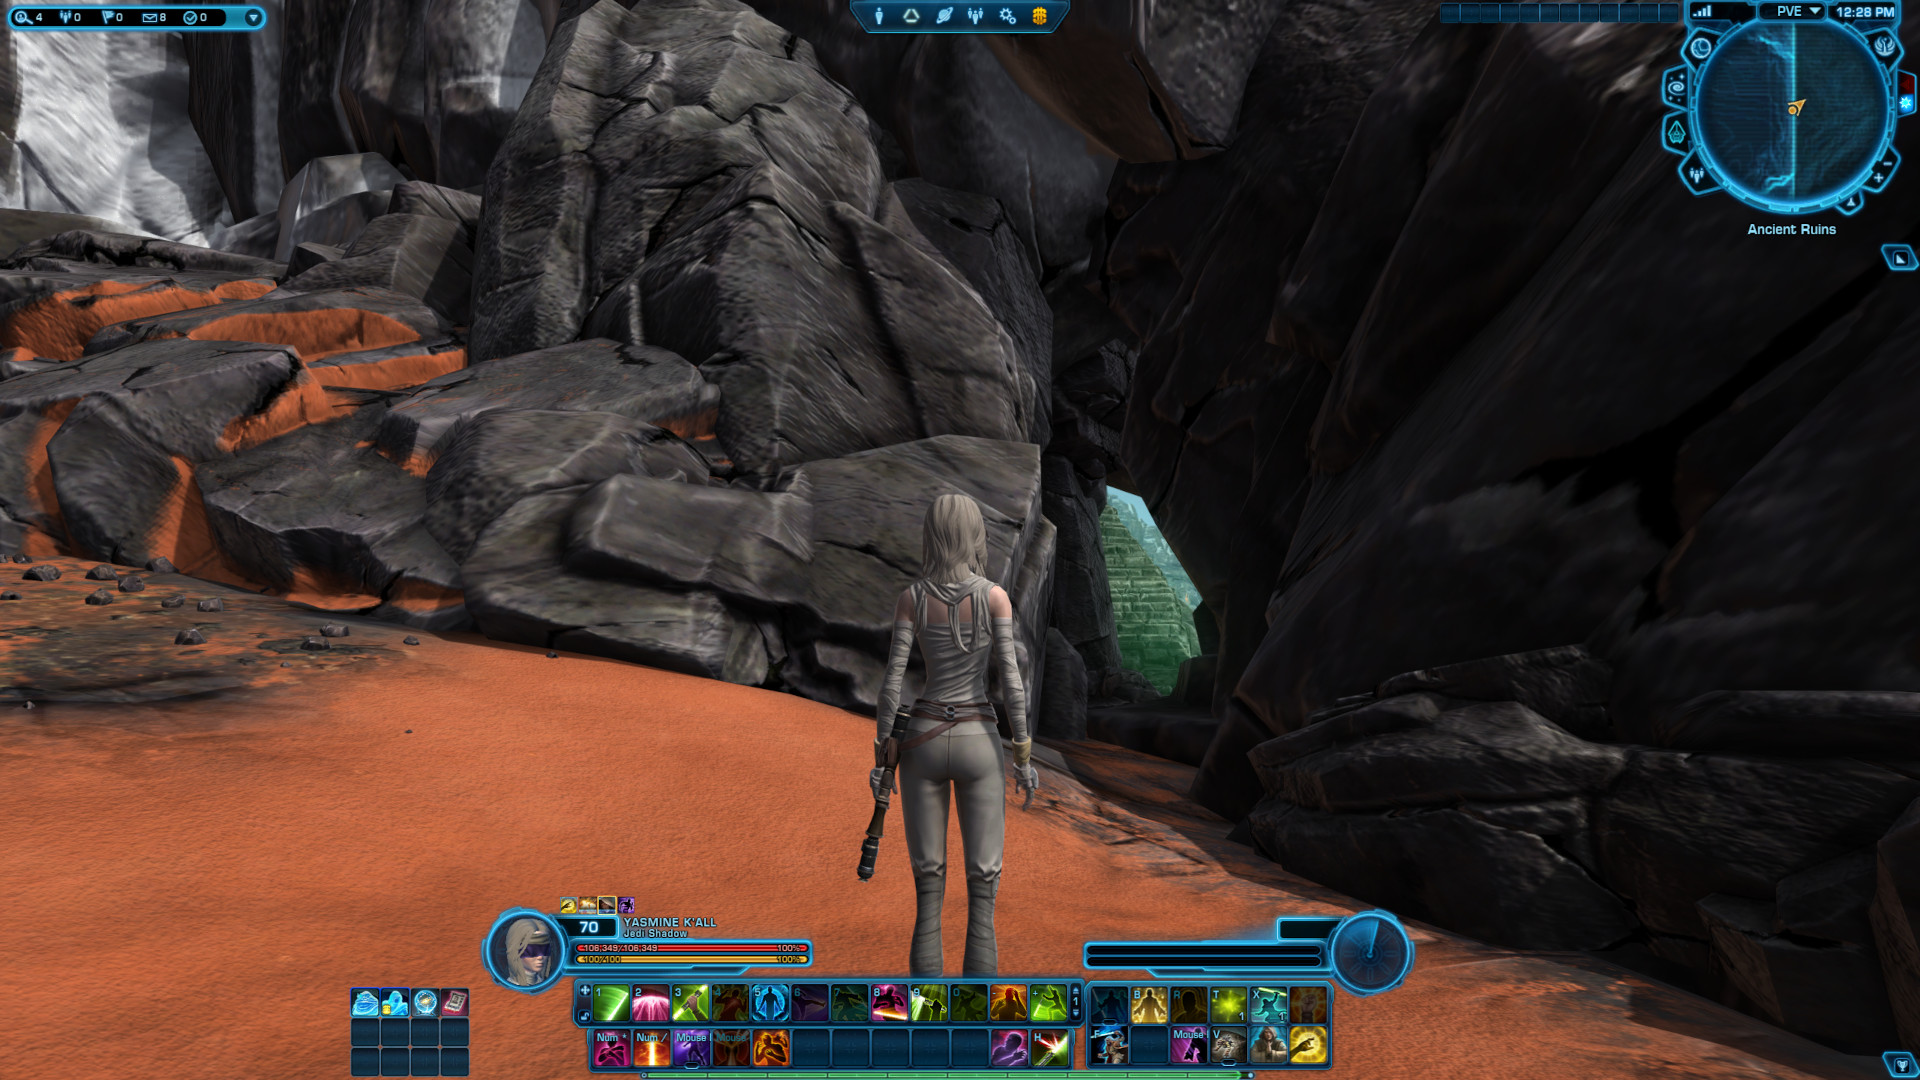
This Datacron is located in a small cave in a personal instance in Ancient Ruins. This is a long puzzle that involves a fairly tough jumping puzzle. This will require you to finish the main story first.
You will start by activating 5 Ancient Switches in a specific order: Blue > Yellow > White > Orange > Green. If you travel to your Stronghold, log out, die or skip any of the steps, you will have to start over.
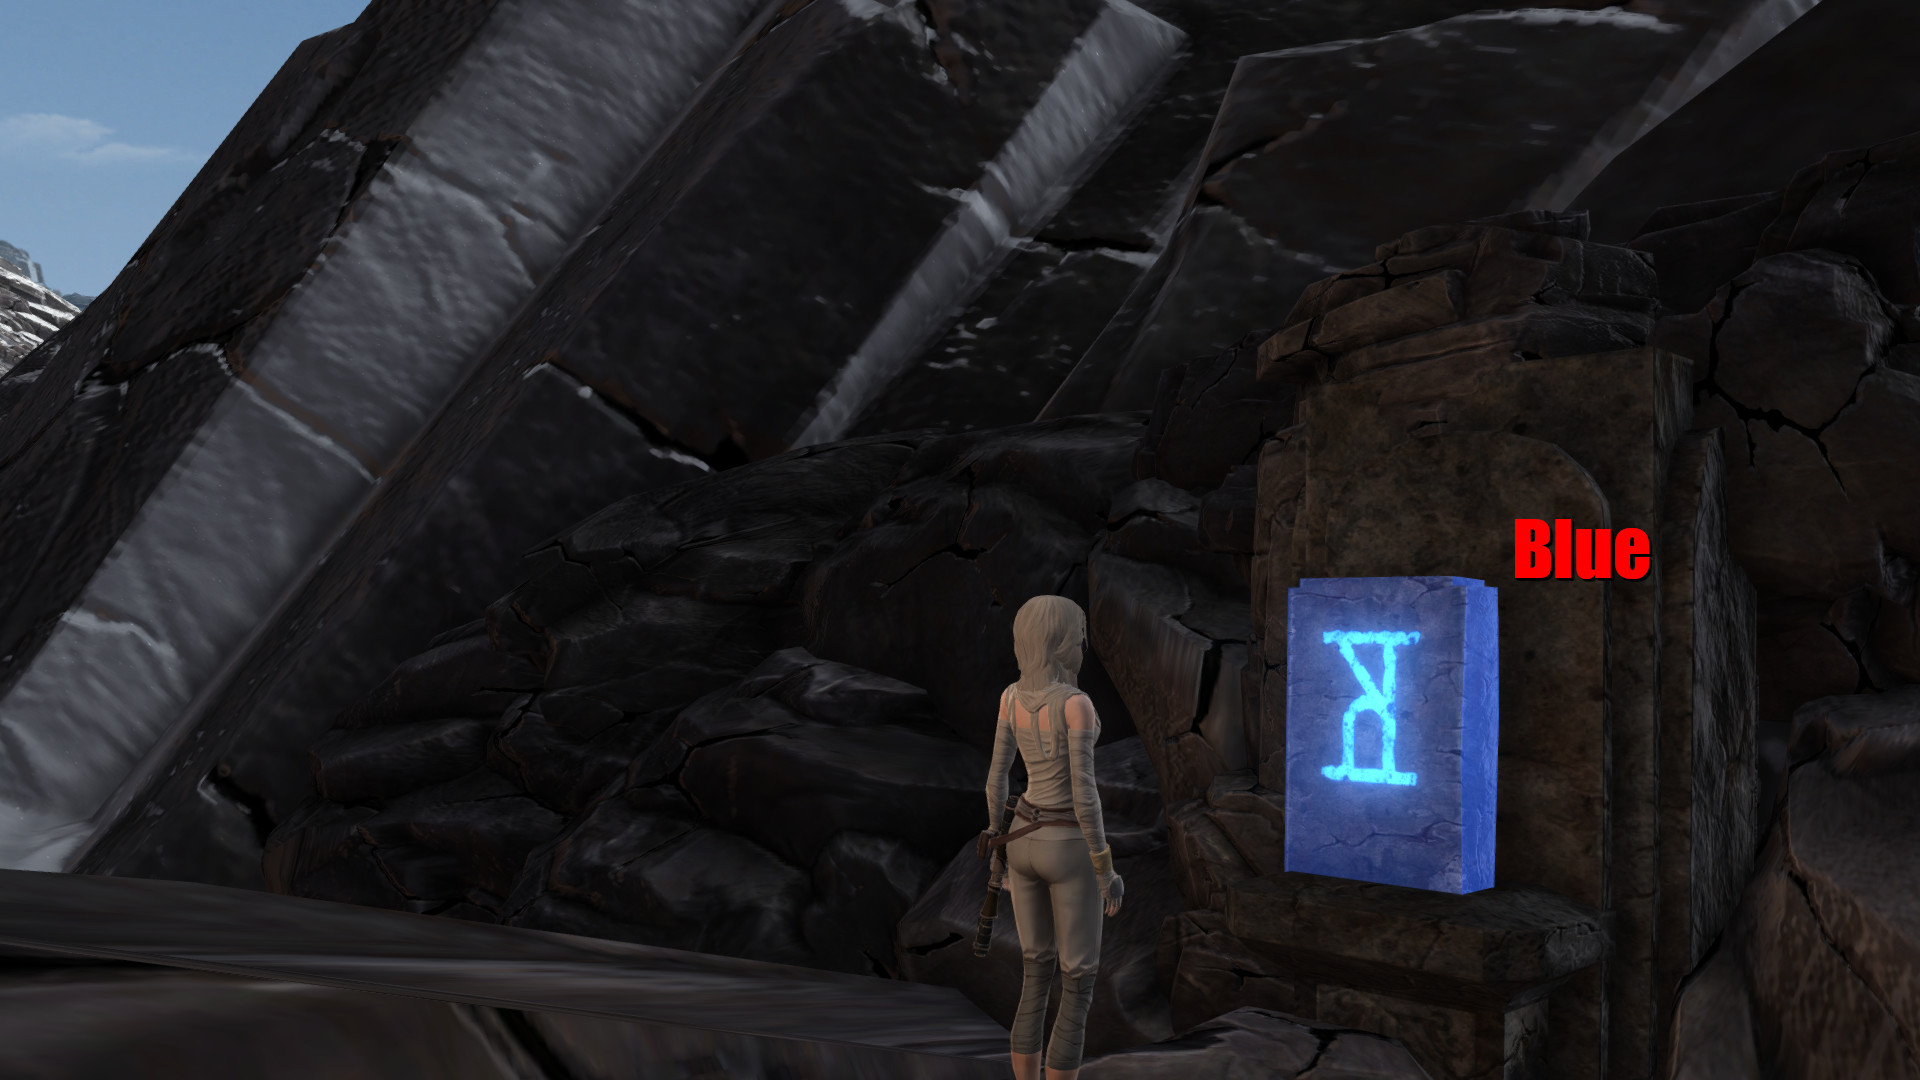
Switch #1 (Blue)
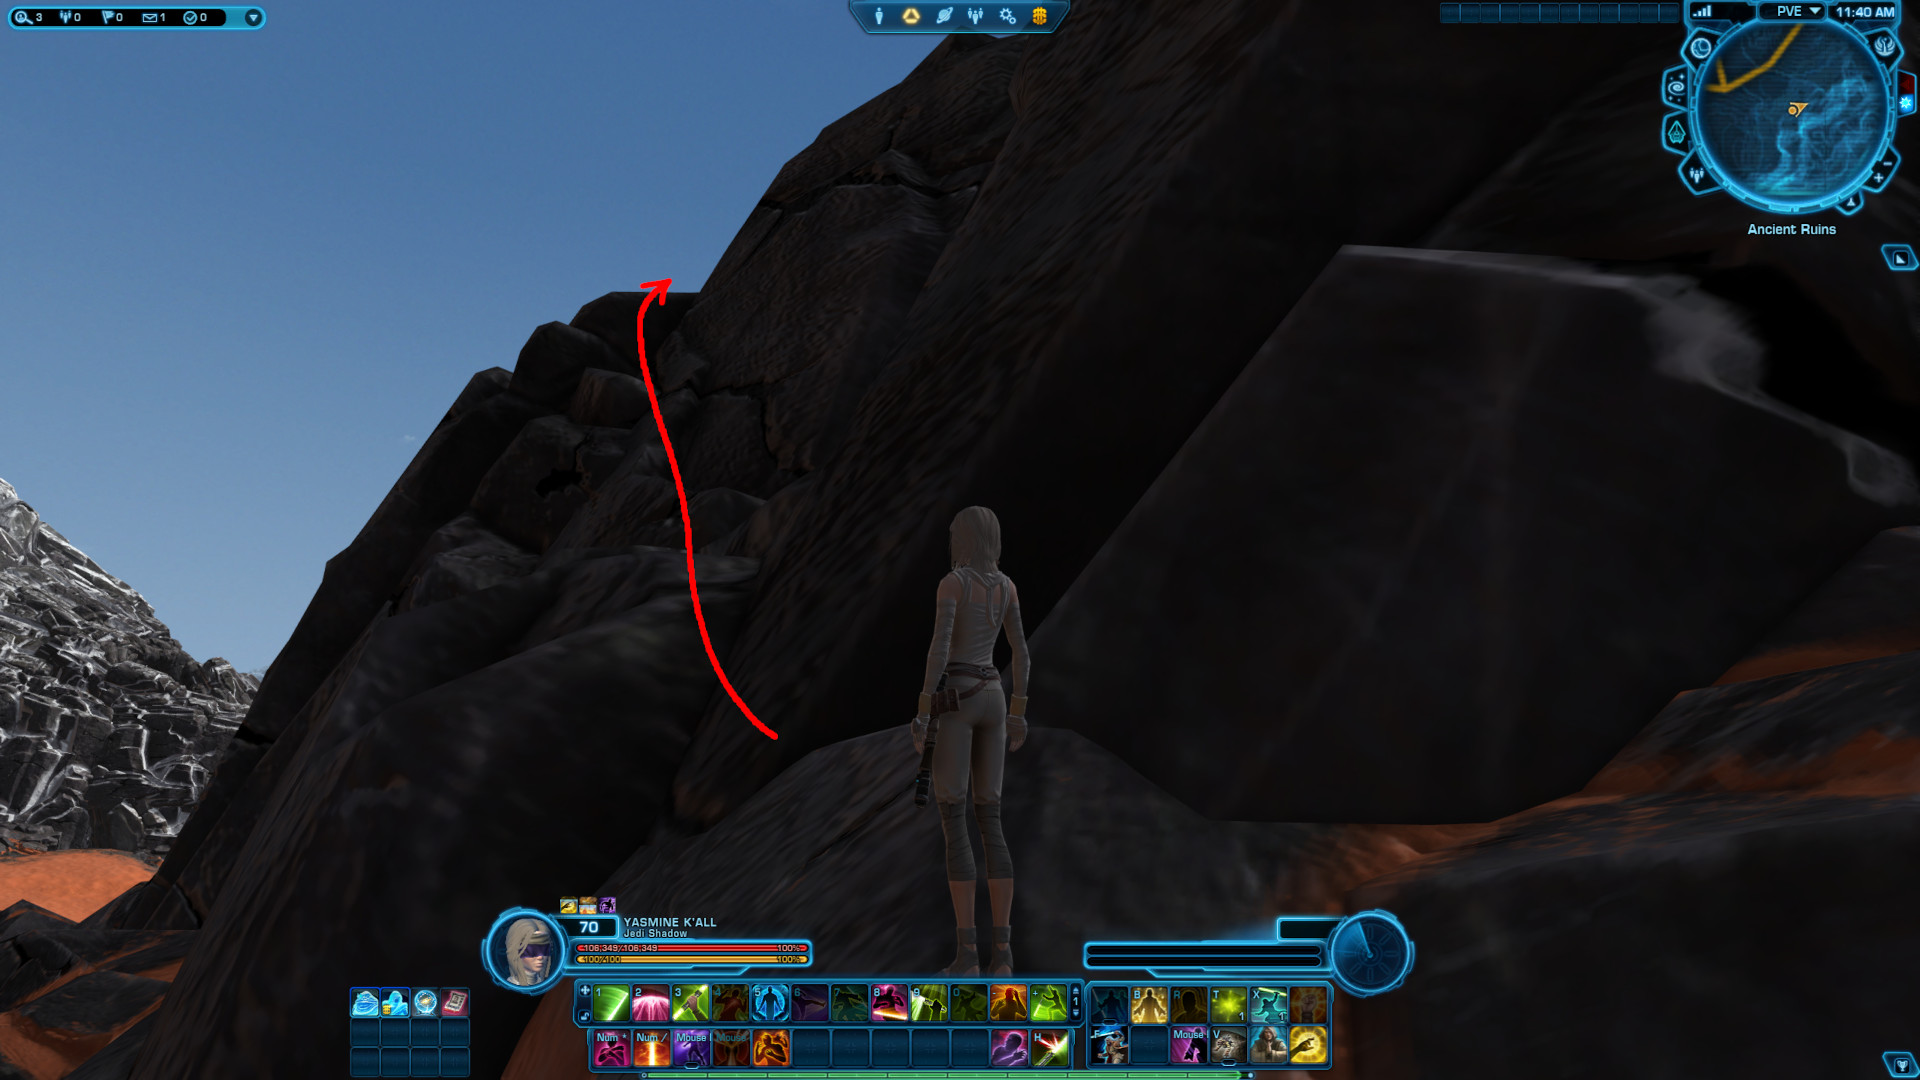
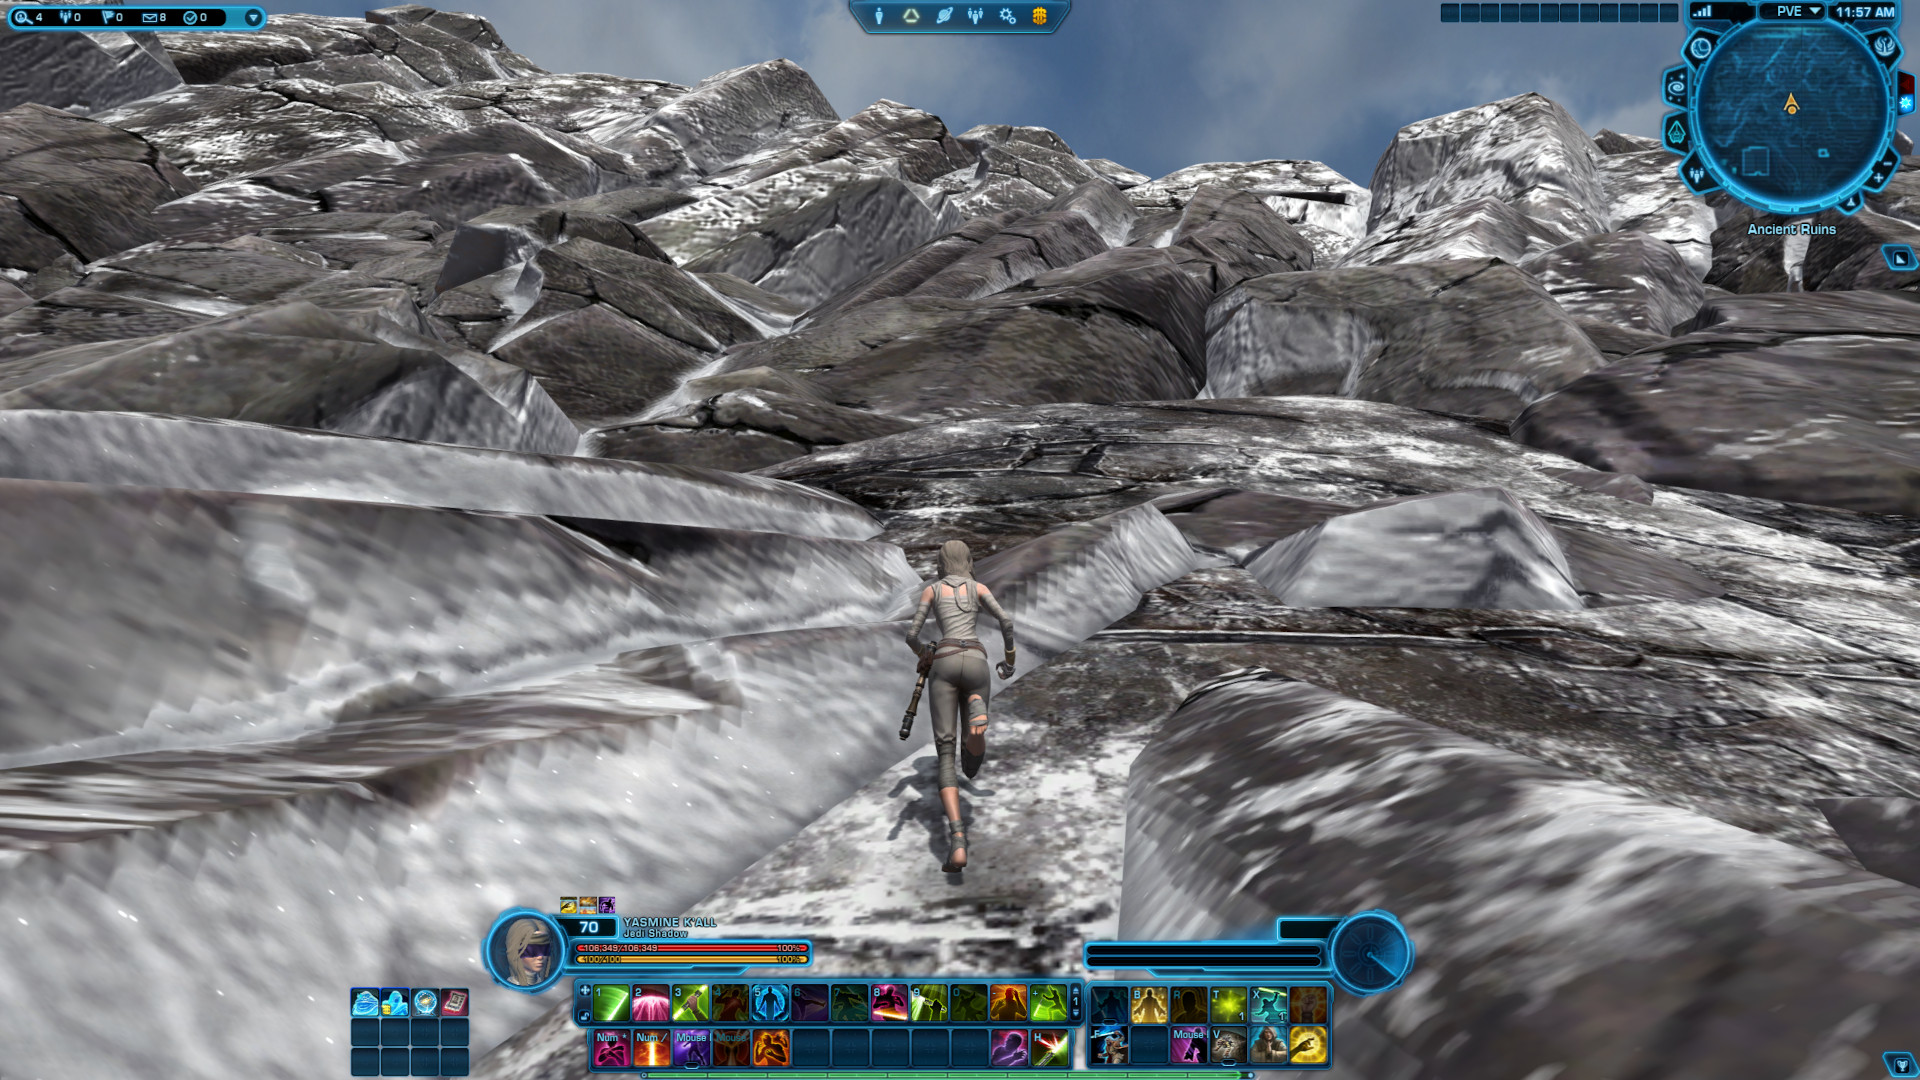
This switch is located on the slope of a rocky mountain in Ancient Ruins. Starting coordinates: 1111, -321.
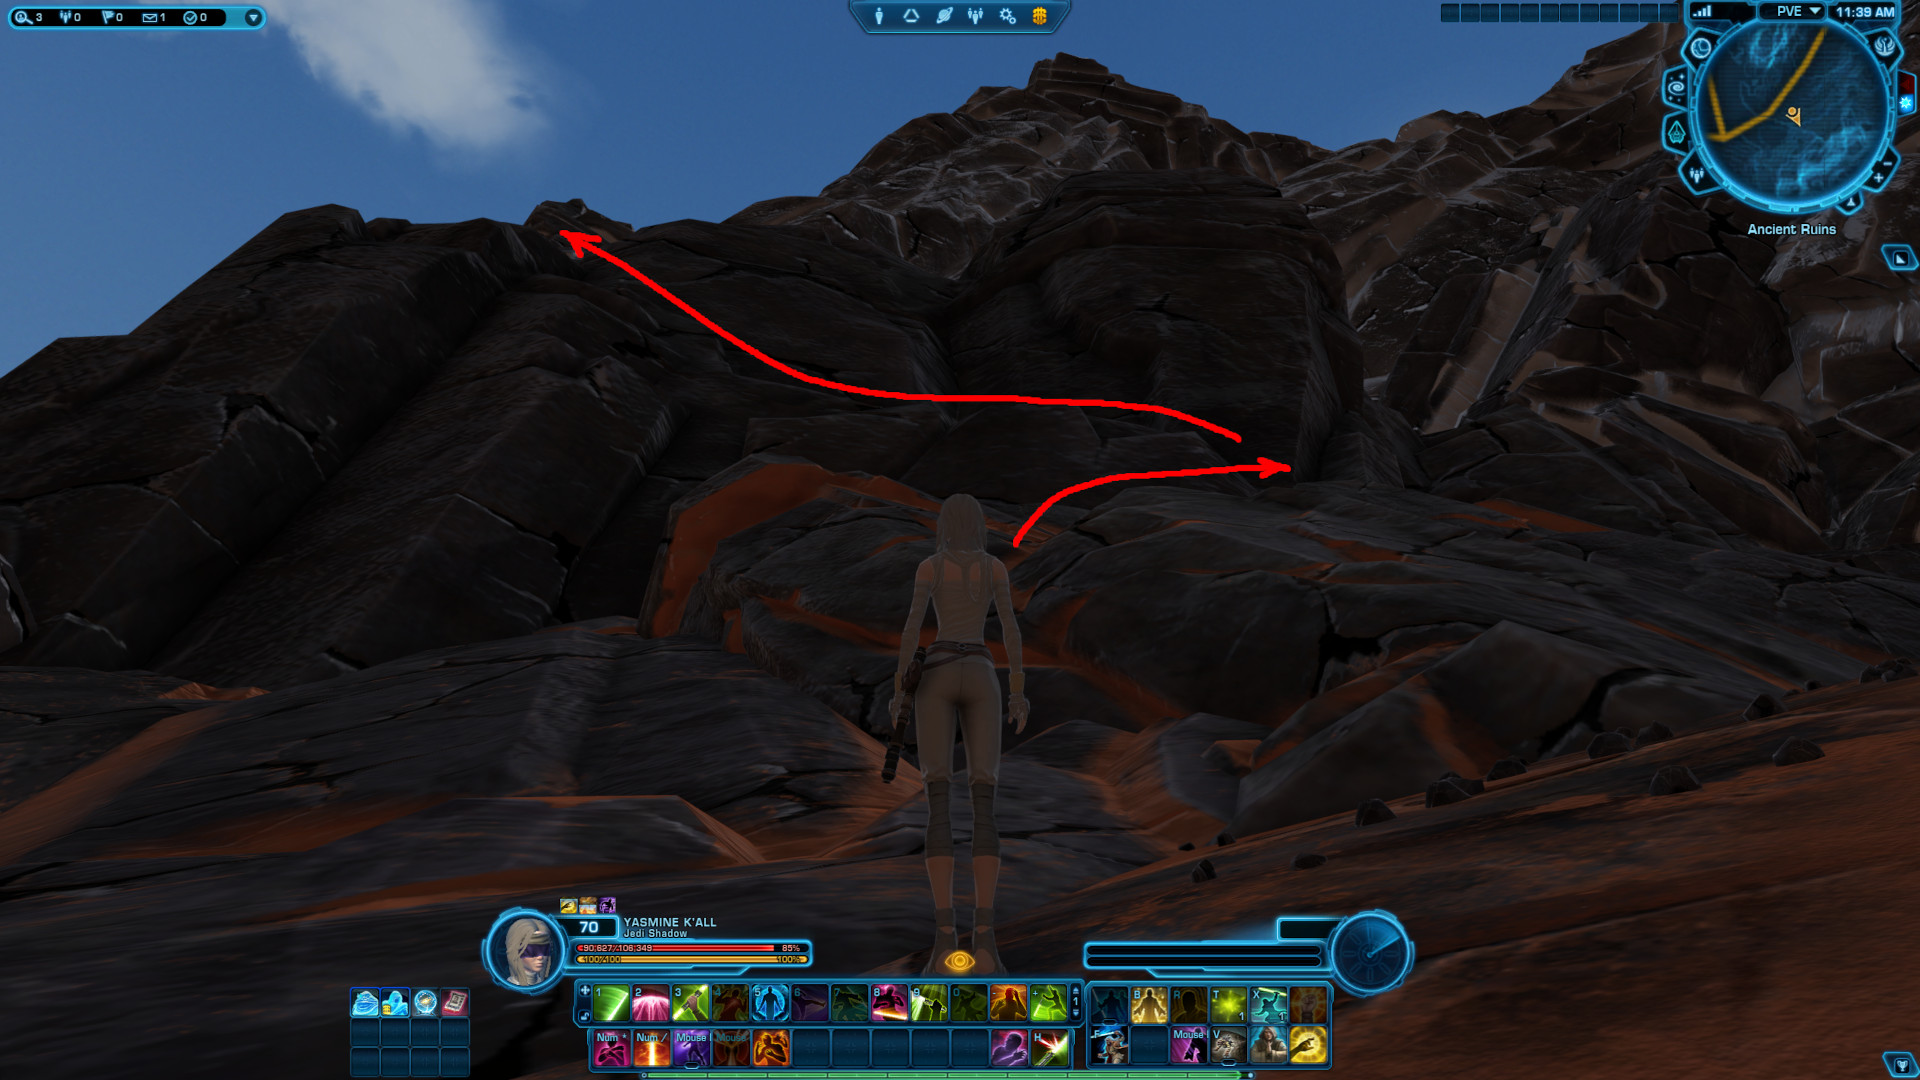
Shimmy up the slope, first to the right, then to the left, then right again. Because of the angle of the mountain, you can easily climb upwards.
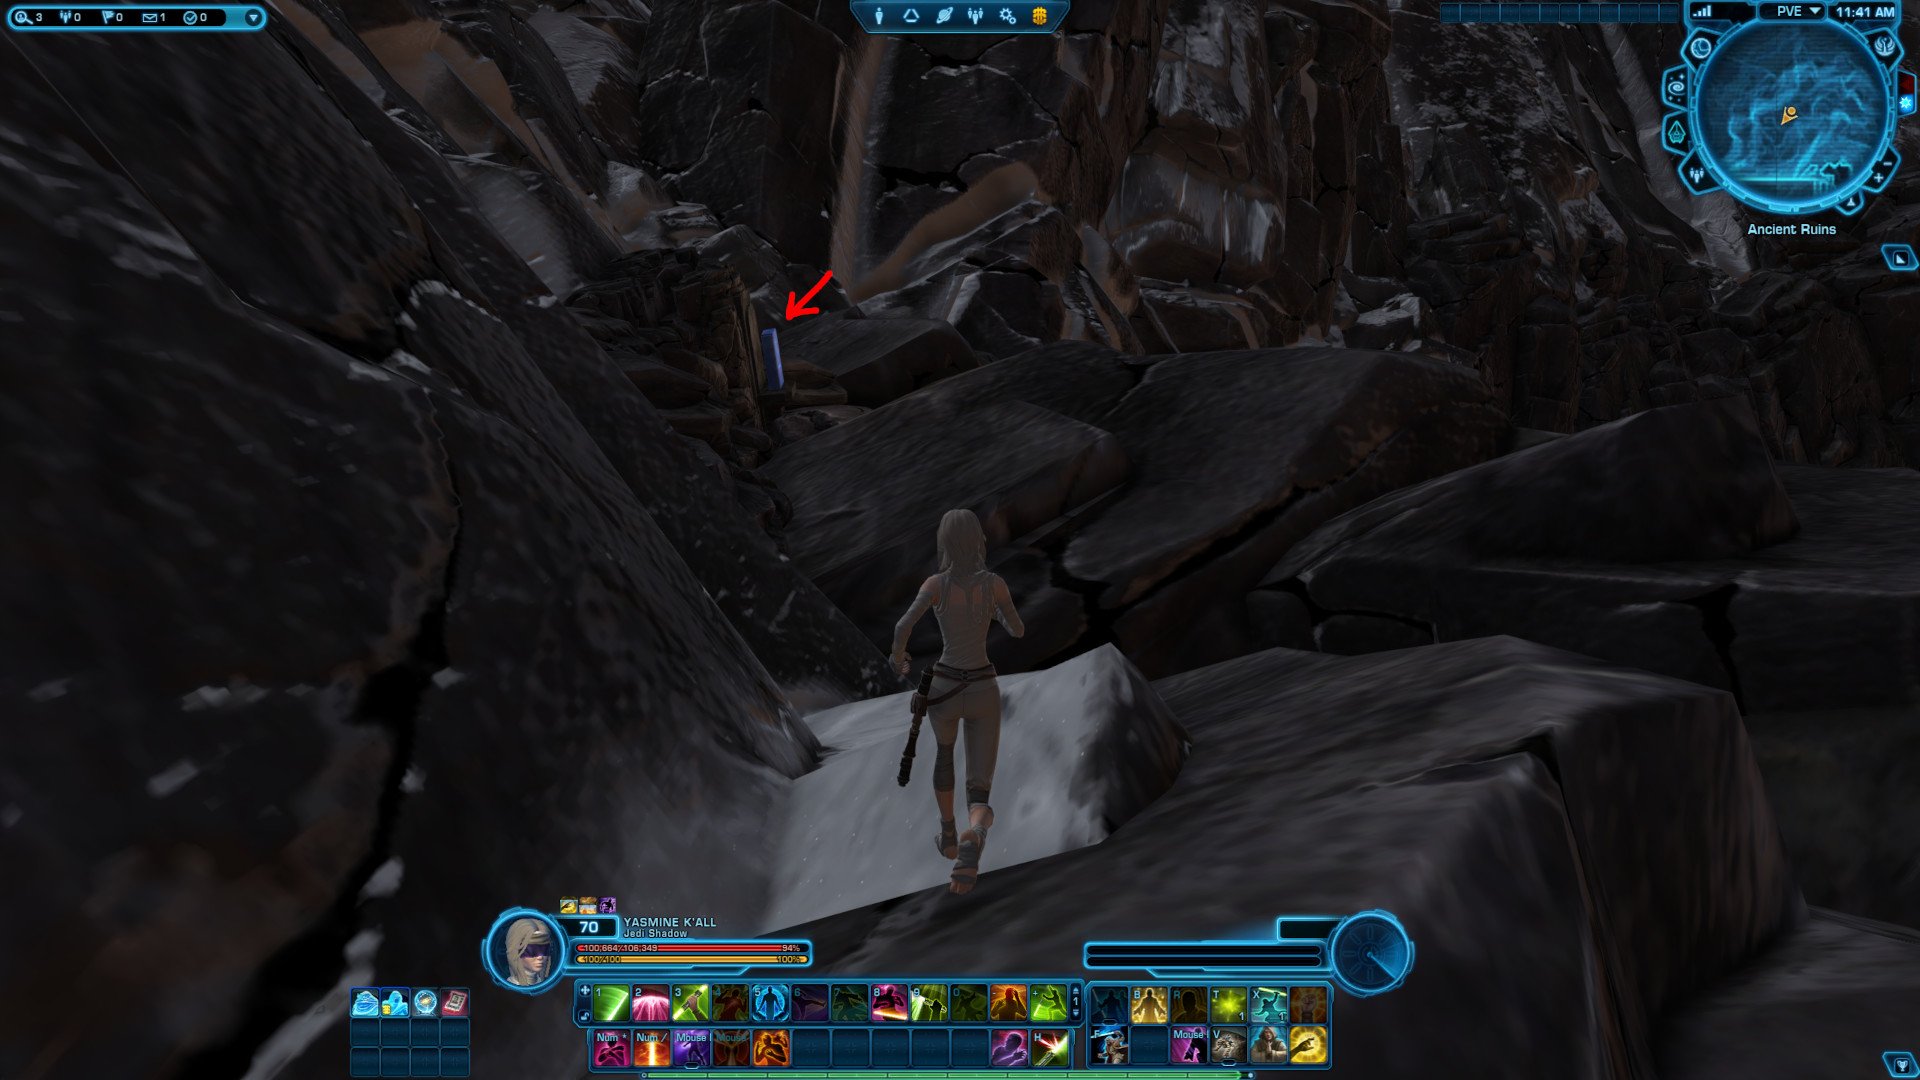
Click the switch. It will cause a pulse and make the switch unavailable for interaction for a moment. Do not click multiple times.
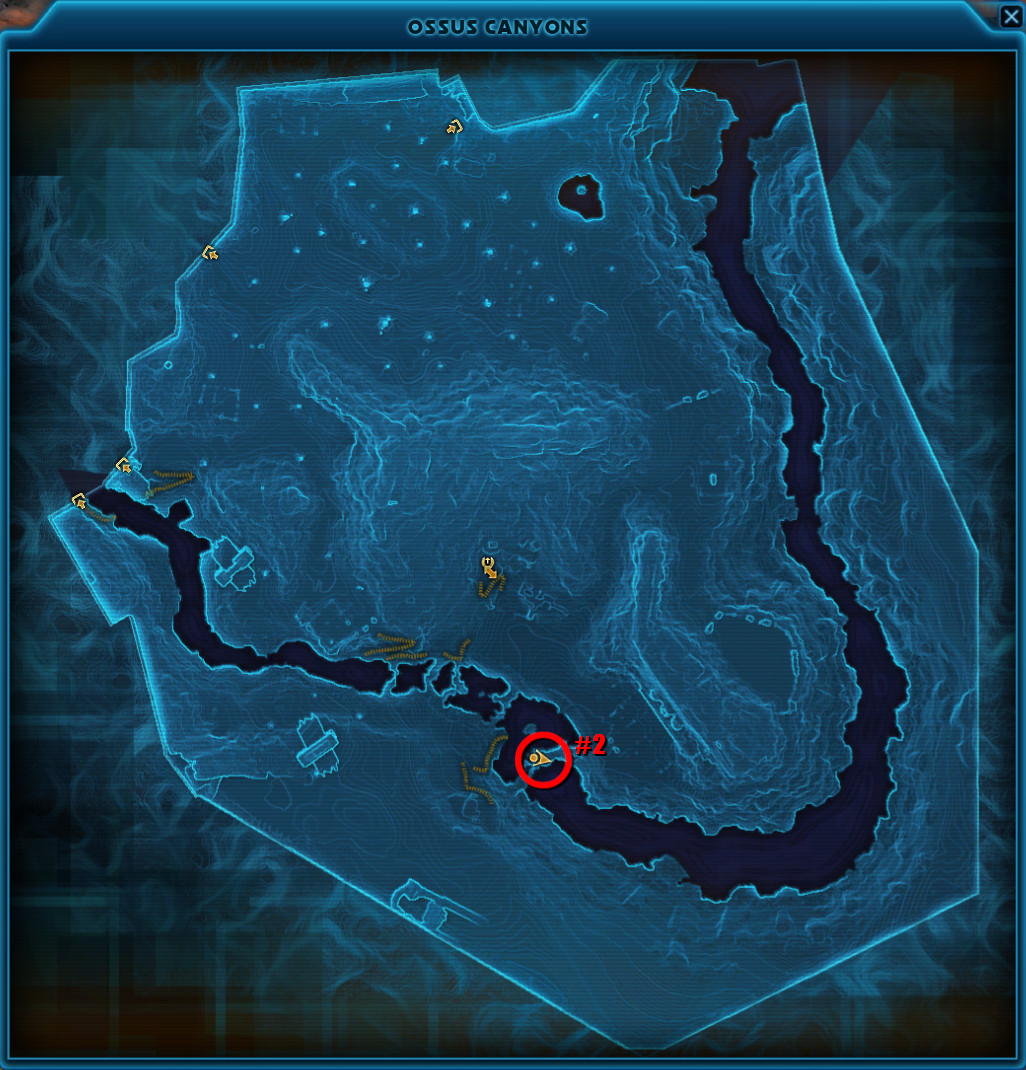
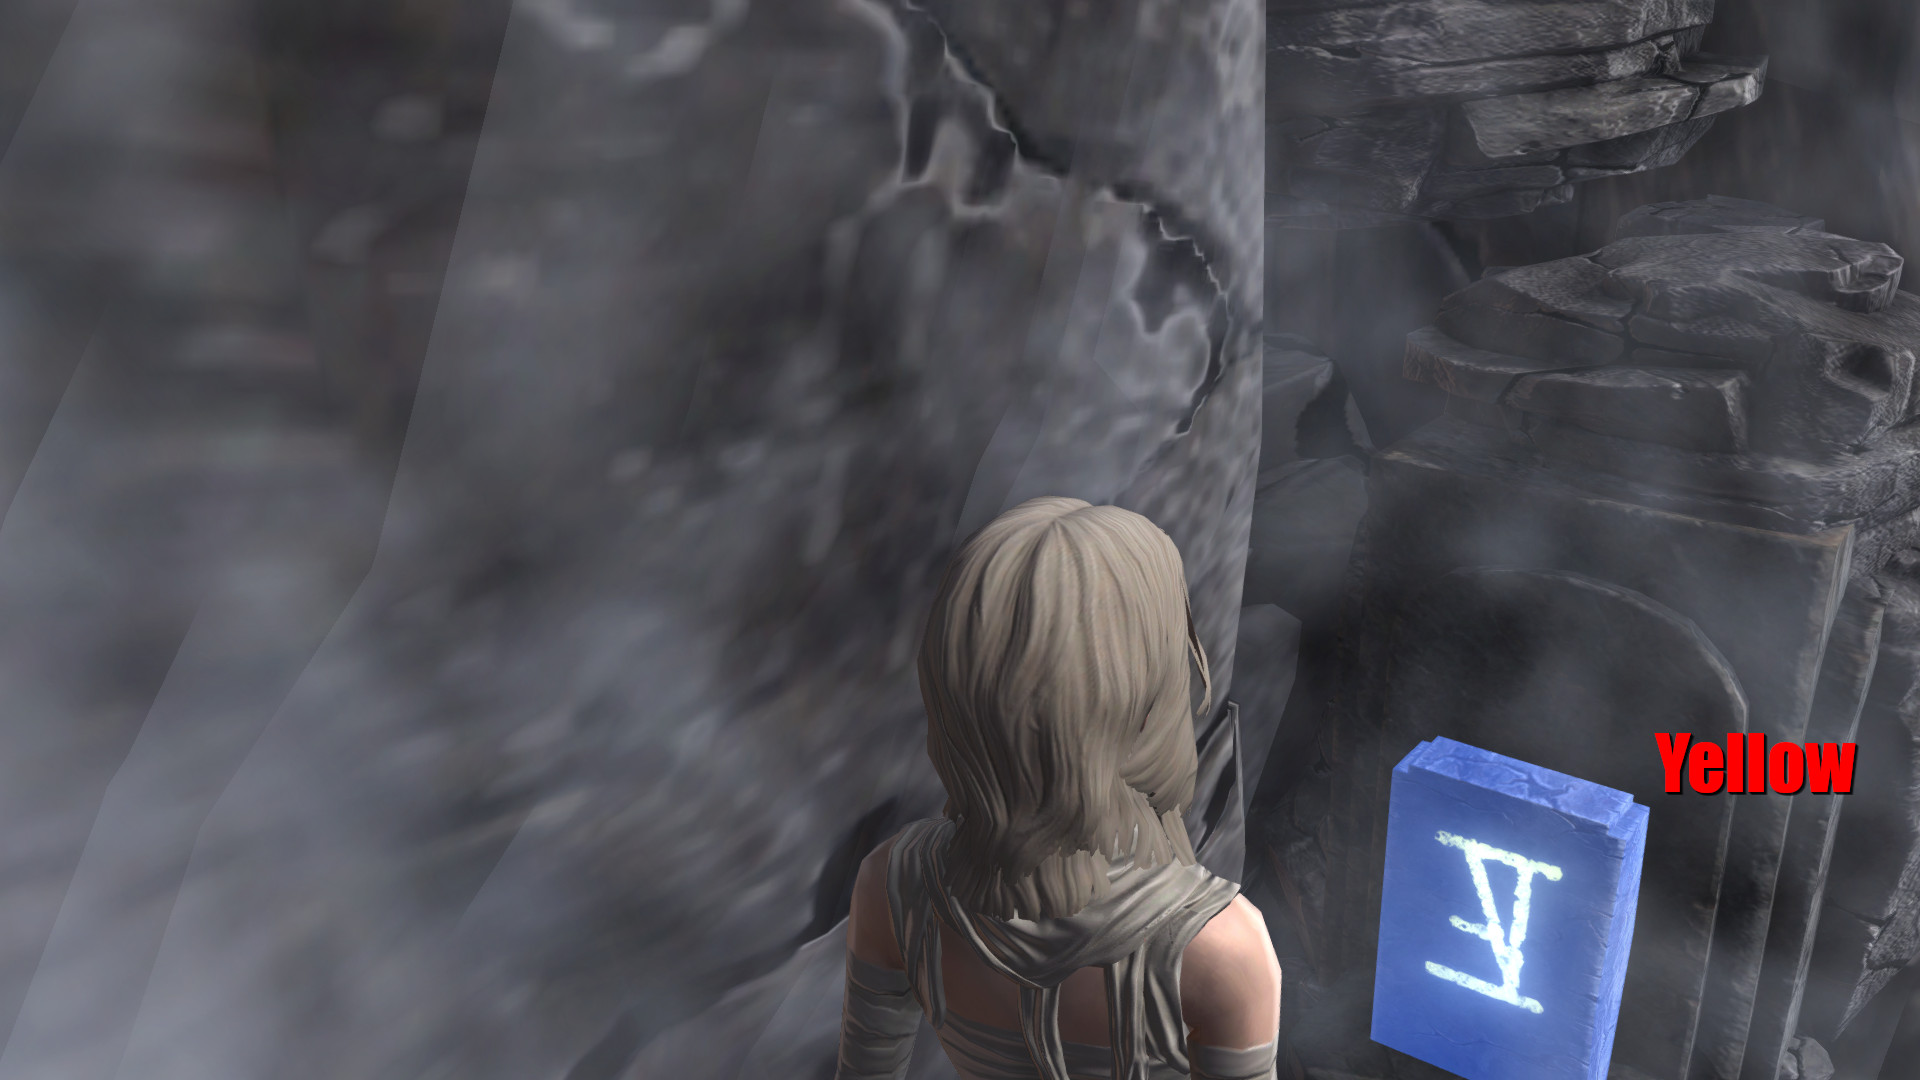
Switch #2 (Yellow)
This switch is located inside one of the last waterfalls going east in Ossus Canyons. Starting coordinates: 1064, 640.
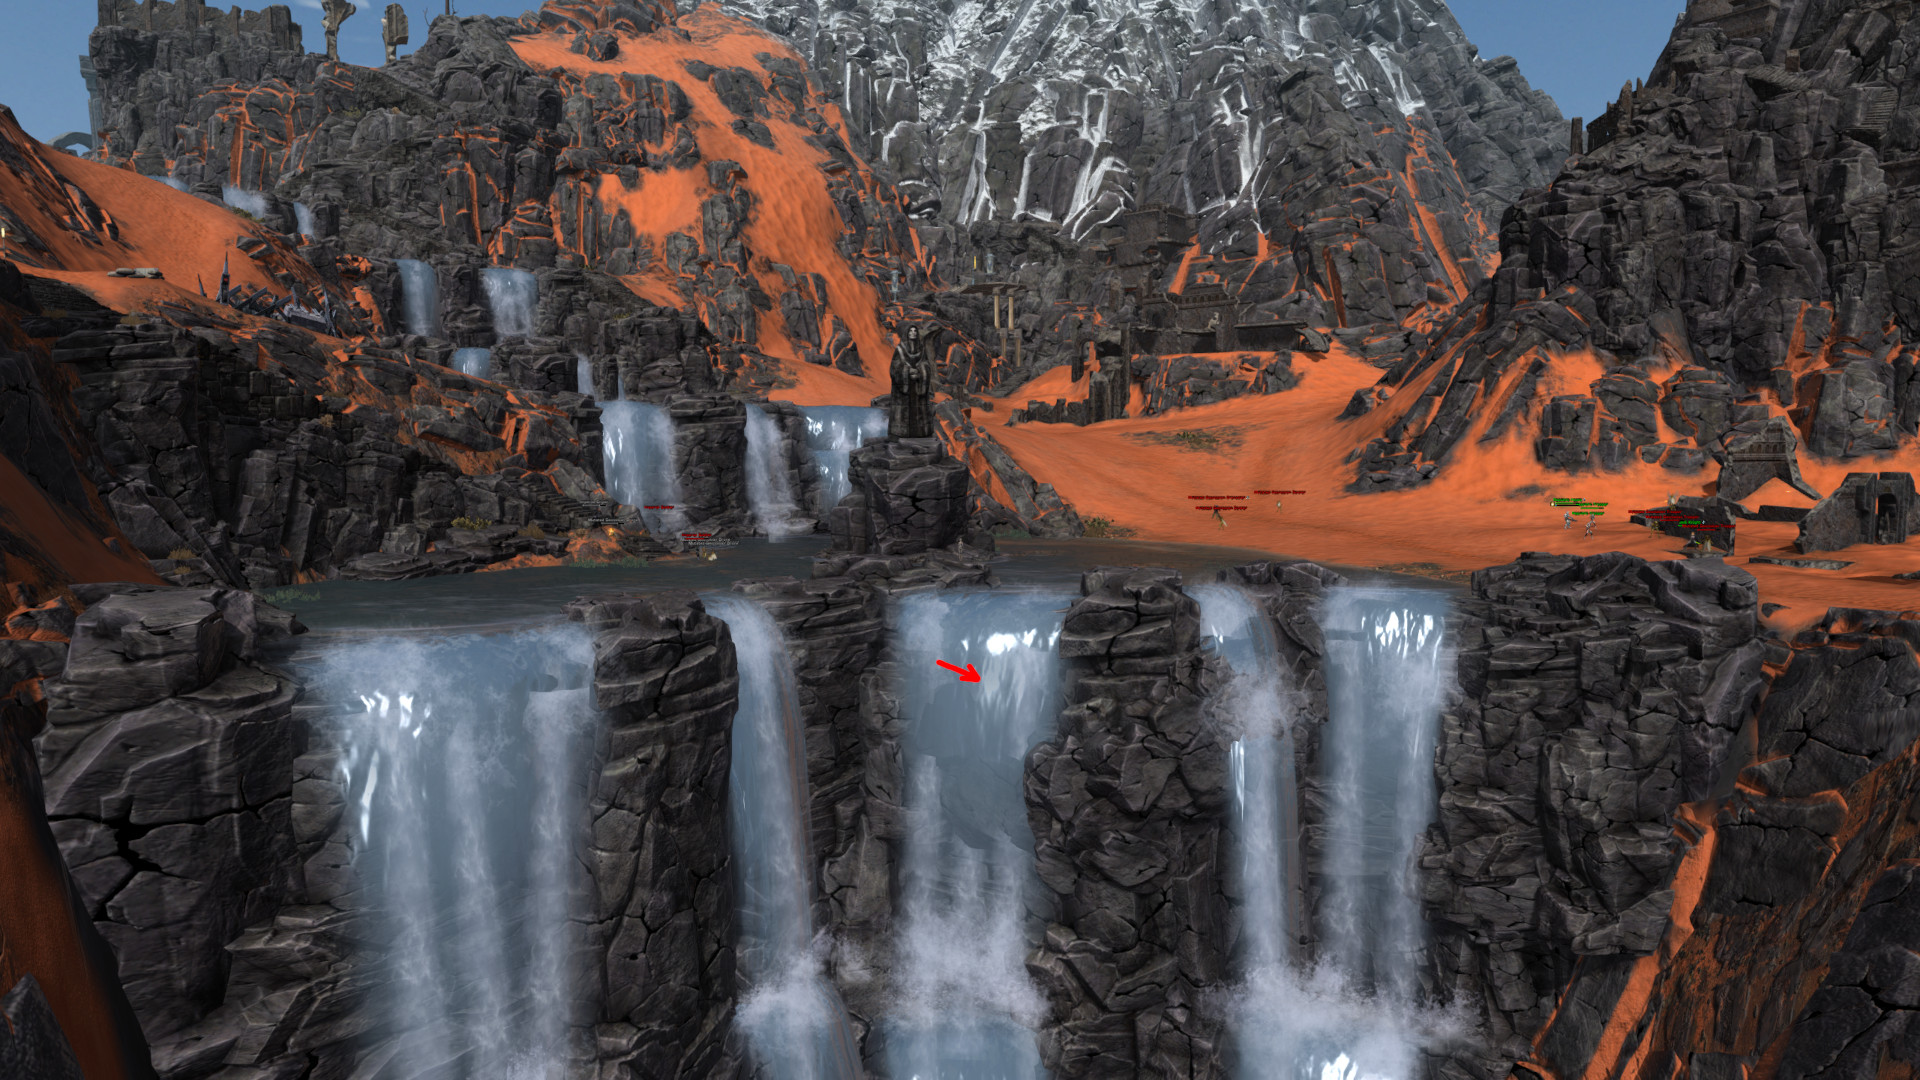
Jump from the right side of the middle waterfall (three from either side) onto the small ledge inside the waterfall.
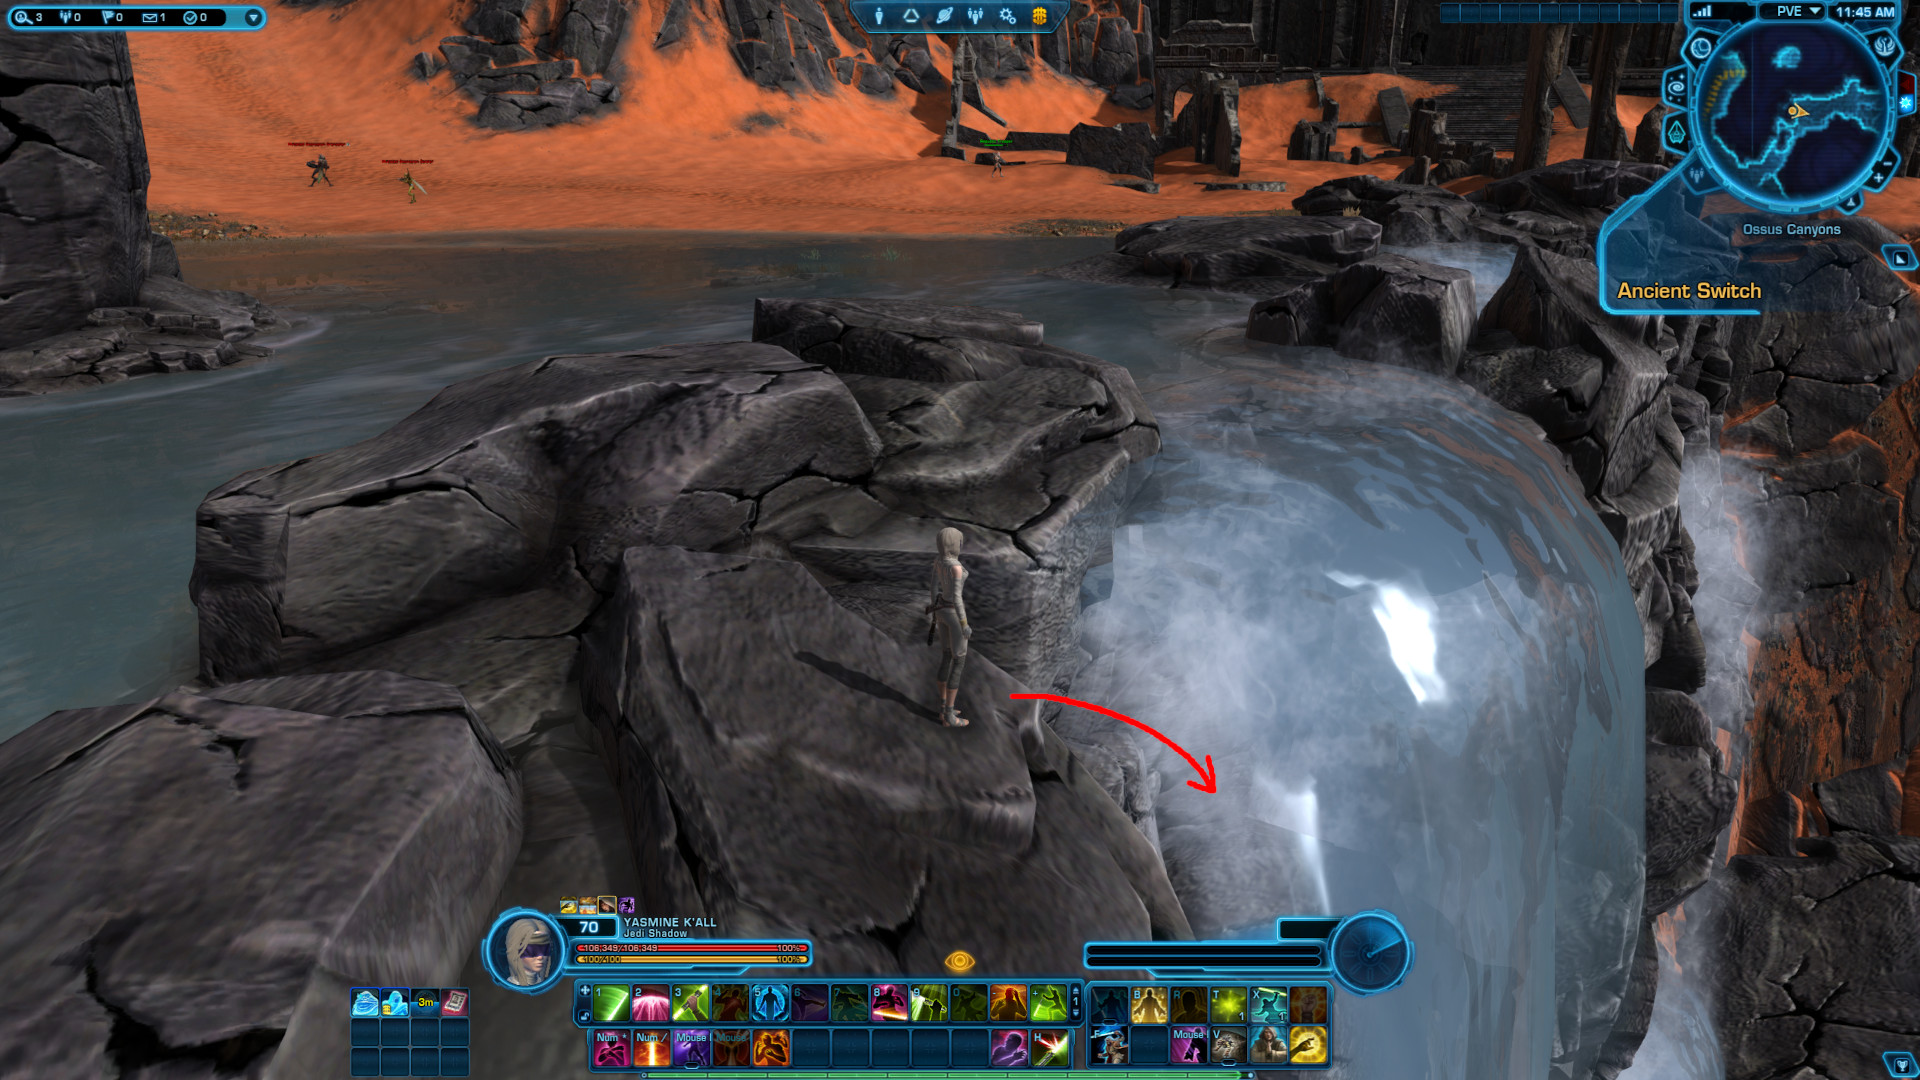
Click the switch. It will cause a pulse and make the switch unavailable for interaction for a moment. Do not click multiple times.
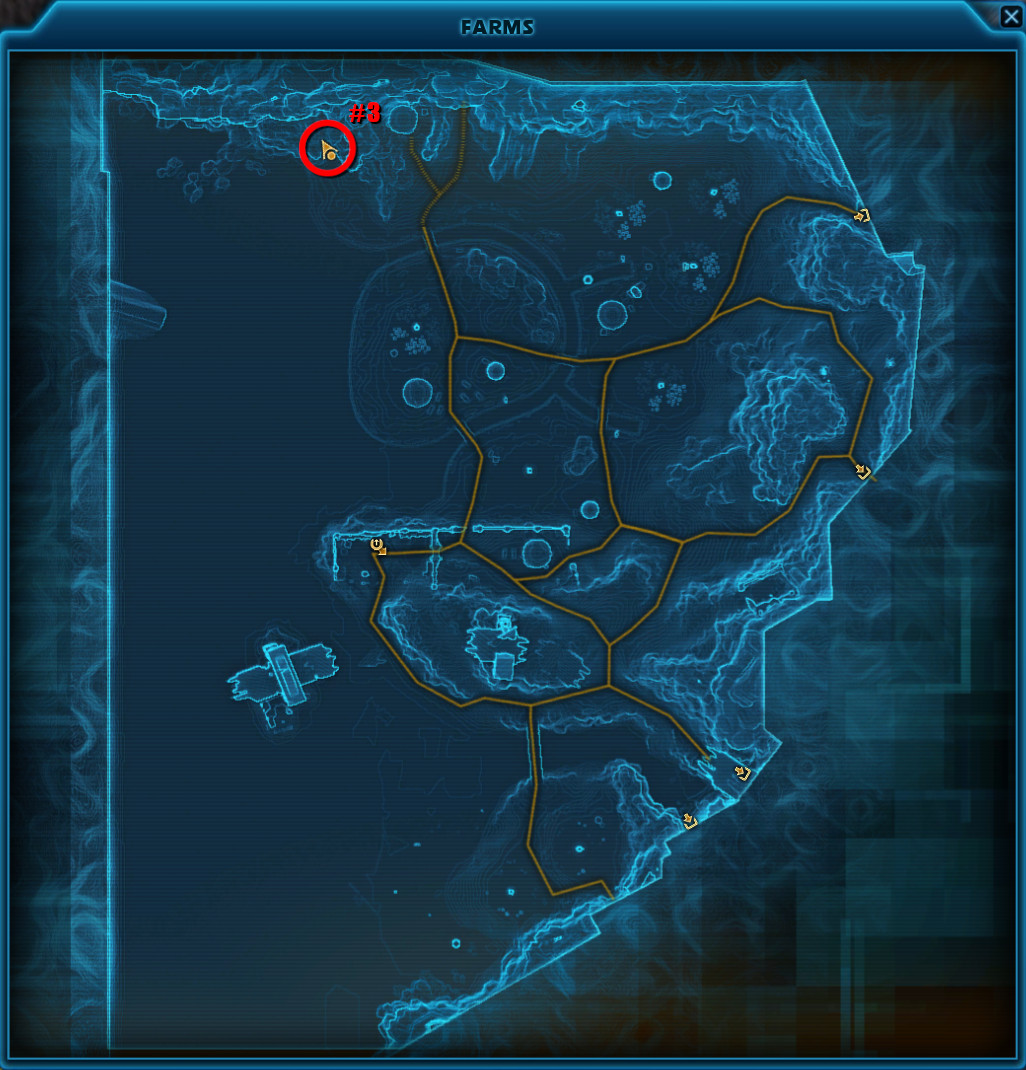
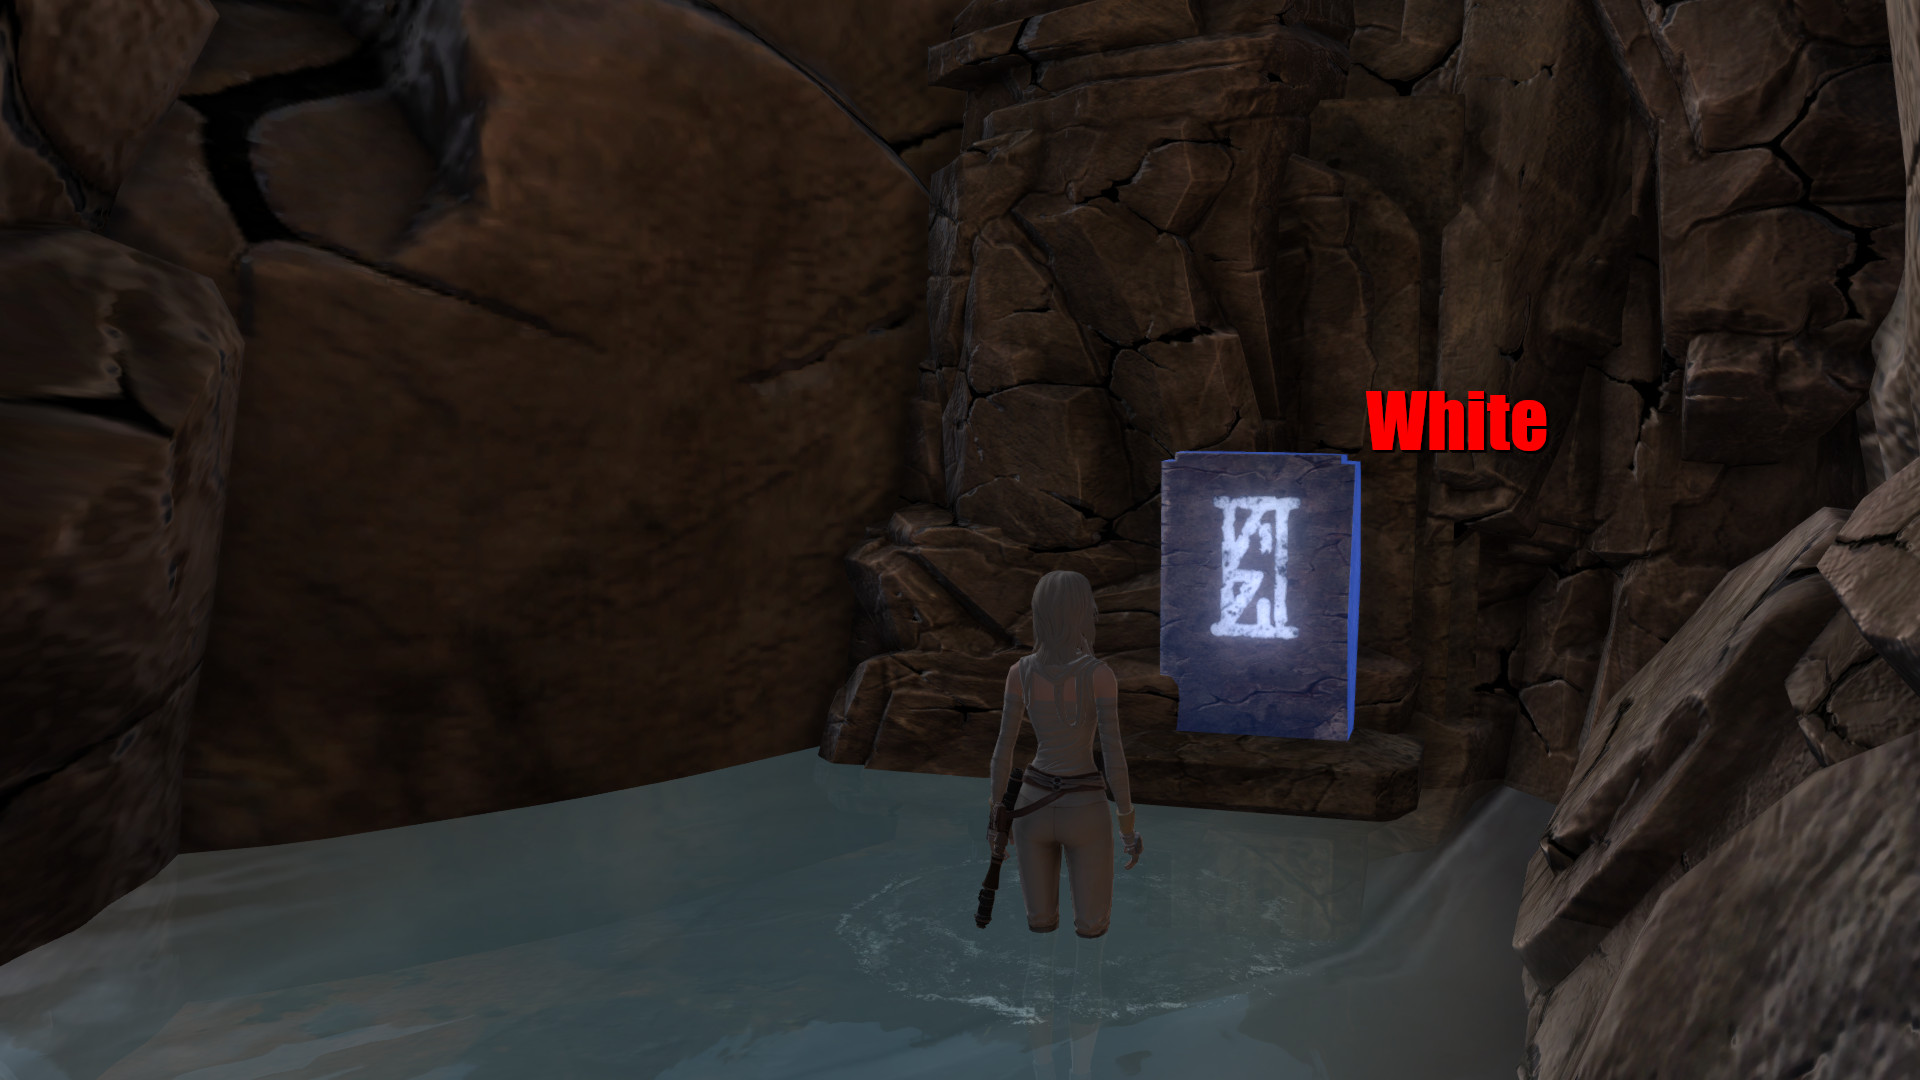
Switch #3 (White)
This switch is located inside a small cave in the north-west corner of the Farms map. Starting coordinates: 220, -229.
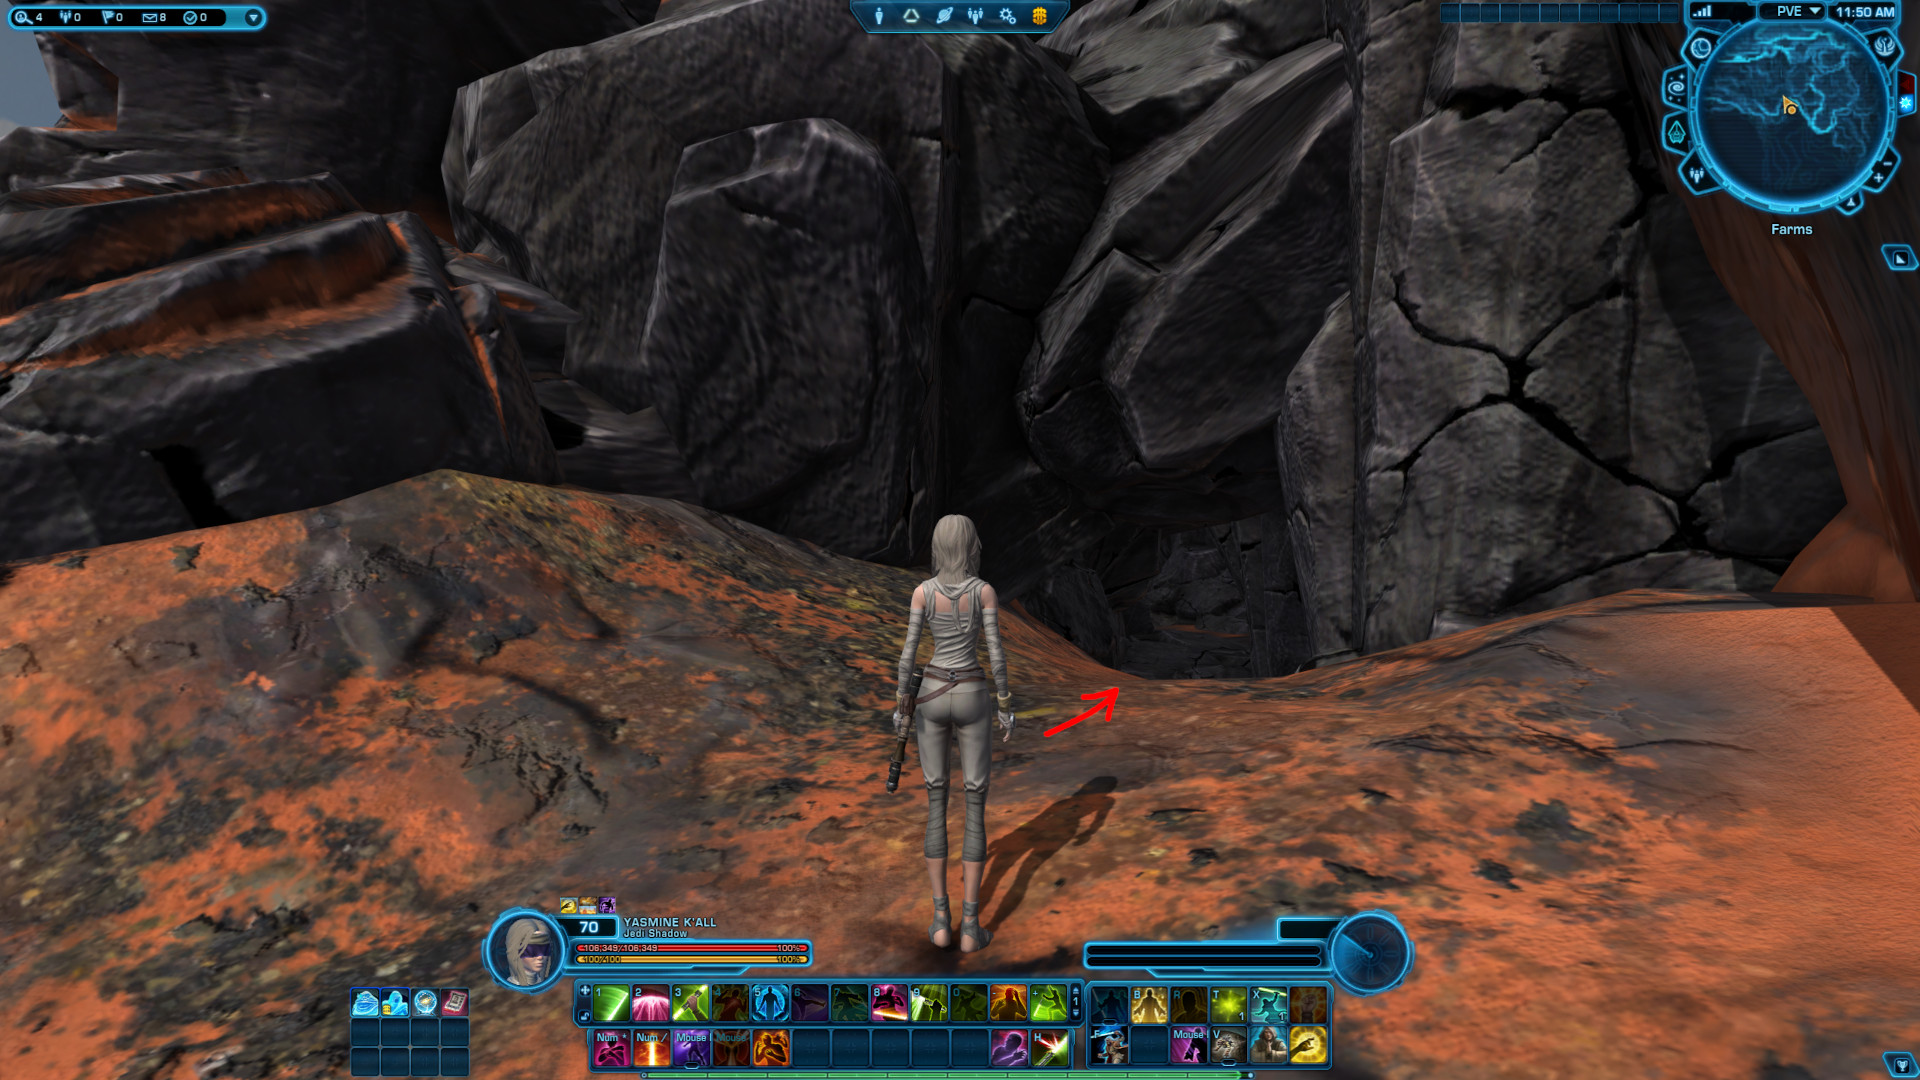
Click the switch. It will cause a pulse and make the switch unavailable for interaction for a moment. Do not click multiple times.
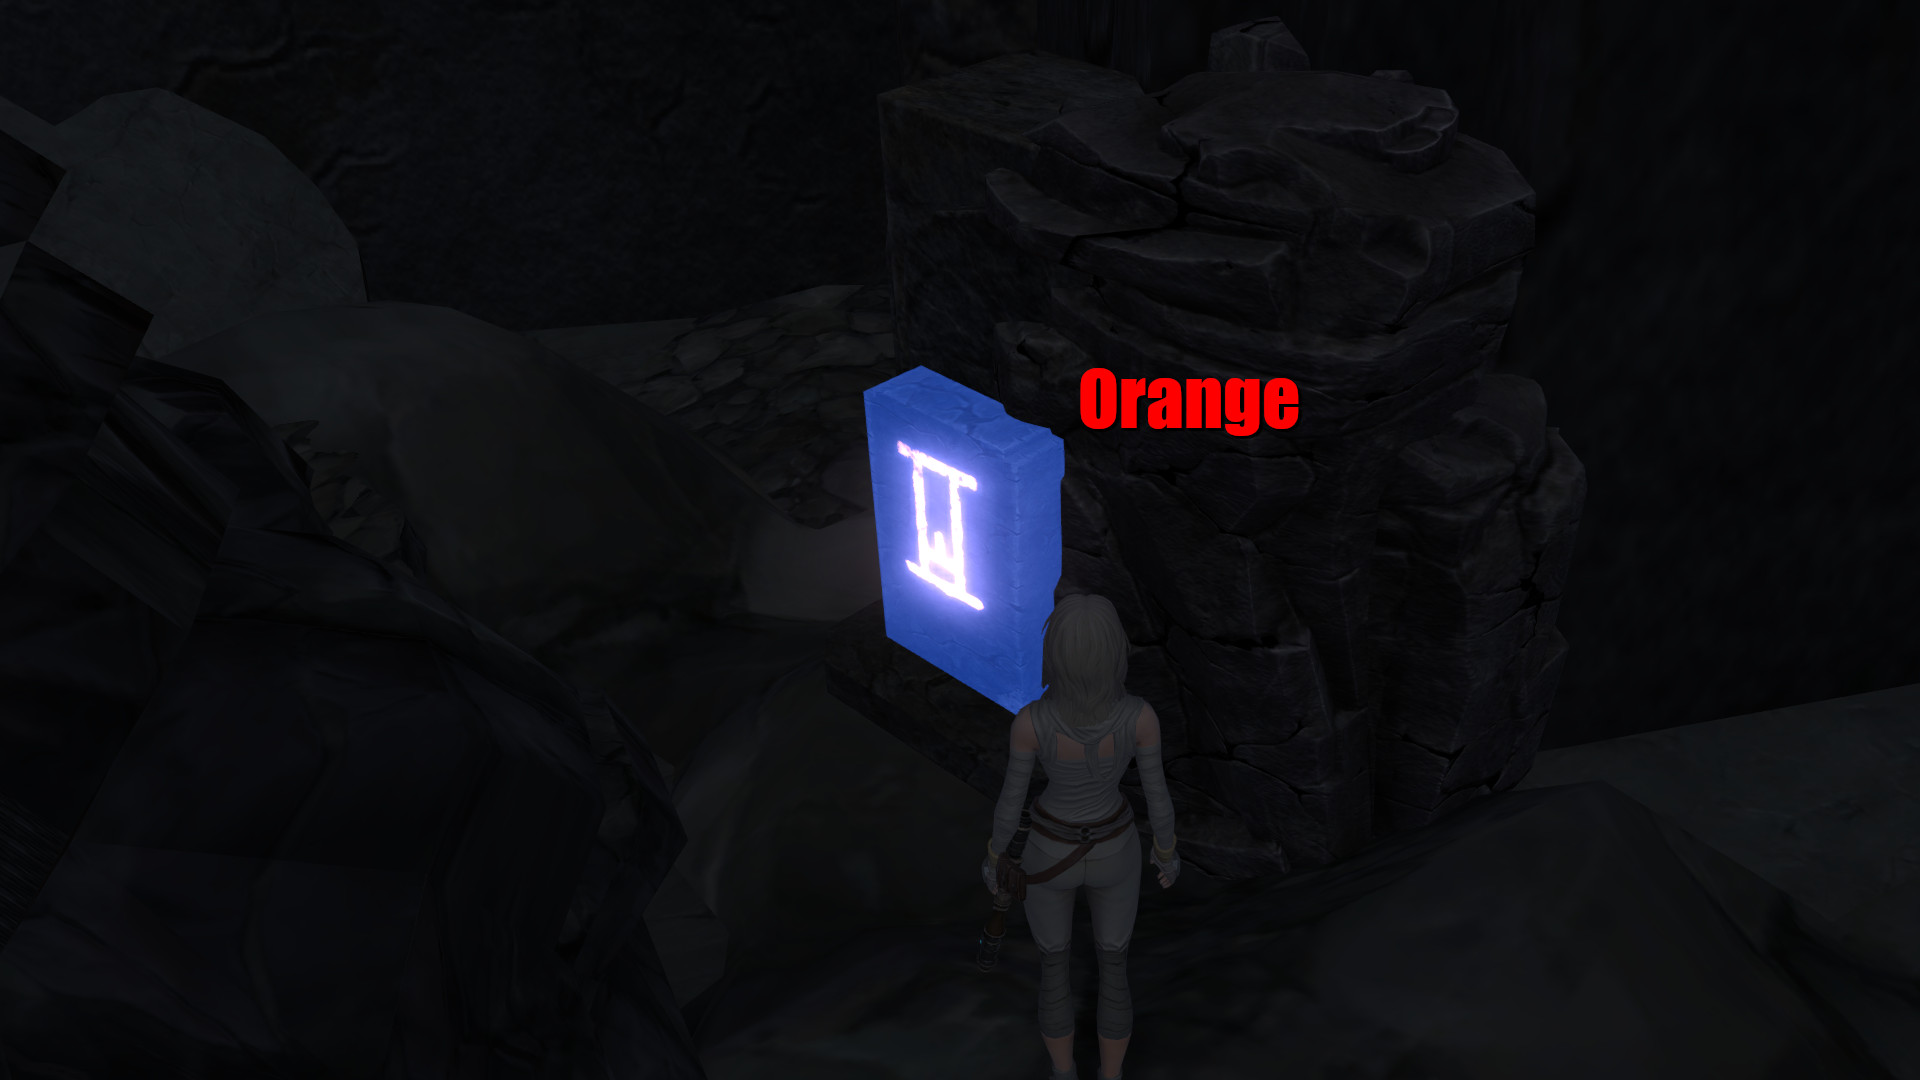
Switch #4 (Orange)
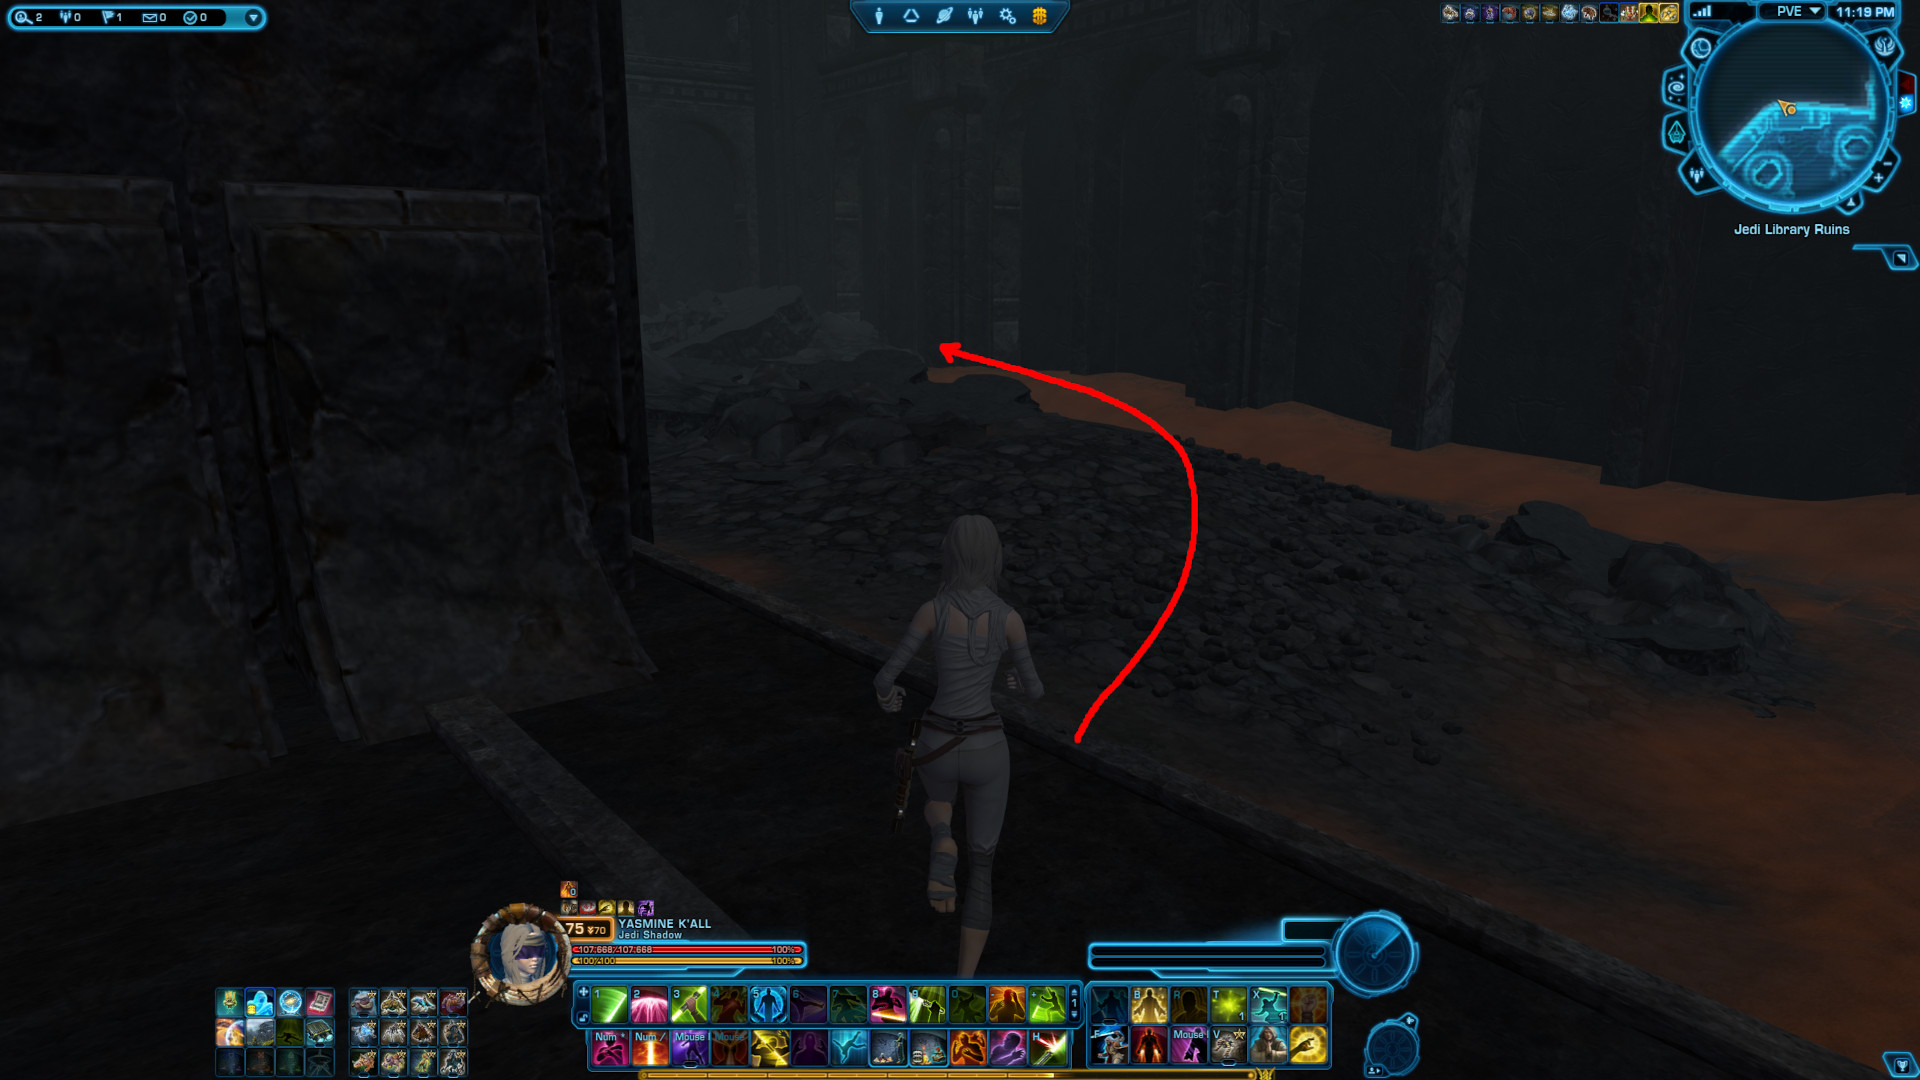
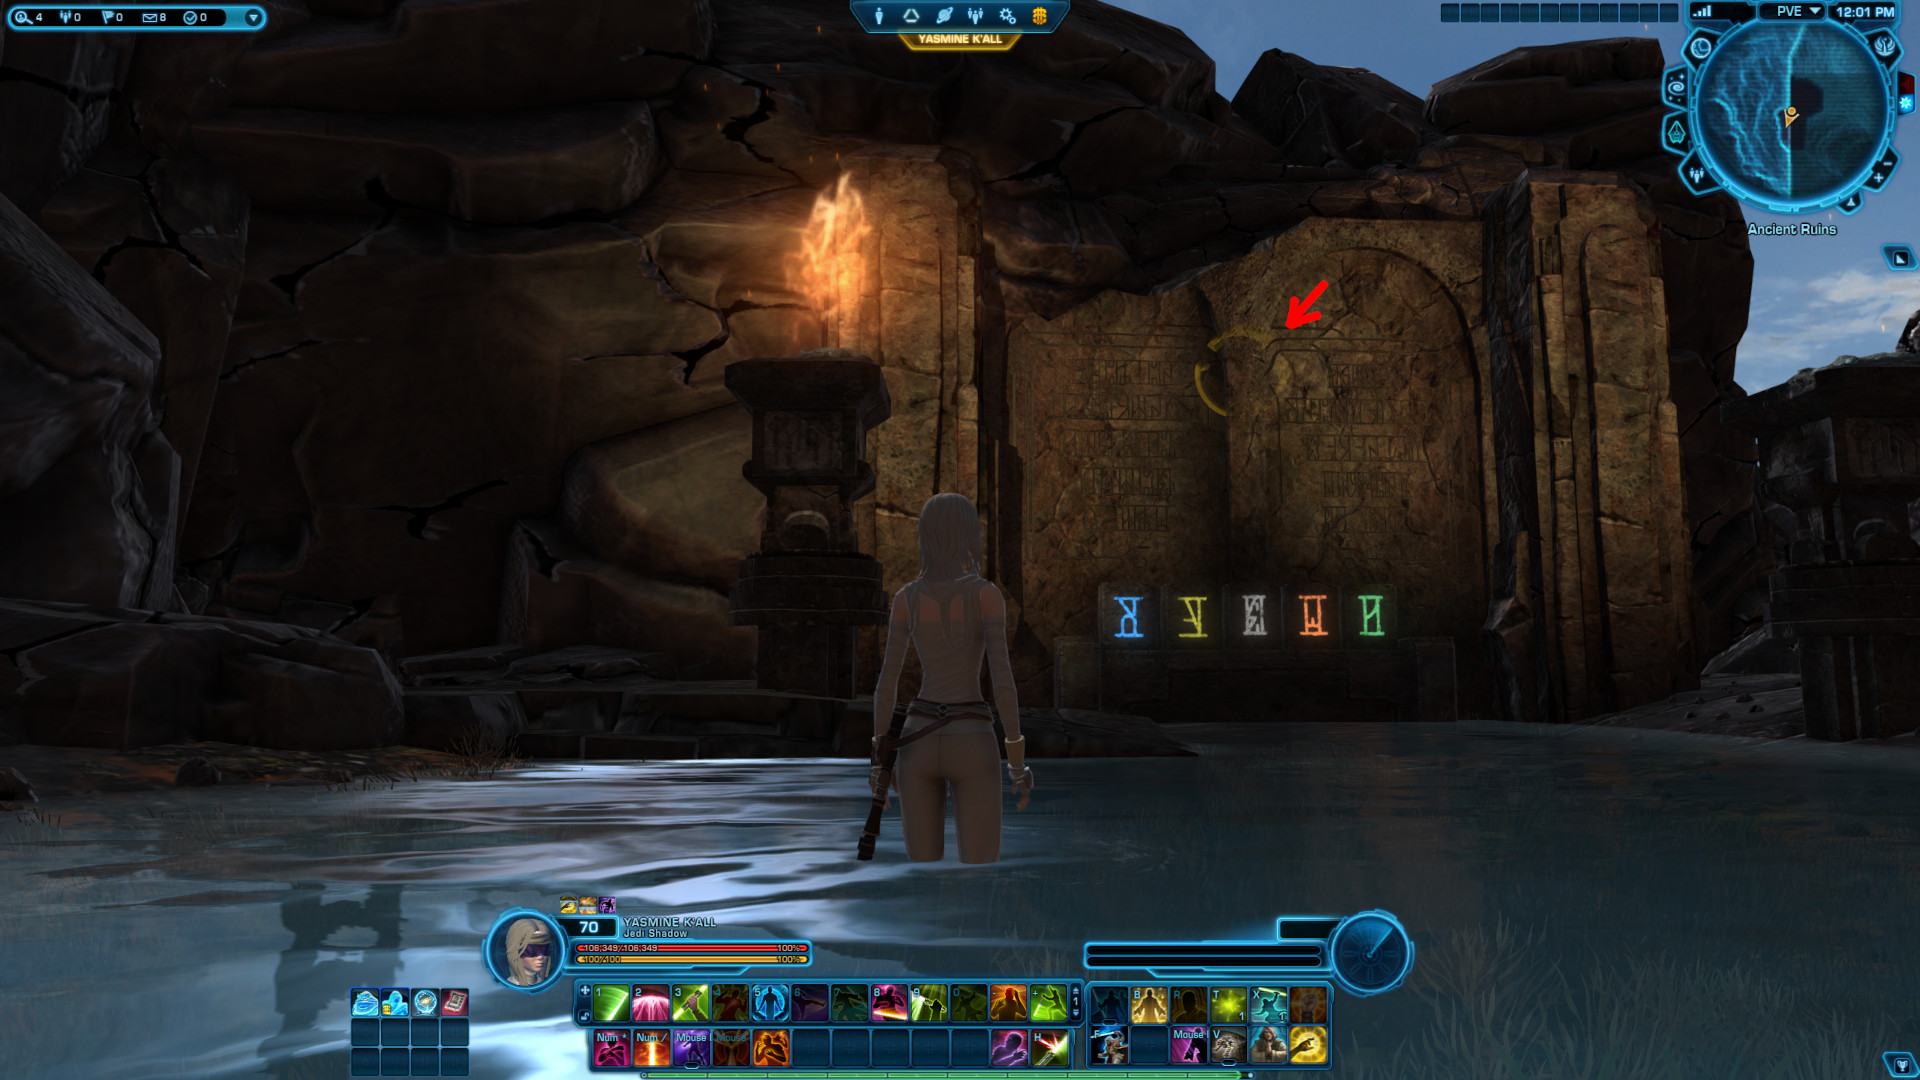
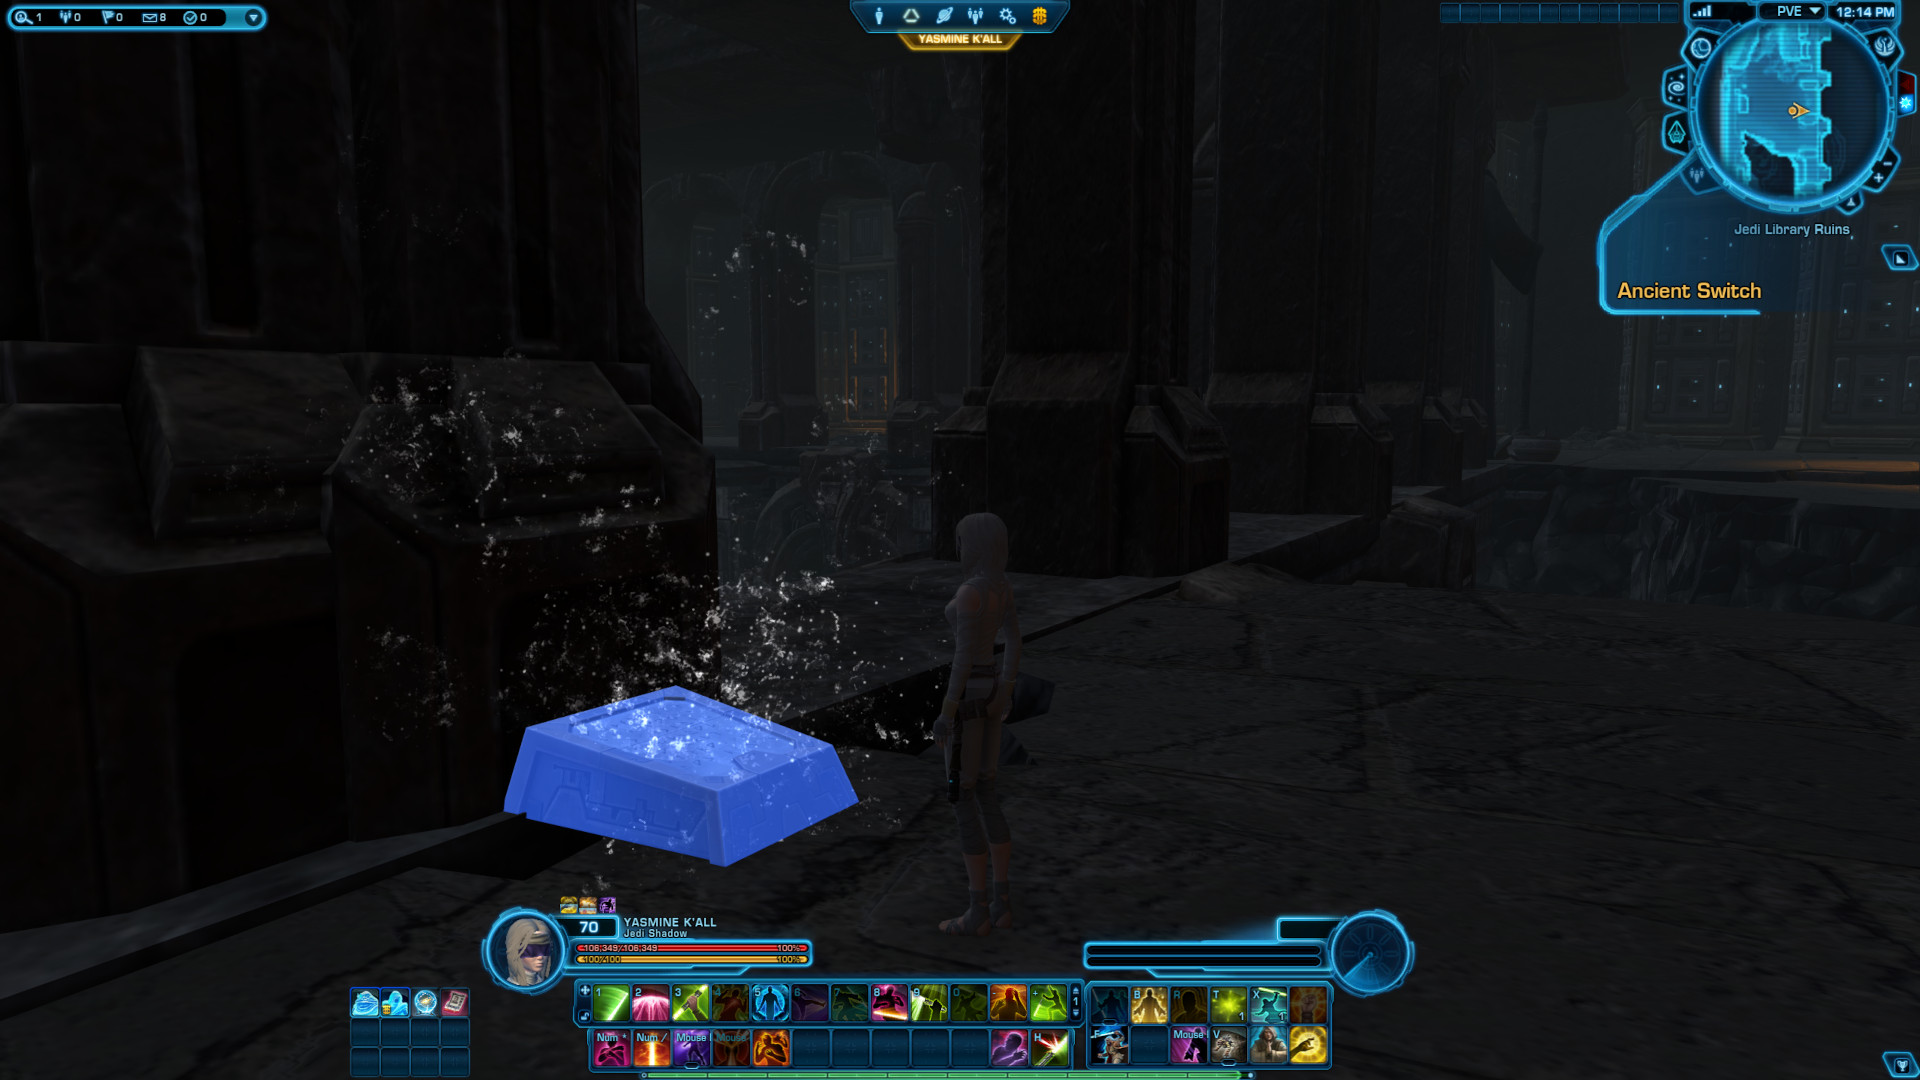
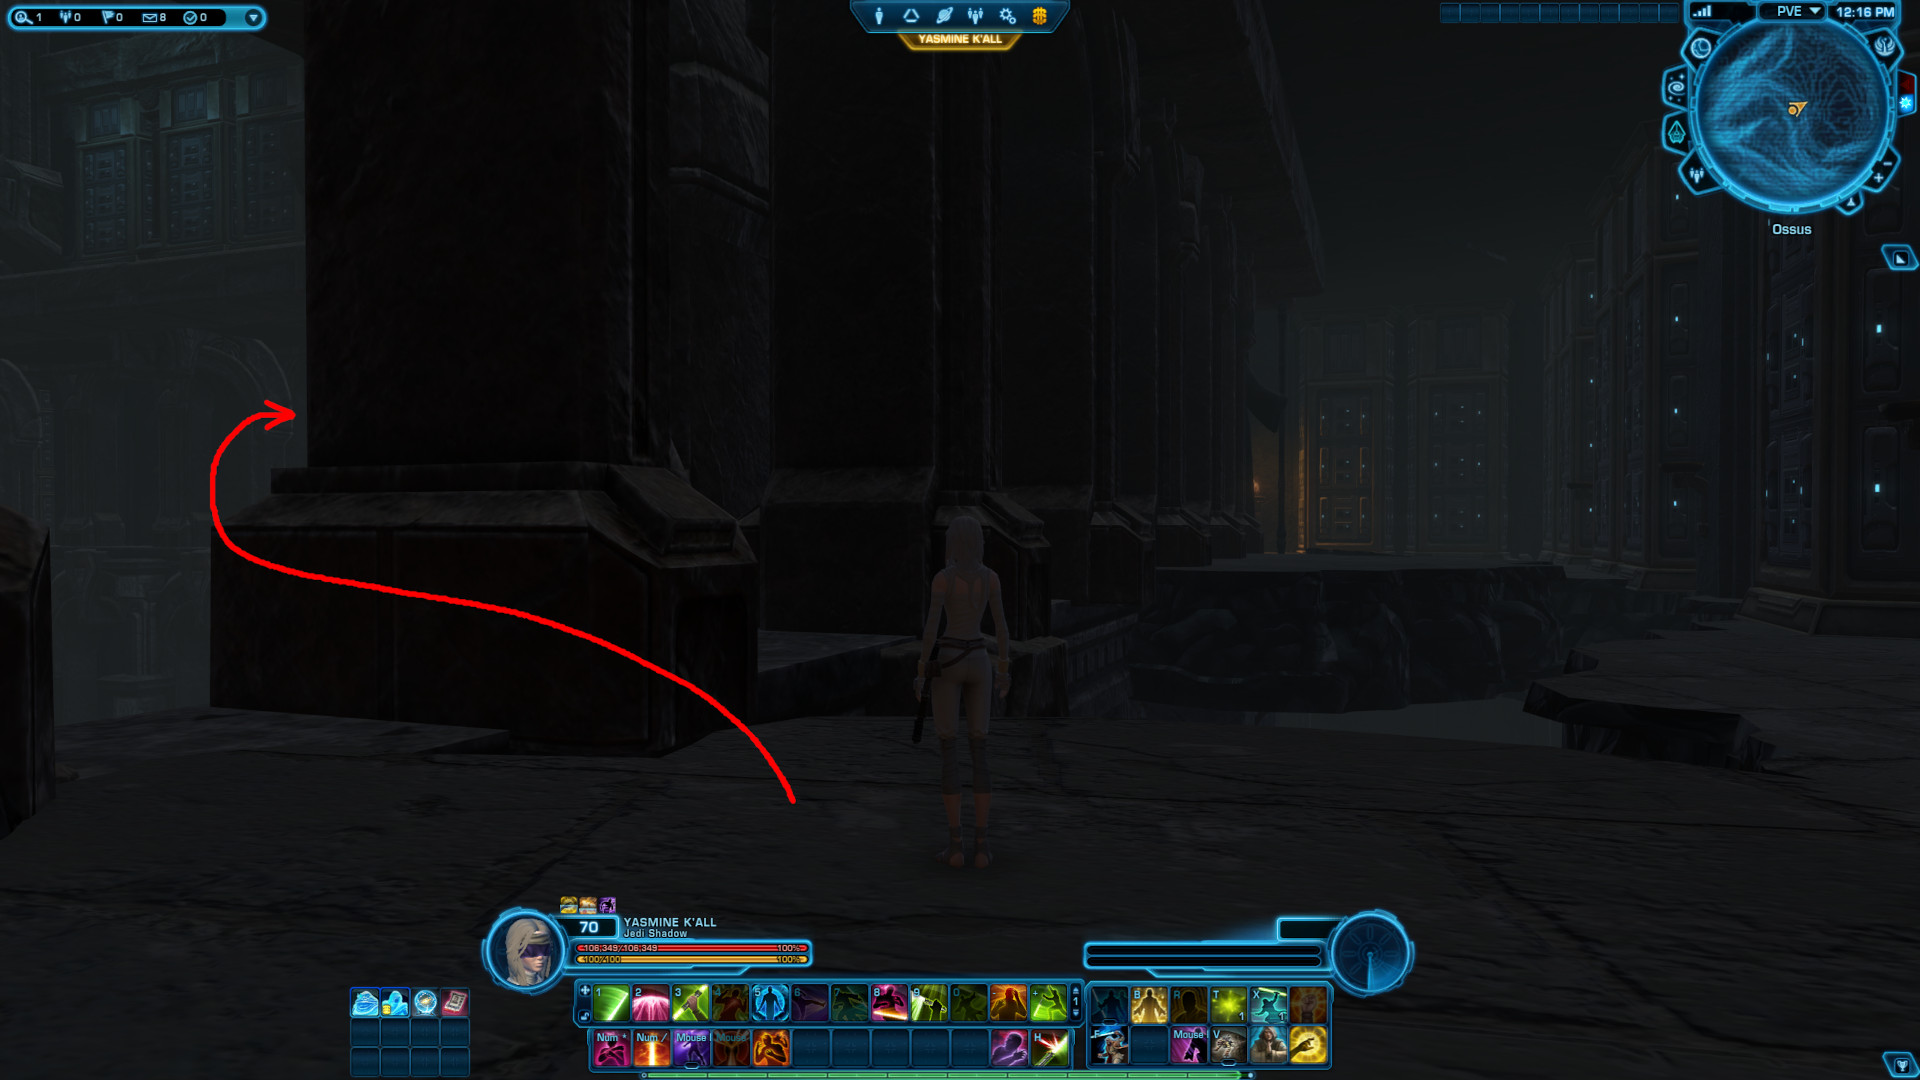
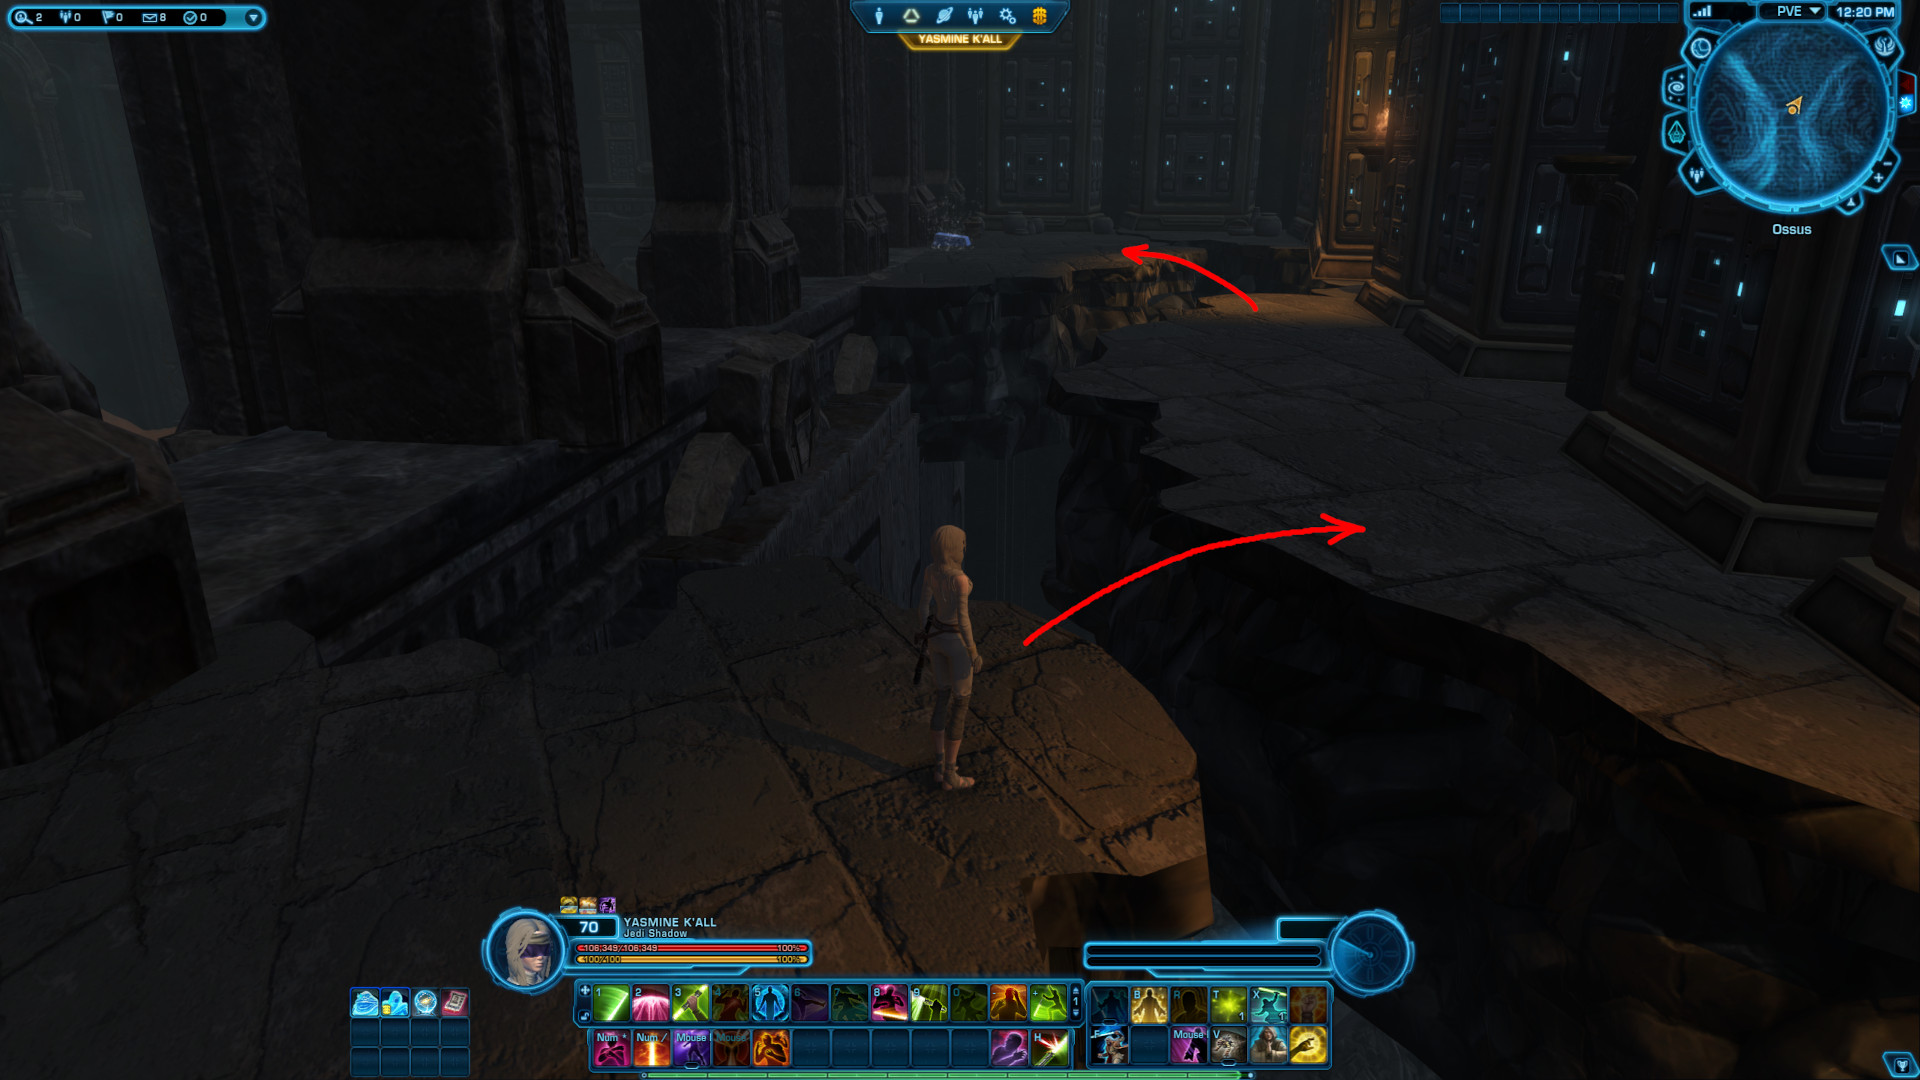
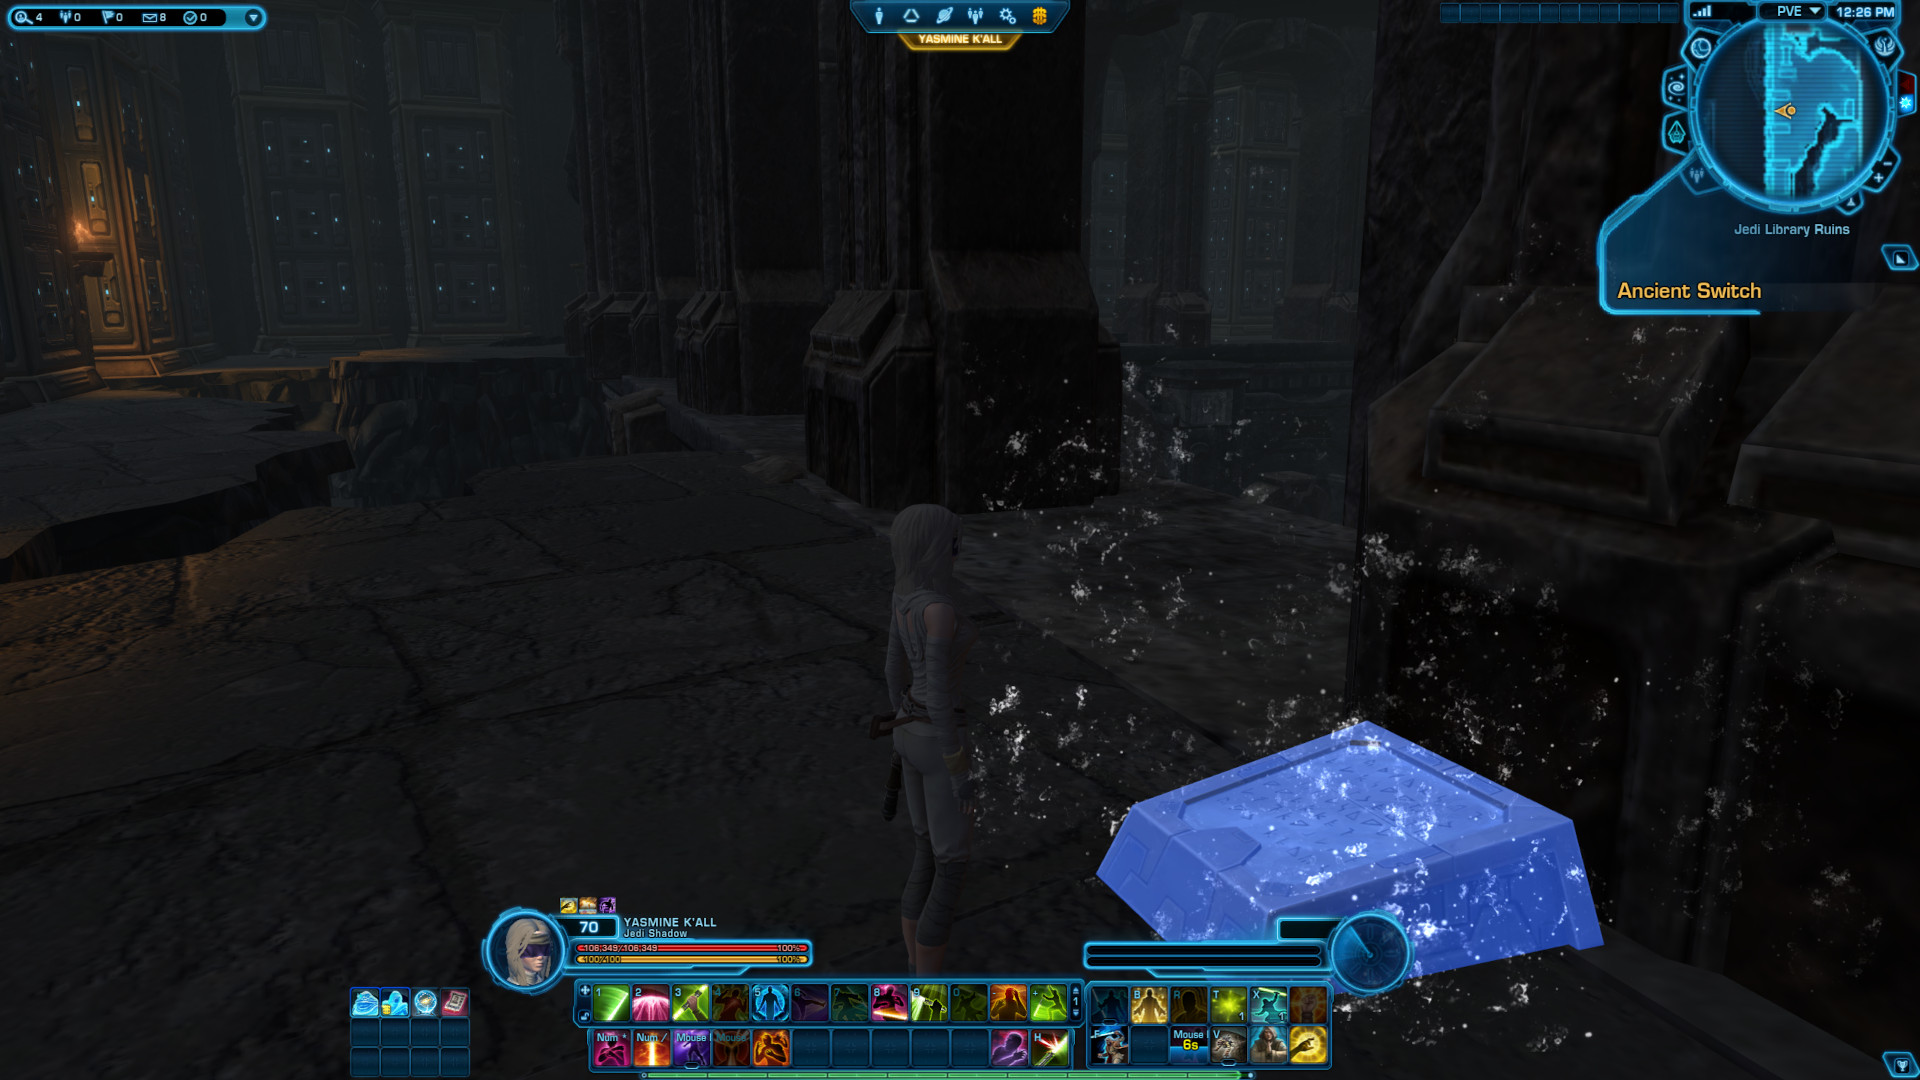
This switch is located inside the Jedi Library Ruins. Starting coordinates: -647, -213.
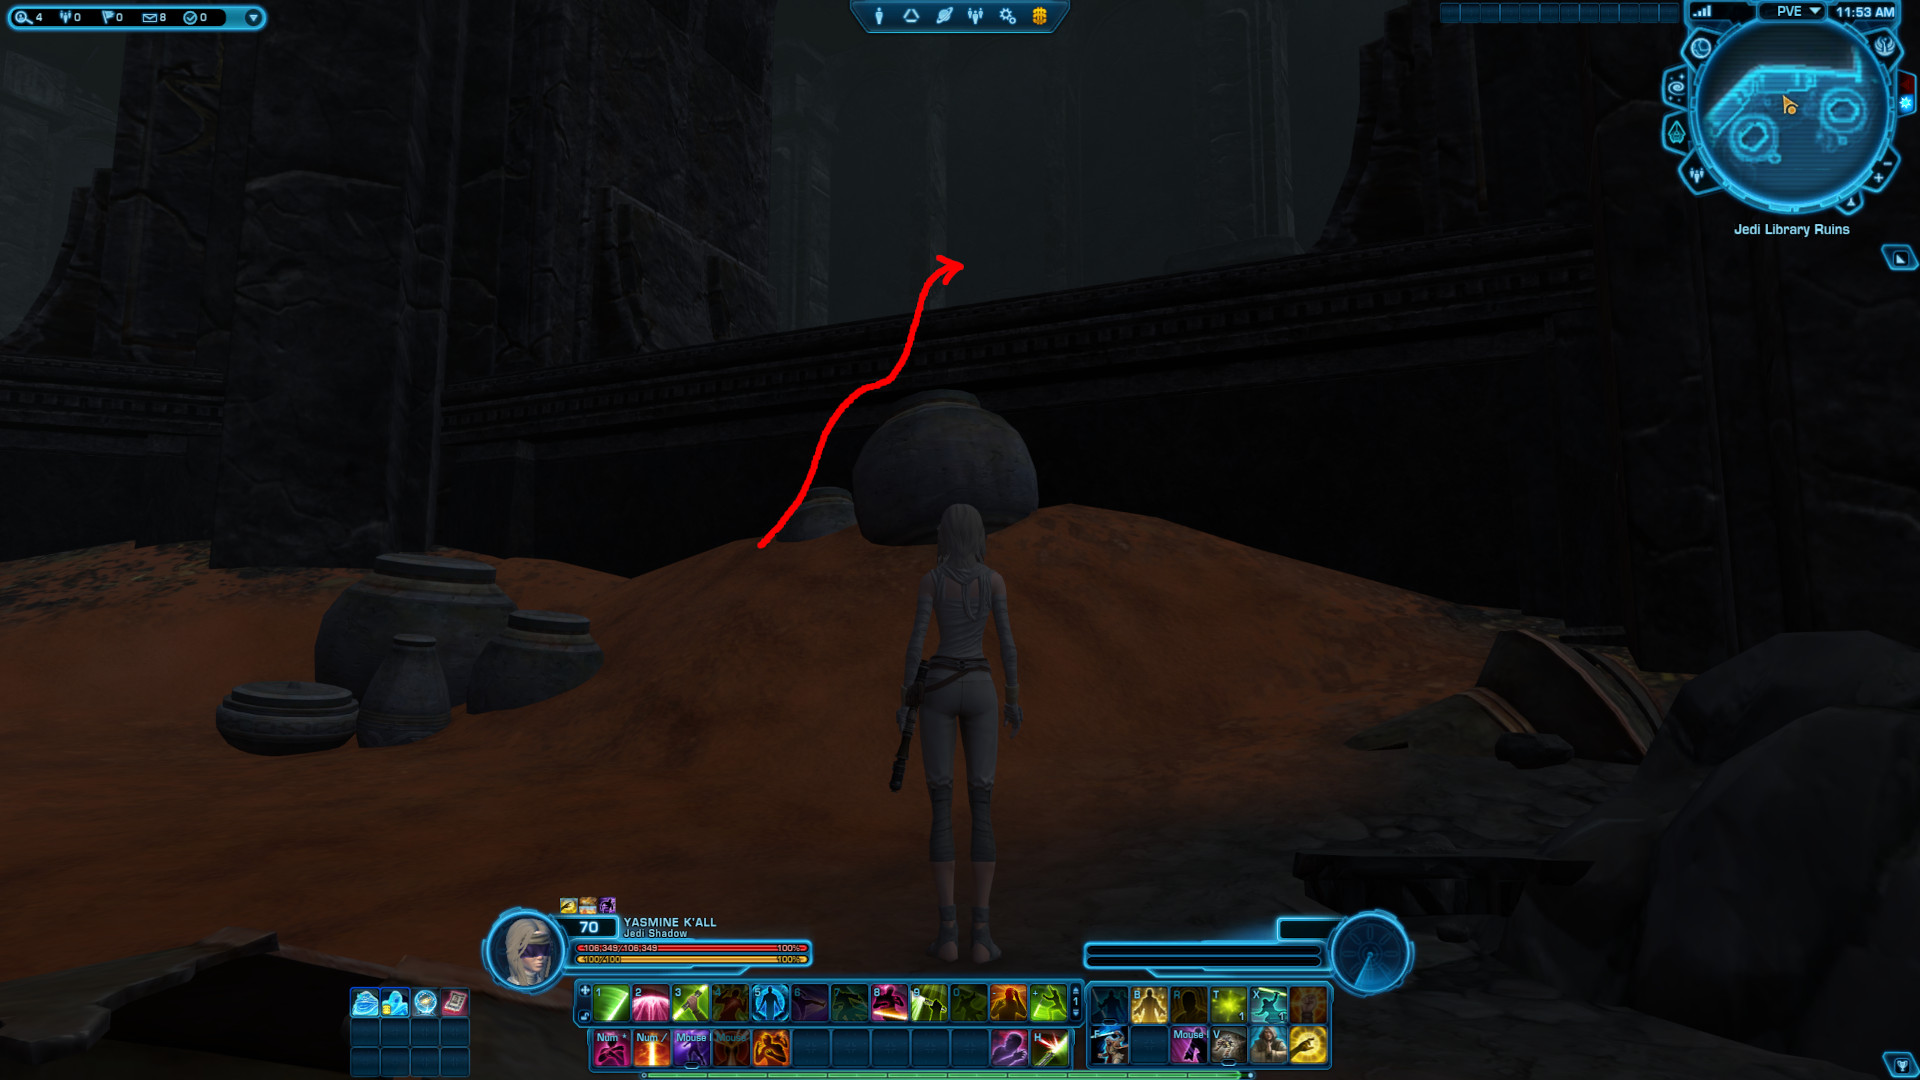
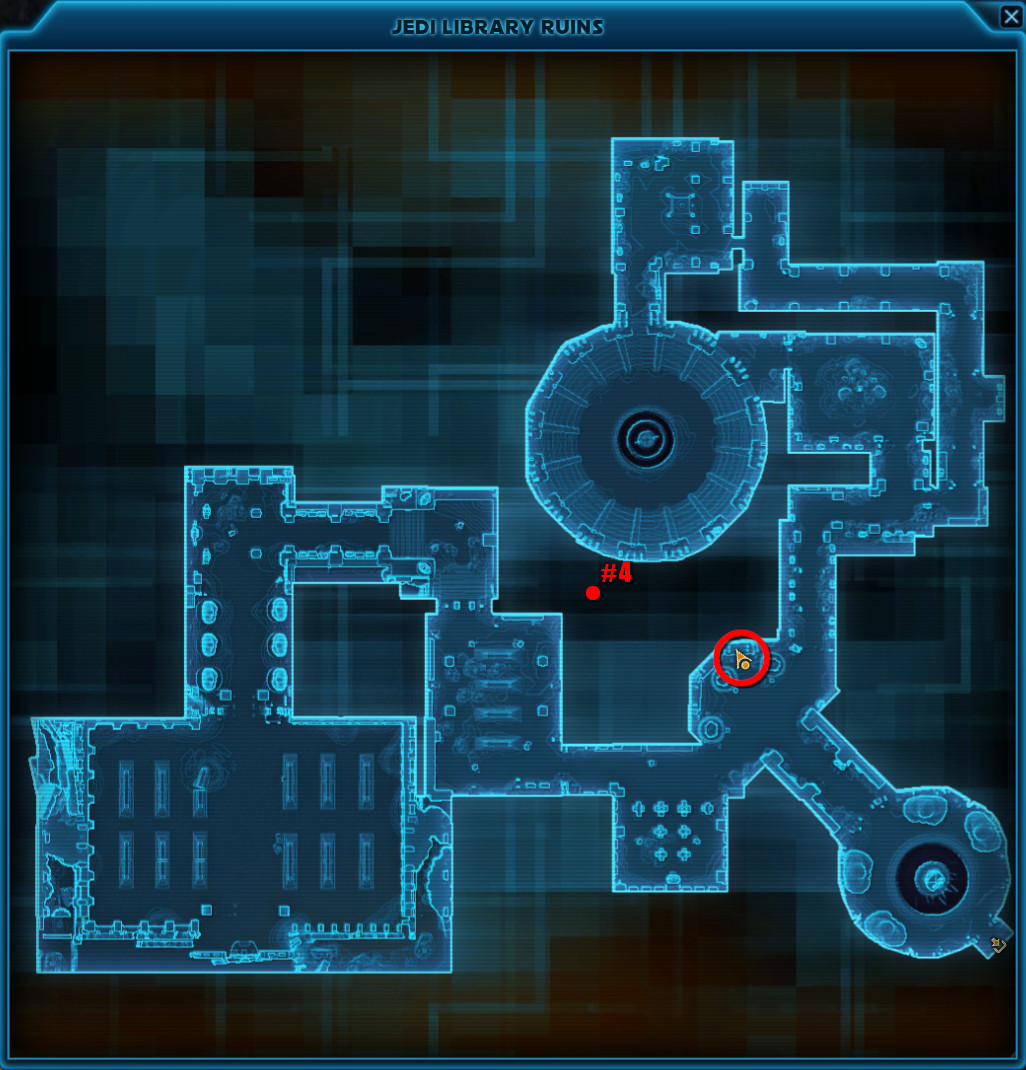
After climbing over the wall, go to the rubble at the upper left corner.
Click the switch. It will cause a pulse and make the switch unavailable for interaction for a moment. Do not click multiple times.
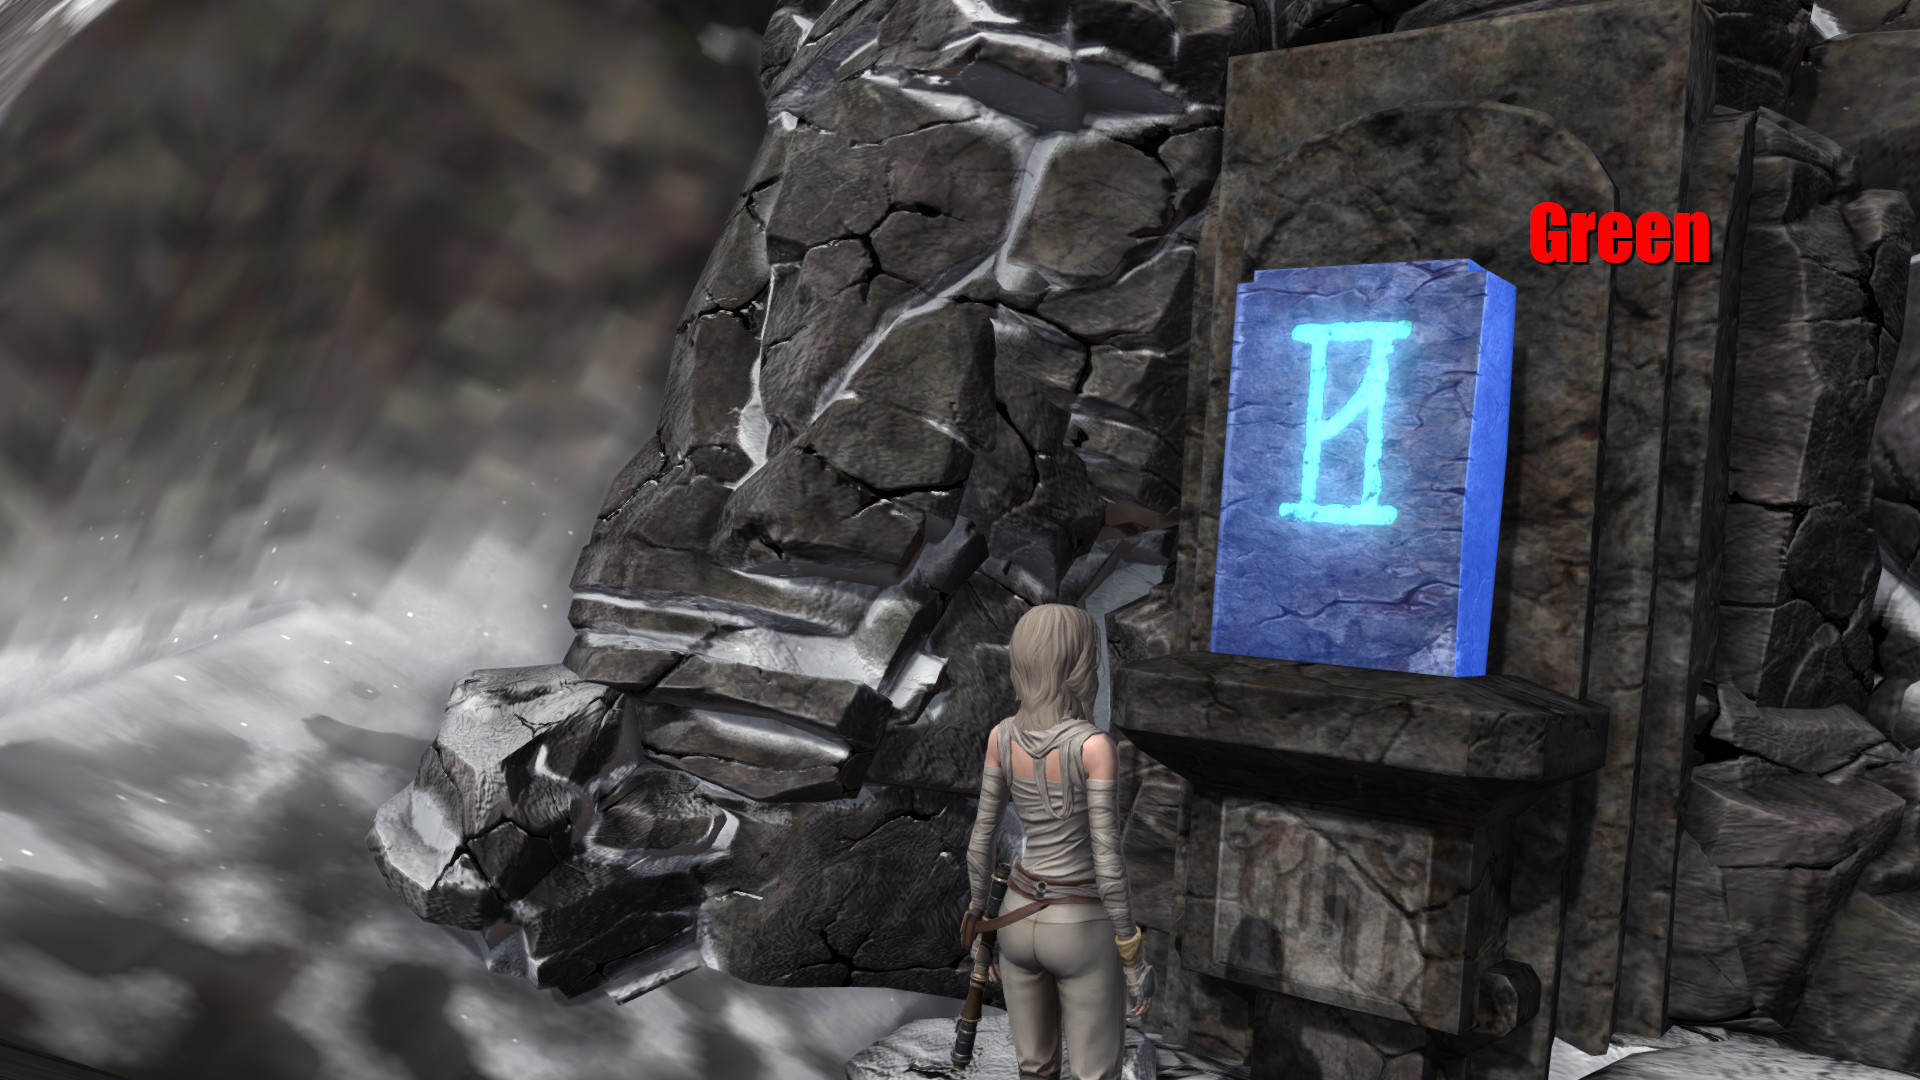
Switch #5 (Green)
This switch is located up the slope of a snow-covered rocky mountain next to an overrun encampment. It looks overwhelming, but it's actually not too bad due to the incline. Starting coordinates: 813, -470.
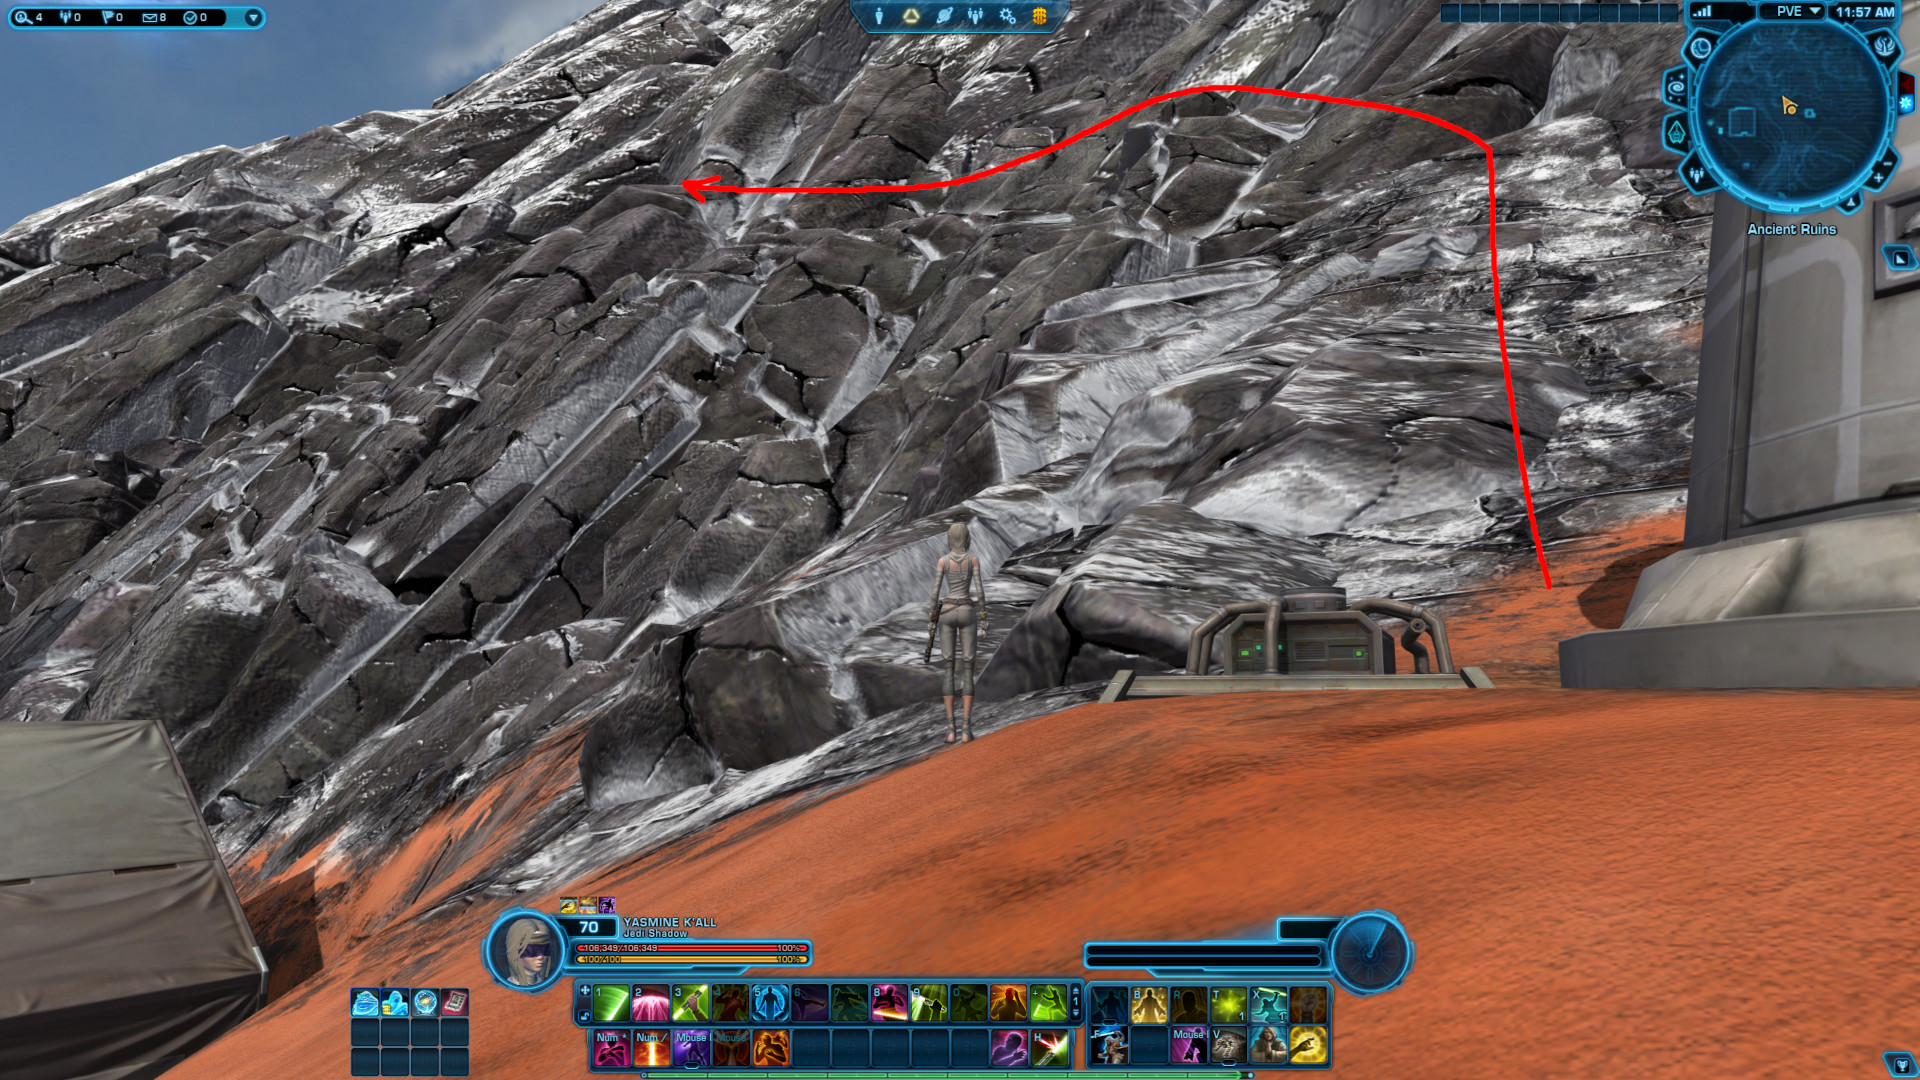
To the left of the Turret and the two Scrambled Turrets, run straight up the slope, as far as you can.
Then turn left and jump from jaggedy ledge to jaggedy ledge.
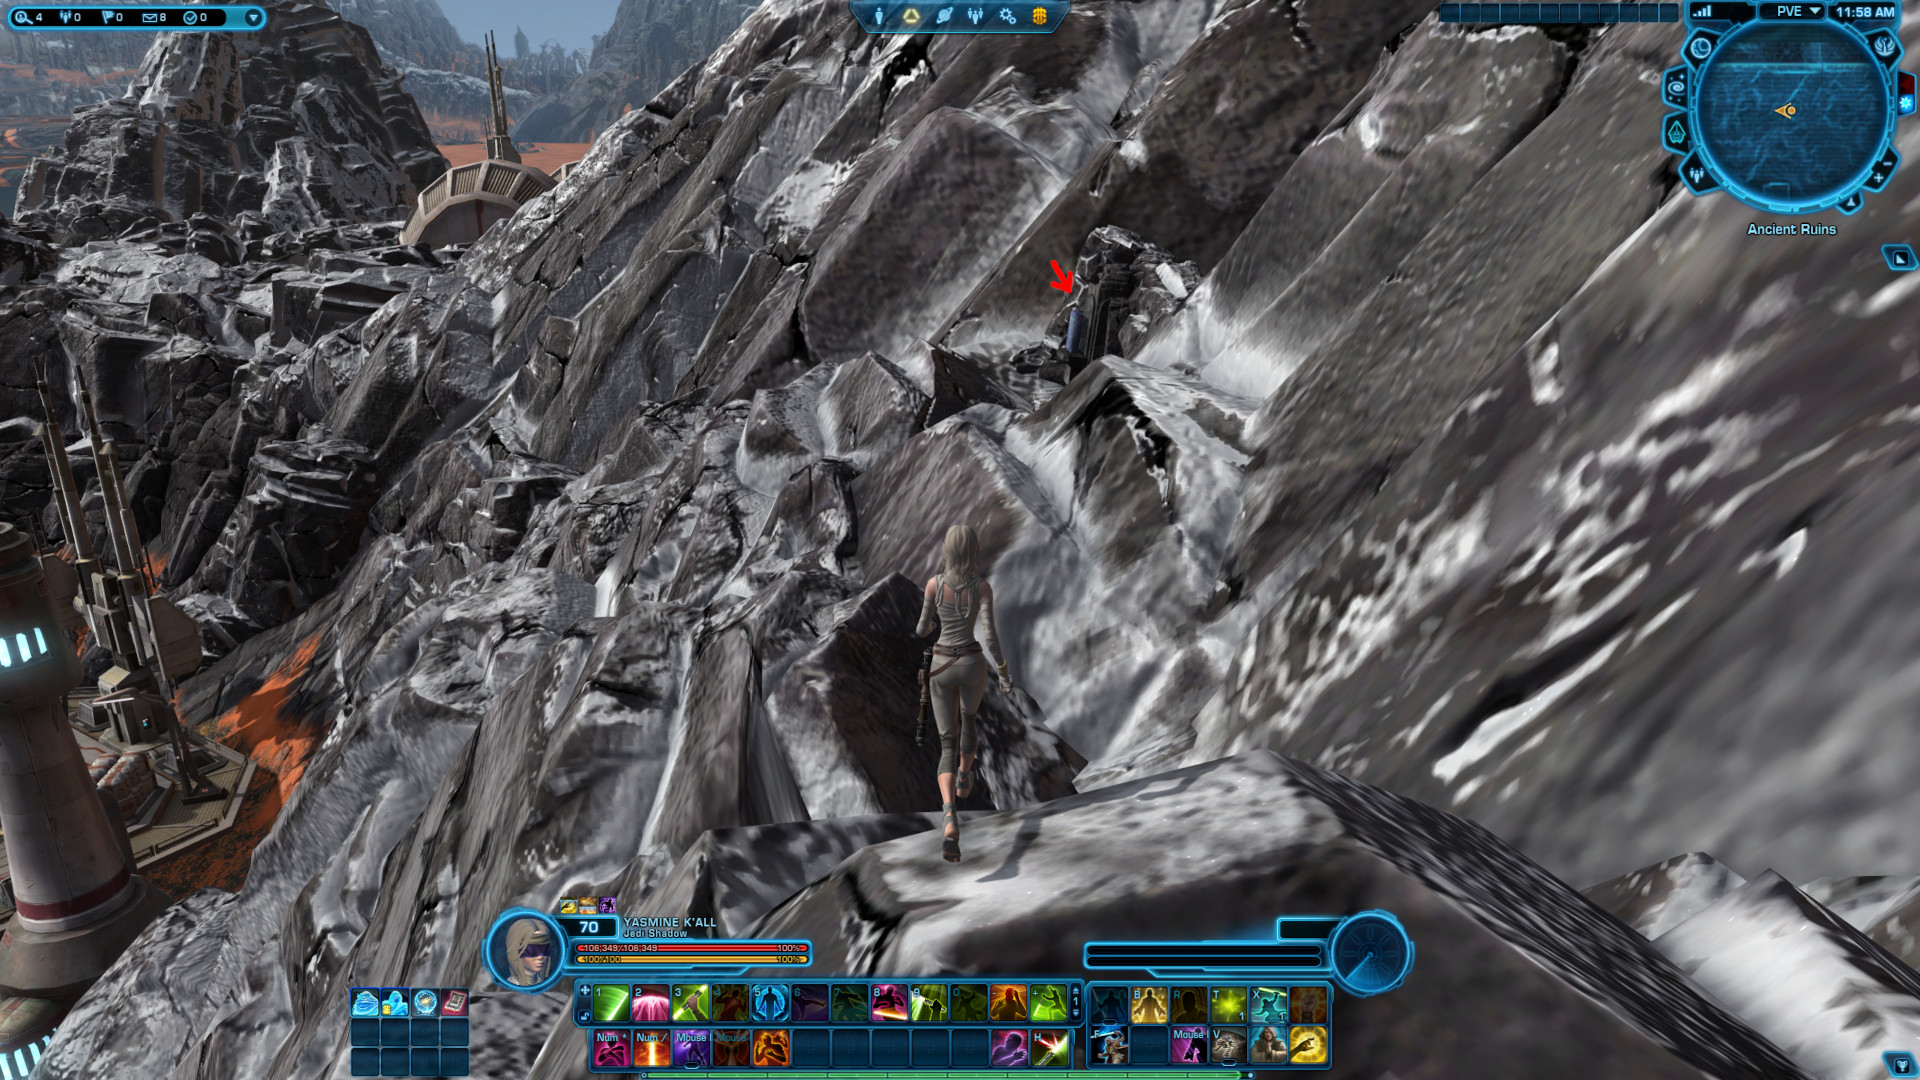
Click the switch. It will cause a pulse and make the switch unavailable for interaction for a moment. Do not click multiple times.
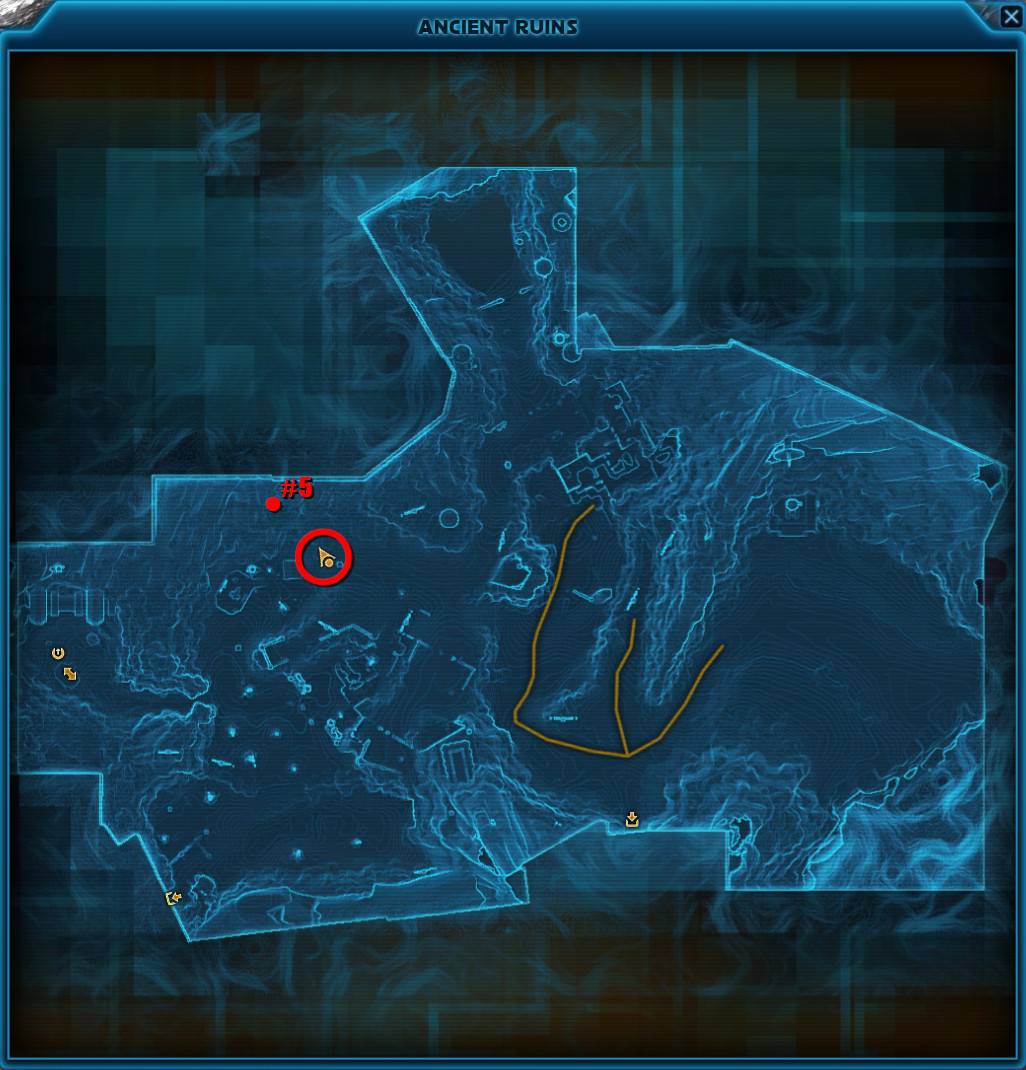
Check Correct Sequence
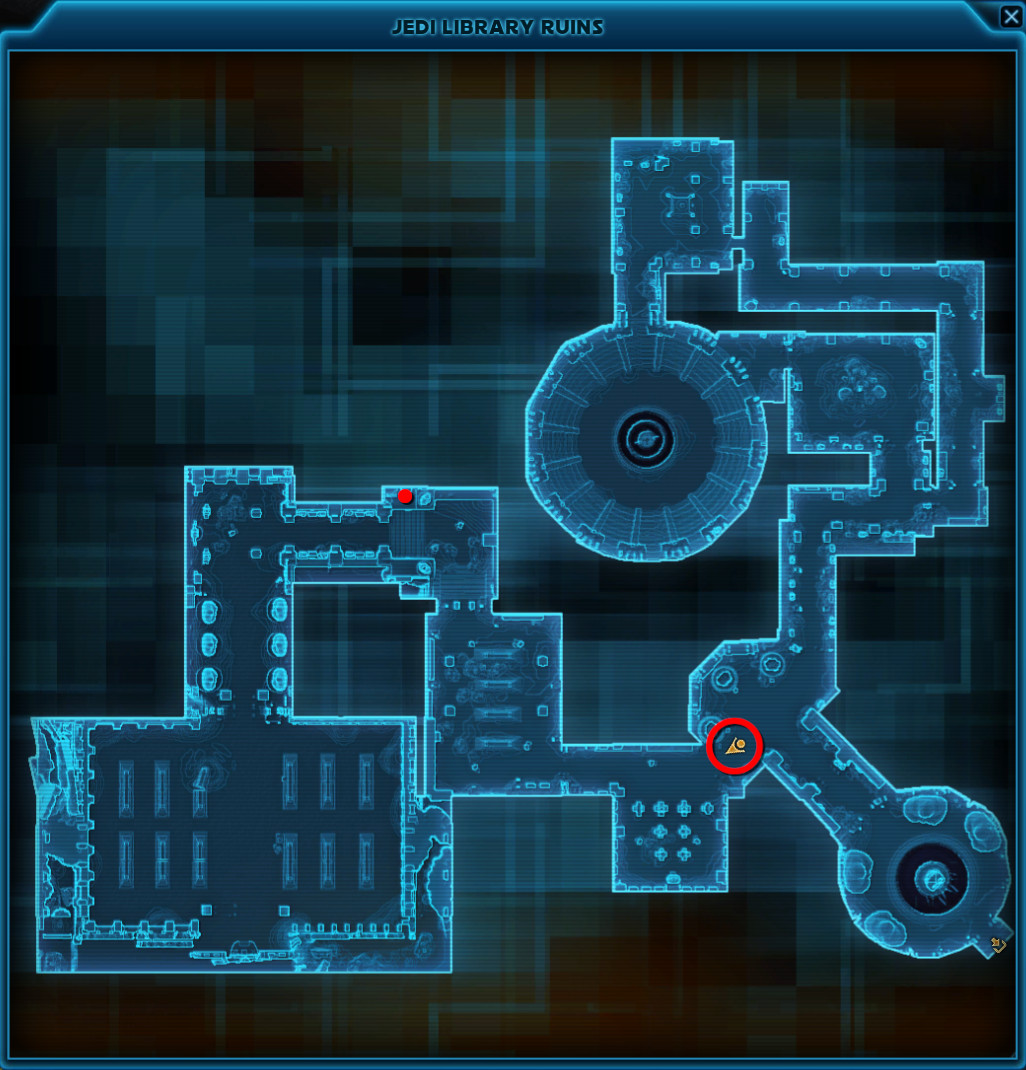
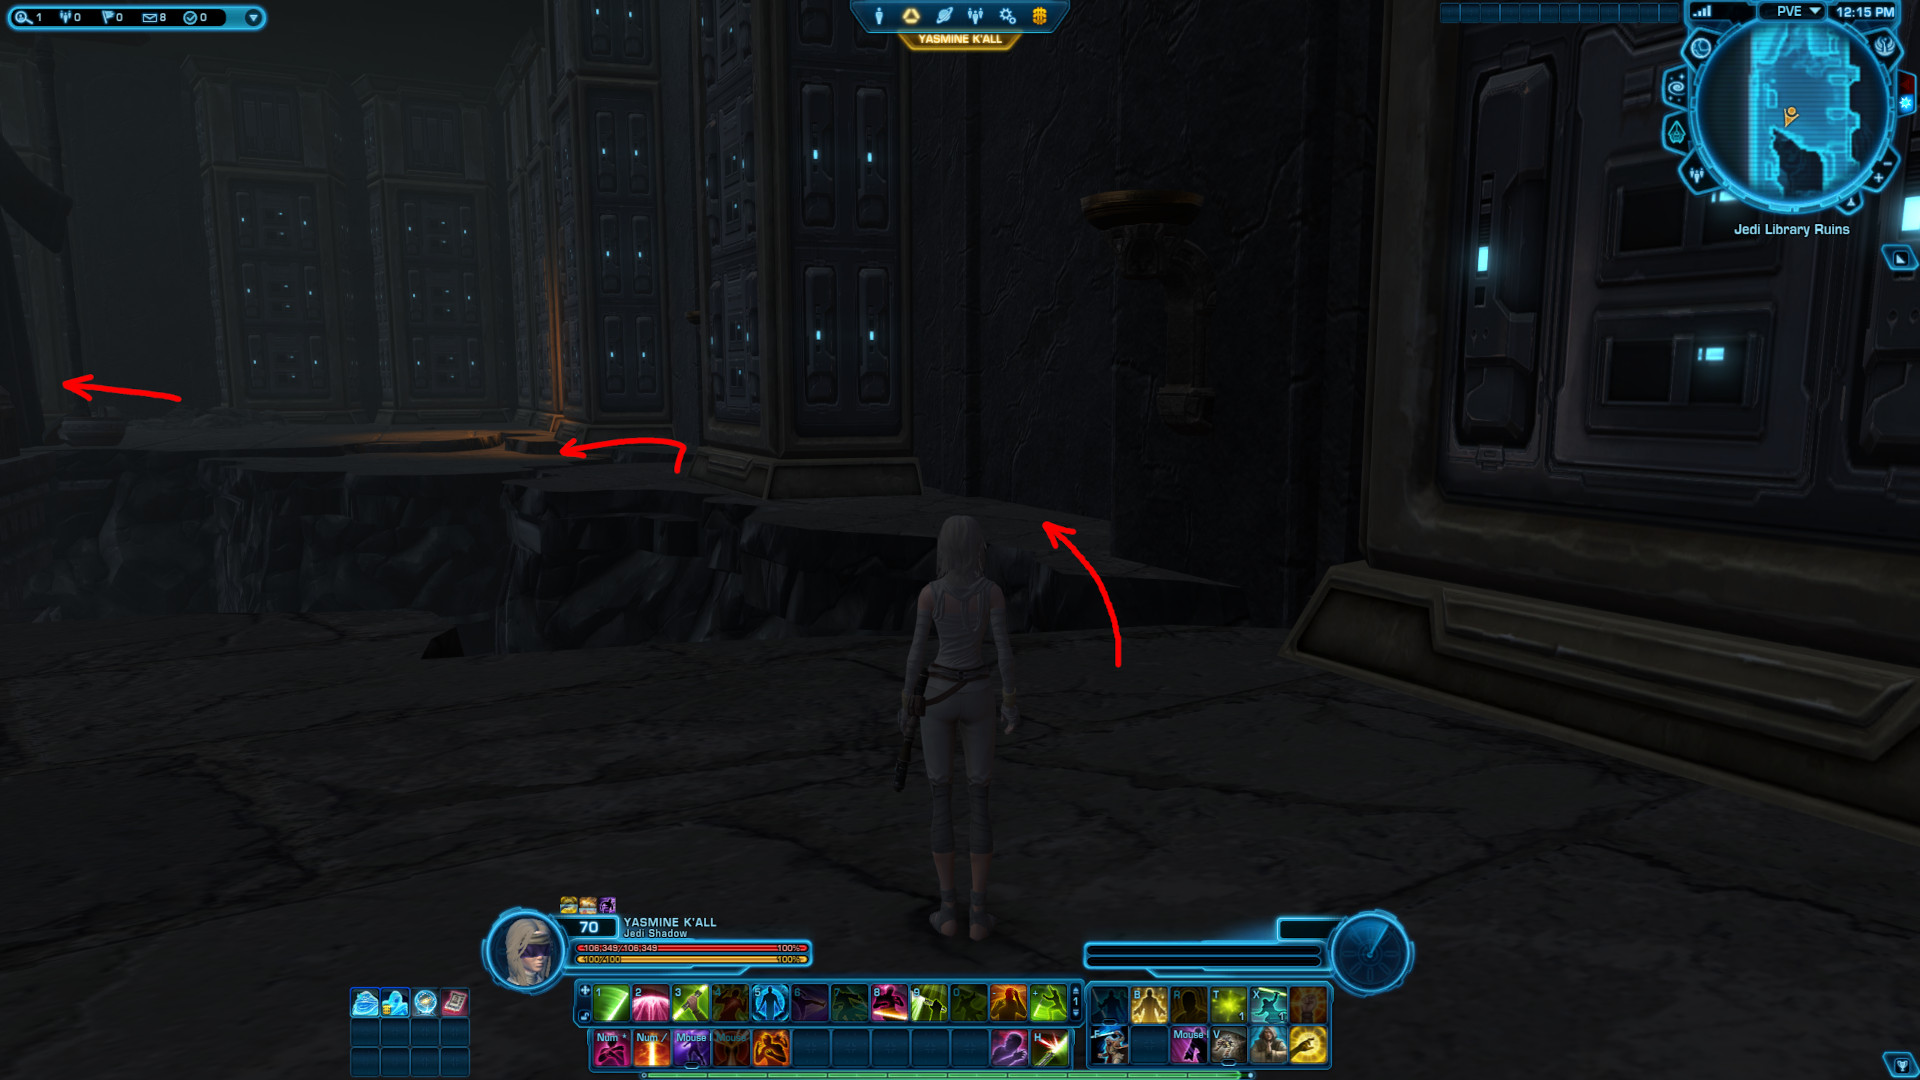
Check if you have activated all the switches correctly before you proceed. You have to go to a hidden personal instance in the west part of the Ancient Ruins map. Starting coordinates: 1373, -372.
On the wall to the left you will see all five colours of the switches, which is where the sequence is determined from.
If you see the glowing yellow ring above the five switch colours, then you have succeeded and can proceed to the next part of the puzzle.
If you do not see the glowing yellow ring, then you have missed something and you have to start over. I recommend resetting by simply relogging.
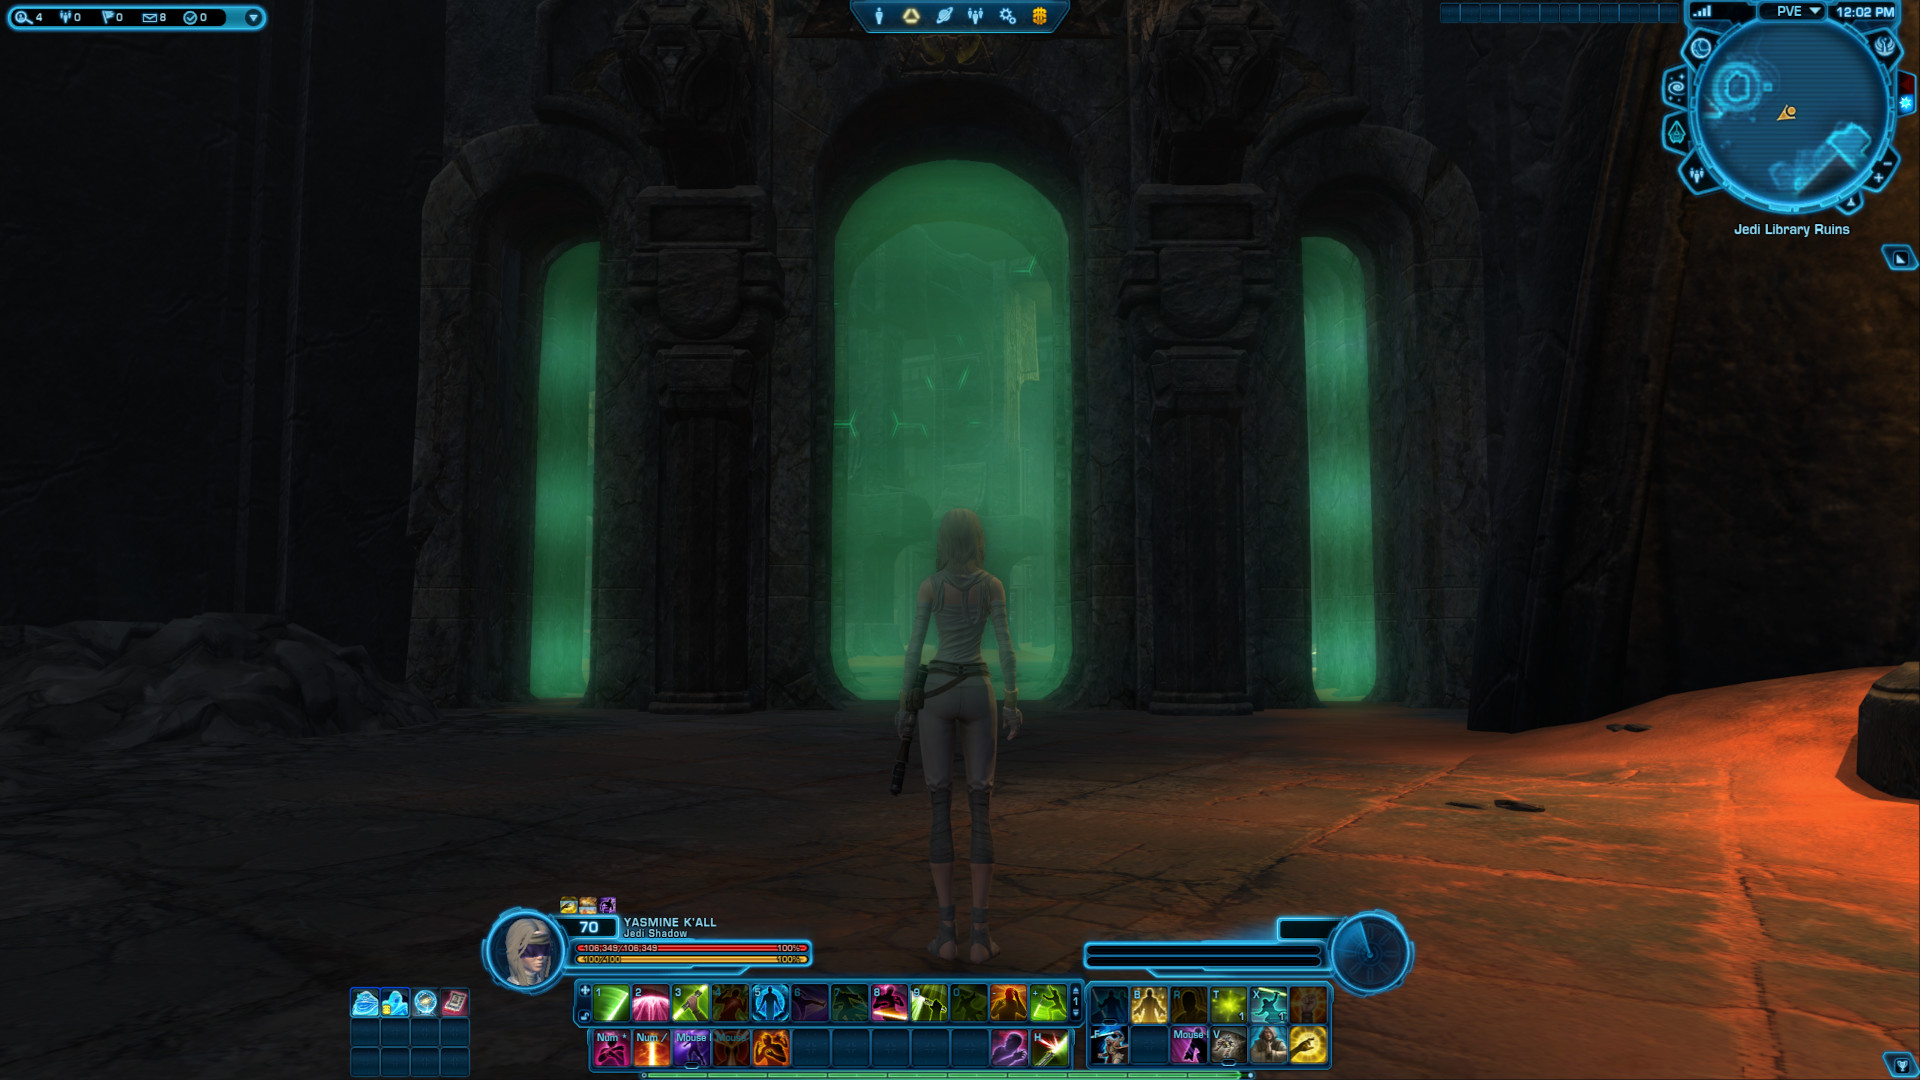
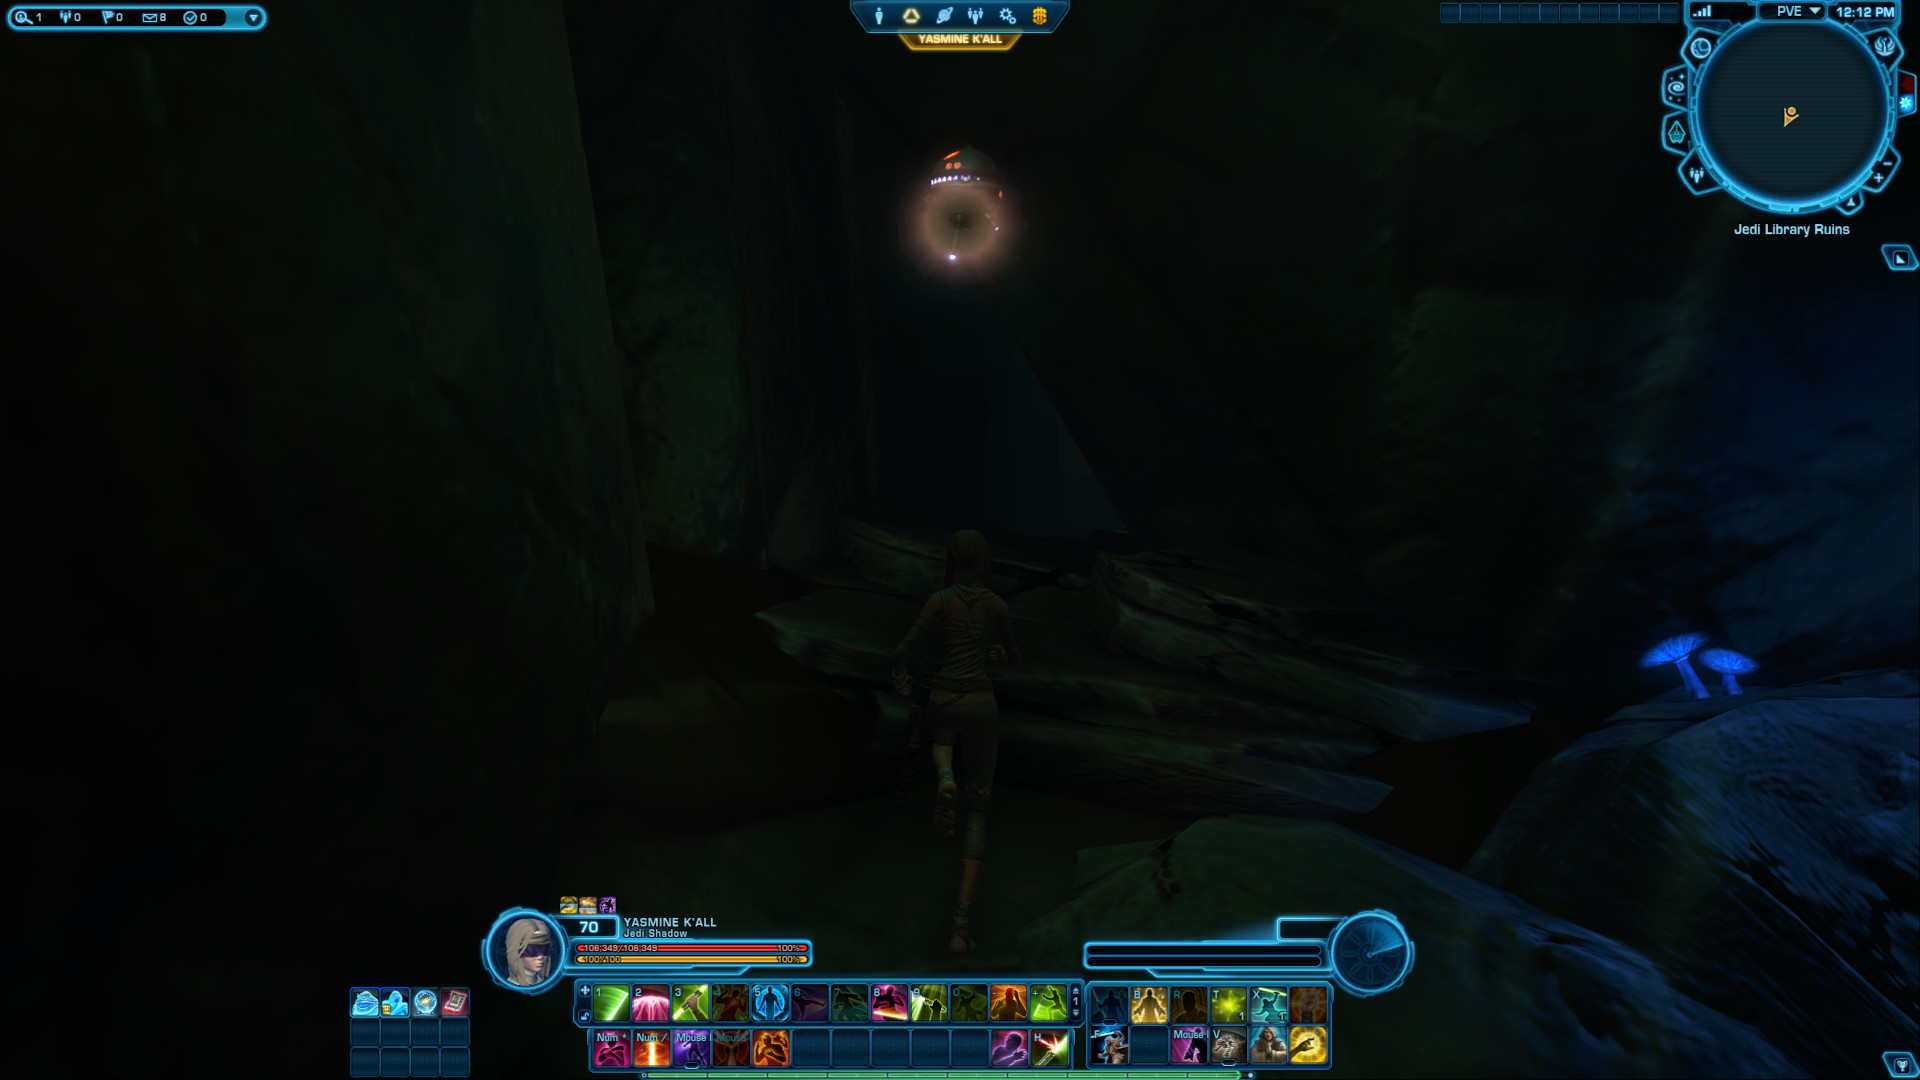
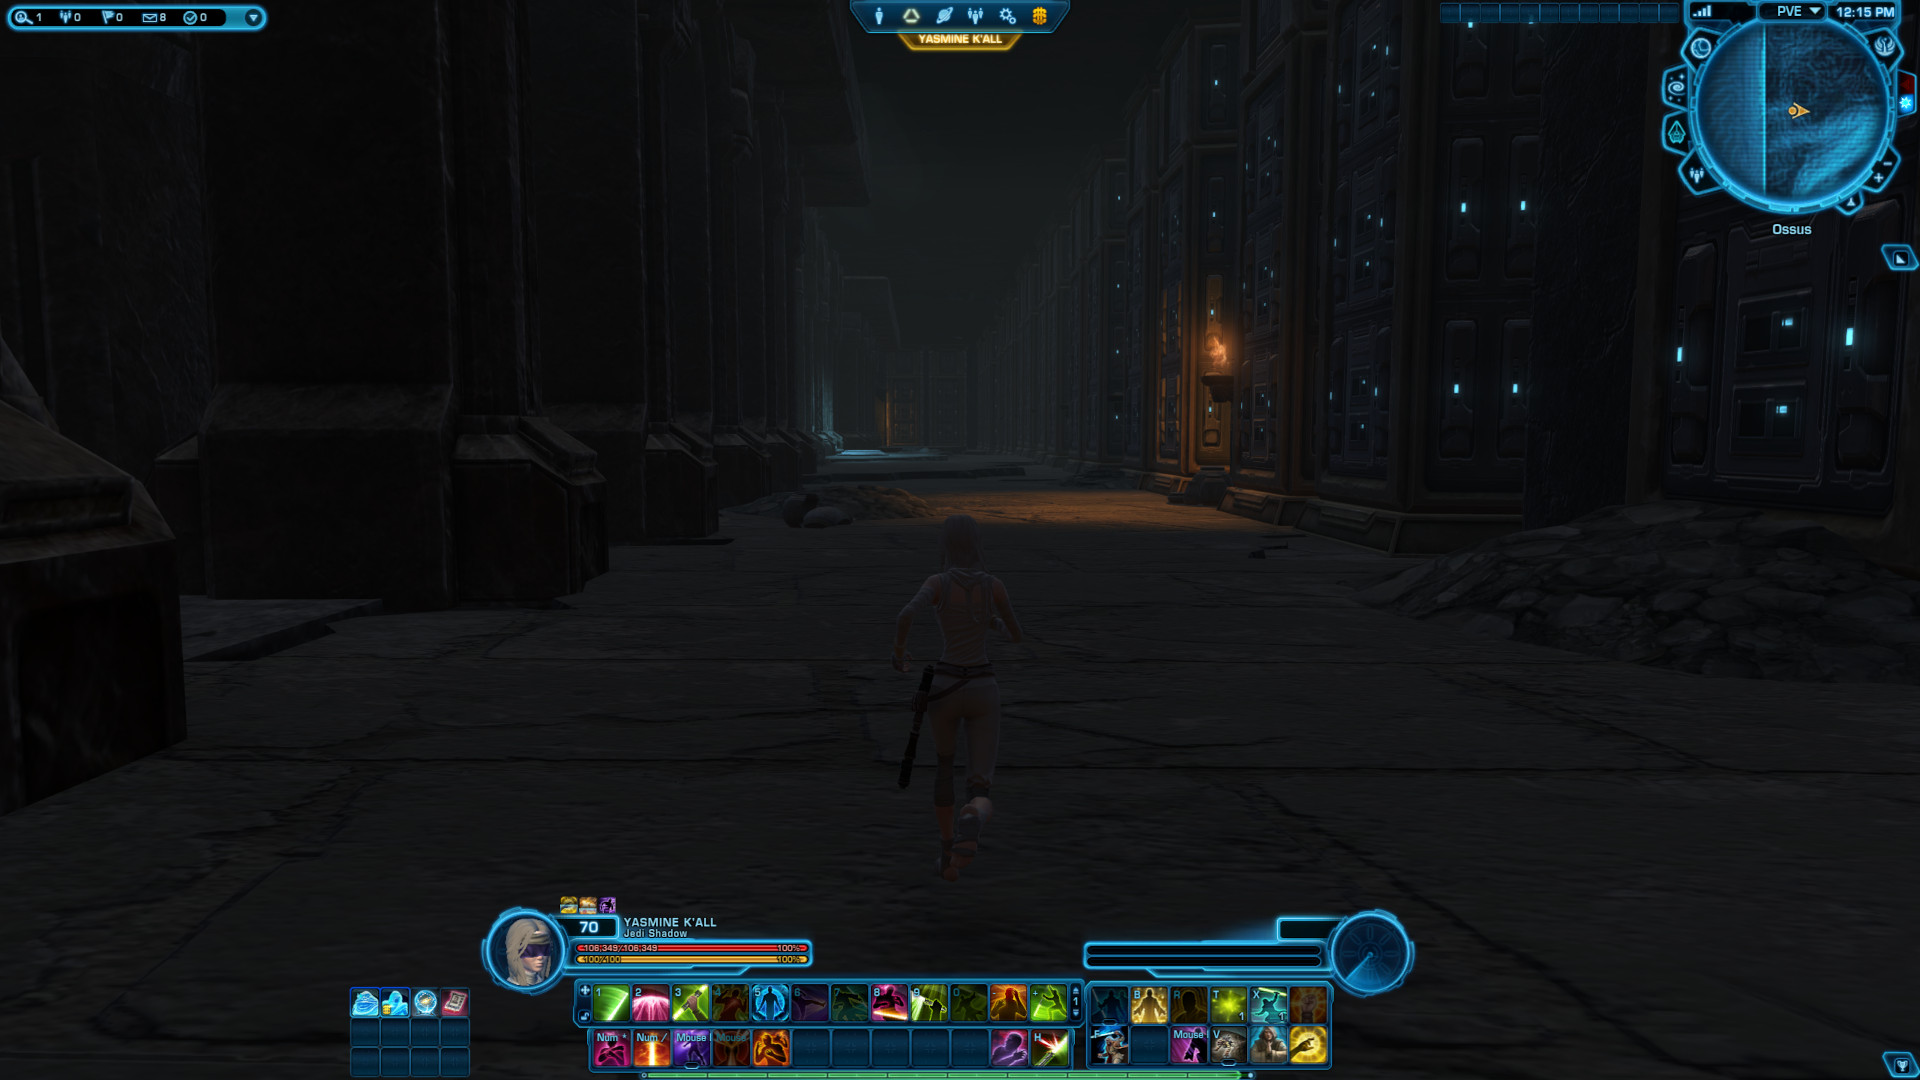
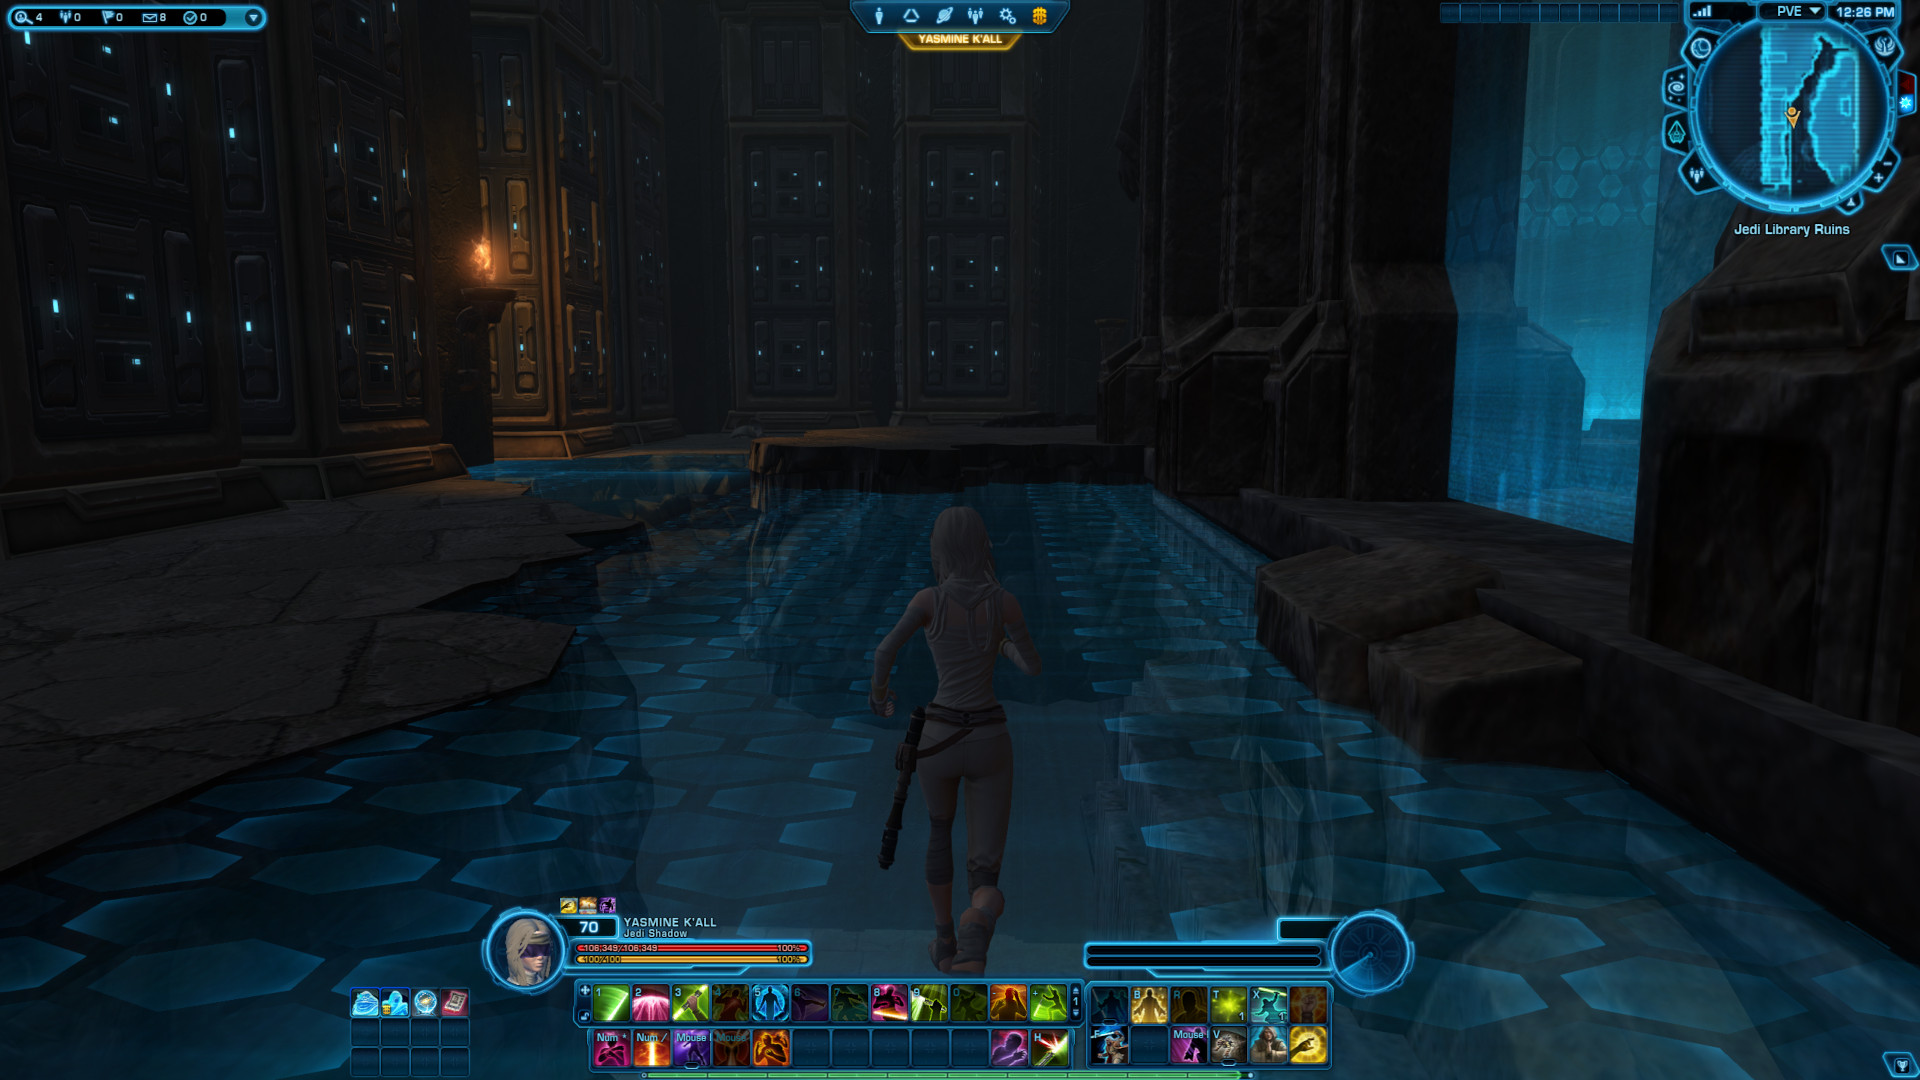
Library Jumping Puzzle
The mission instance for the final main story is now active again, and this is where the big jumping puzzle will start. If you fall you will lose a lot of health, but it is survivable and you only have to start at last known location again inside this instance.
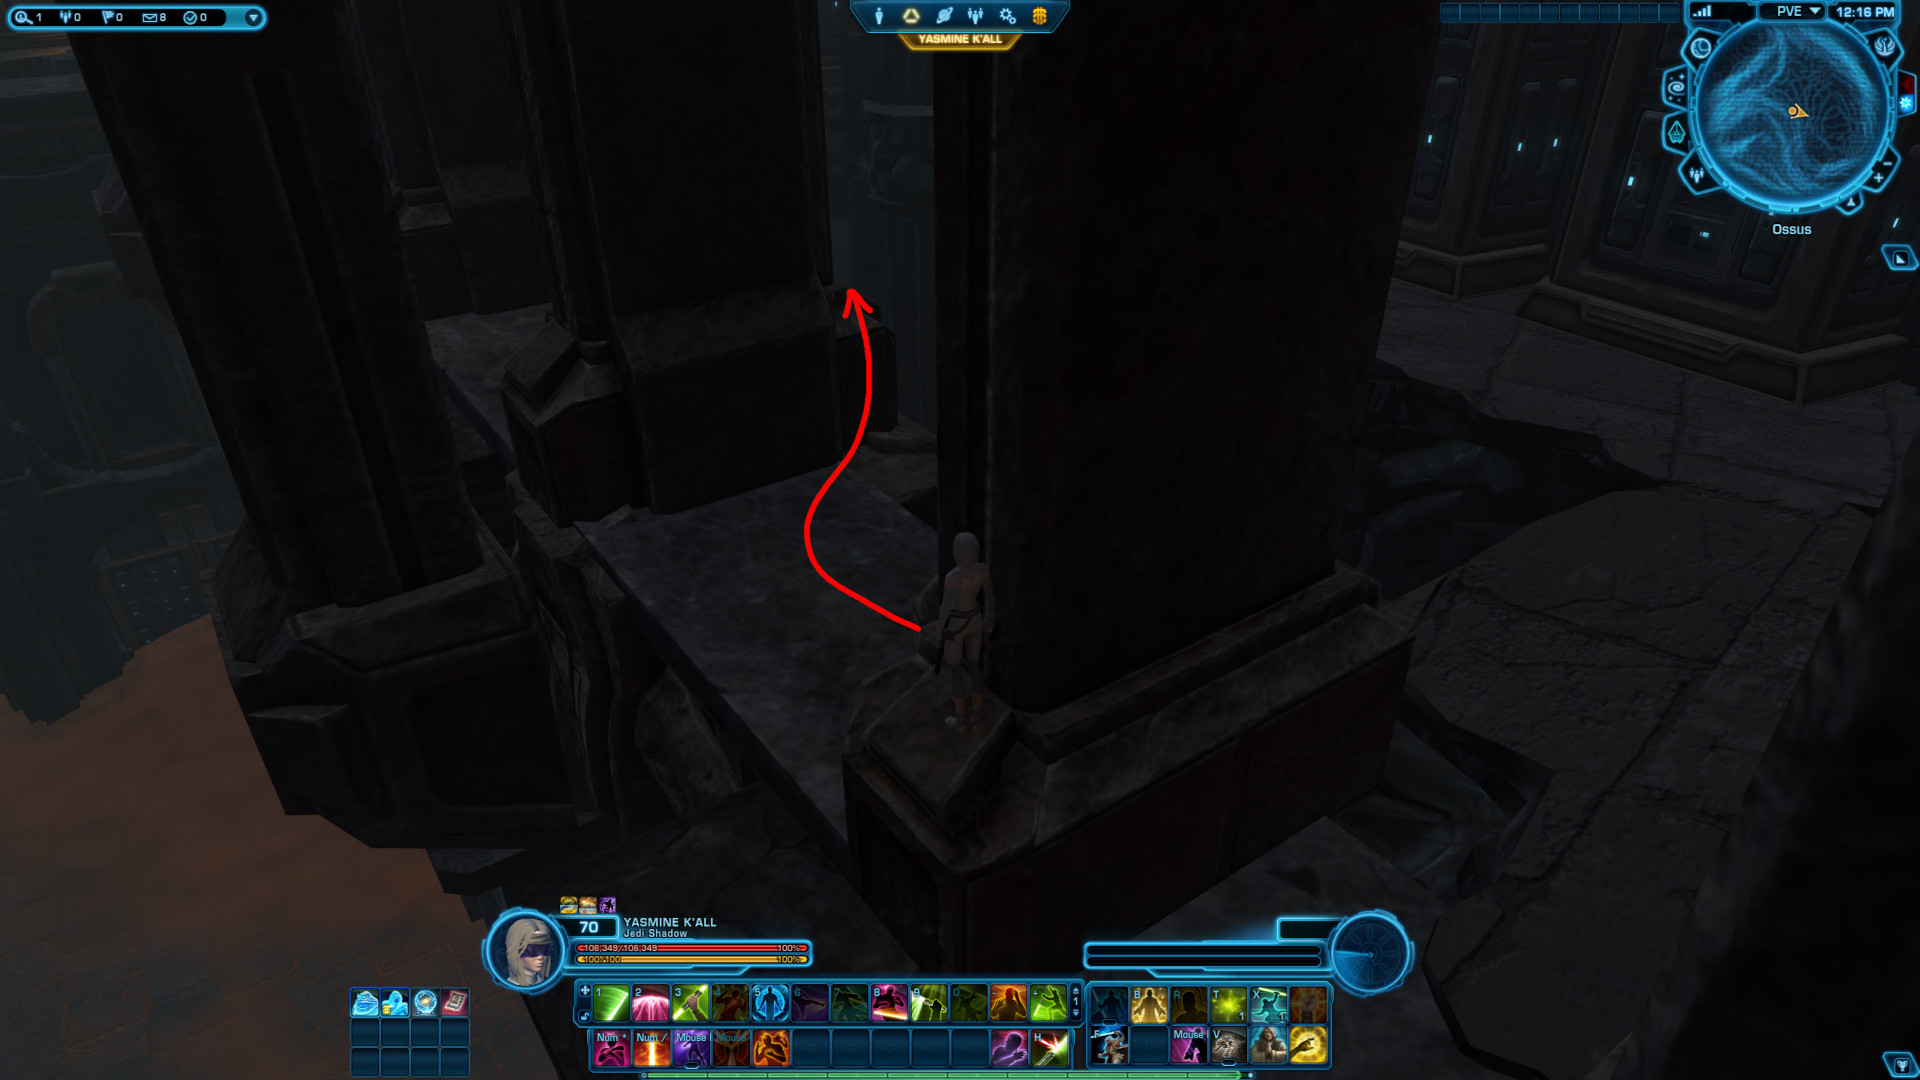
As you pass the second doorway, you will see the same glowing yellow ring on the wall to the left of the statue across from you.
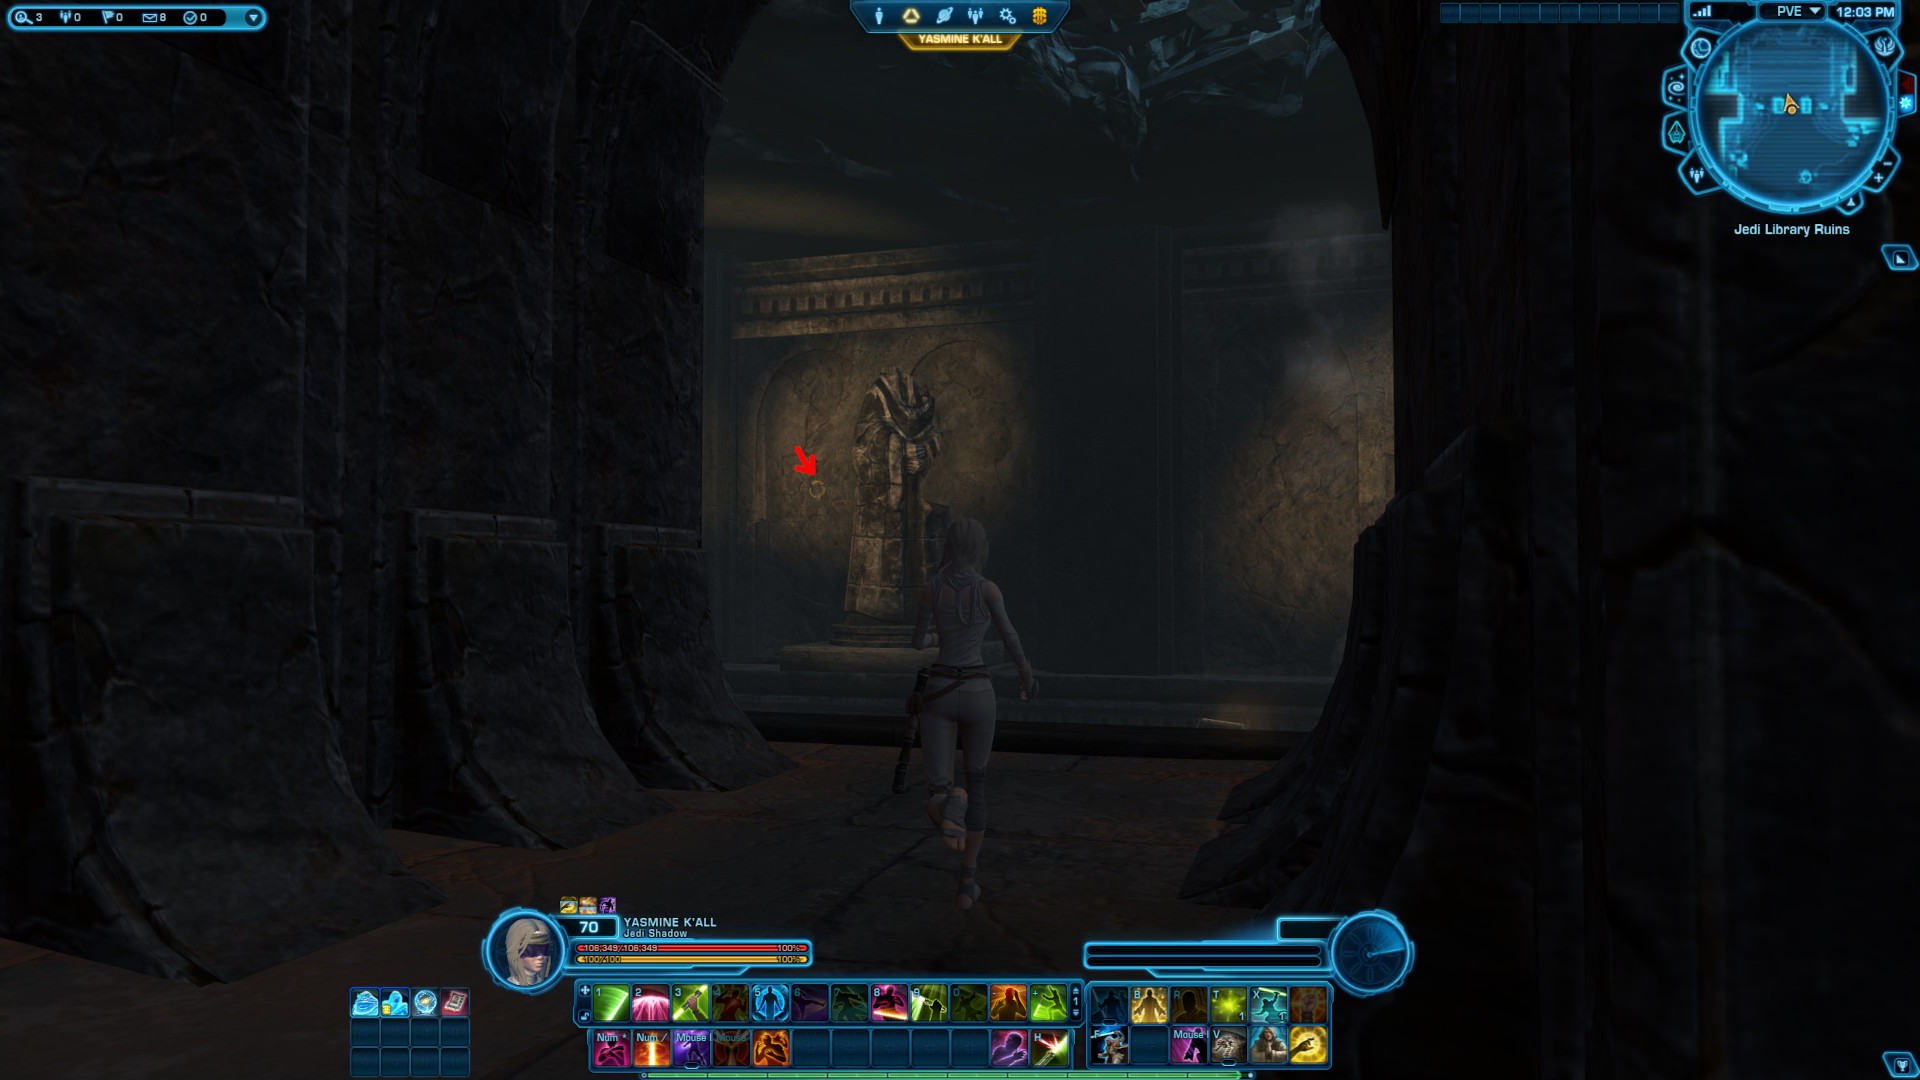
From the right side of the wall you see the glowing yellow circle on, you can jump up onto the ledge in the corner.

Shimmy around the statue. You will find a hole in the ground left of the statue. The glowing yellow circle will be directly above as an indicator.
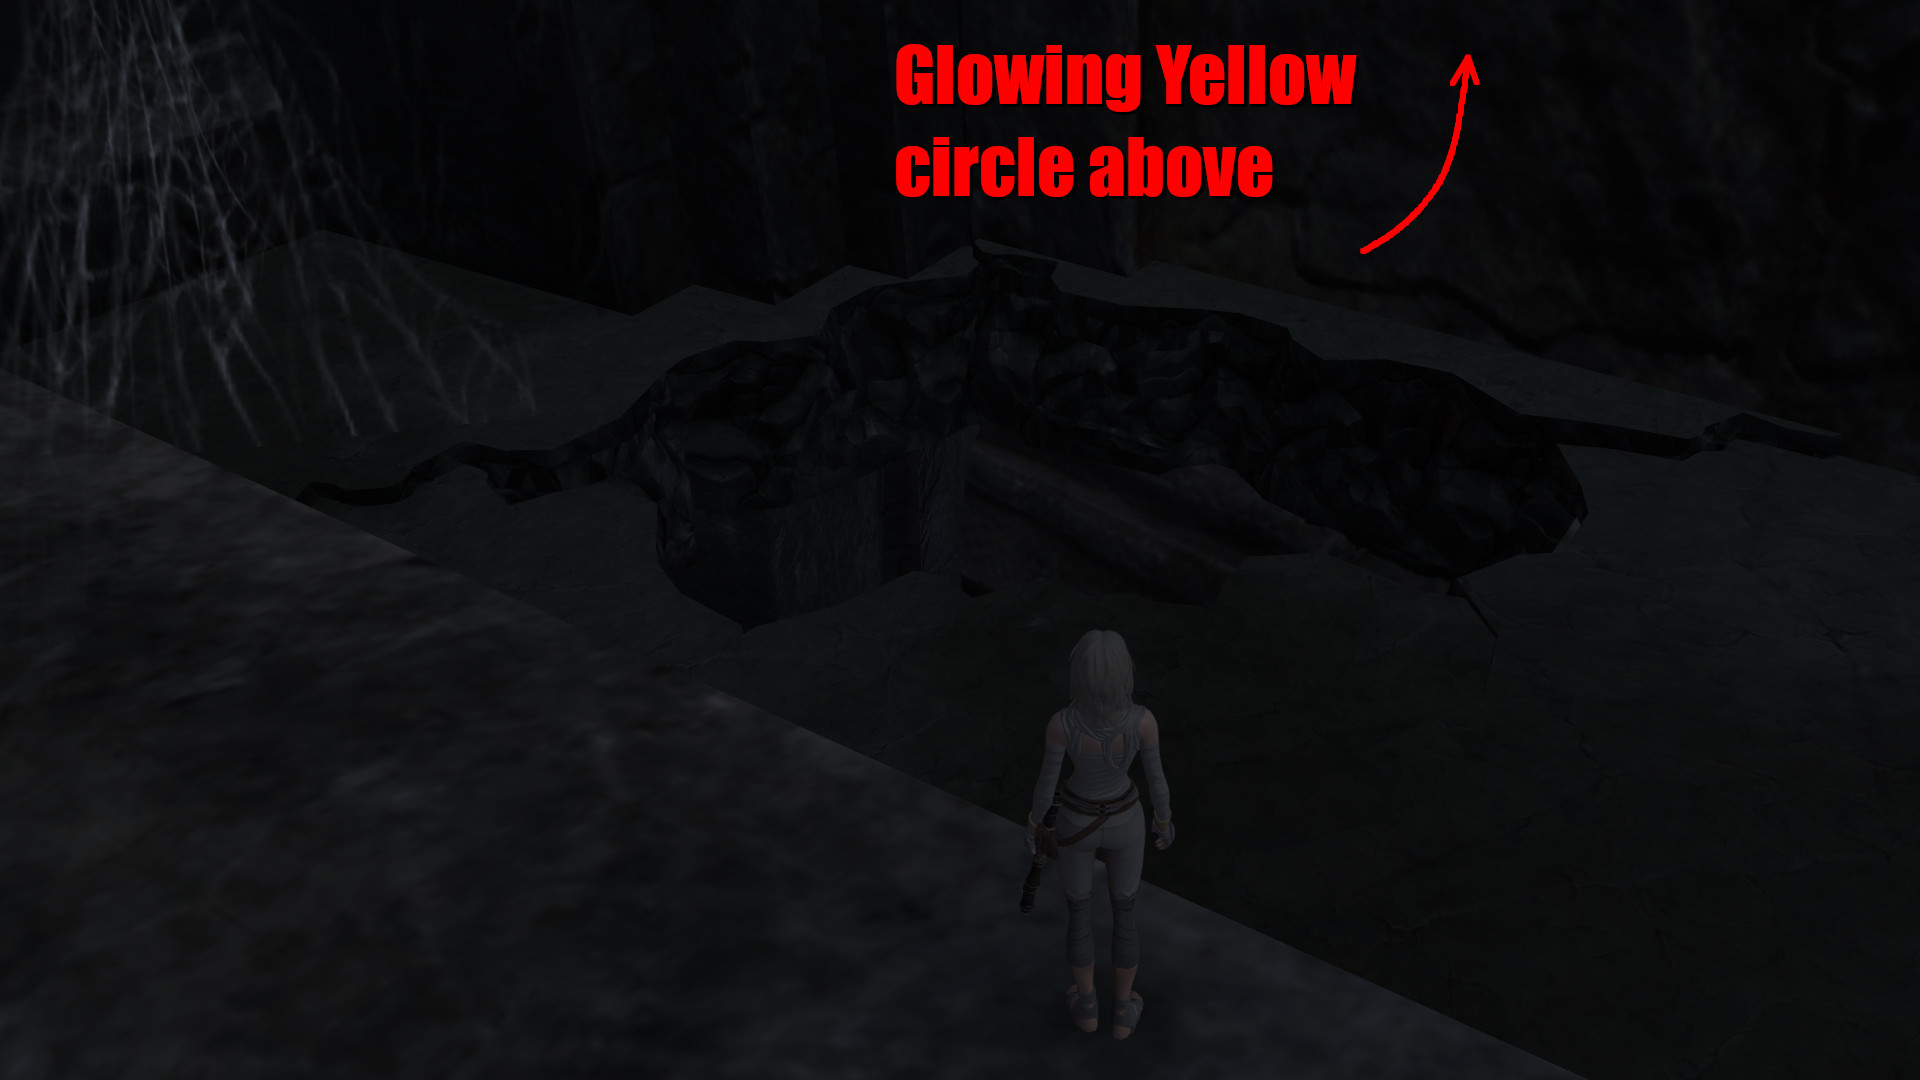
Drop down to the first ledge, then down to the dark cave.
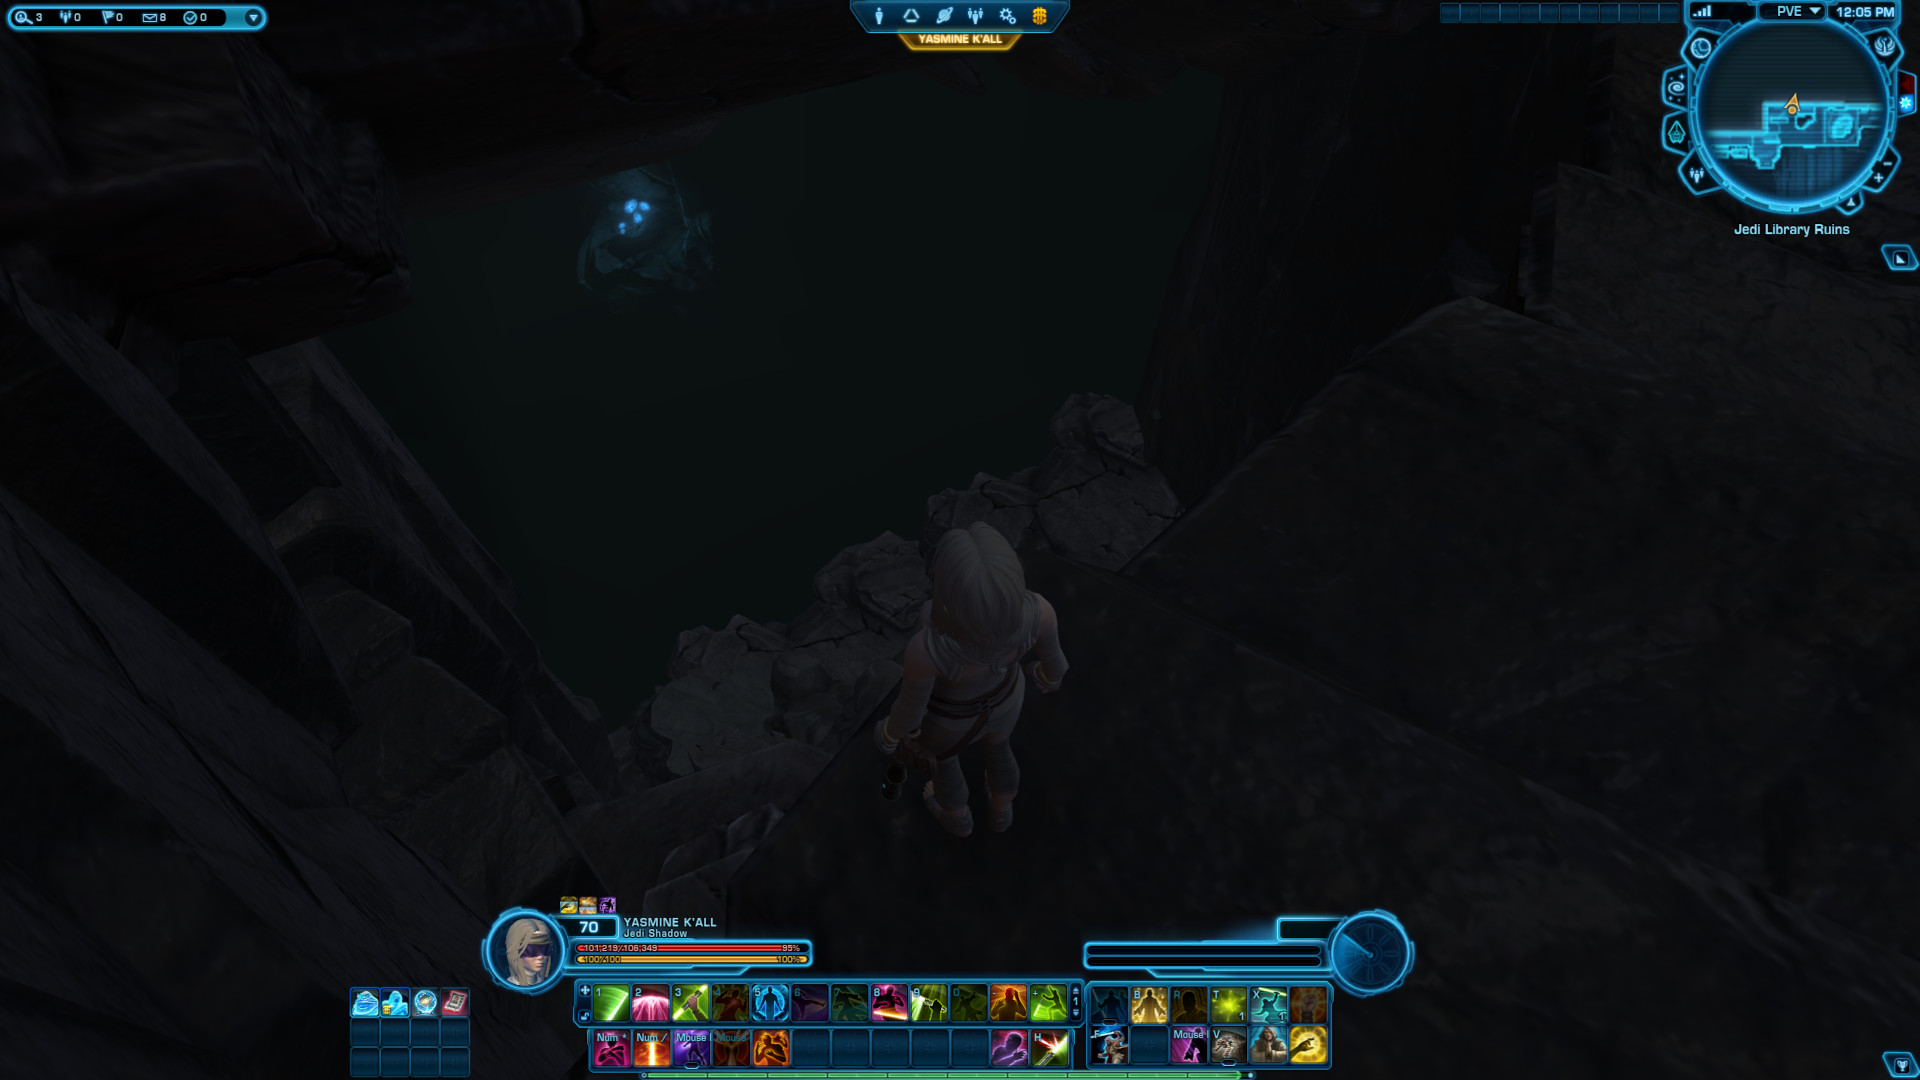
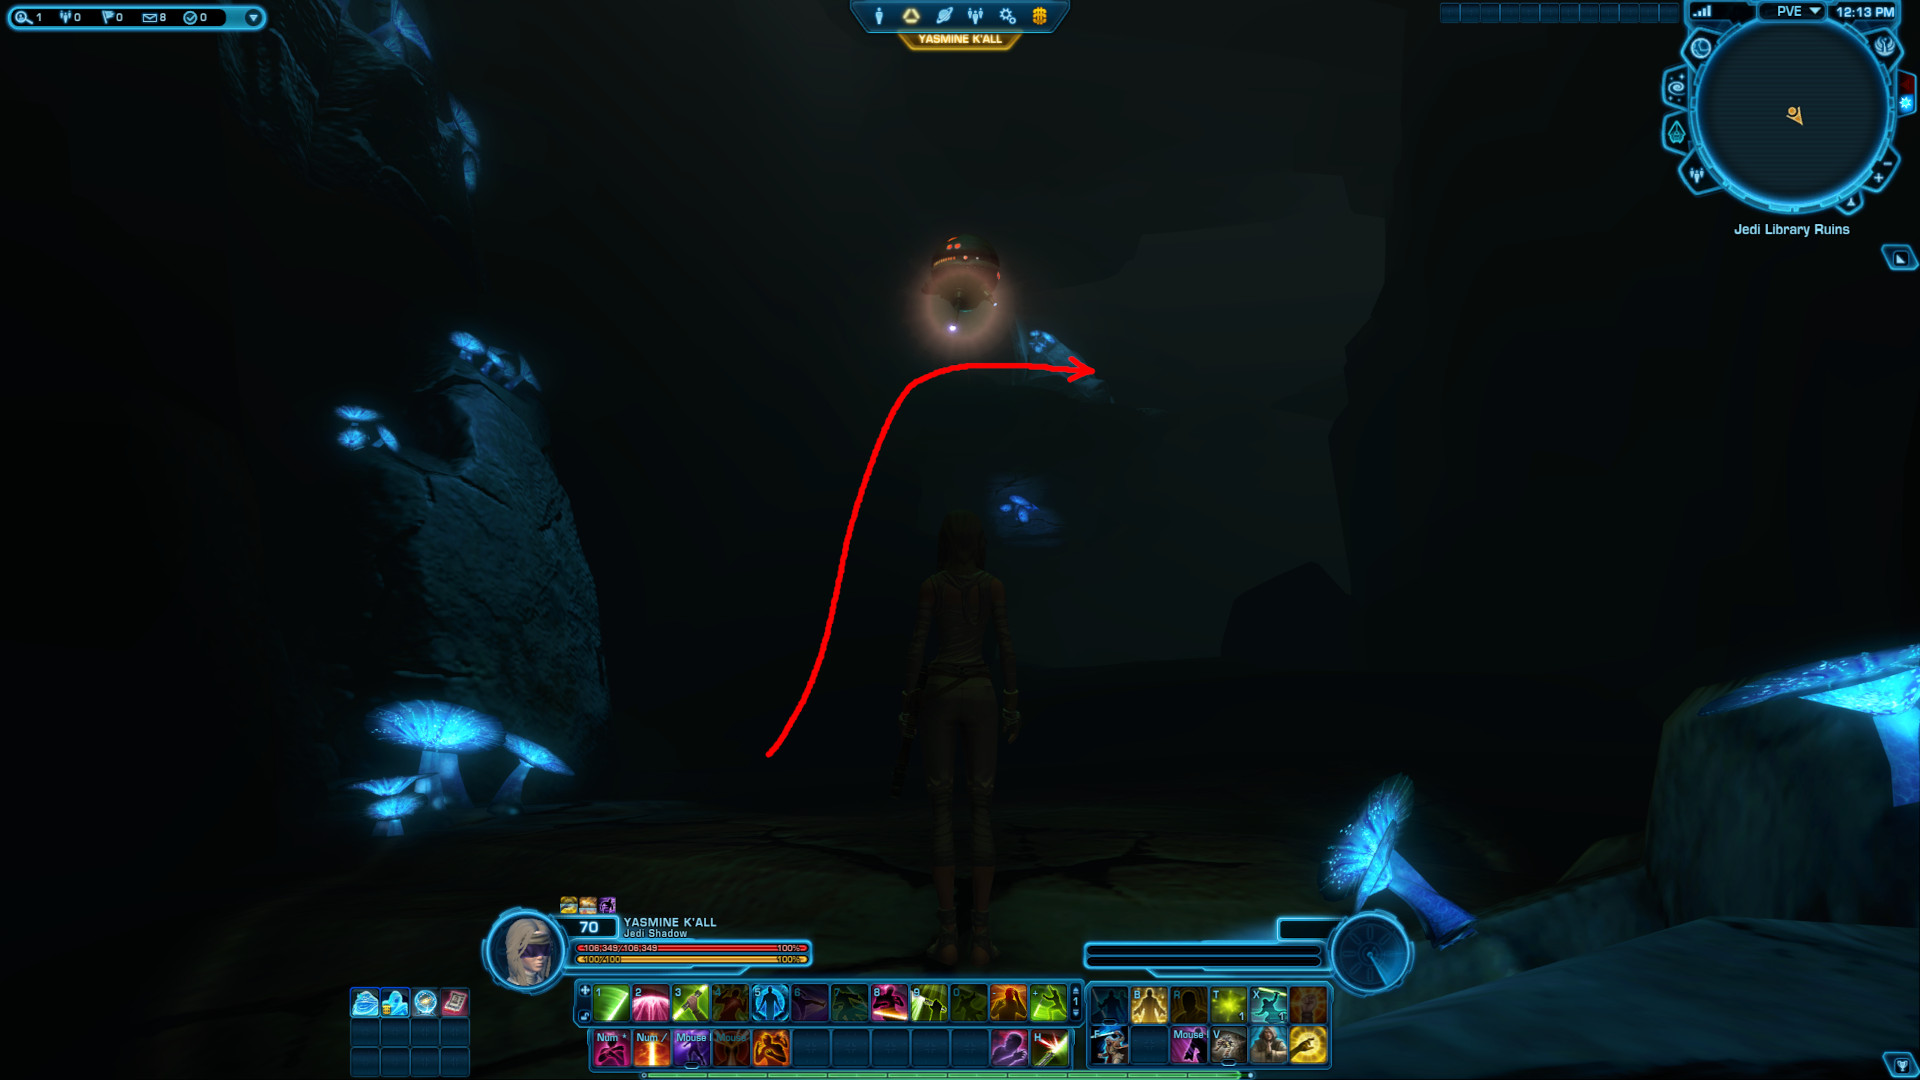
The cave is very dark, but as you step forward, a light probe will spawn and follow you around, as well as all the glowy blue mushrooms are your indicators to your path ahead. Your first climbing point is at the first glowy mushroom to your left.
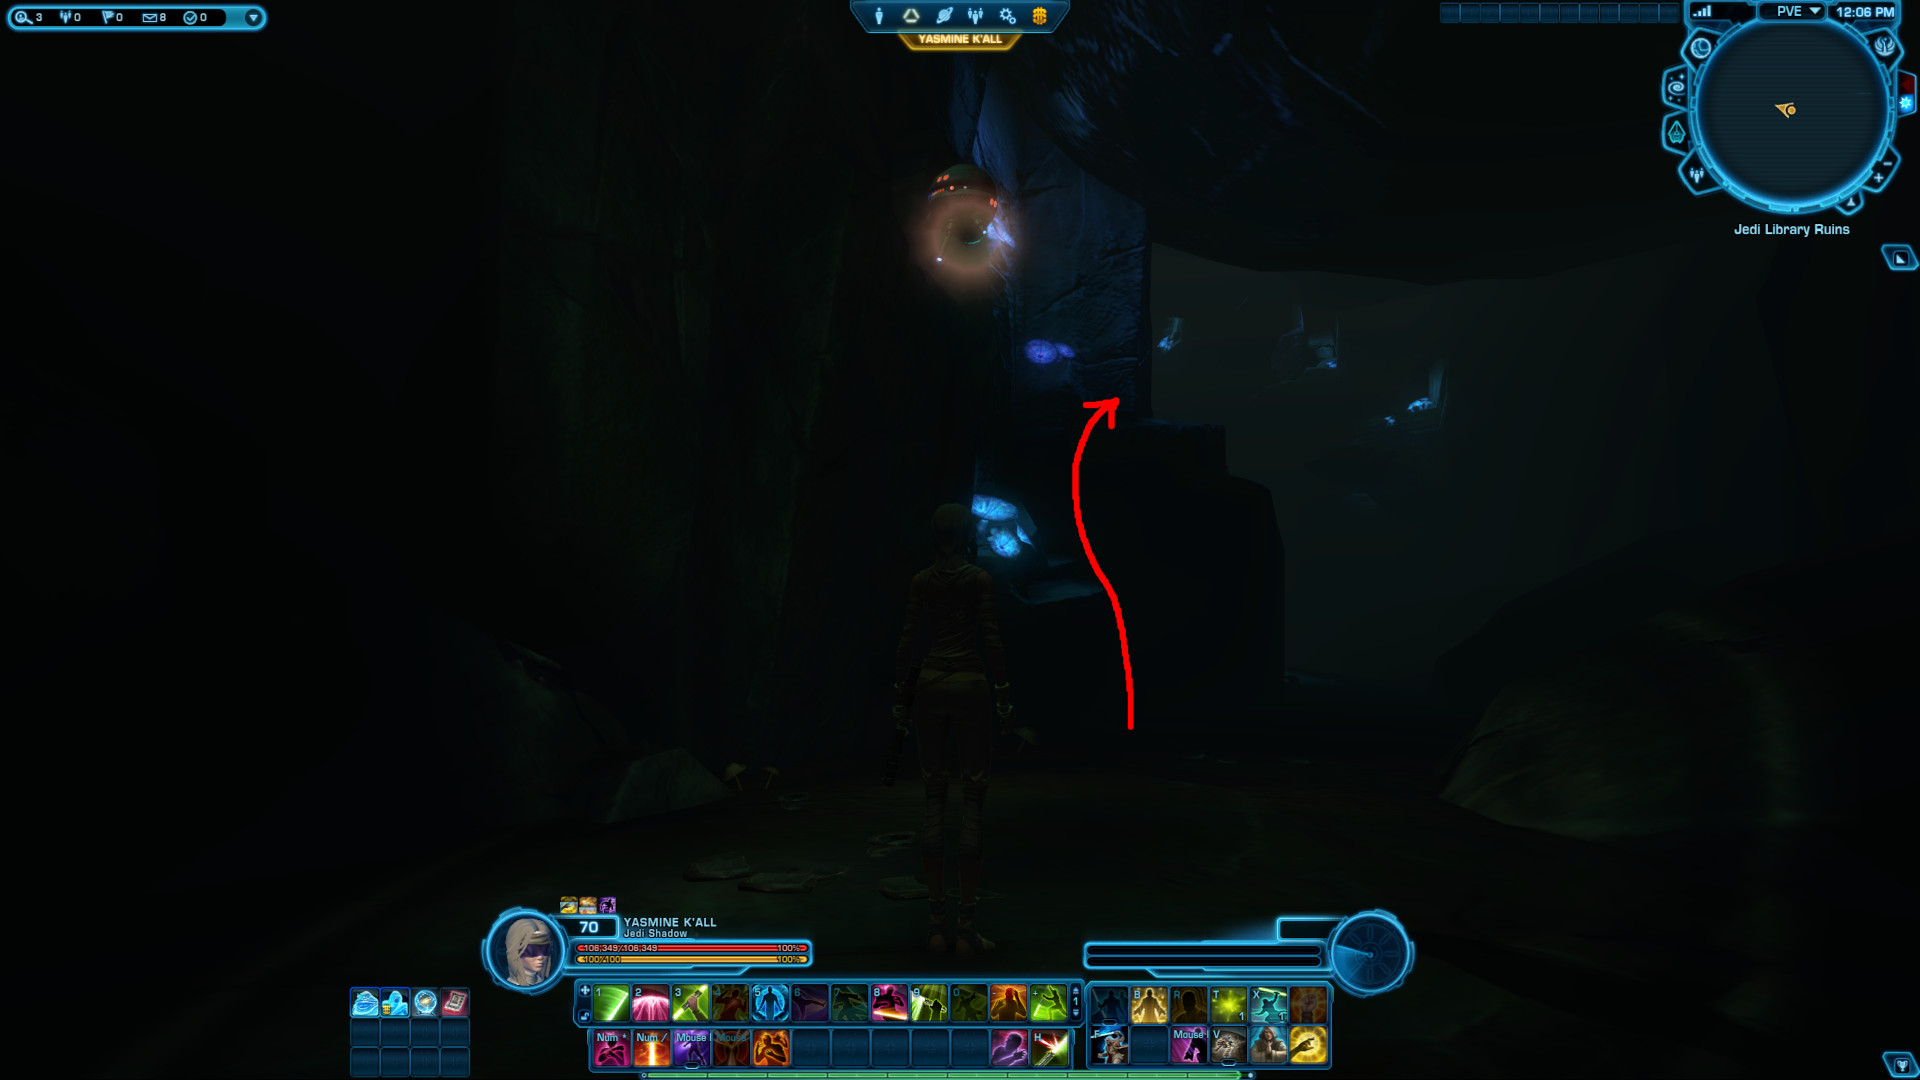
Start out by staying on the left side, but be ready to jump back and forth between left and right side, following the path of the glowy mushrooms.
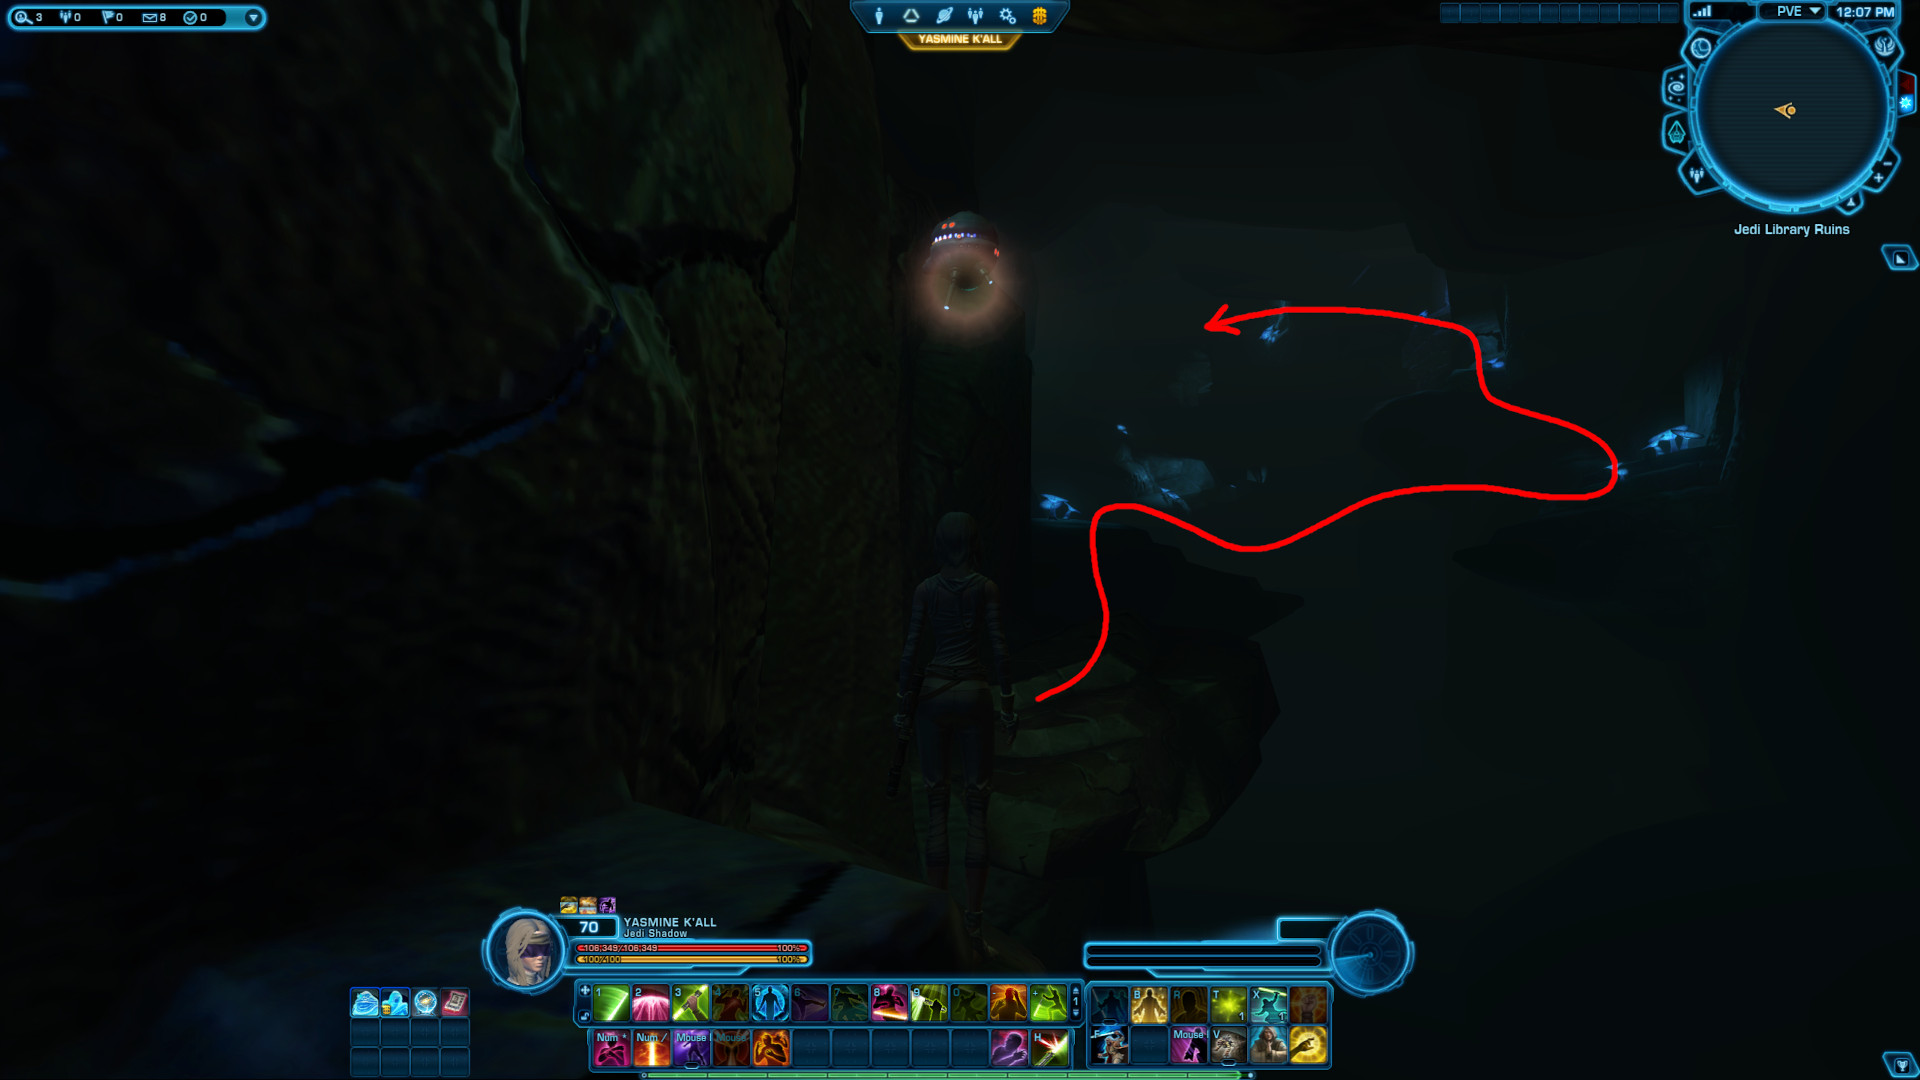
Continue until you get to solid ground underneath you again.
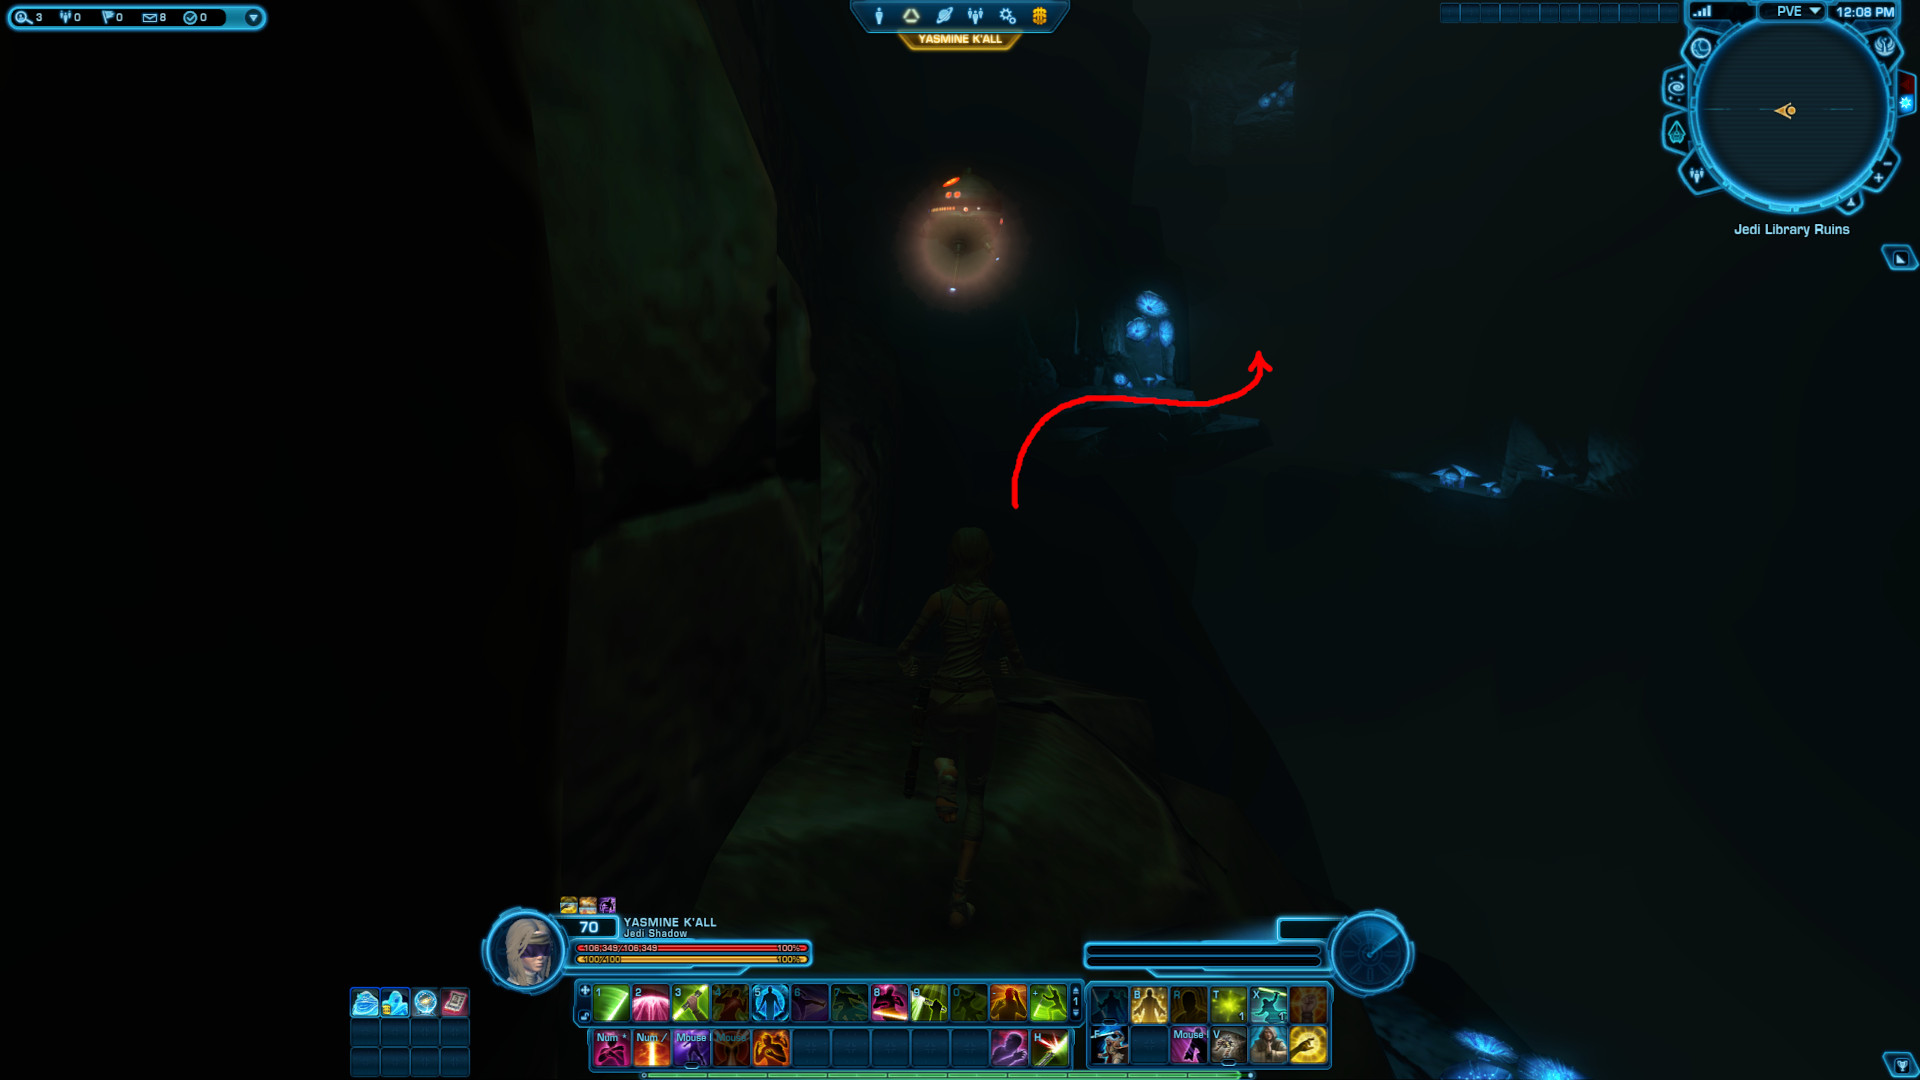
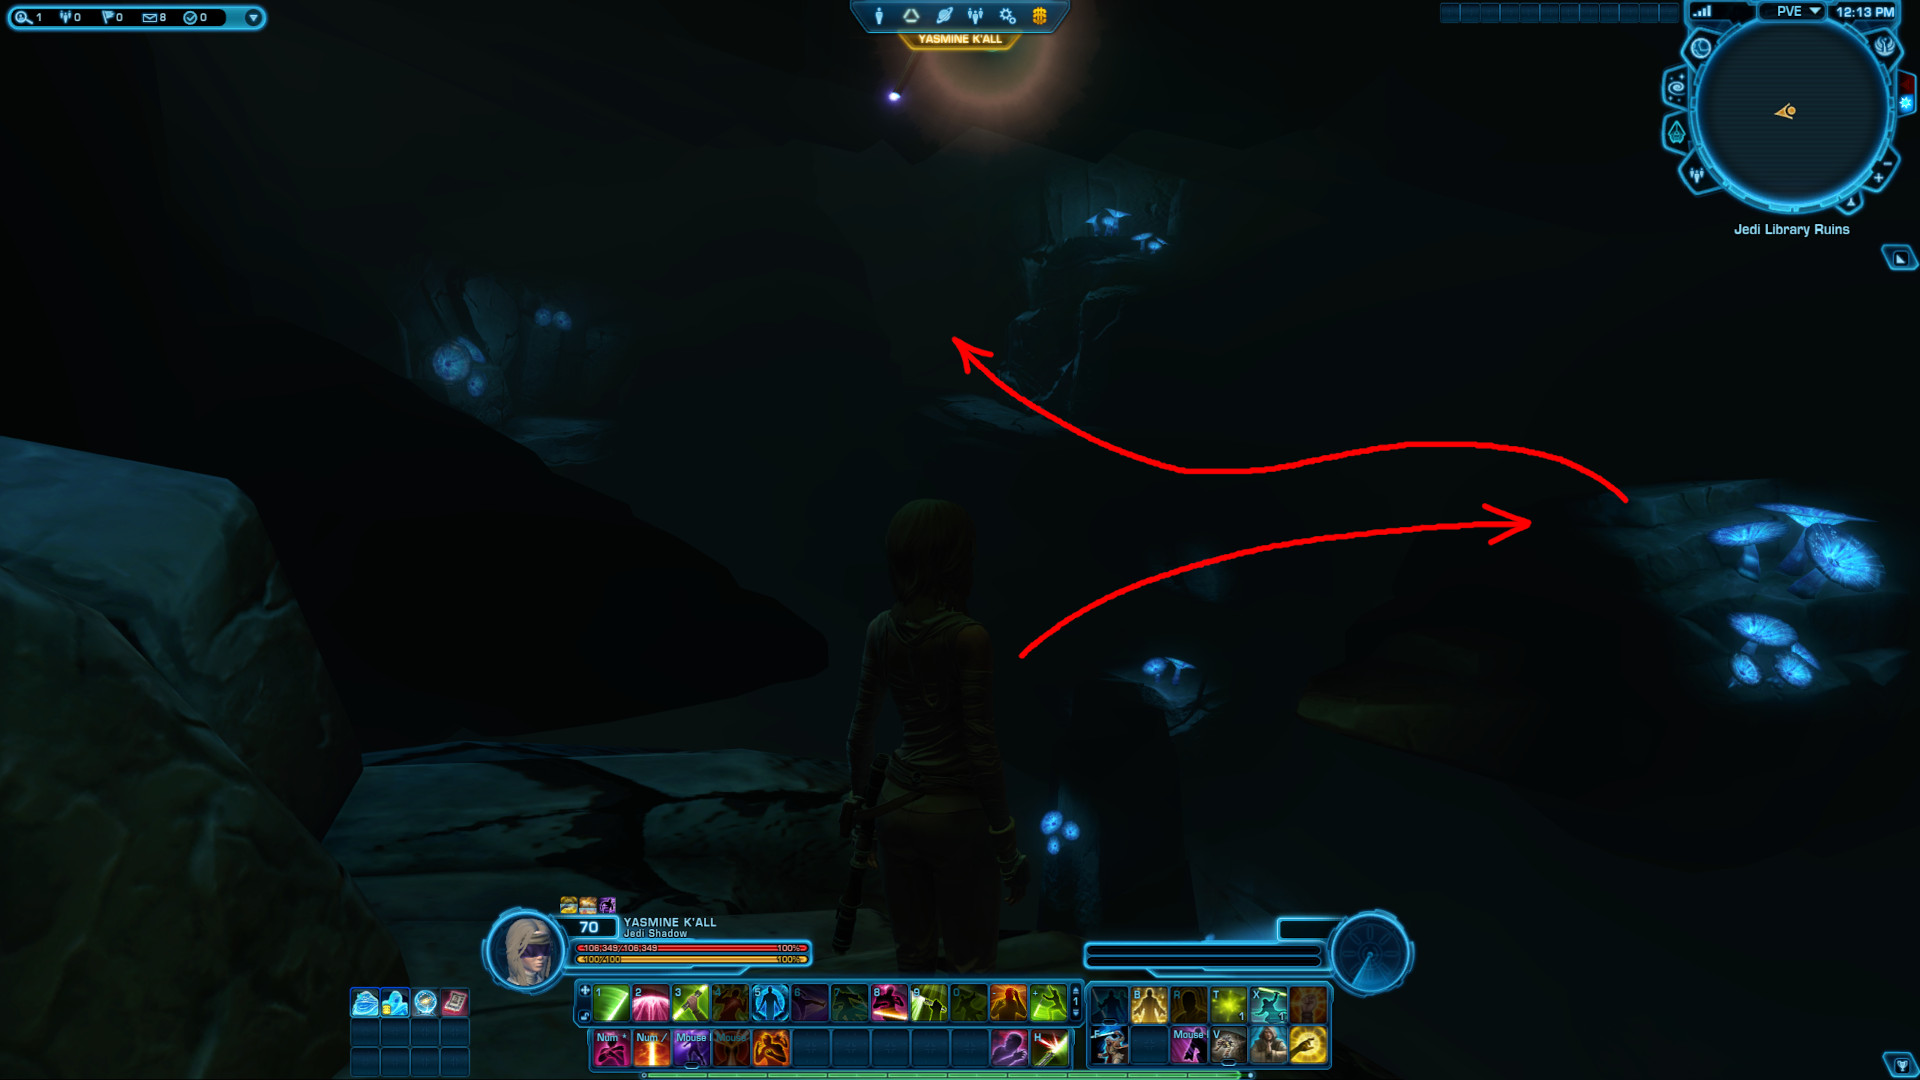
From this part of the ground floor, your climb starts at your left yet again at the lone glowy mushroom and stay on the left side all the way.
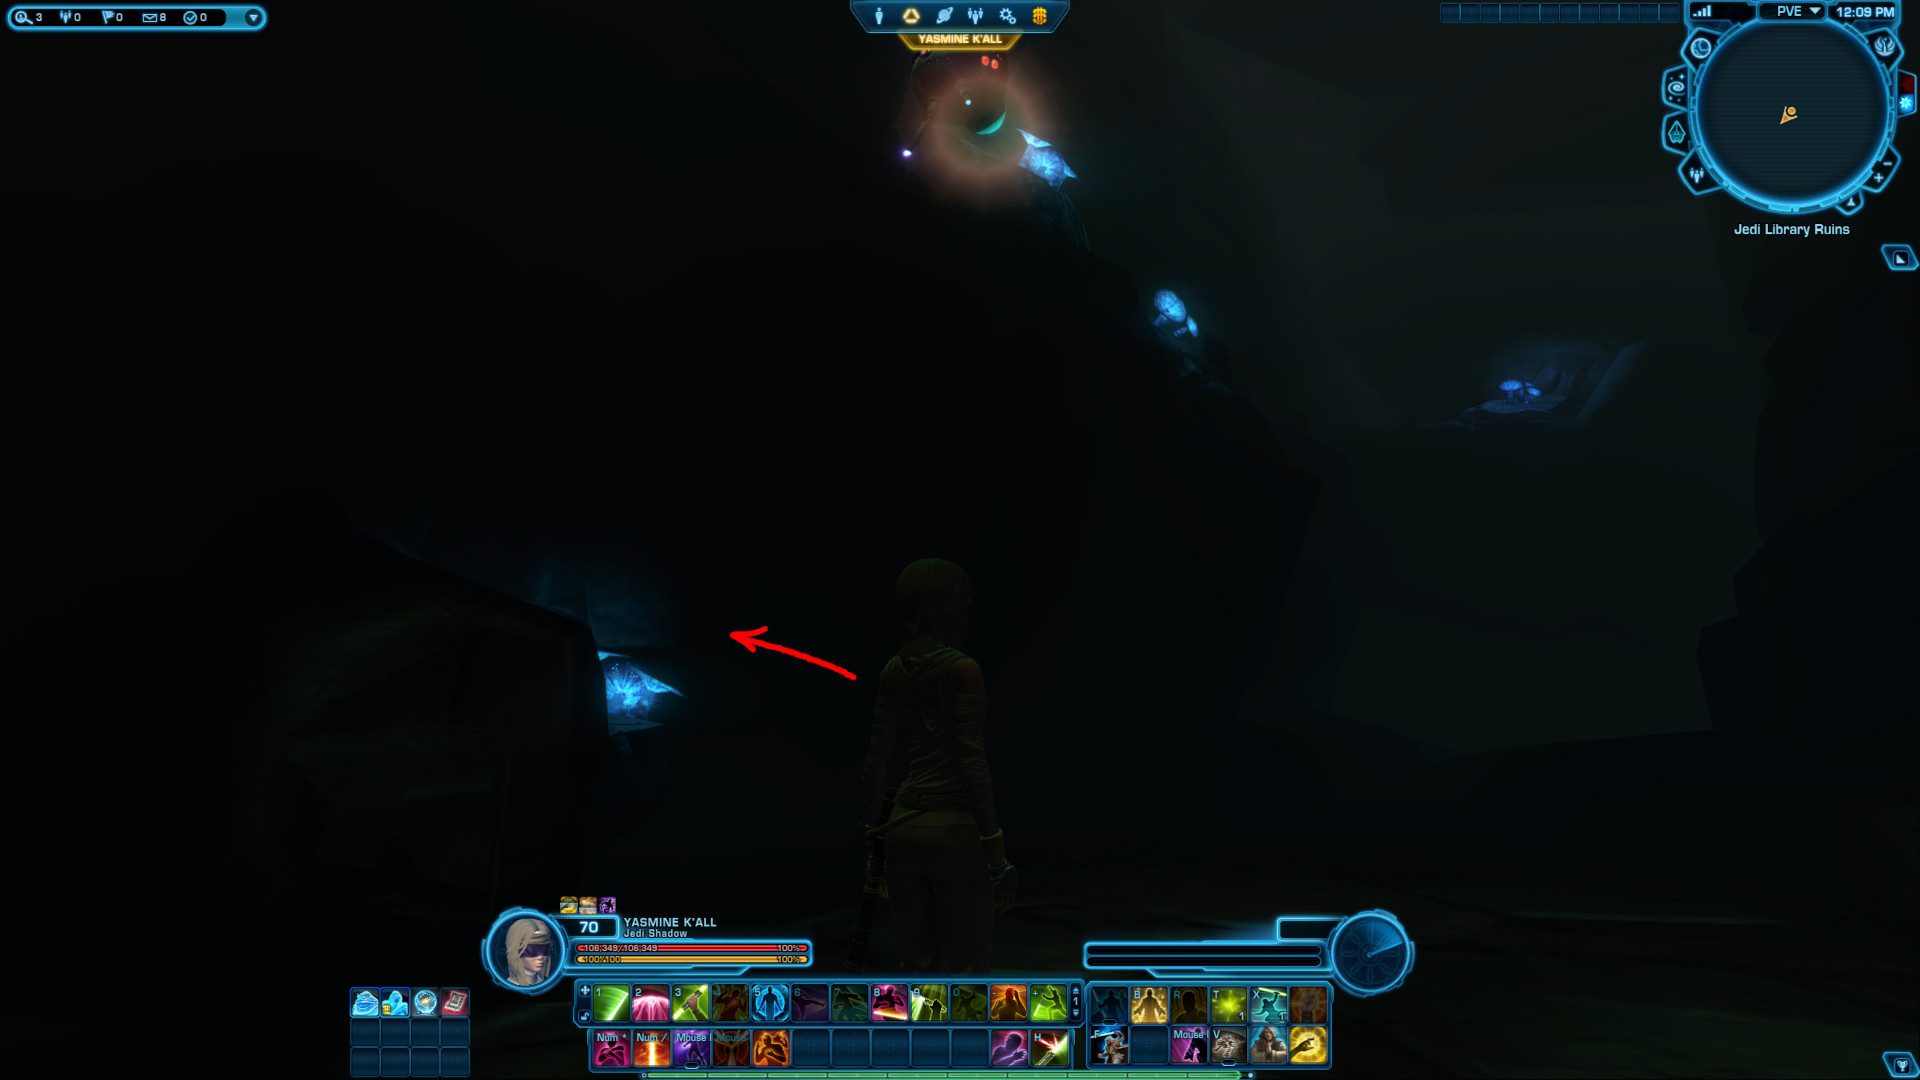
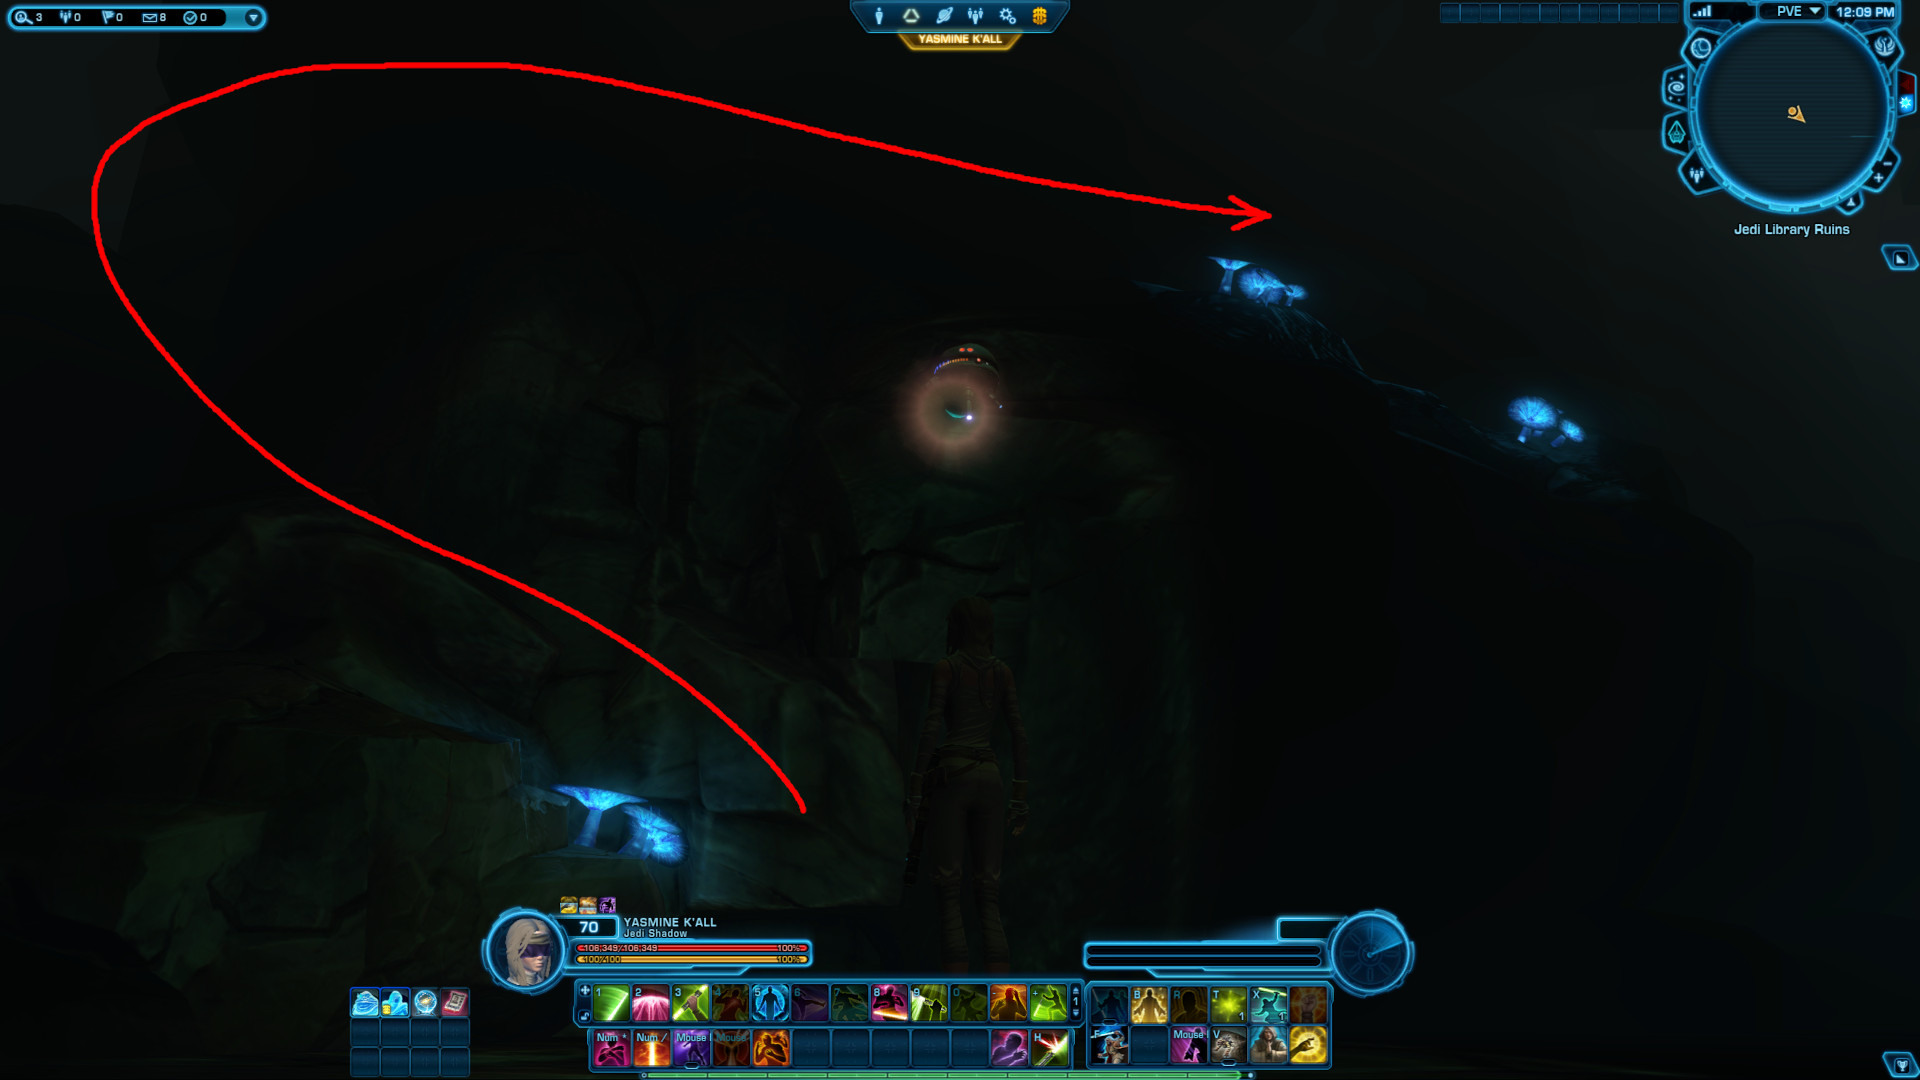
Run through the small gap in front of you and drop down to solid ground.
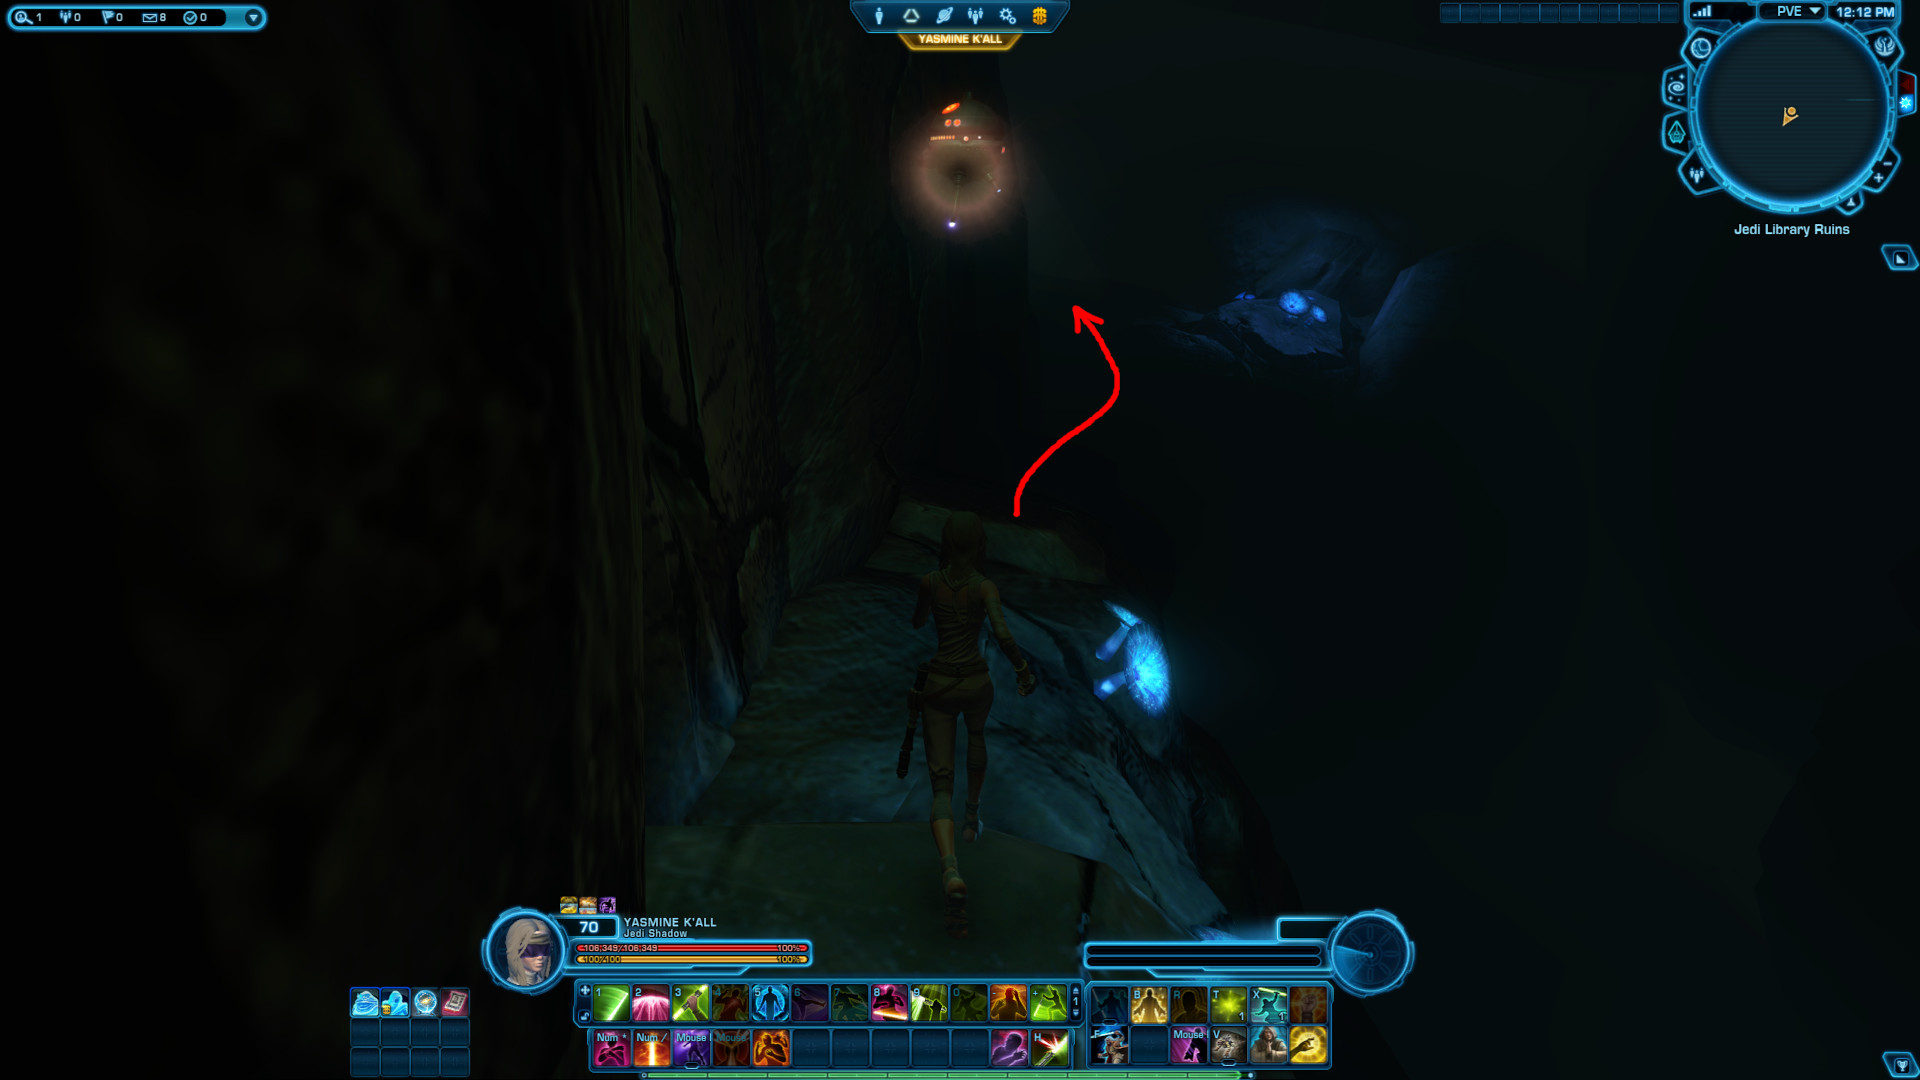
From here, stay left again. Follow a ramp upwards. It's hard to see at first, but when you get close enough, your probe will illuminate your path.
At the jaggedy rock, jump to the right side and follow the last ledge and run through the gap. You will soon see light at the end of the tunnel.
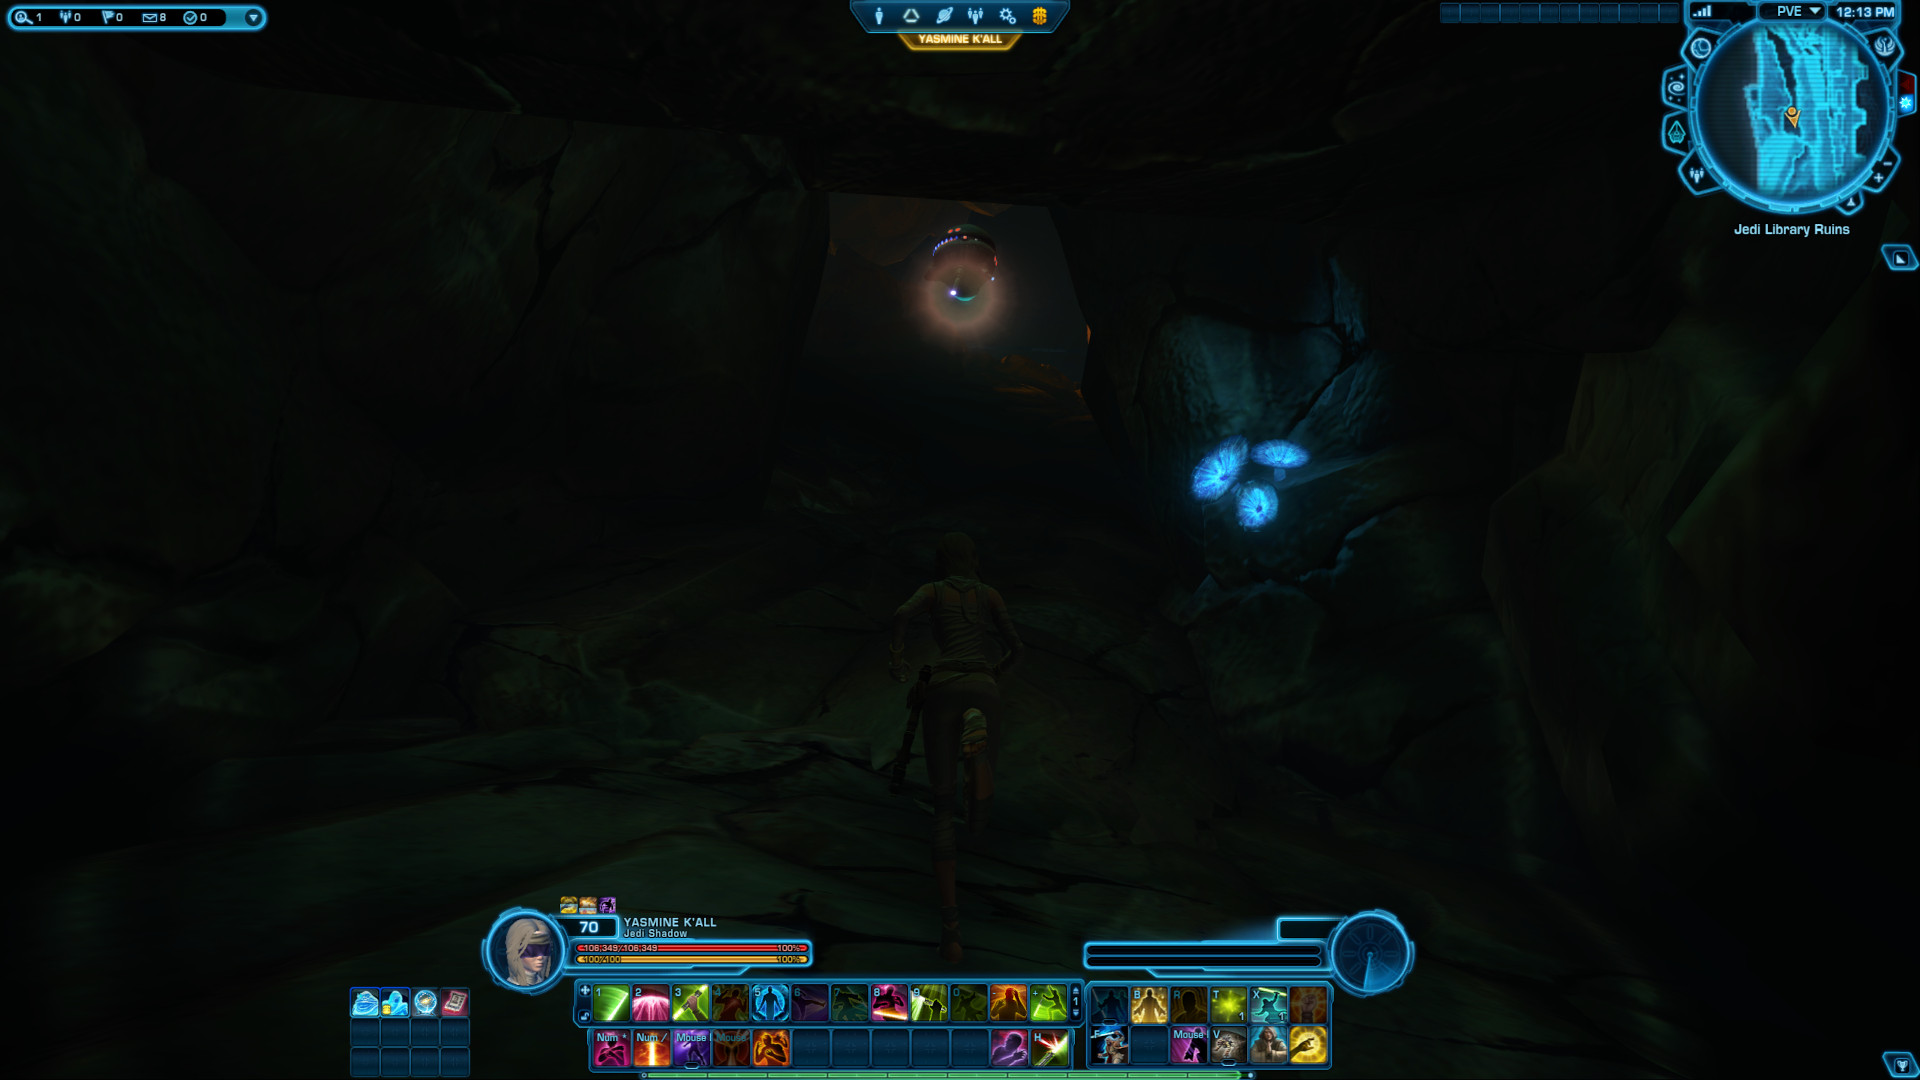
You are now at the upper level of the large Library room at which you have a confrontation with Malora / Gnost-Dural in your main story. Click the first of two Ancient Switches.
Move to the right side of the catwalk and jump over the few narrow gaps.
Follow the catwalk around to the left. You will pass the Holocron that you cannot interact with just yet.
Proceed forward. At the large hole in the catwalk, go to the column on your left.
Jump onto the small ledge on the column and shimmy around on the left side. If you fall to the left, you land in the Main Library room, you will survive and you have to do the cave jumping puzzle over again. If you fall to the right, you will lose health and spawn back at the Ancient Switch again.
Do the same on the second column, but shimmy to the right and left again on the third column.
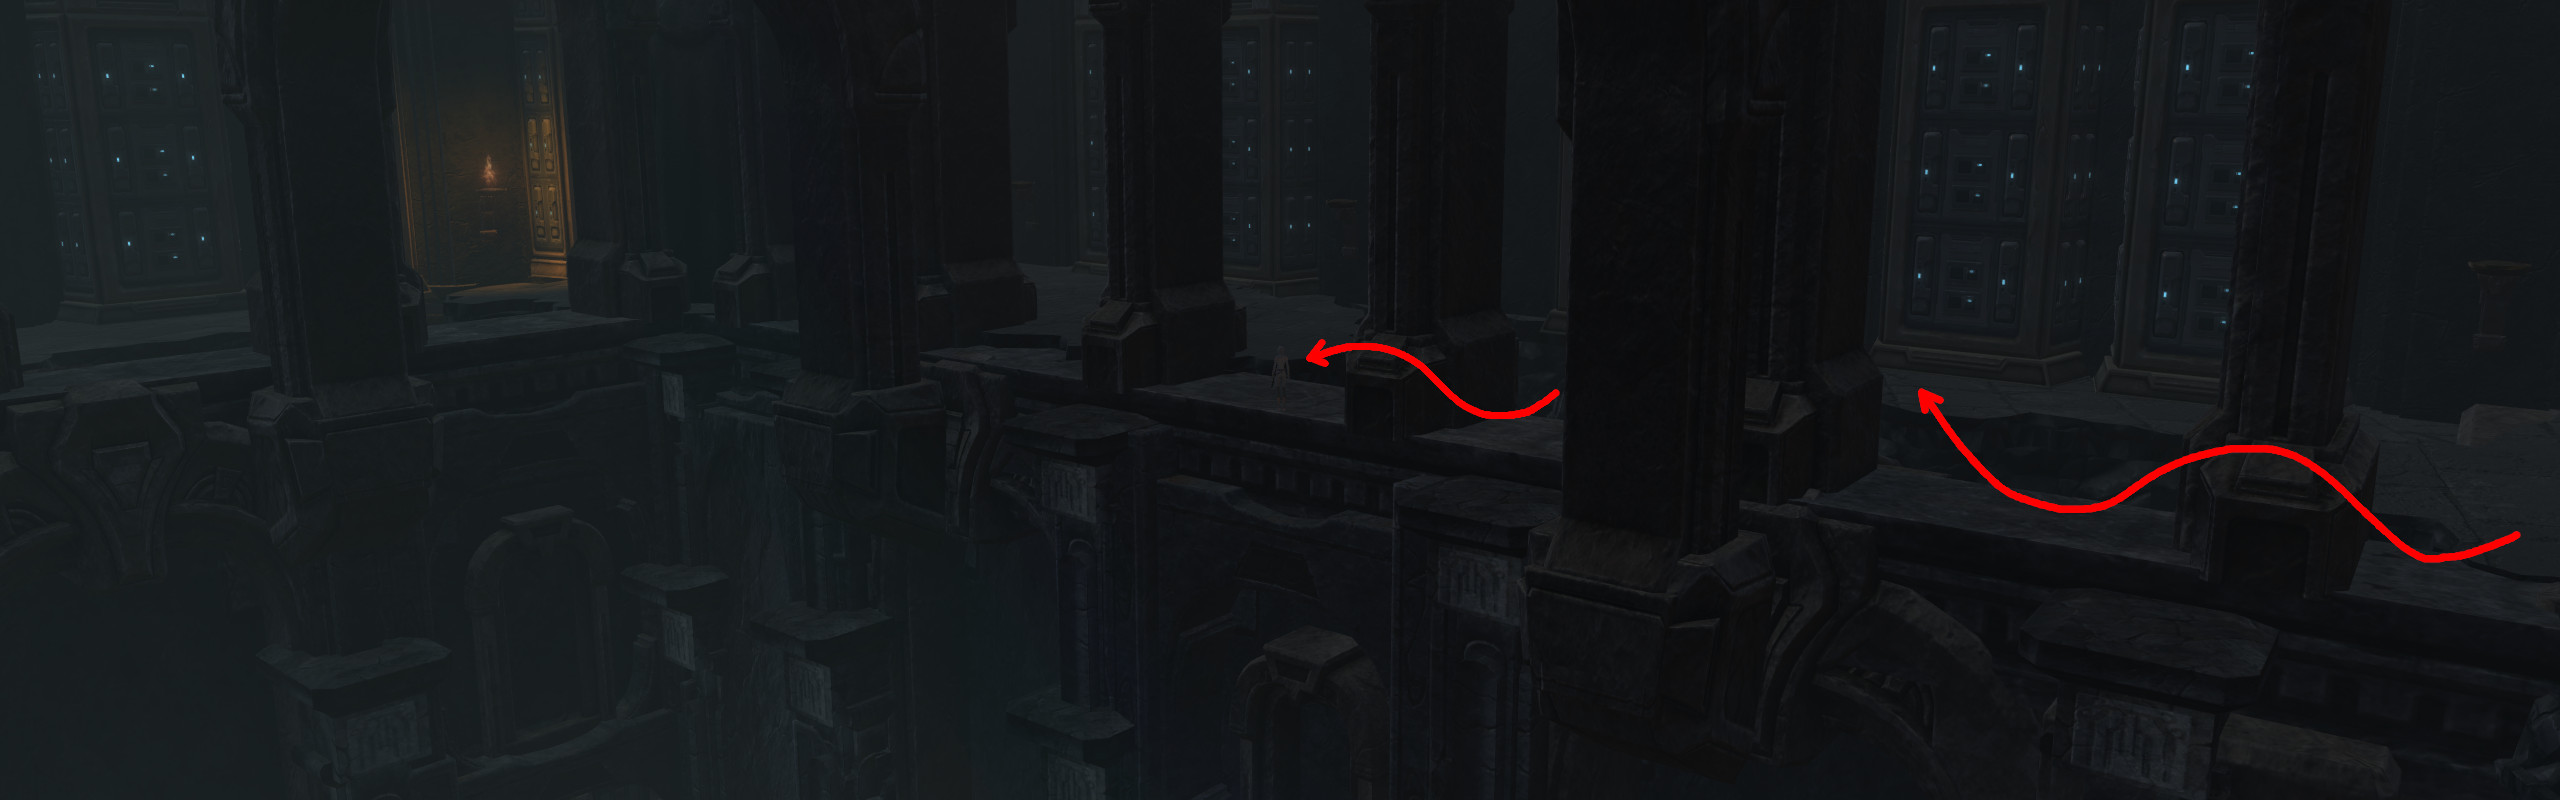
Back on the catwalk, stay right and jump over the gap where it is most narrow.
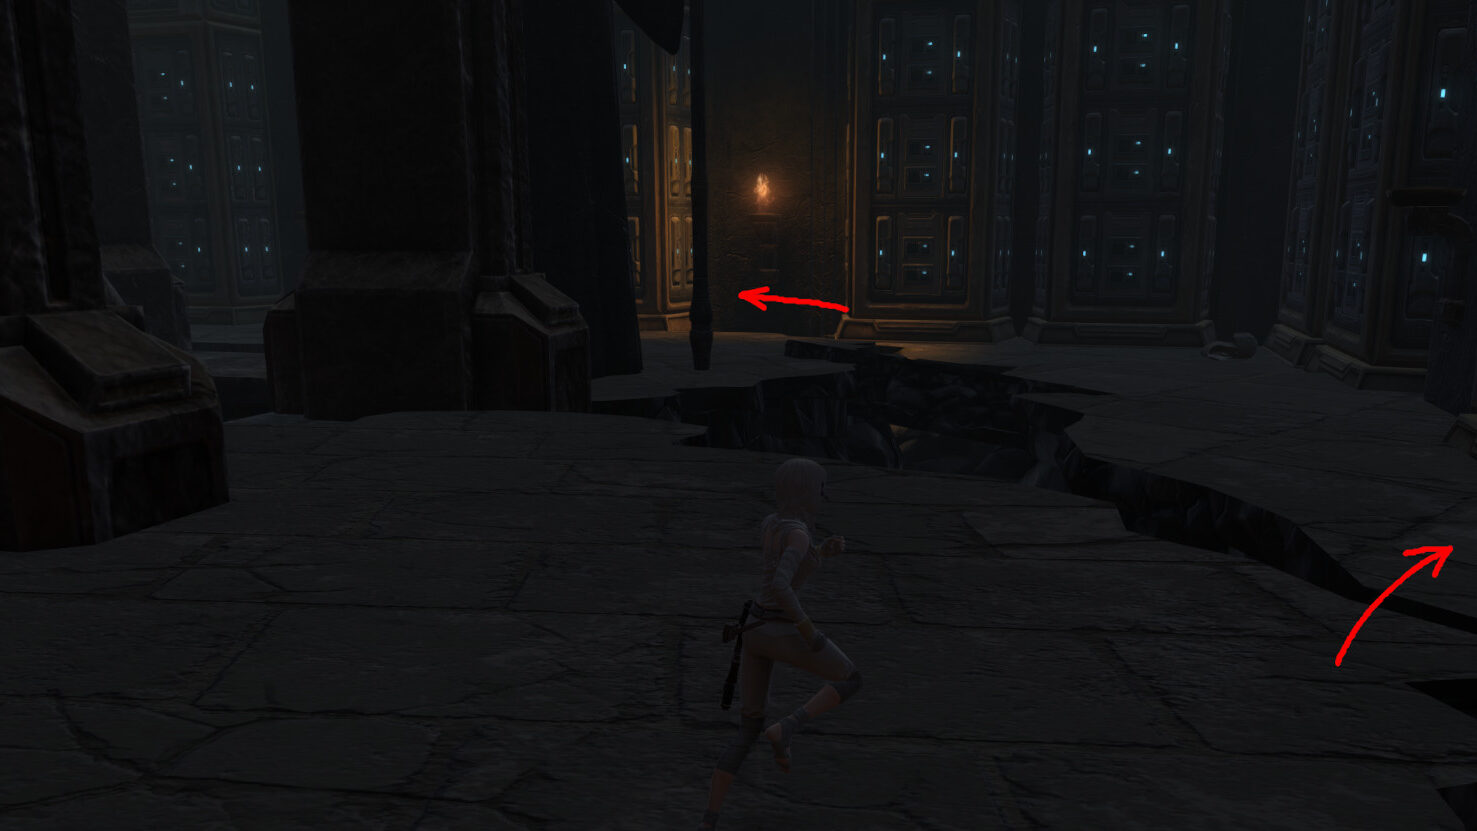
Continue onwards until you reach the next two gaps are a bit further apart, so I recommend using your rocket boots (from your Legacy Tab - 2 mill credits)
Click the second Ancient Switch.
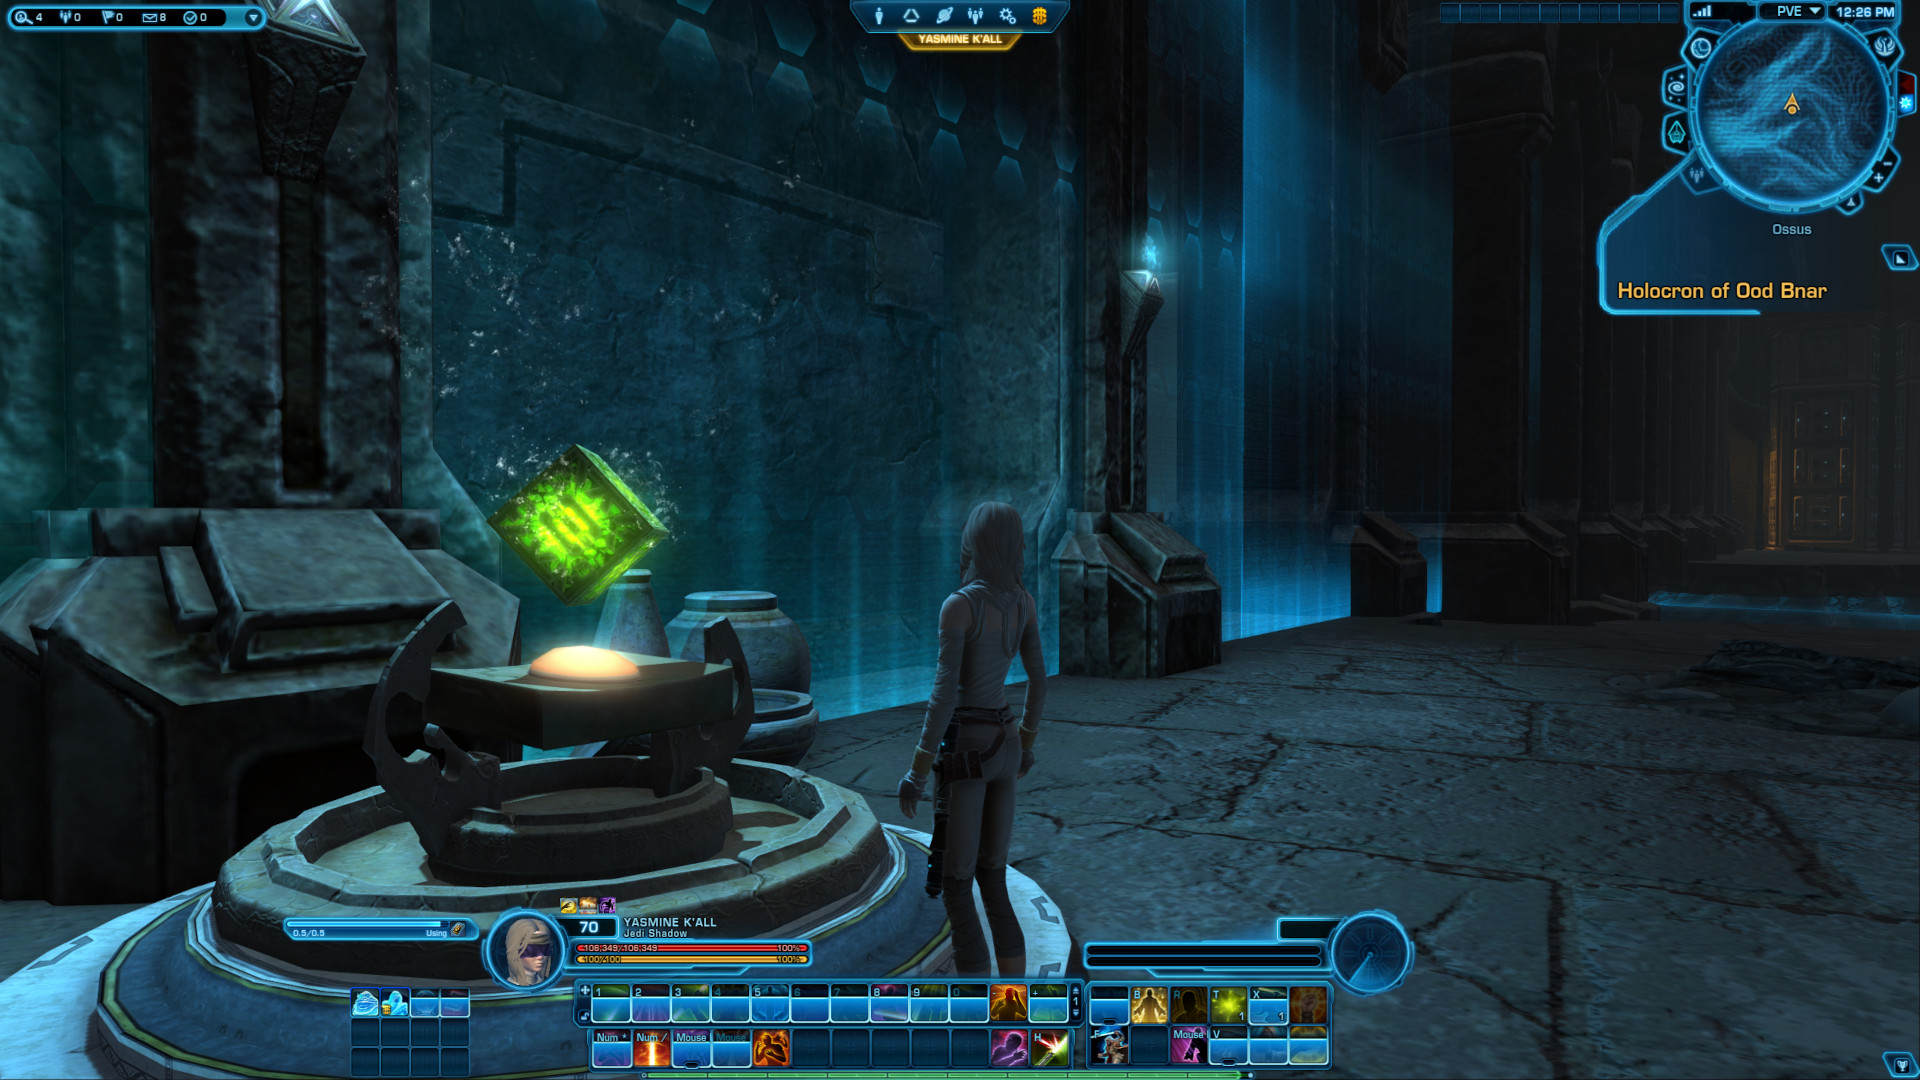
This activates a protective barrier that allows you to run safely back to the Holocron.
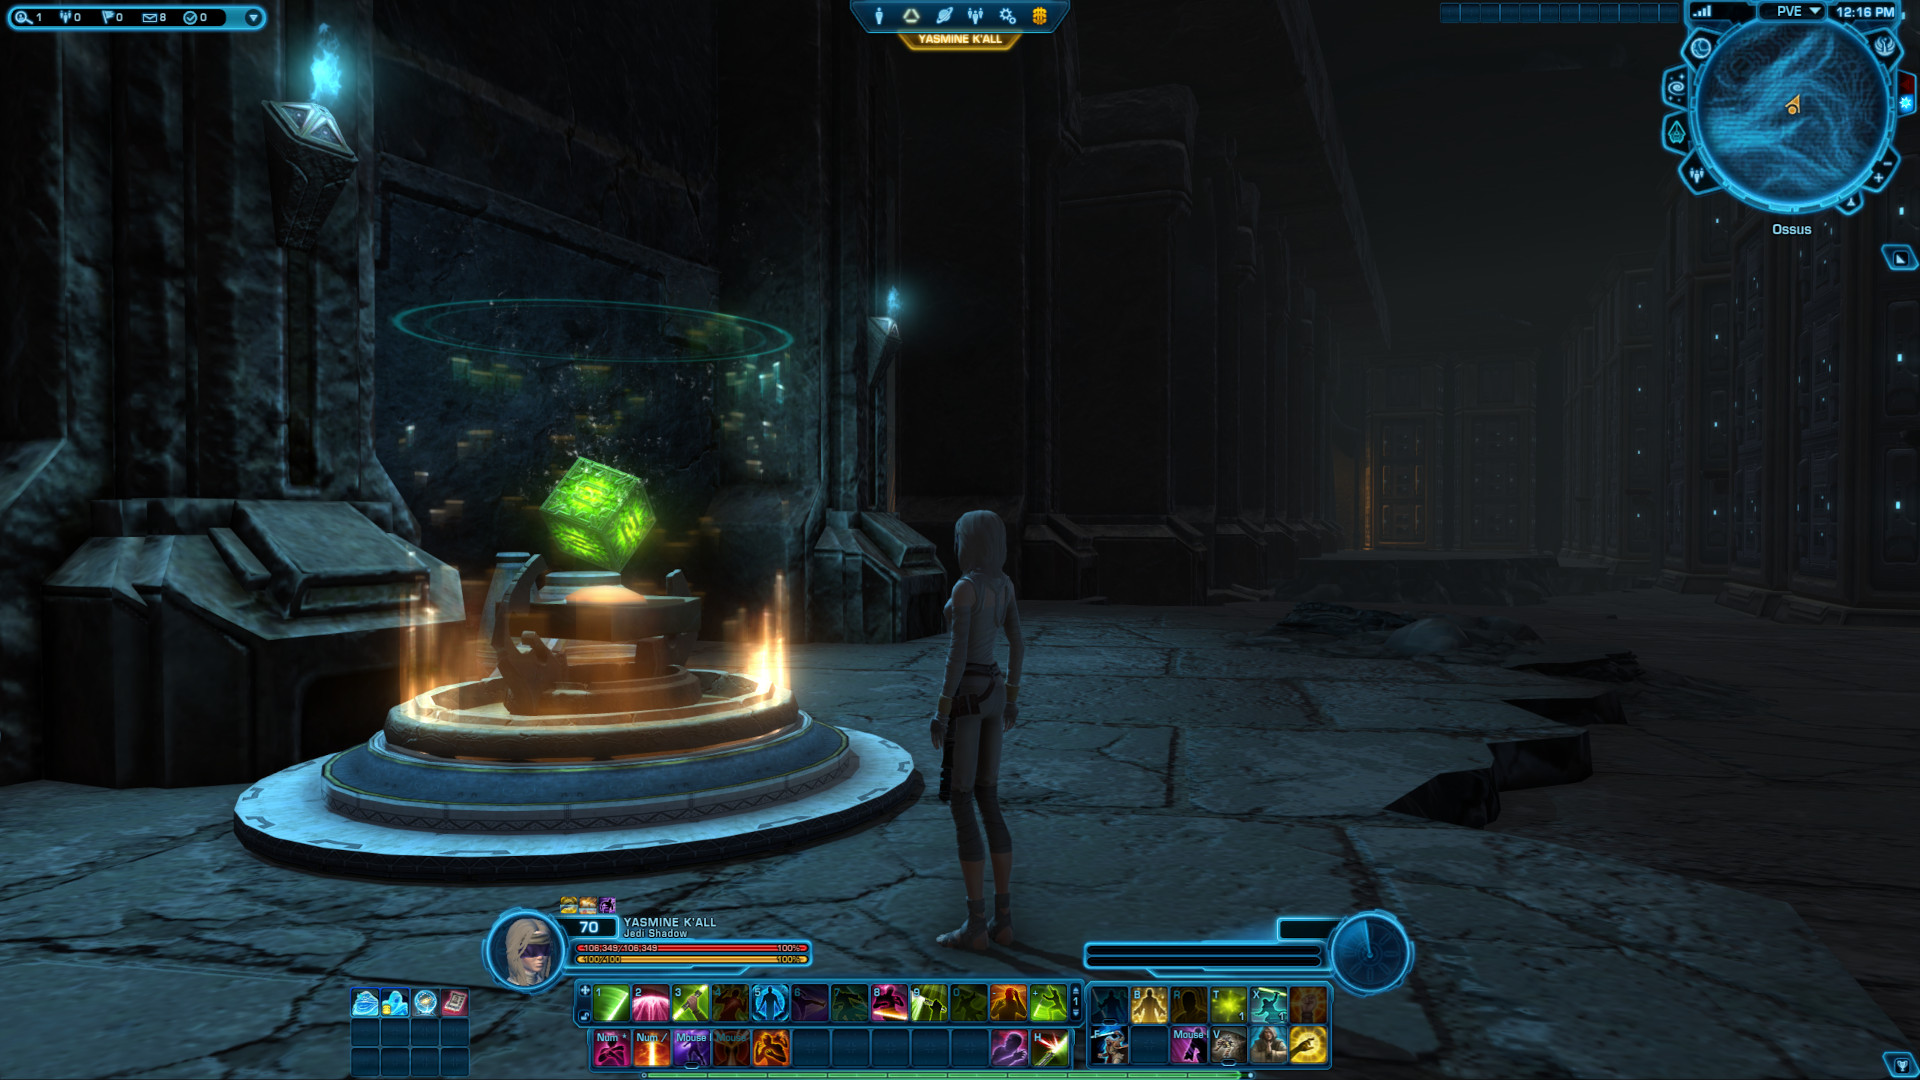
Now retrieve the unshielded Holocron of Ood Bnar.
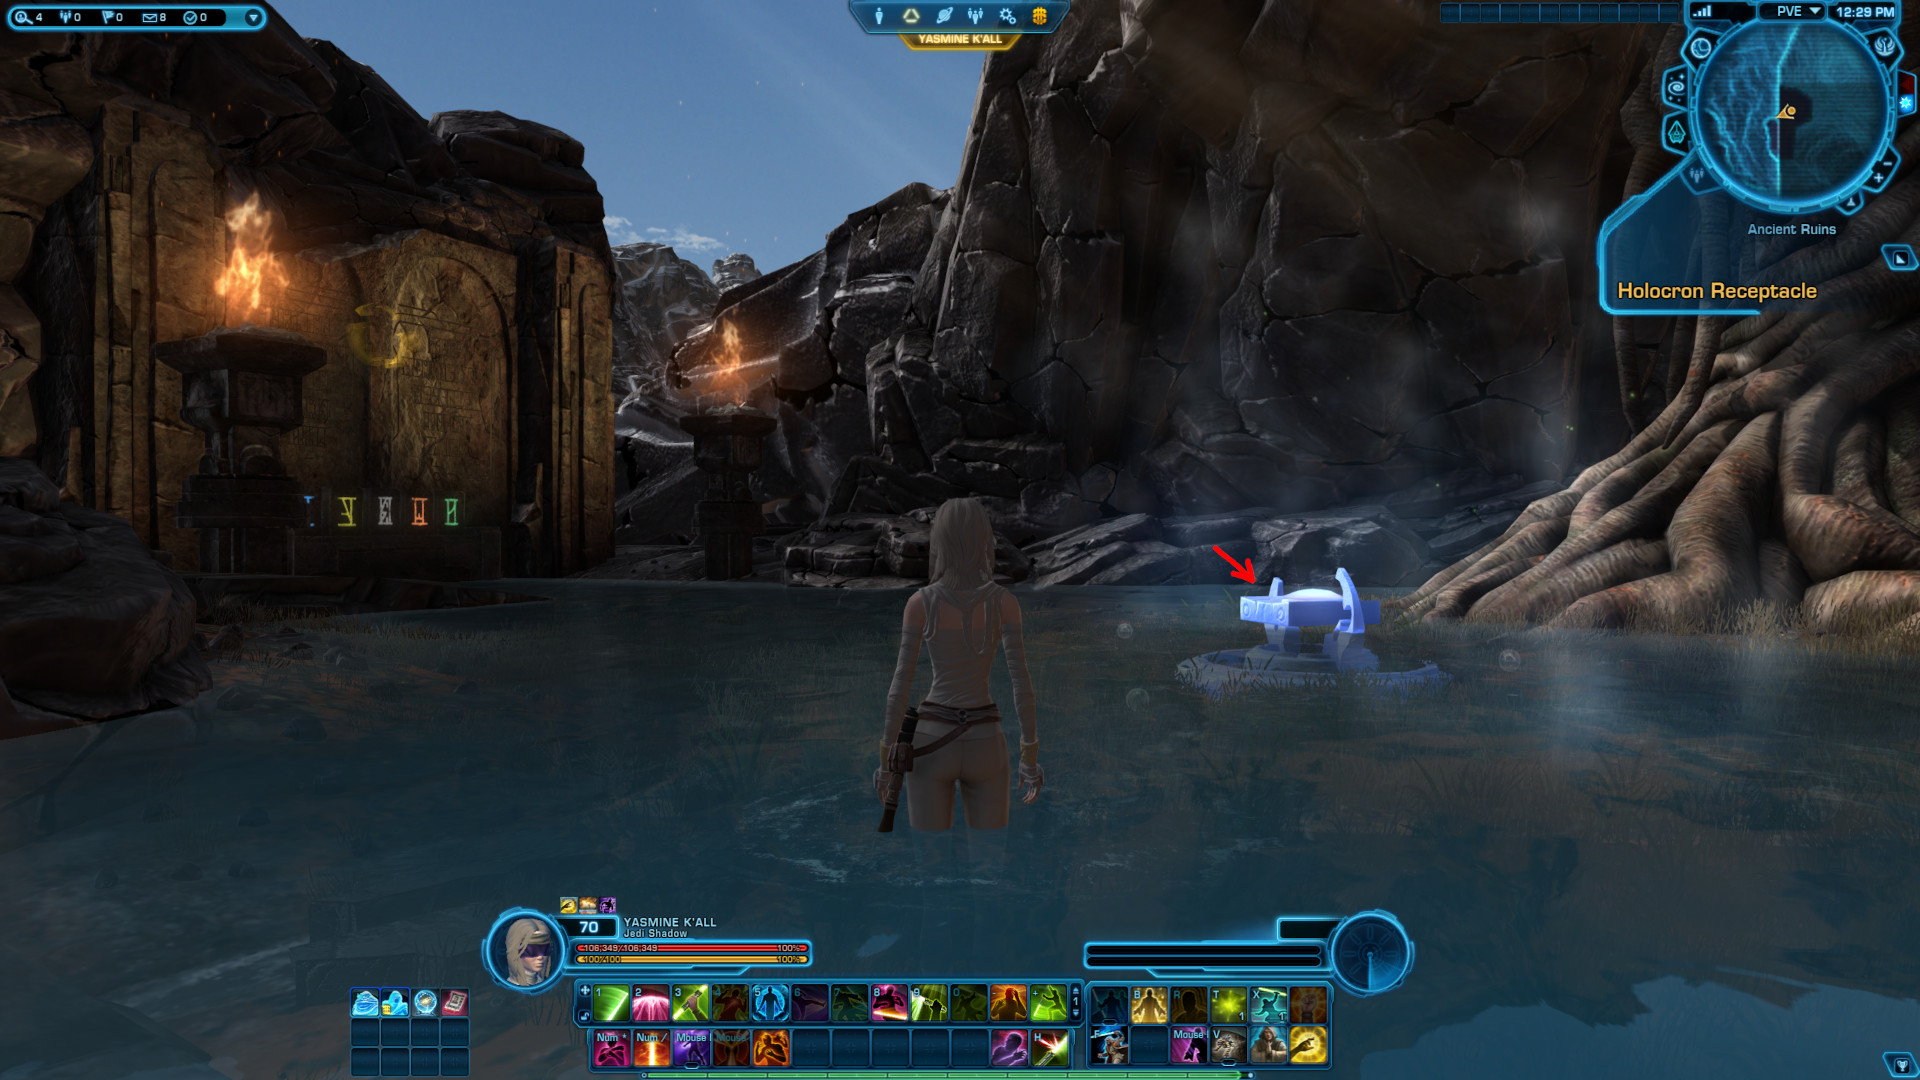
Return to your hidden personal instance again at coordinates 1374, -373 in Ancient Ruins.
You can now click the Holocron Receptacle in front of the hibernating Ood Bnar. Once you are done here, you cannot enter again, so enjoy!
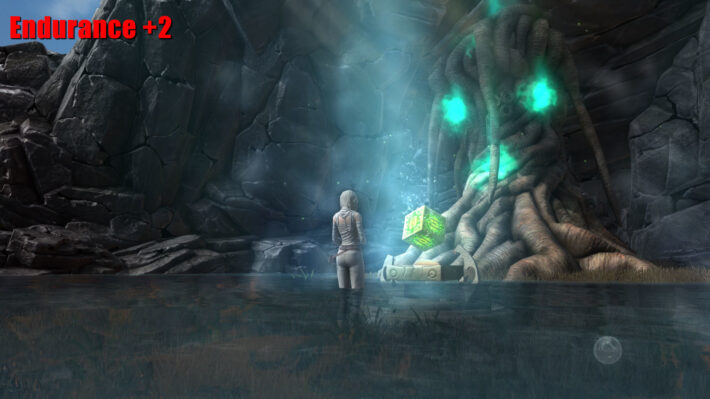
This will grant you Endurance +2 to your permanent stats along with codex: Ood Bnar.
This datacron holds unheard of power and knowledge collected by an unknown individual. You access its power and discover information unknown to many:
At the time of the Cron Supernova, the Great Jedi Library of Ossus was overseen by Ood Bnar, a Jedi Master specializing in knowledge of the Sith and their use of the dark side. Though his tenure as head librarian was short, Ood Bnar served loyally, defending the library's artifacts from the Sith Lord Exar Kun in the final moments before the supernova razed the planet.
As a member of the tree-like Neti species, Ood Bnar could alter his physiology and shape, allowing him to transform from a humanoid into a towering tree in order to envelop and protect a cache of ancient lightsabers. He entered a form of deep hibernation as the Cron Supernova struck and has yet to rouse from this trance-like state. Master Gnost-Dural and many other Jedi have meditated at his roots, hoping to communicate and learn from the ancient Jedi, but thus far, Ood Bnar has offered no response.
This will also grant you the only earnable Weapon Tuning, which will automatically be placed in your inventory.


If you would like to know more about this Ancient Jedi Master, then watch my video "Who is the sleeping Jedi on Ossus?"