Fleet Datacron Master
SWTOR Datacron Locations and Guides
- Alderaan Datacron Master
- Balmorra (Empire) Datacron Master
- Balmorra (Republic) Datacron Master
- Belsavis Datacron Master
- Corellia Datacron Master
- Coruscant Datacron Master
- Dromund Kaas Datacron Master
- Fleet Datacron Master
- Hoth Datacron Master
- Hutta Datacron Master
- Ilum Datacron Master
- Kessan's Landing Datacron Master
- Korriban Datacron Master
- Makeb Datacron Master
- Mek-Sha Datacron Master
- Nar Shaddaa (Empire) Datacron Master
- Nar Shaddaa (Republic) Datacron Master
- Onderon Datacron Master
- Ord Mantell Datacron Master
- Ossus Datacron Master
- Quesh Datacron Master
- Rishi Datacron Master
- Ruhnuk Datacron Master
- Taris (Empire) Datacron Master
- Taris (Republic) Datacron Master
- Tatooine Datacron Master
- Tython Datacron Master
- Voss Datacron Master


SWTOR Fleet (Republic) Datacron Location Guide

The Fleet Datacron increases your aptitude in combat, your max health and the effectiveness of your companion. This will grant you All Stats +10 to your permanent stats. There is only 1 Datacron in total located on the Republic Fleet Carrick Station.
Datacrons are collectables scattered around the galaxy in Star Wars: The Old Republic. Each Datacron contributes towards your Legacy's passive stats permanently. Furthermore, they also provide interesting Lore and Codex Entries about the Old Republic era.
This Datacron is located in the Museum area of the Gav Daragon on the Republic Fleet. This is a semi difficult jumping puzzle and you will need a group of at least 4 people. You can do this on either side, but once you have completed it, you can't access the area yourself anymore. You can accompany others though.
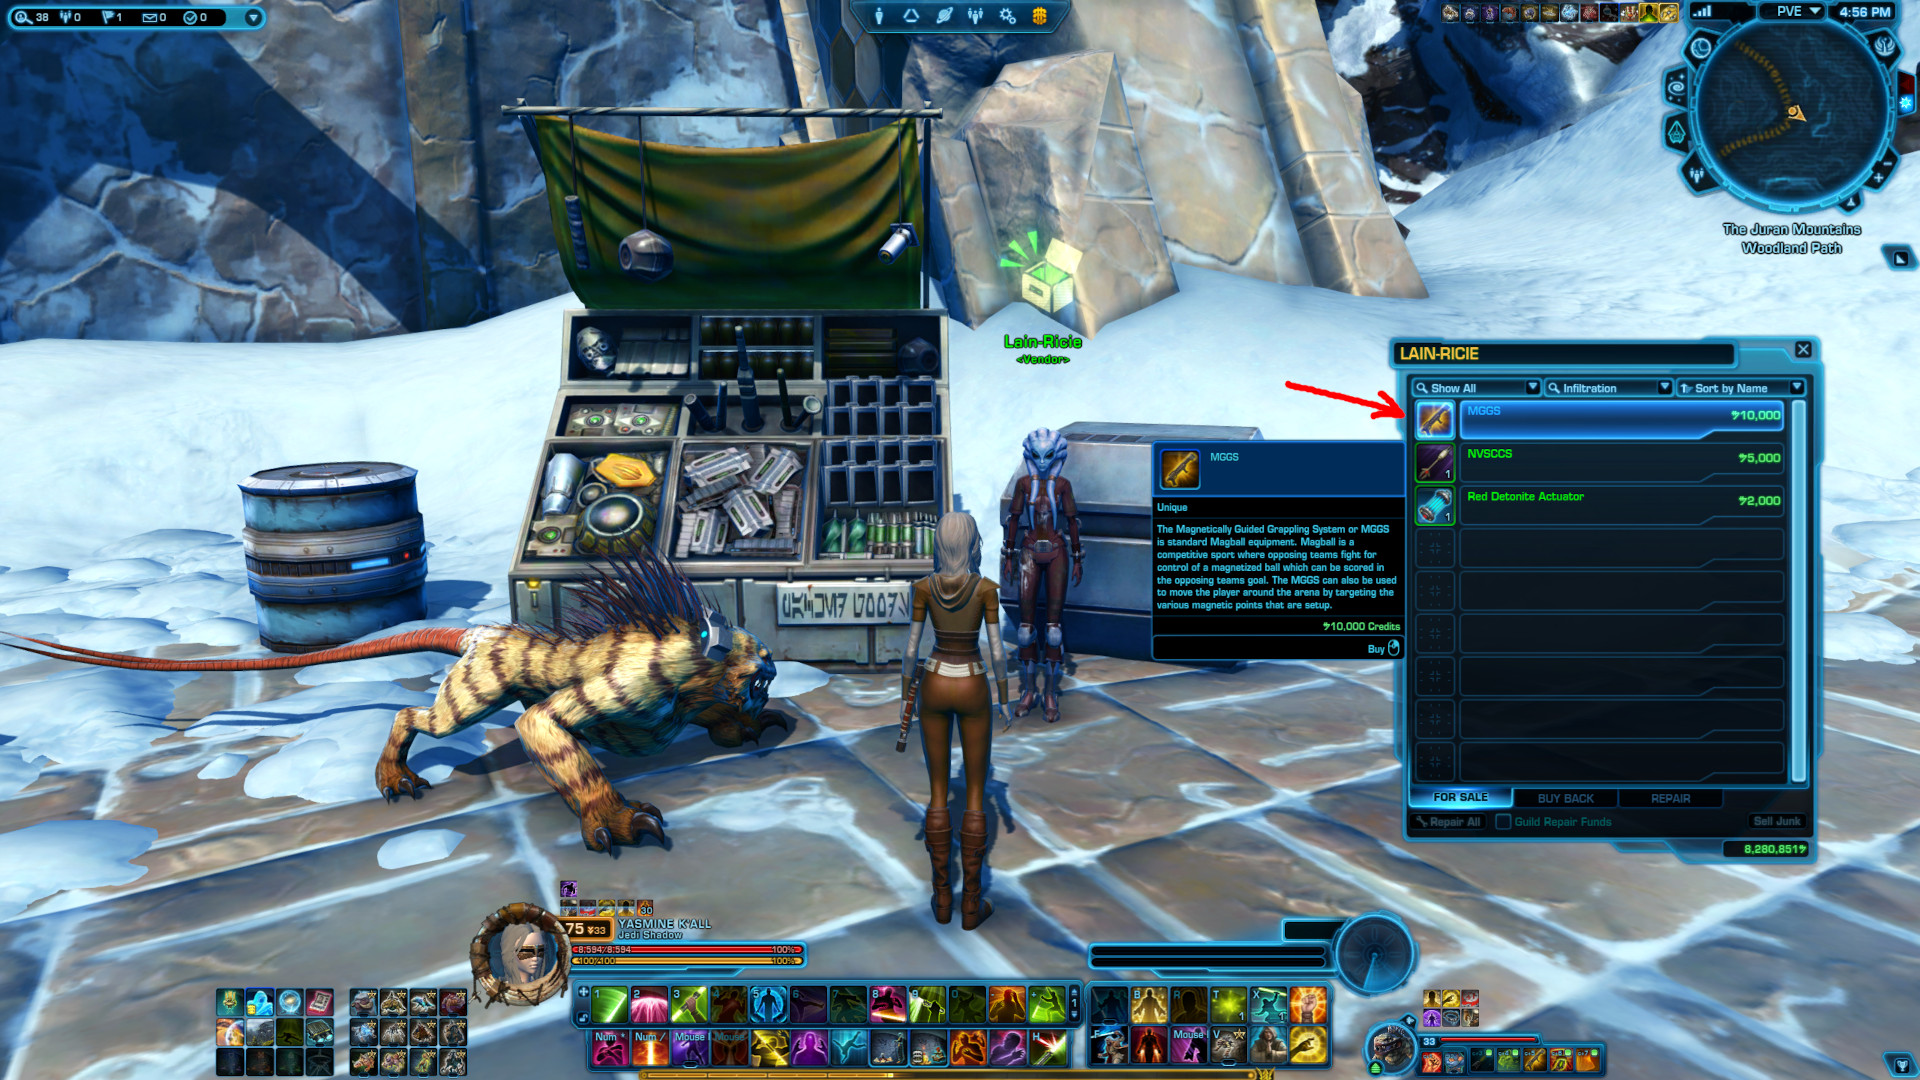
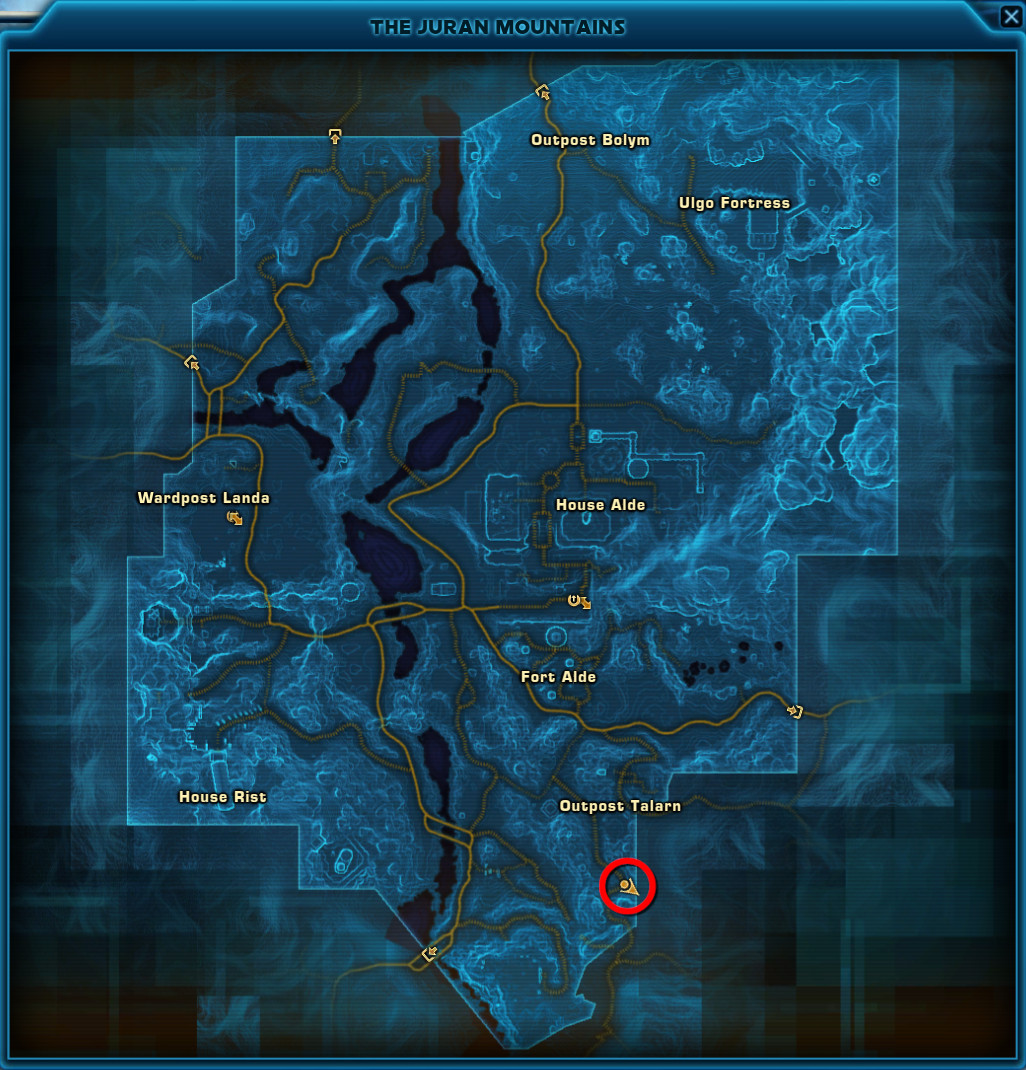
You will need to purchase an item at a lone vendor directly south of Outpost Talarn in the Juran Mountains, and I highly recommend everyone has this item, since using abilities can bug out or fail due to dsync (if you didn't buy it at the same time as the Red Mastery Datacron on Alderaan). Coordinates for the vendor: 1867, 1089.
You have to purchase the MGGS for 10,000 credits, which you will need for other Datacrons and achievements as well.
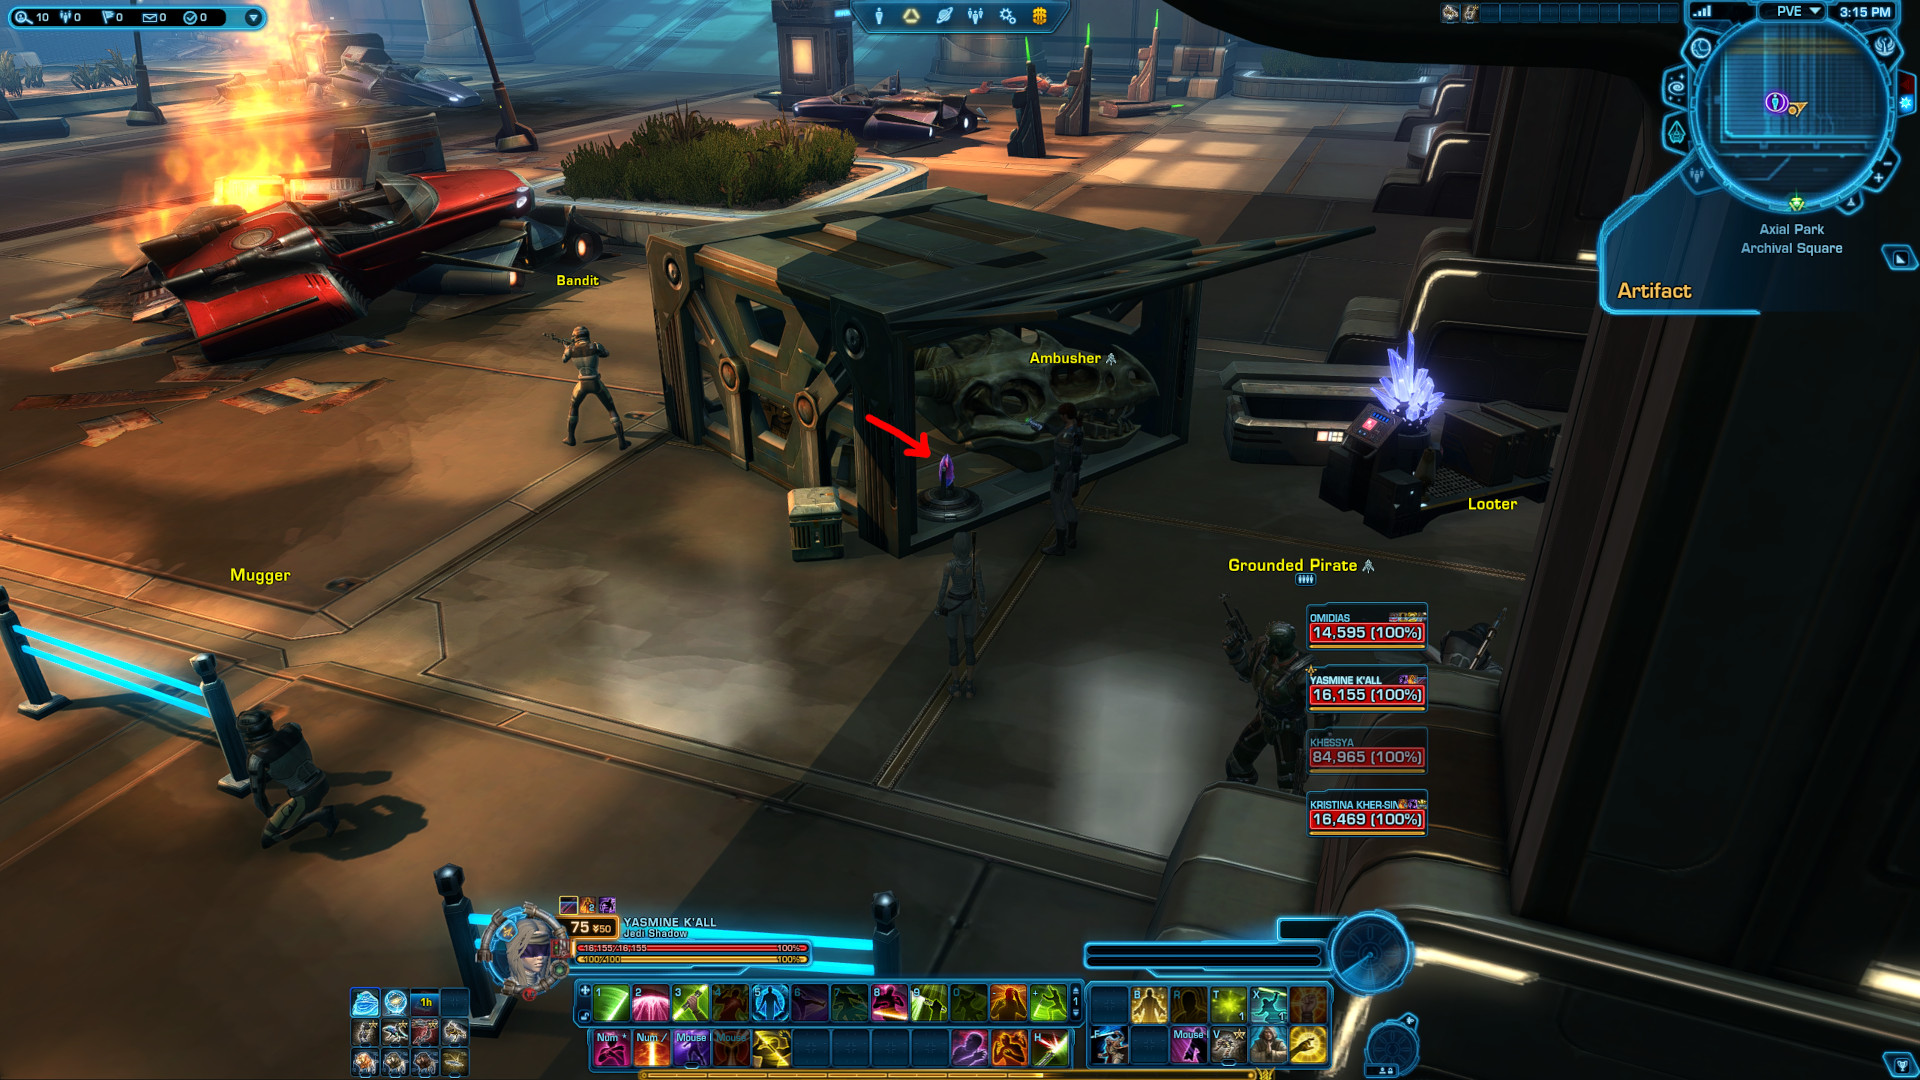
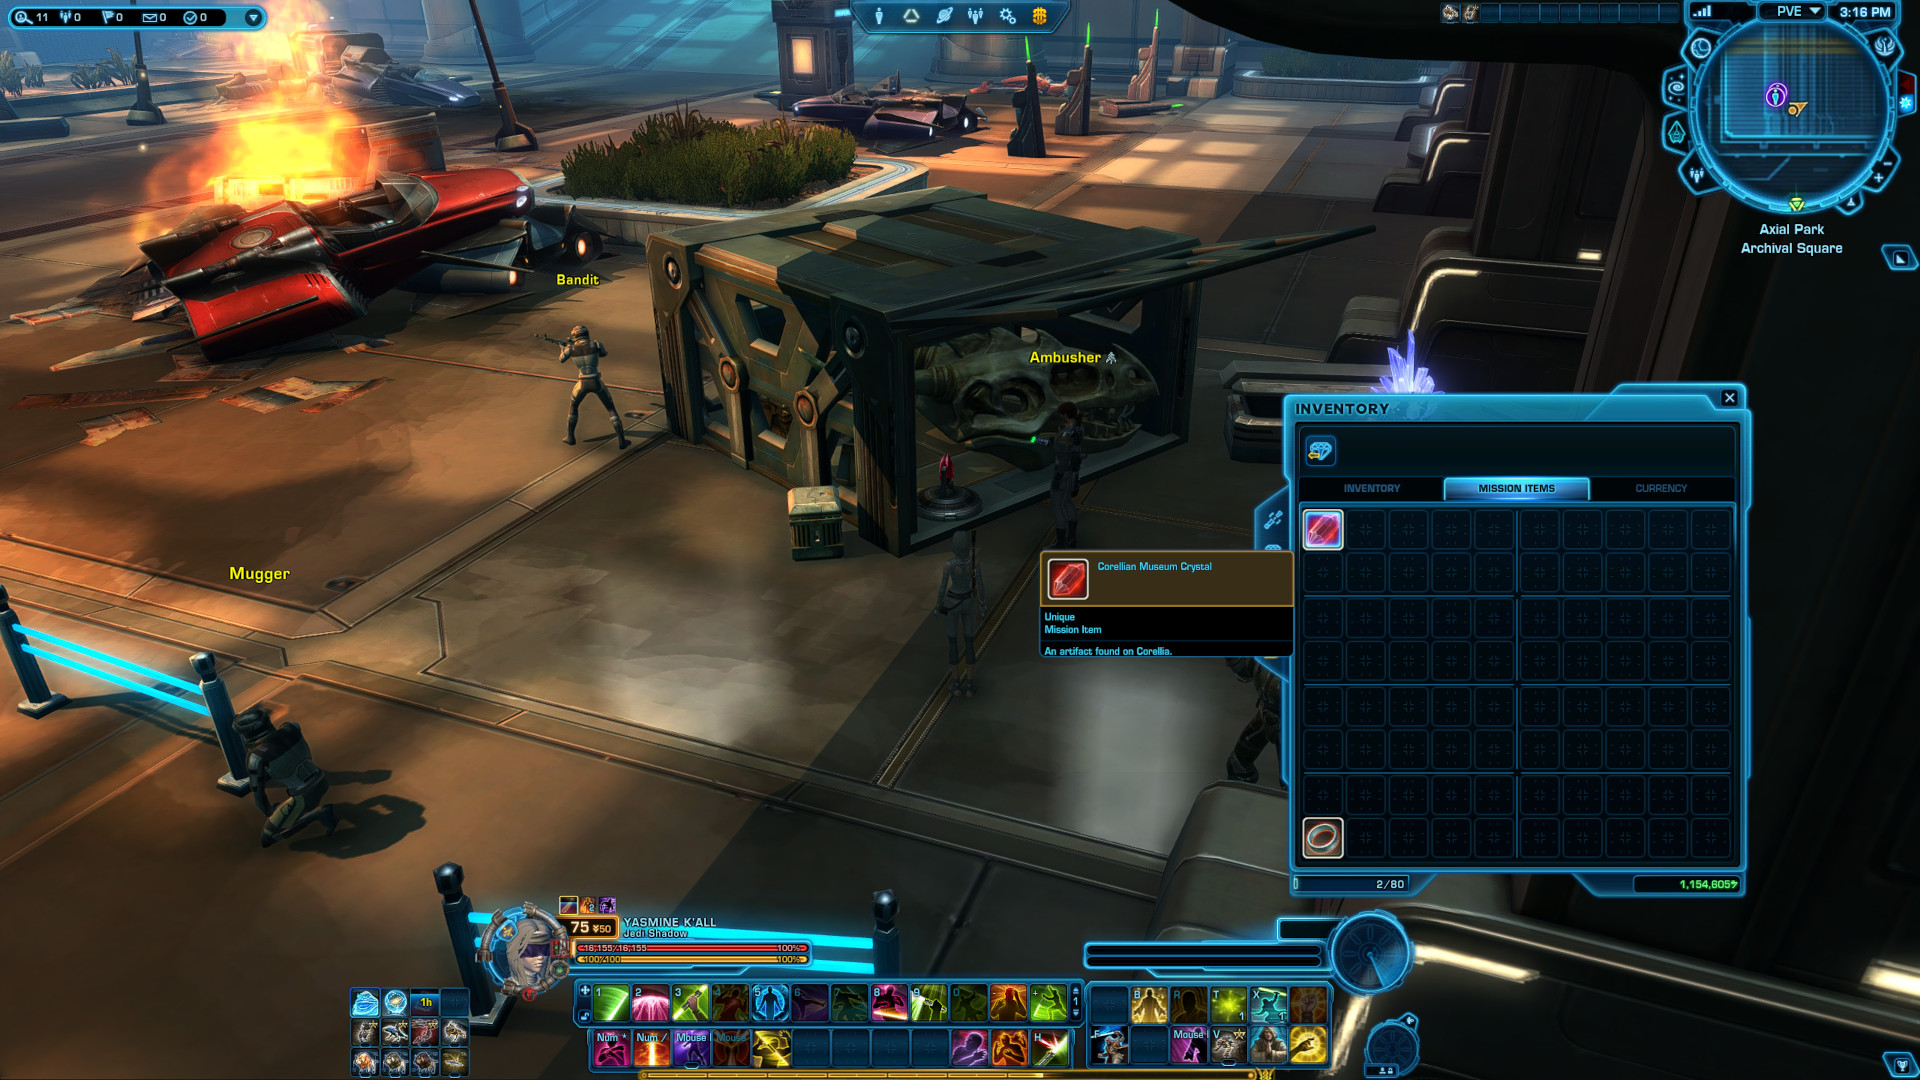
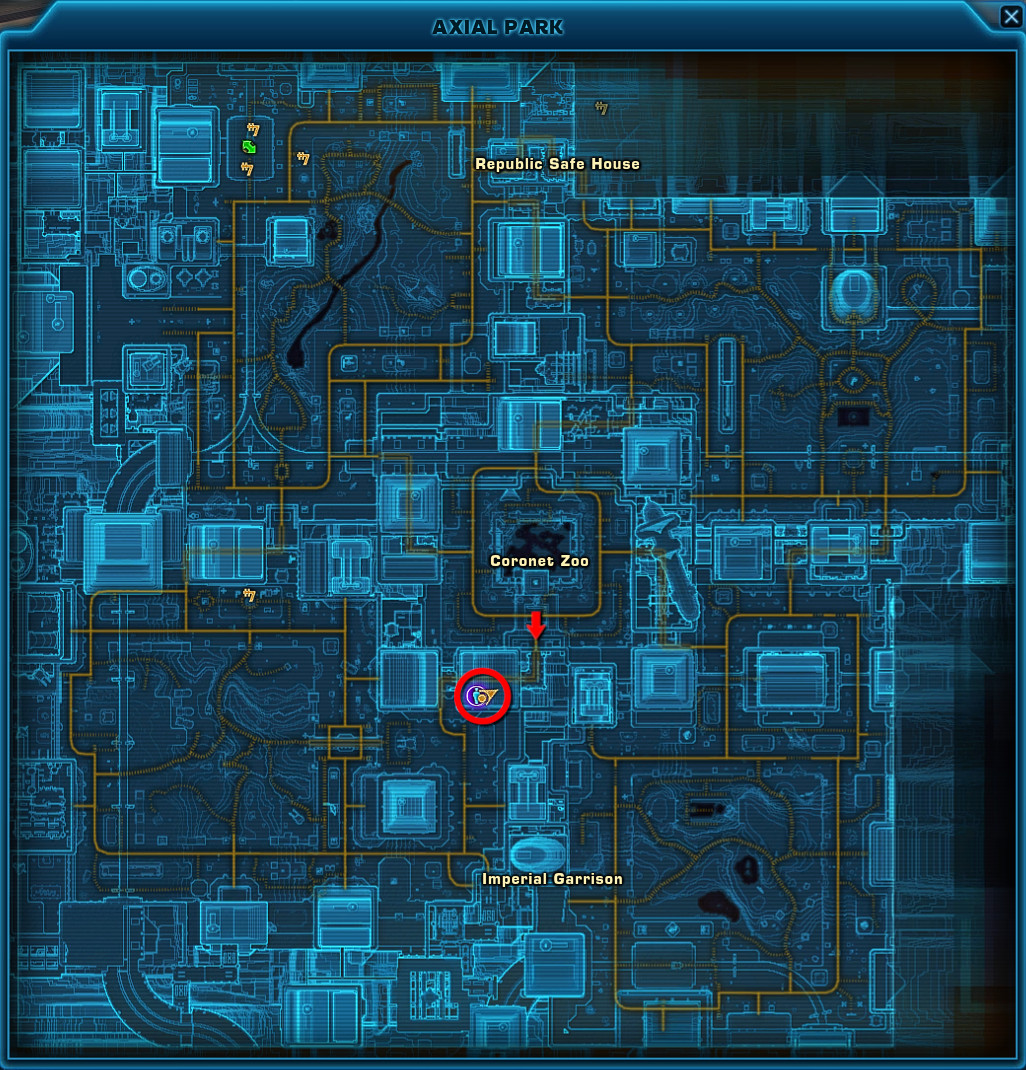
Then you need to pick up an item in Axial Park on Corellia called Corellian Museum Crystal. You will find this little red crystal artifact in a large crate with a large skull inside surrounded by yellow enemies (they won't attack unless you attack) in a tunnel going south from Coronet Zoo. The item will be transferred to your Mission Item Inventory. This item is required to even interact with the final door, where your Datacron is locked behind. Coordinates: 687, -2199.
Republic Fleet
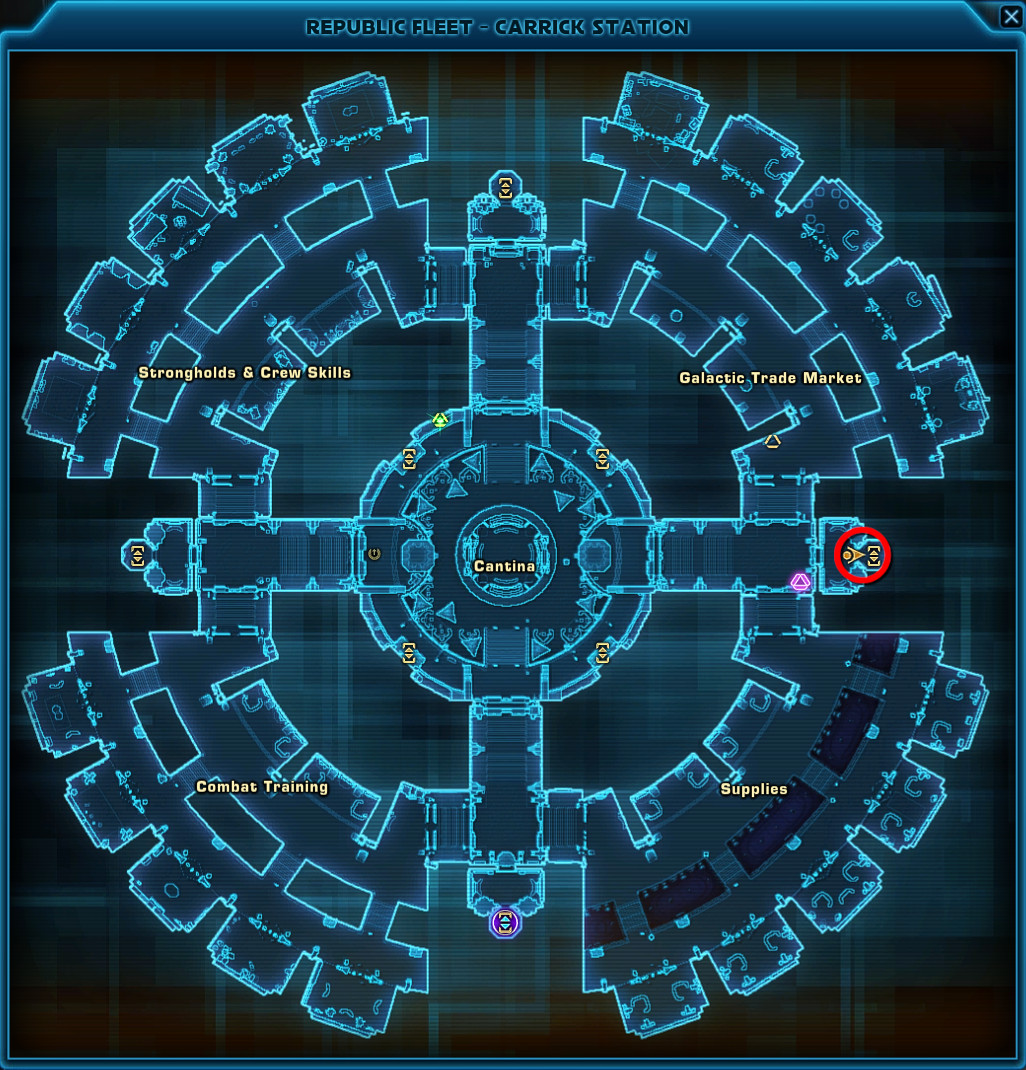
On the fleet, travel to Gav Daragon. You can take the speeder from the Interfleet Transport.
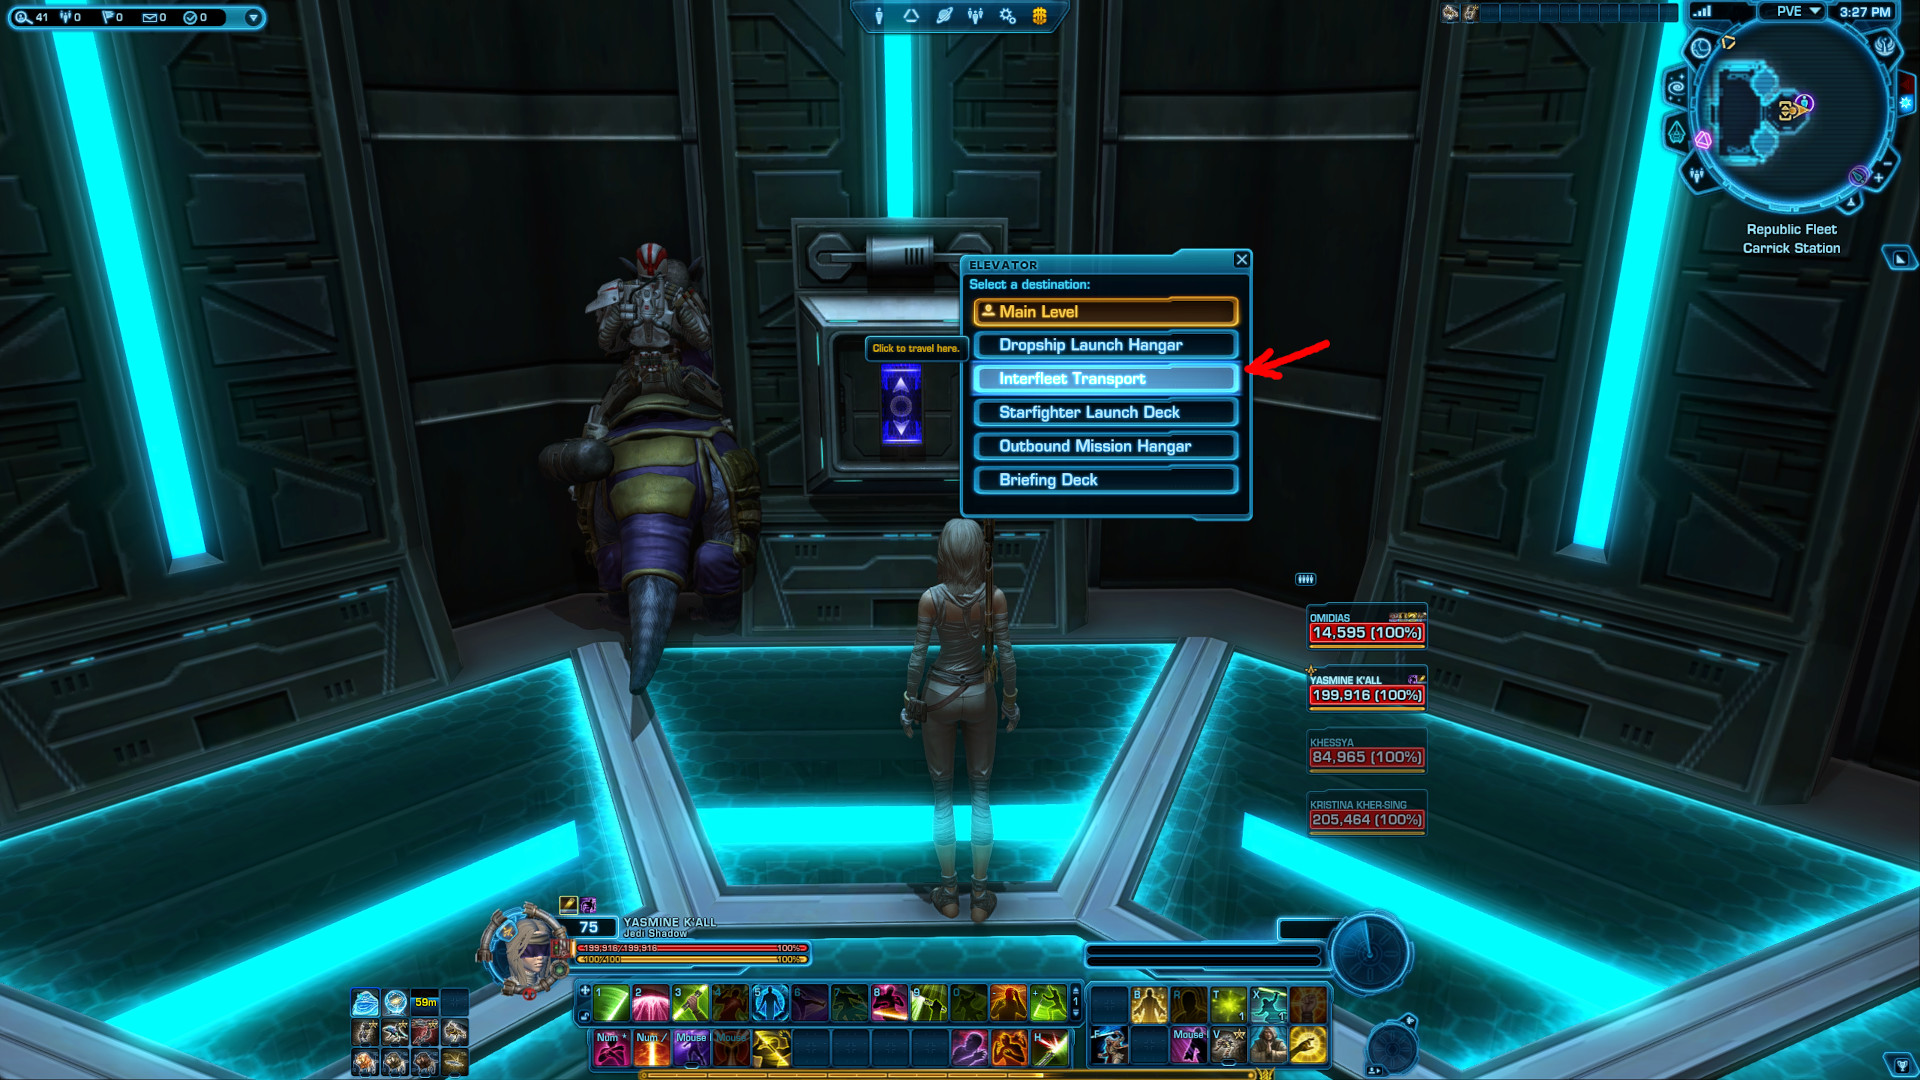
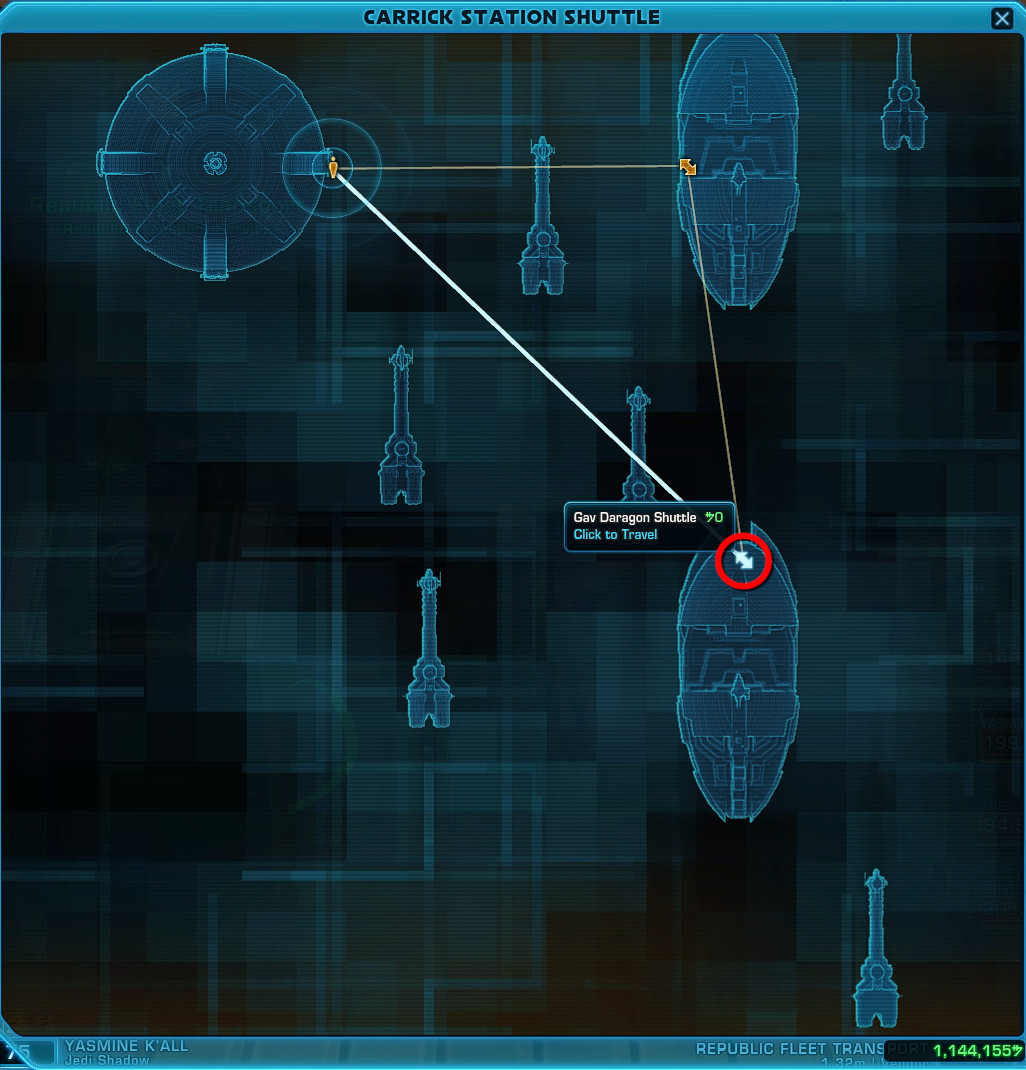
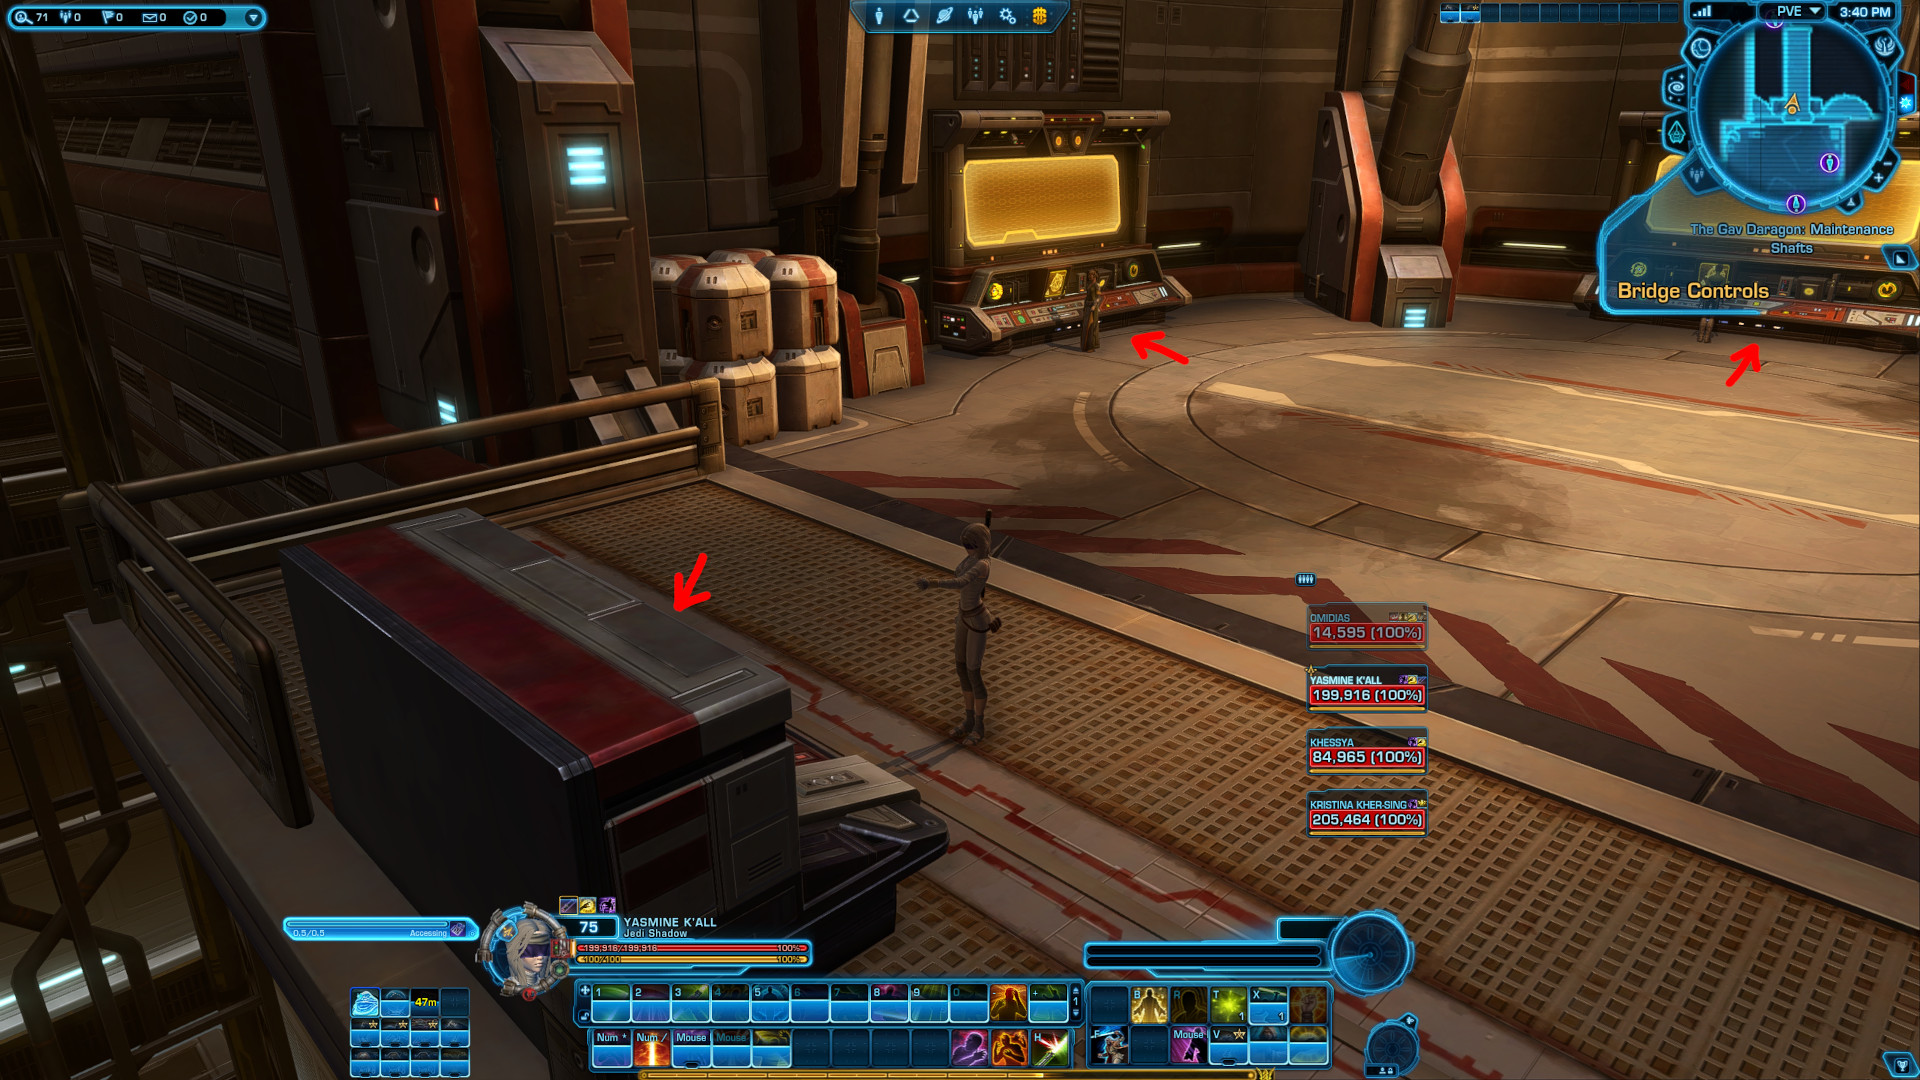
Or simply Quick Travel to the ship. Either way you have to take the elevator to the Bridge.
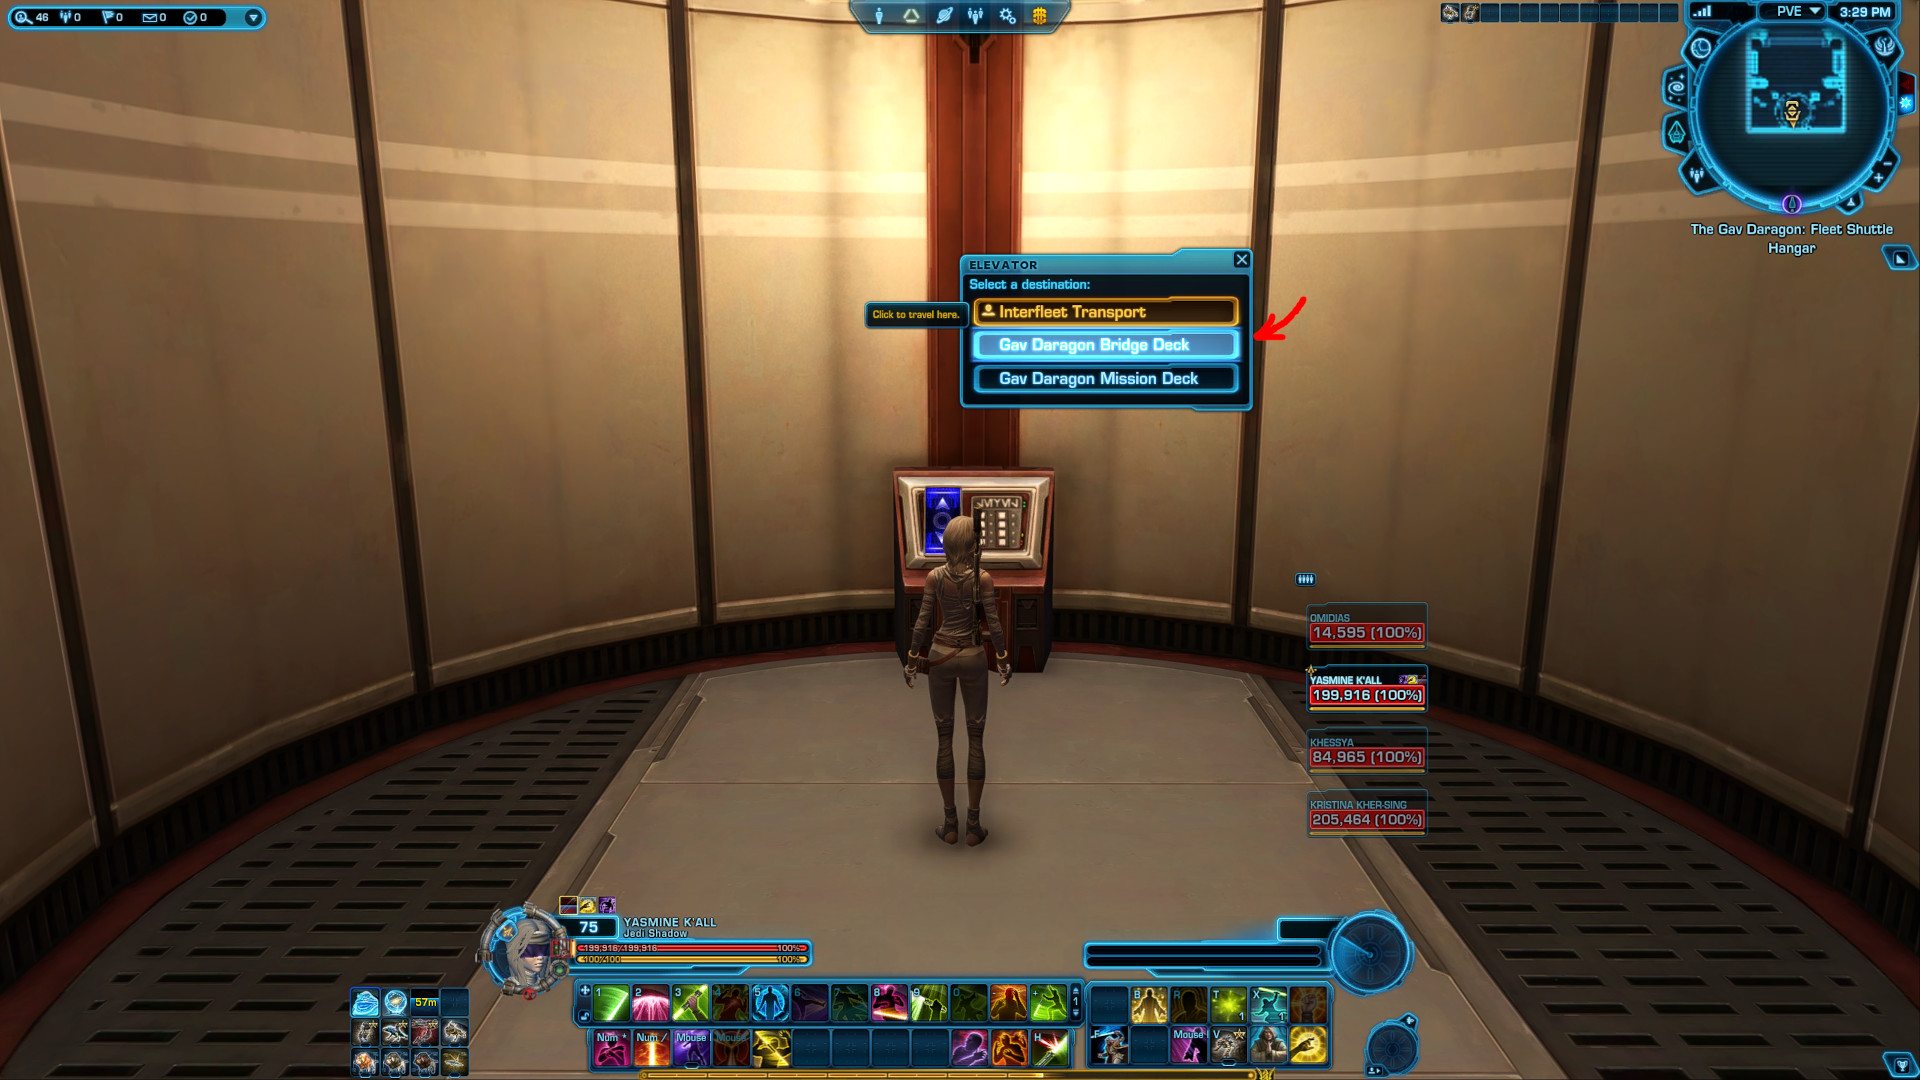
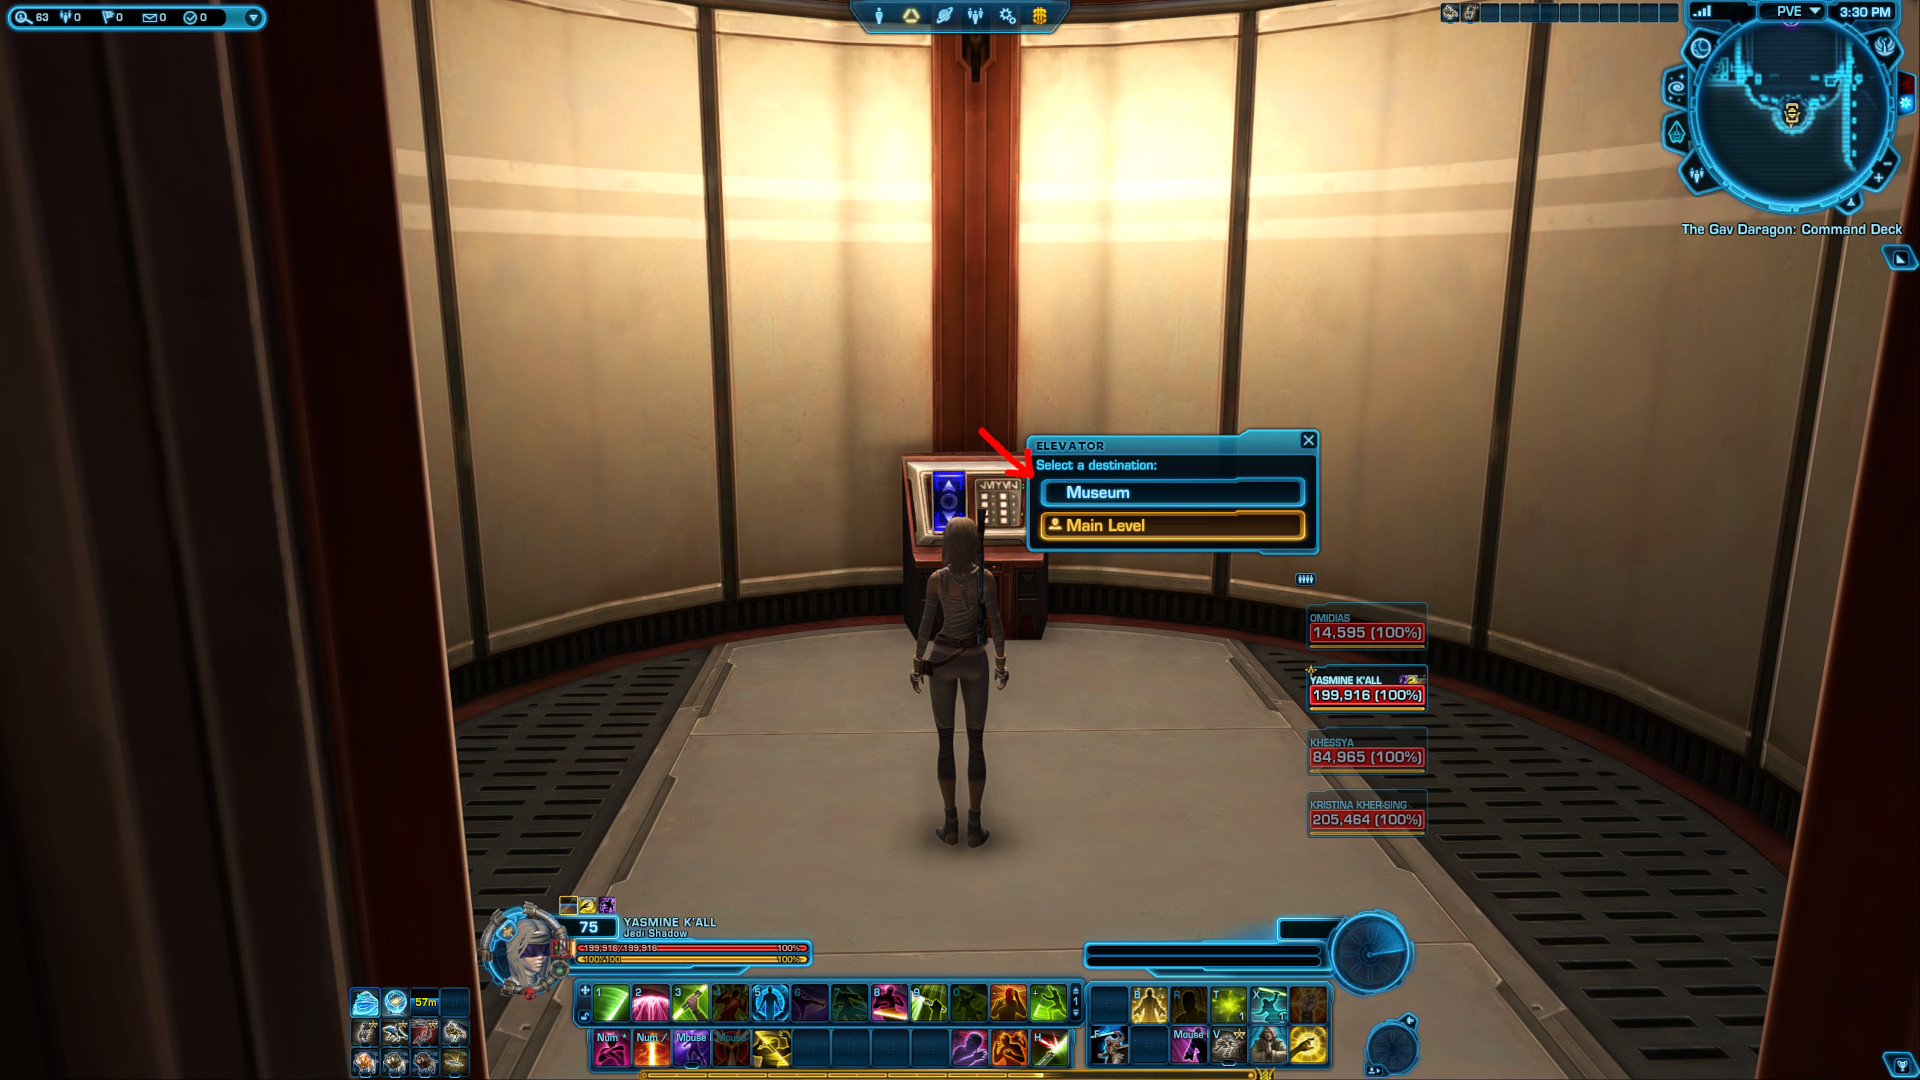
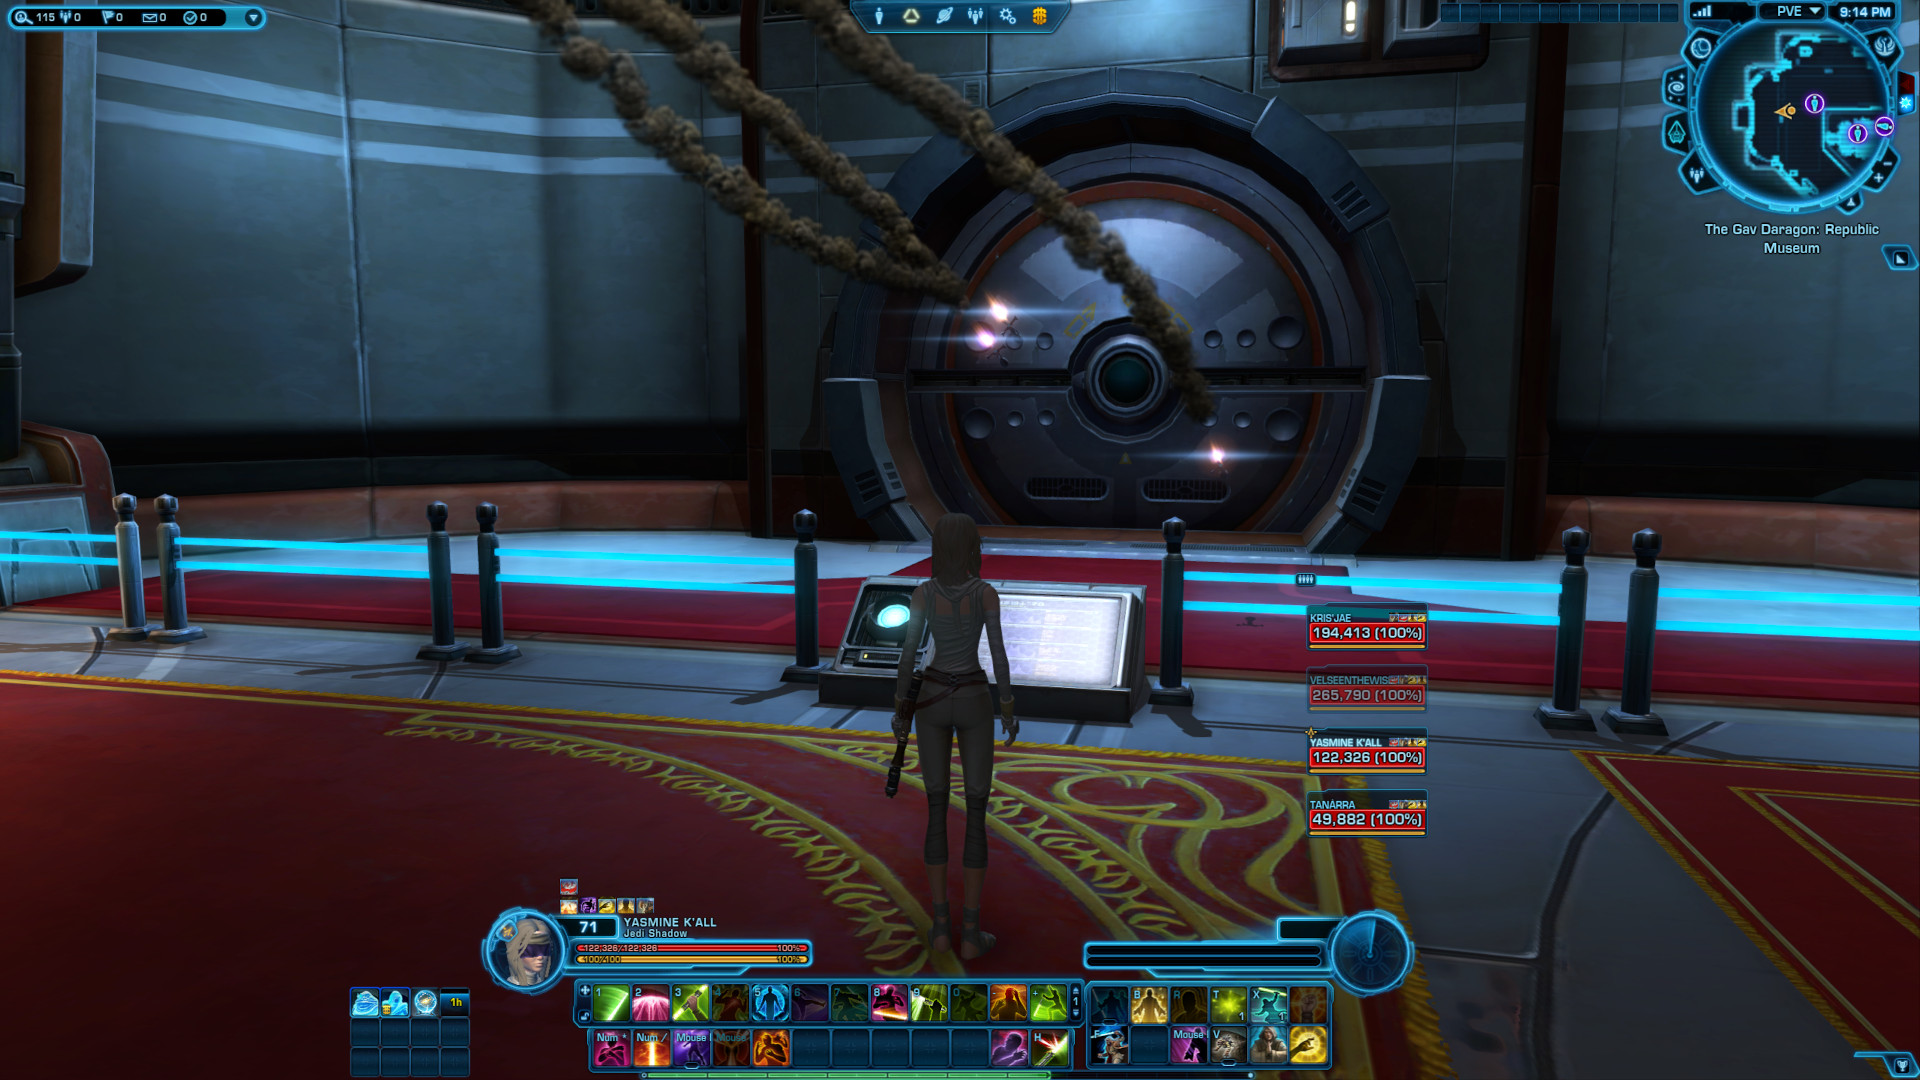
At the opposite end of the bridge, take the elevator to the Museum.
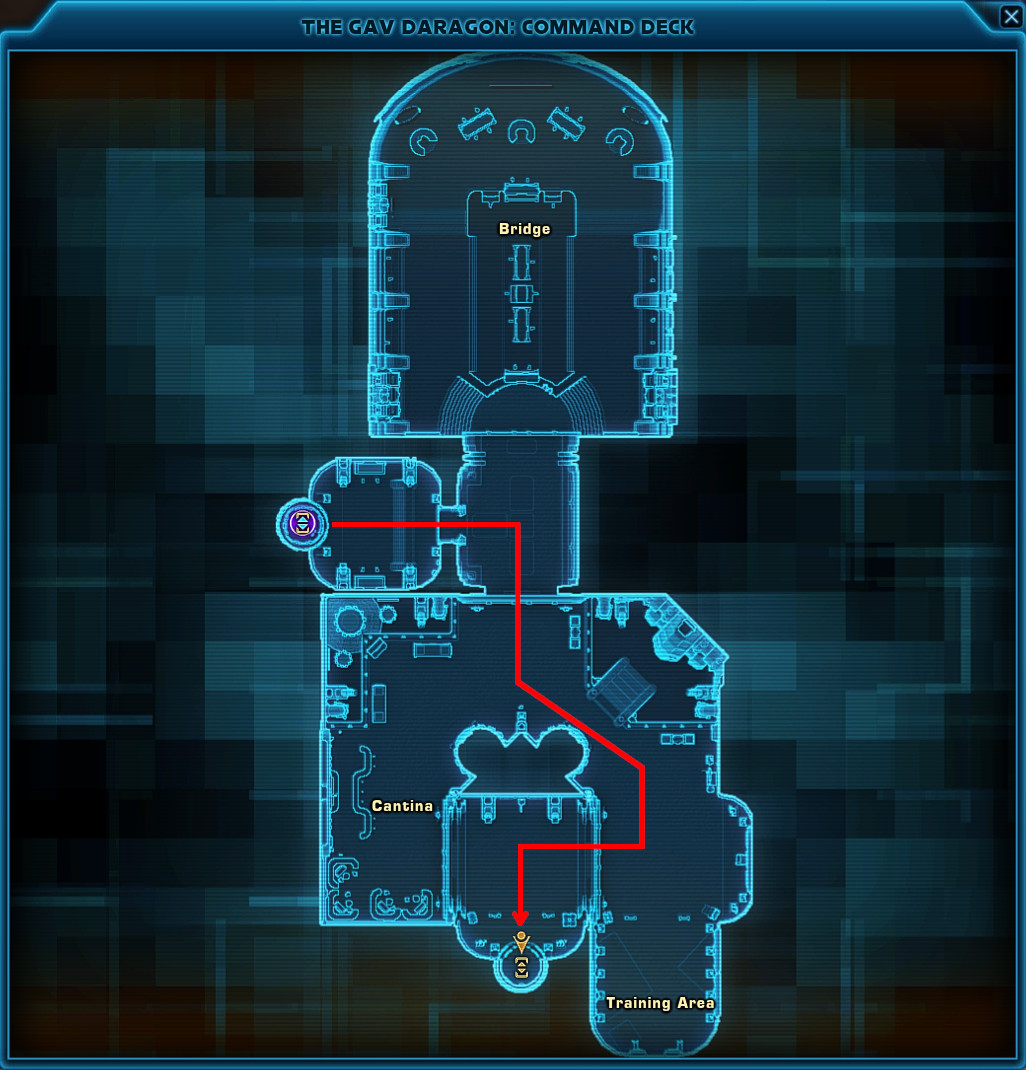
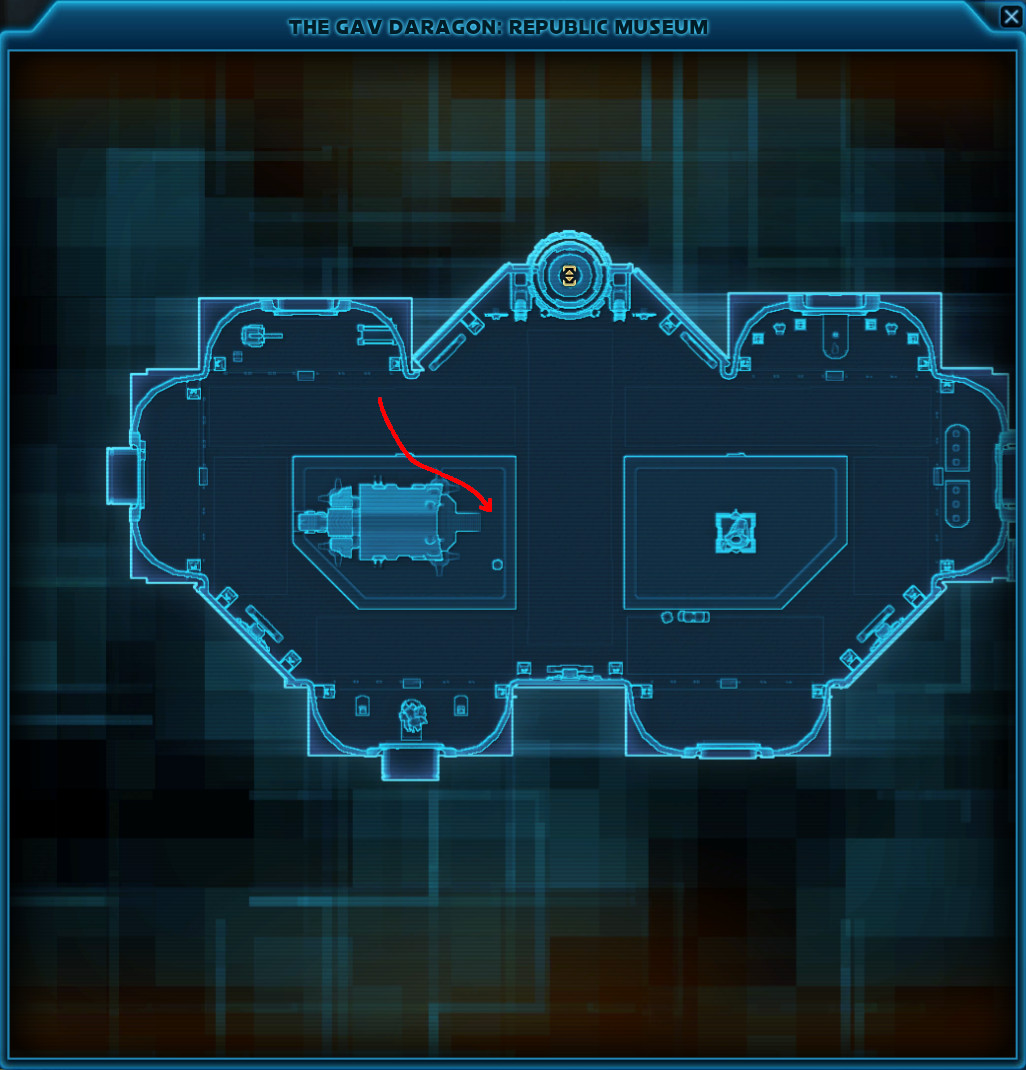
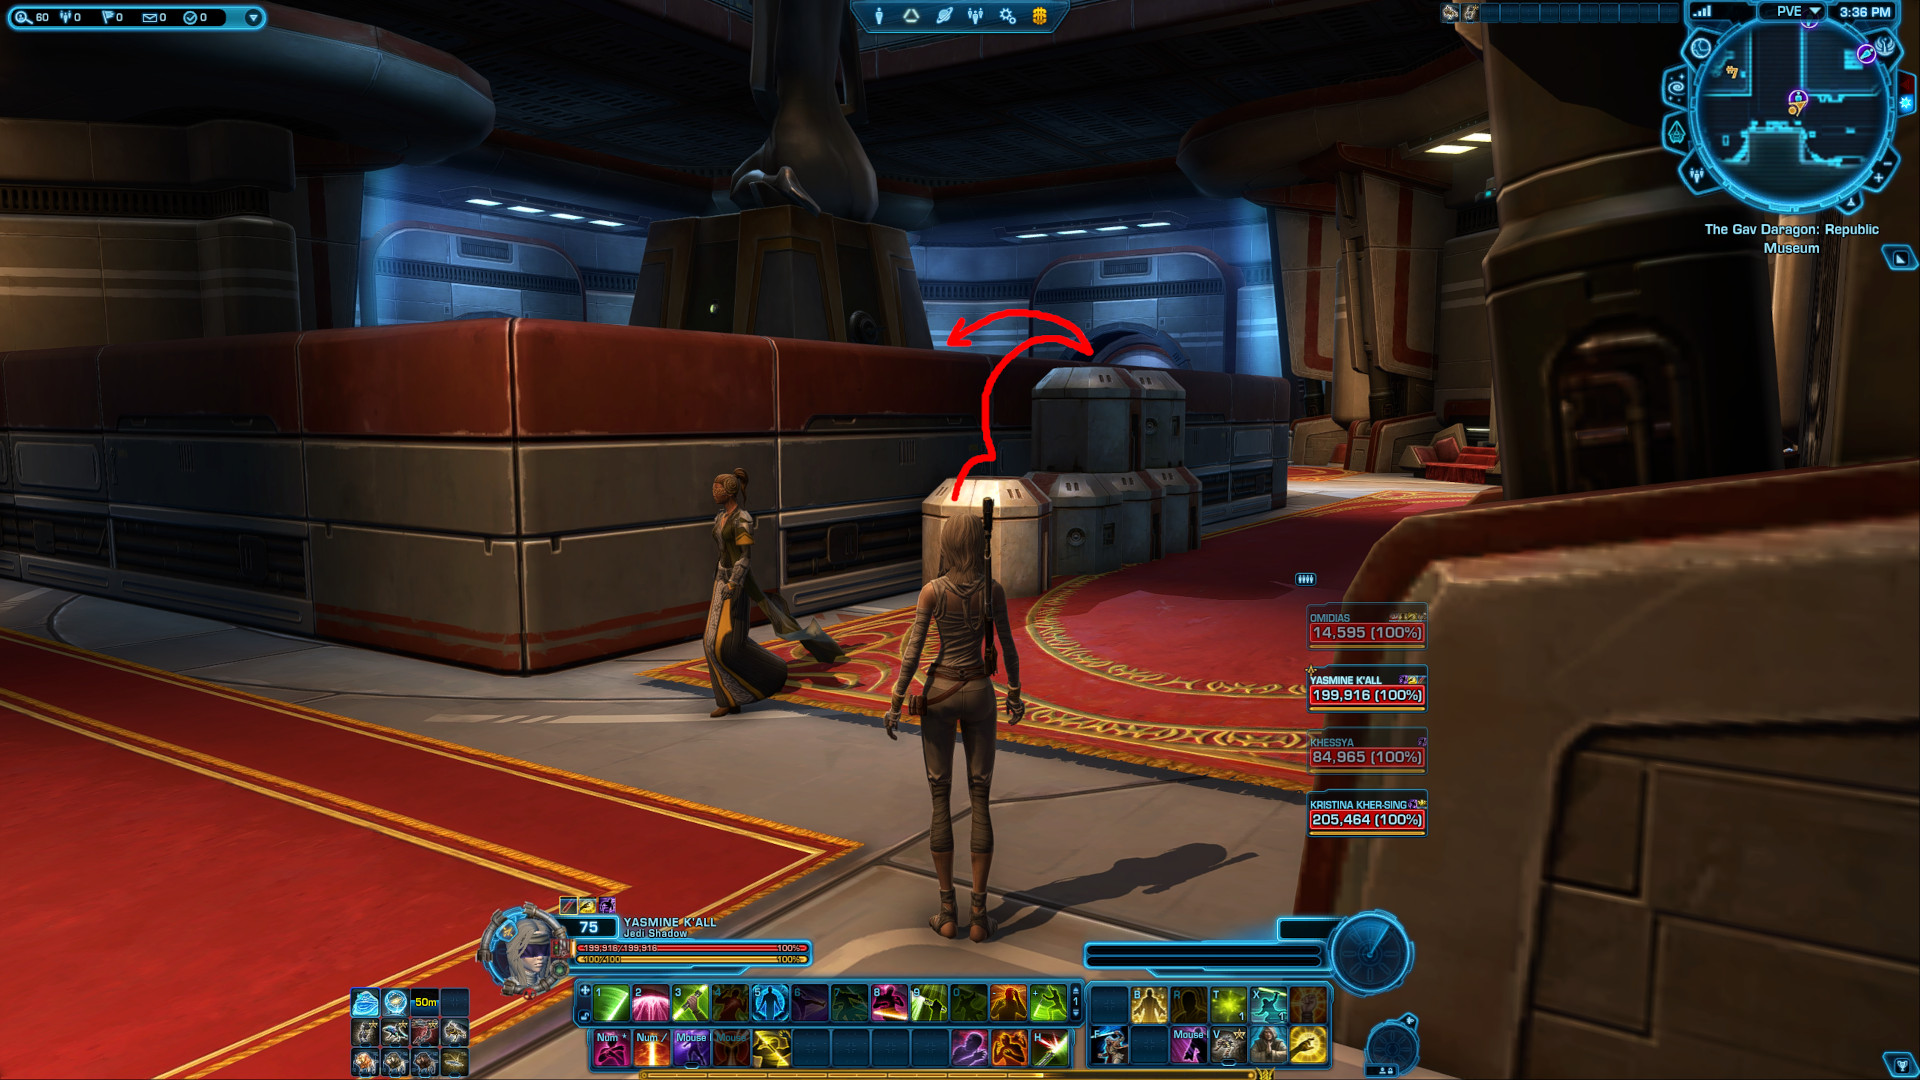
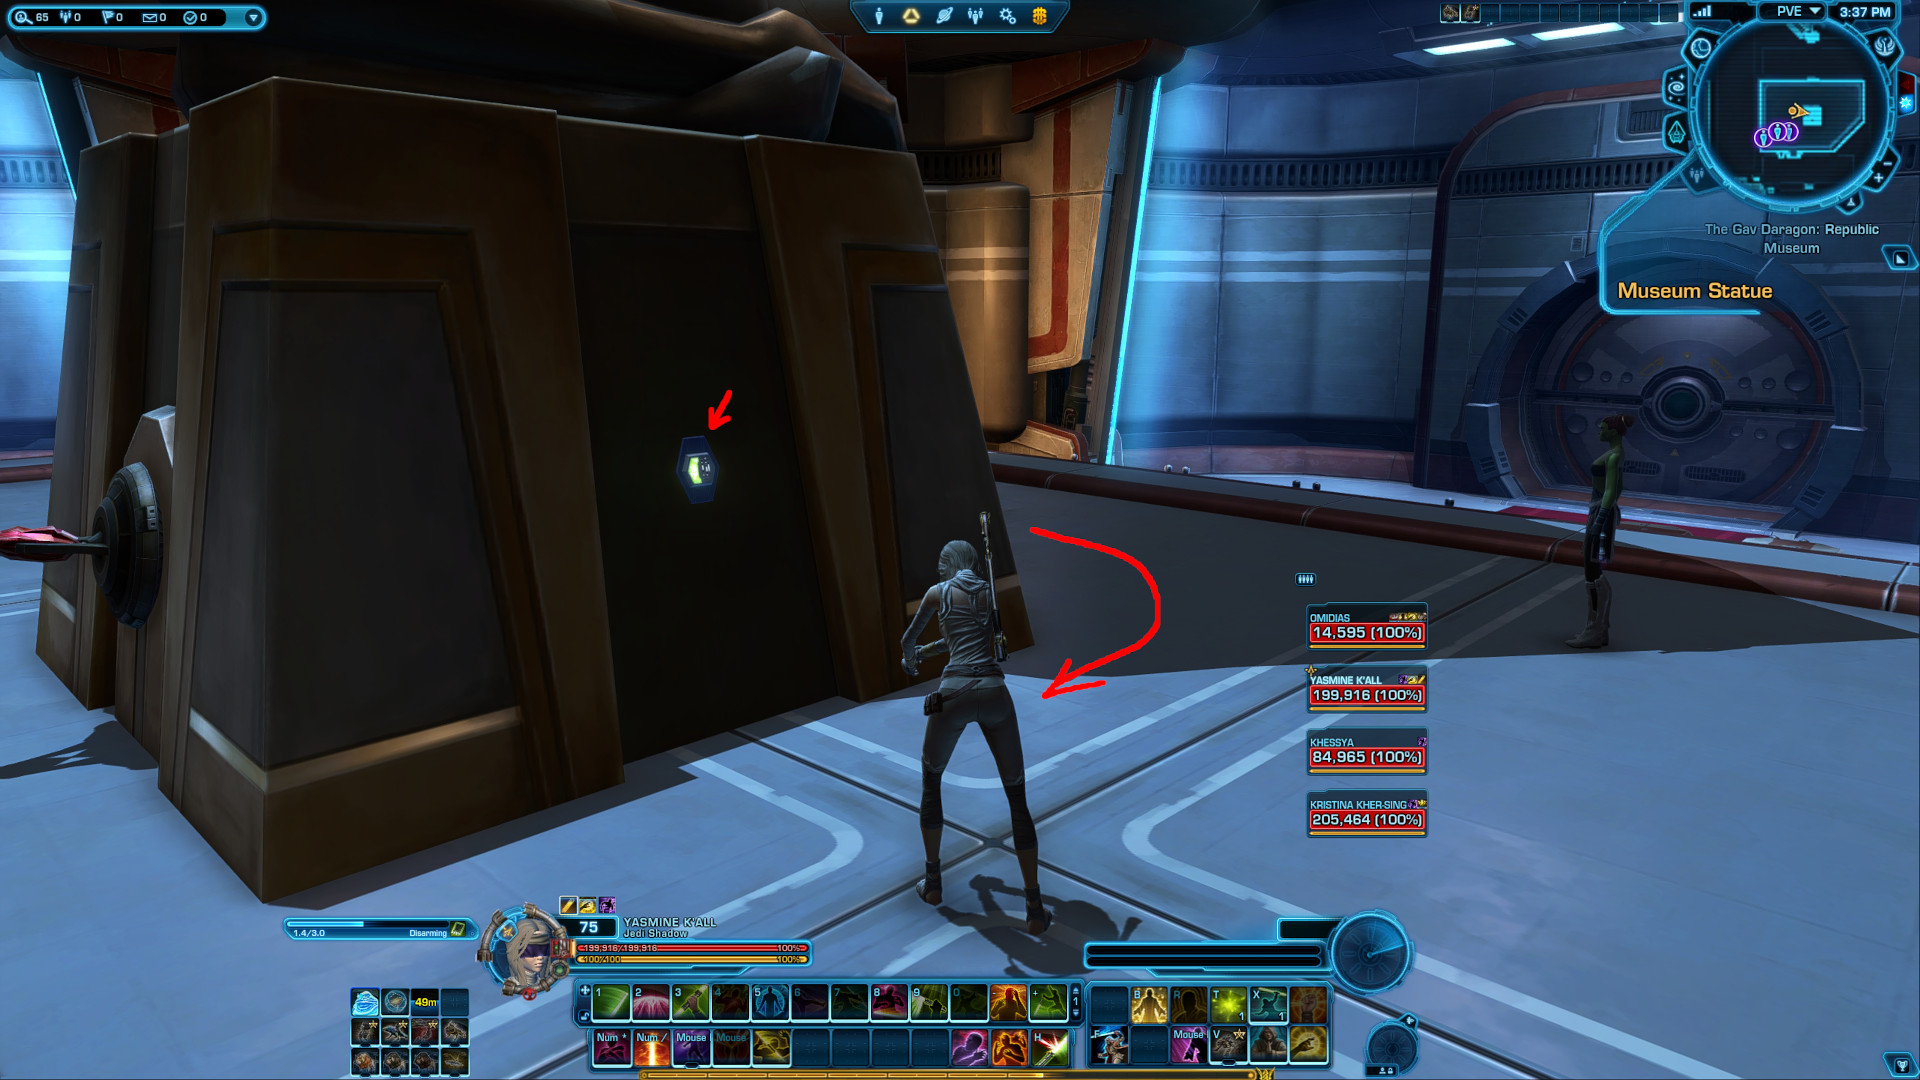
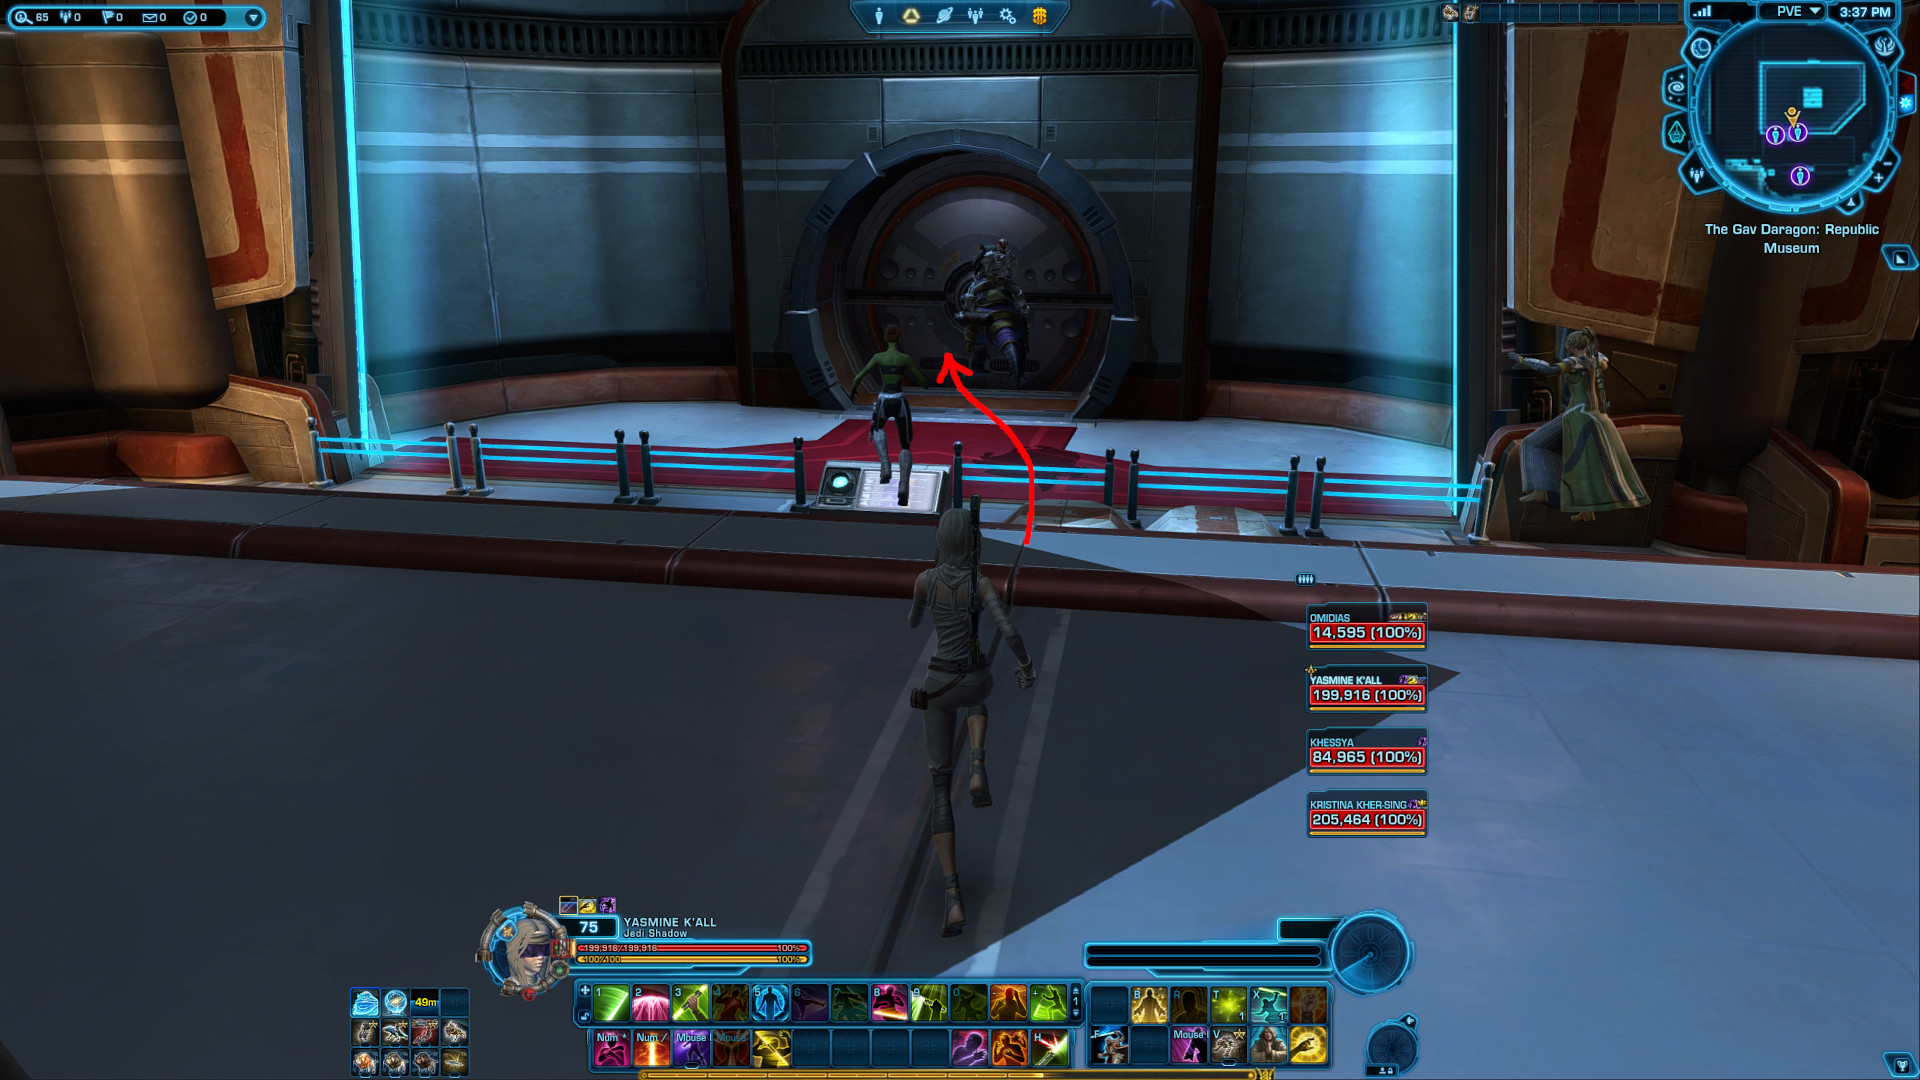
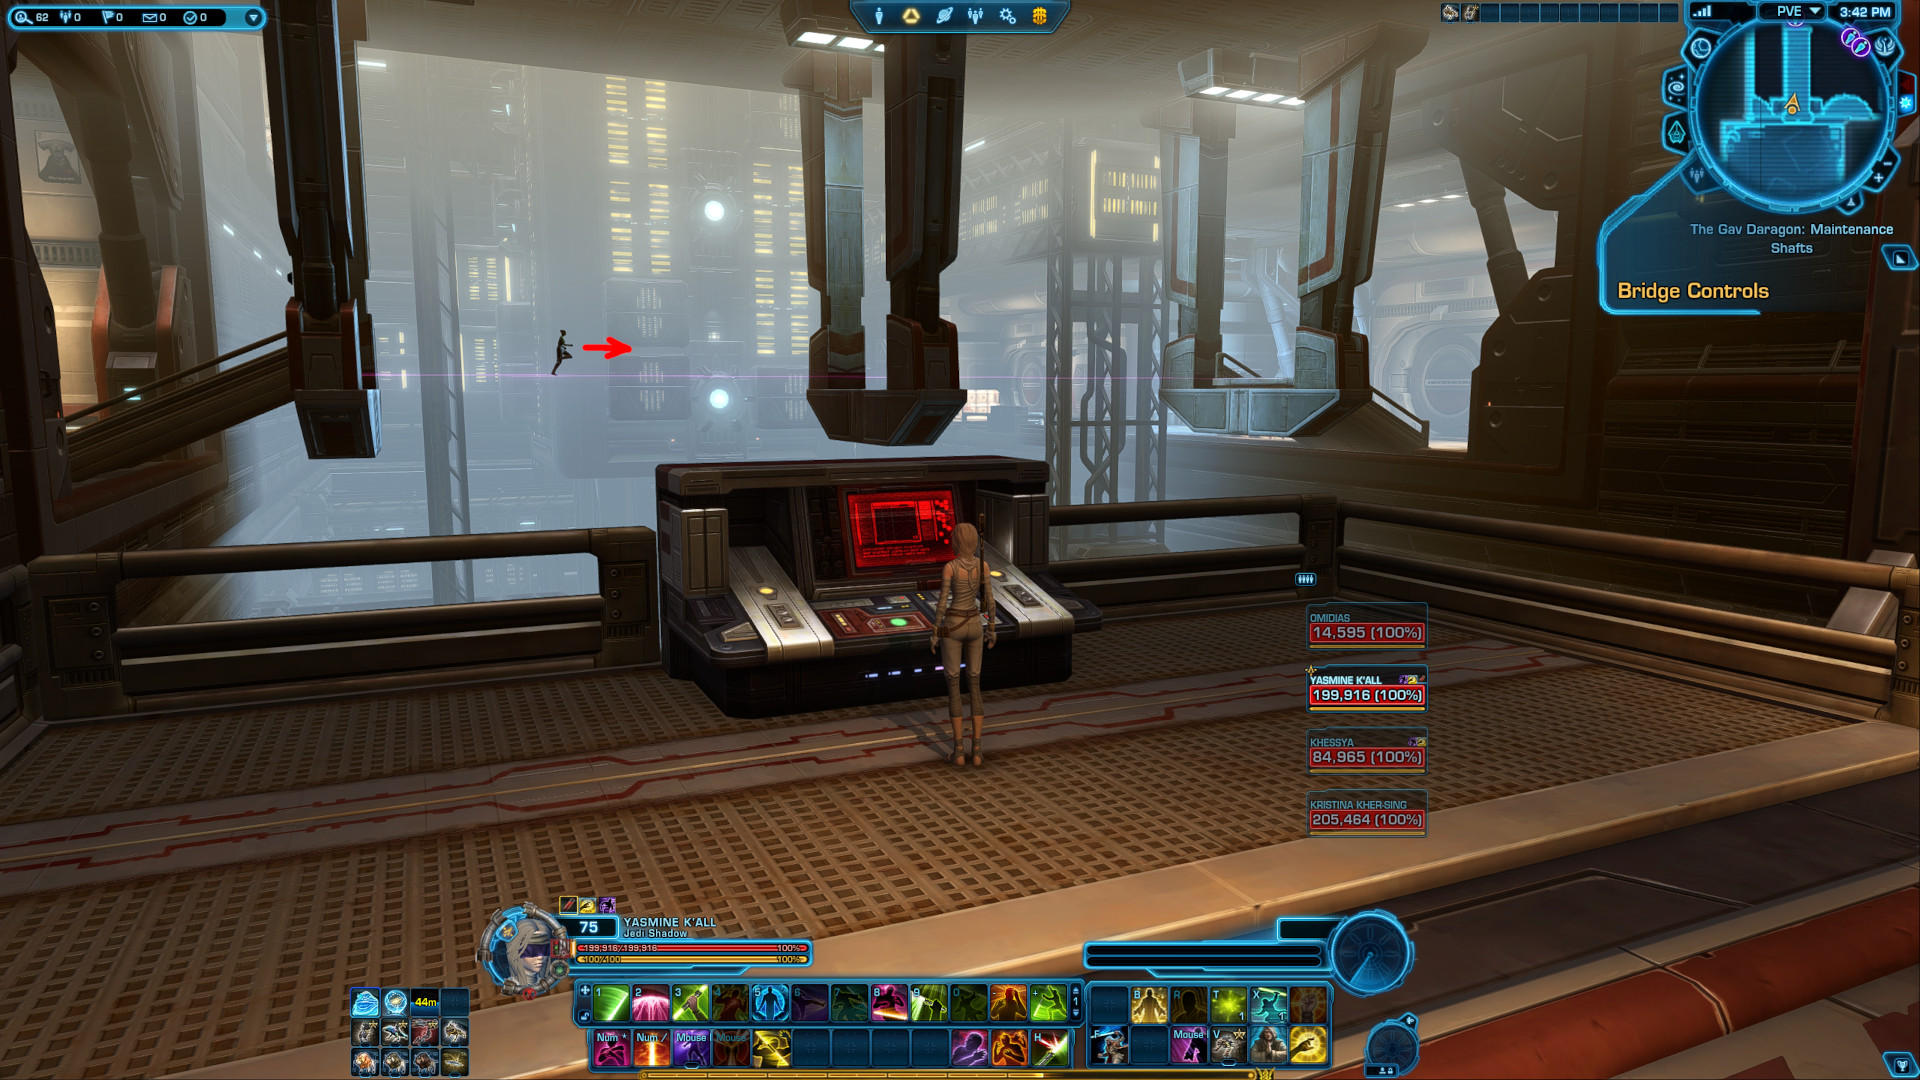
Originally, you were supposed to shoot a teammate, who would then spawn on top of the right podium with the Medical Droid and the Republic Walker (left on the map), but it is currently bugged. But on the Republic Side, you can use a mount in the museum which will help you to jump up without needing to respawn.
You can also use Trick Move, Holotraverse, Intercede or Guardian Leap to reach the friendly Medical Droid next to the walker.
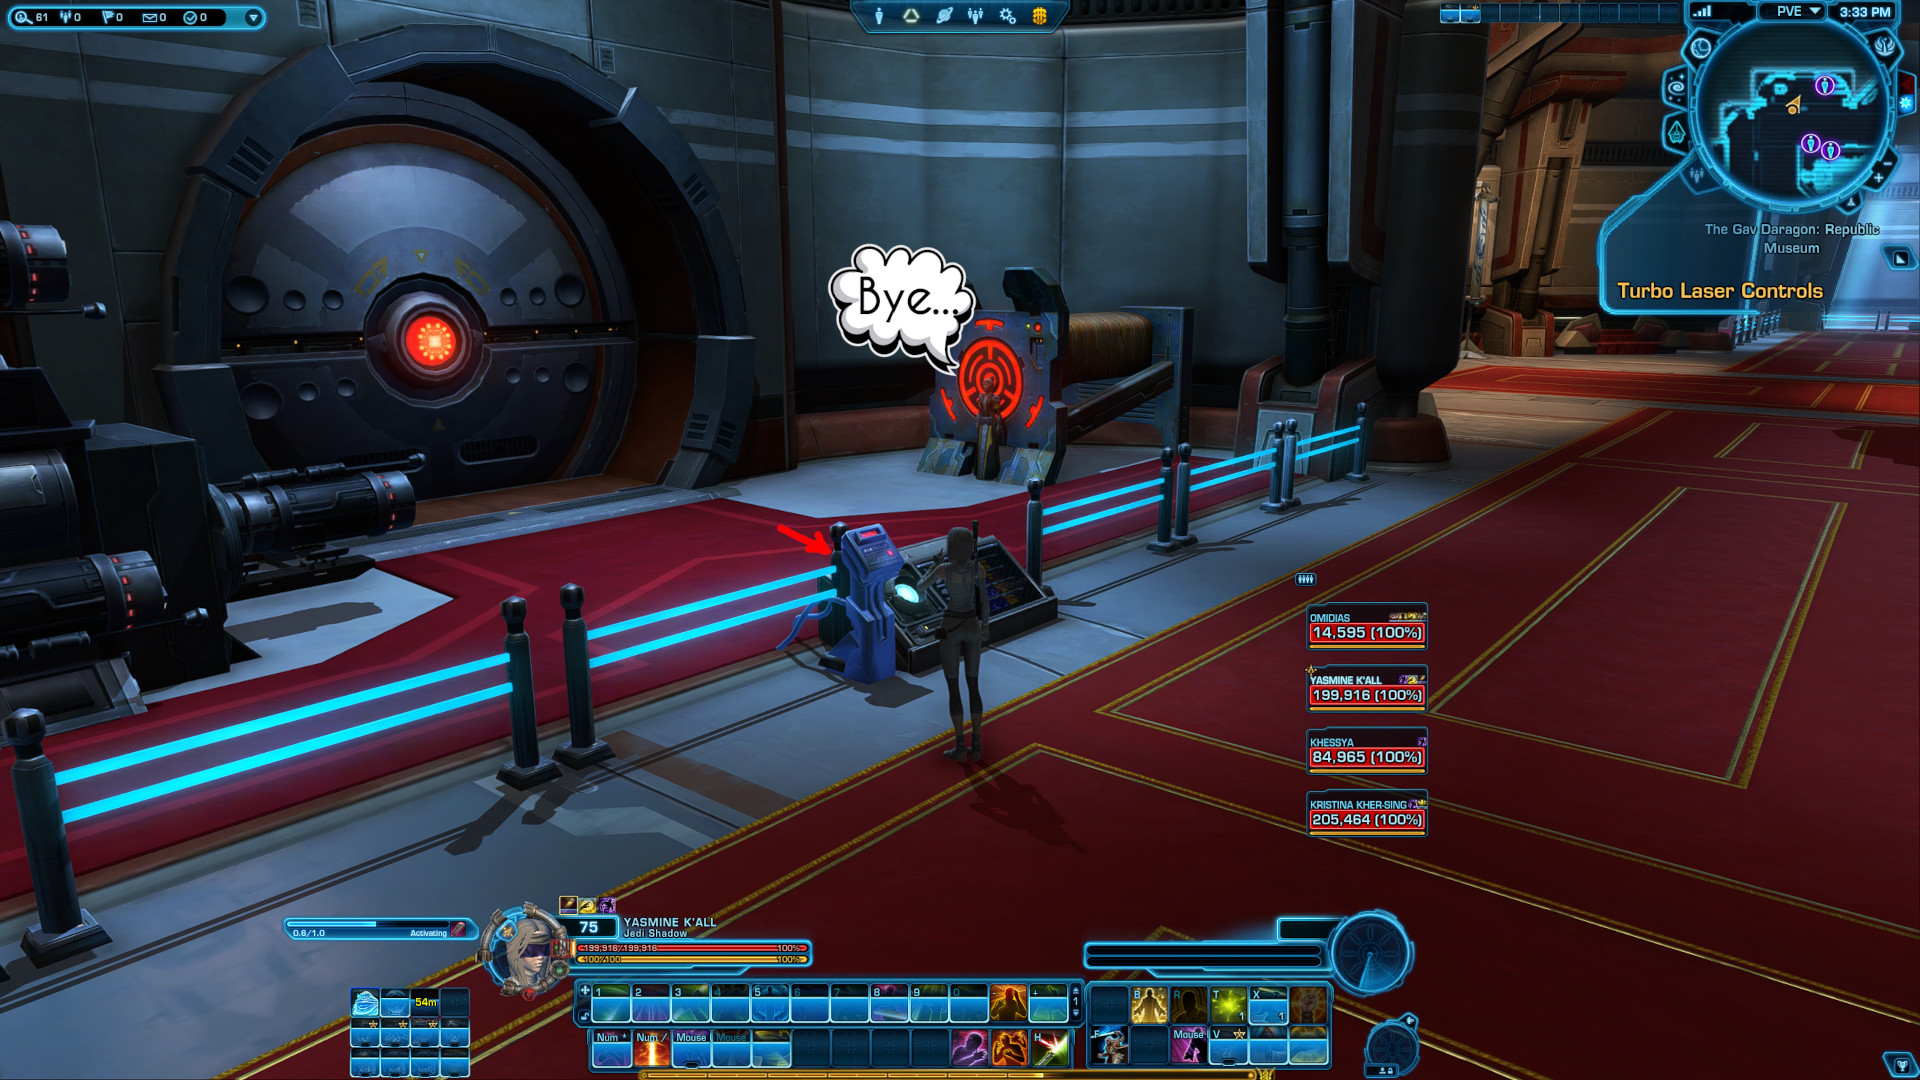
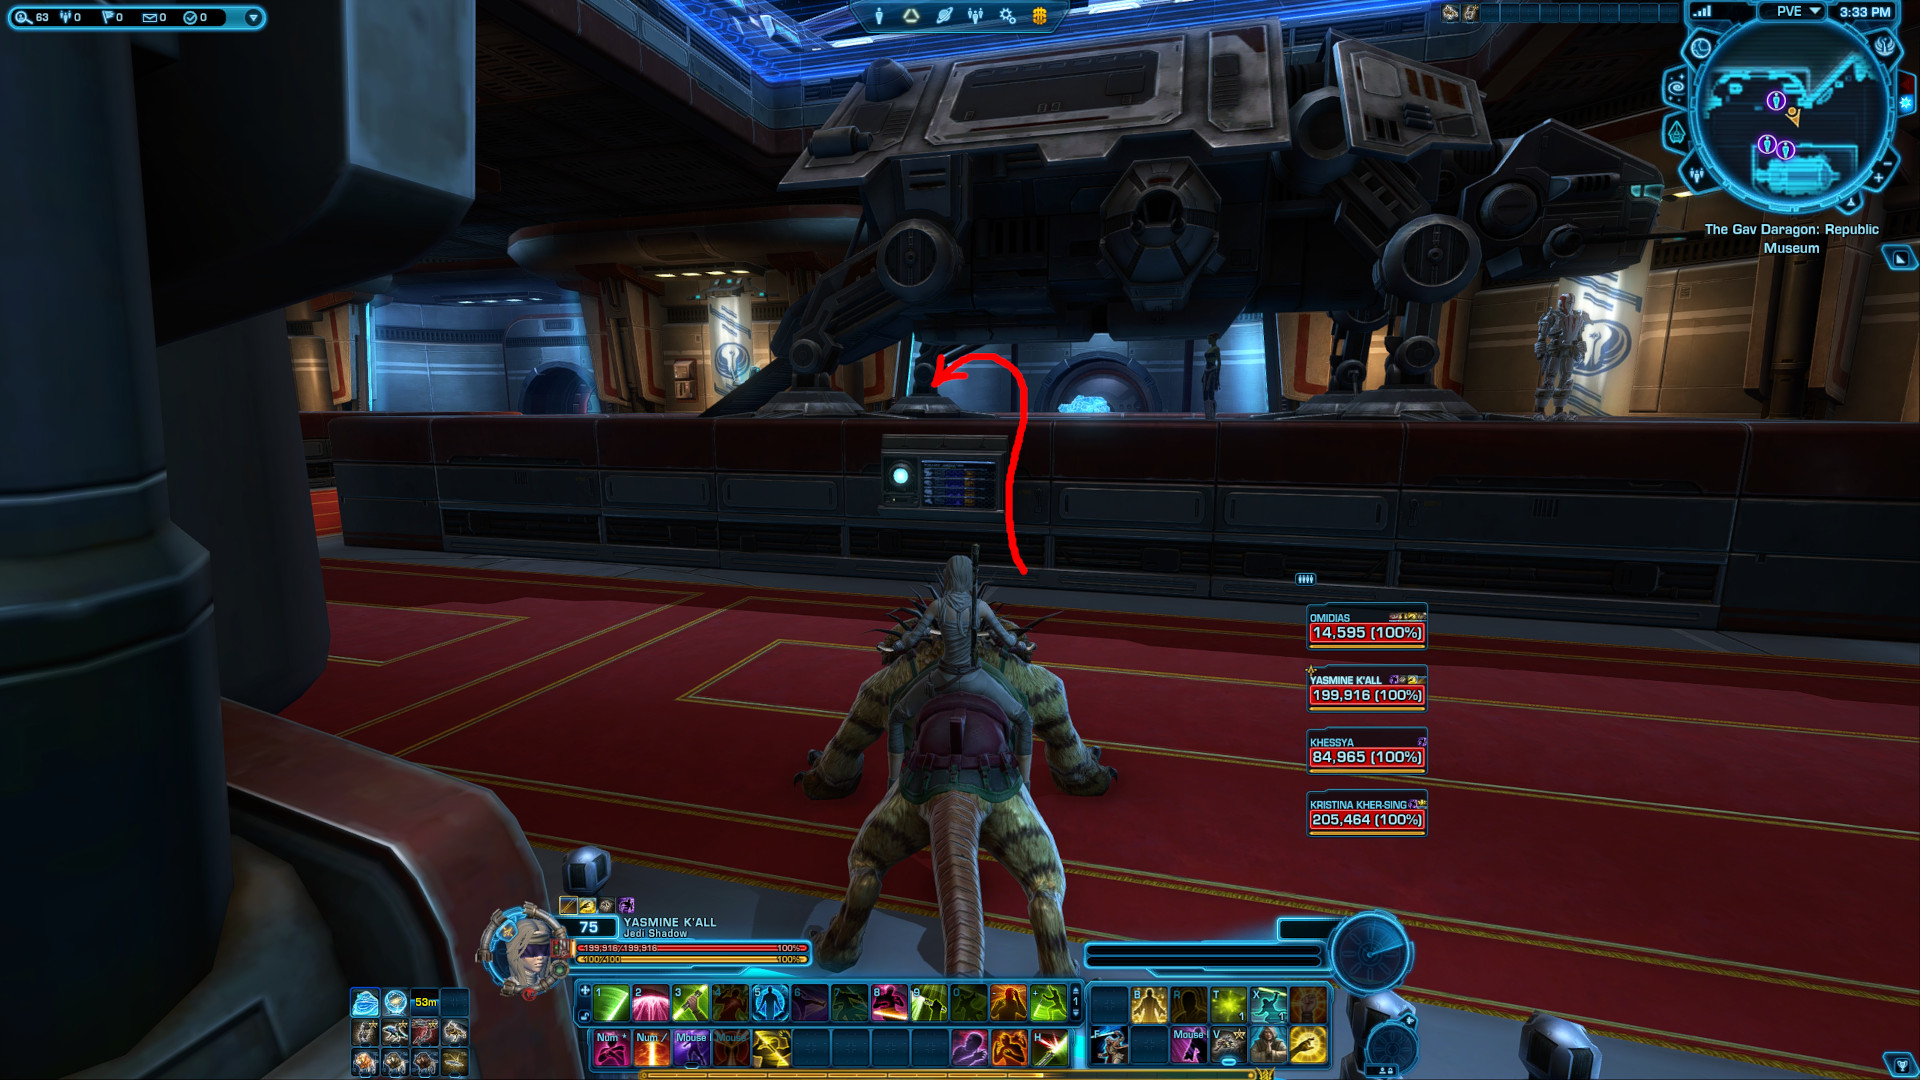
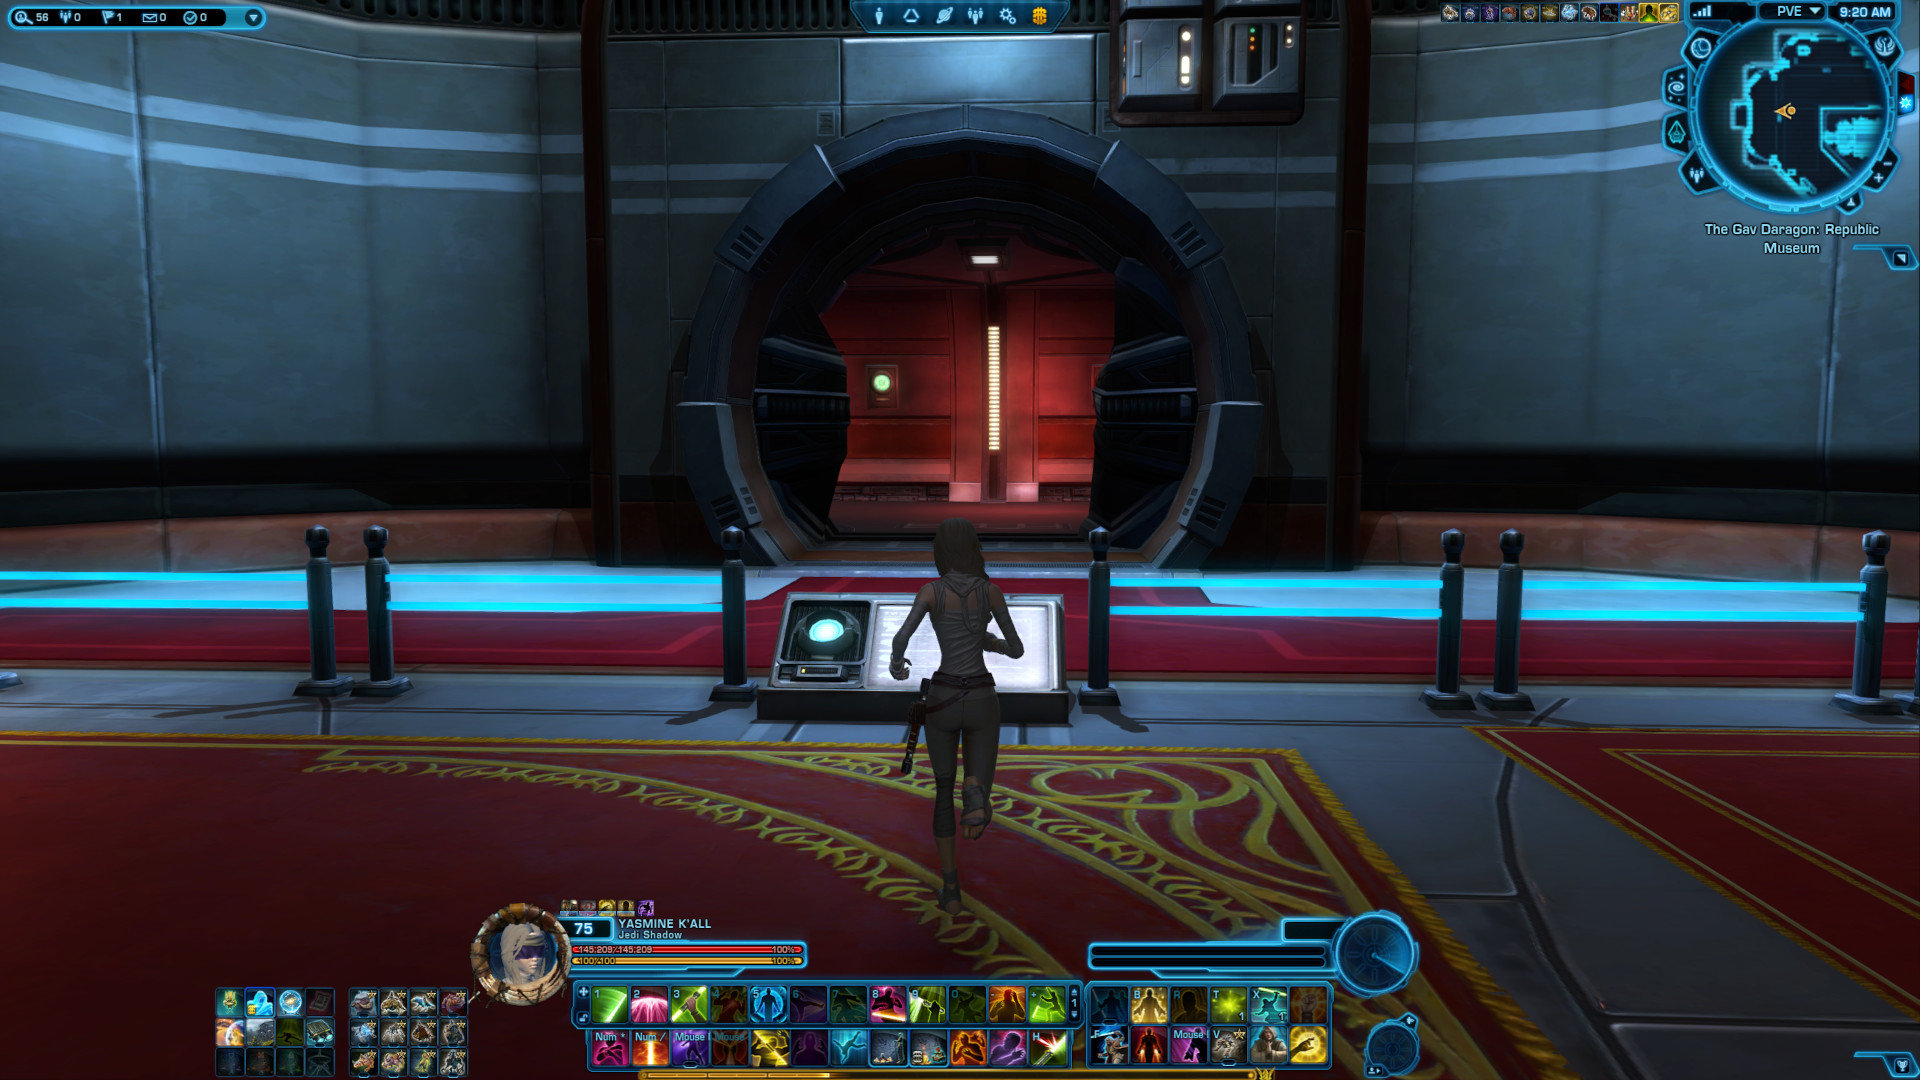
Inside the walker is a clickable Weapons Console that will blast the door in front of the walker.
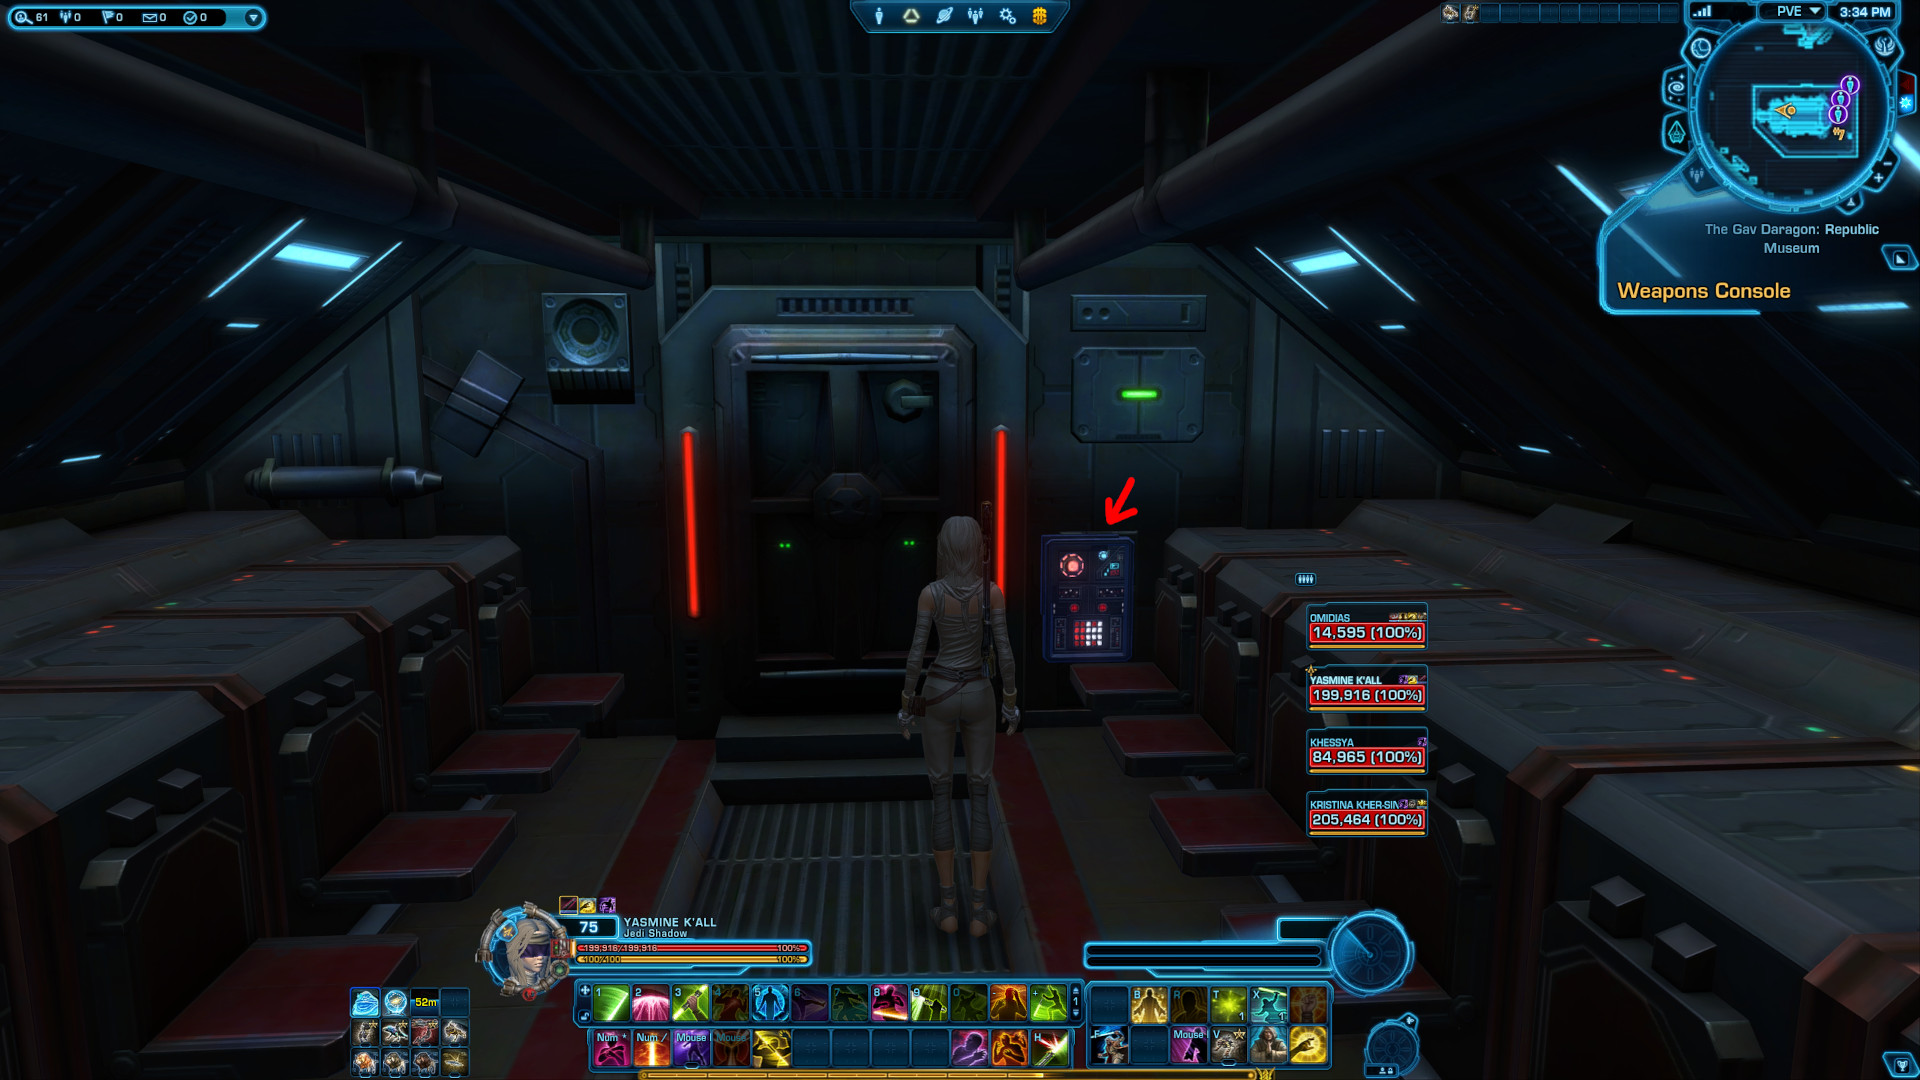
Exit the walker and run through the broken door.
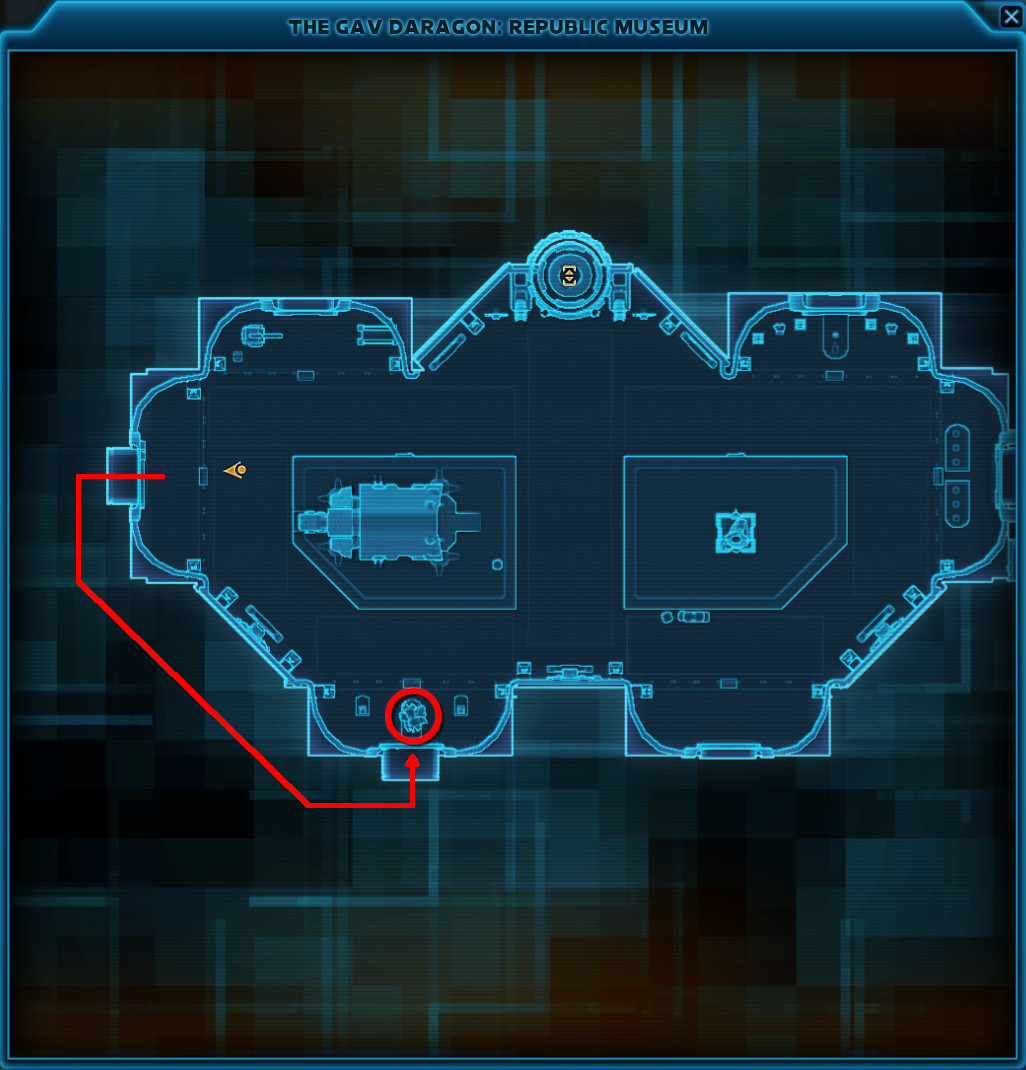
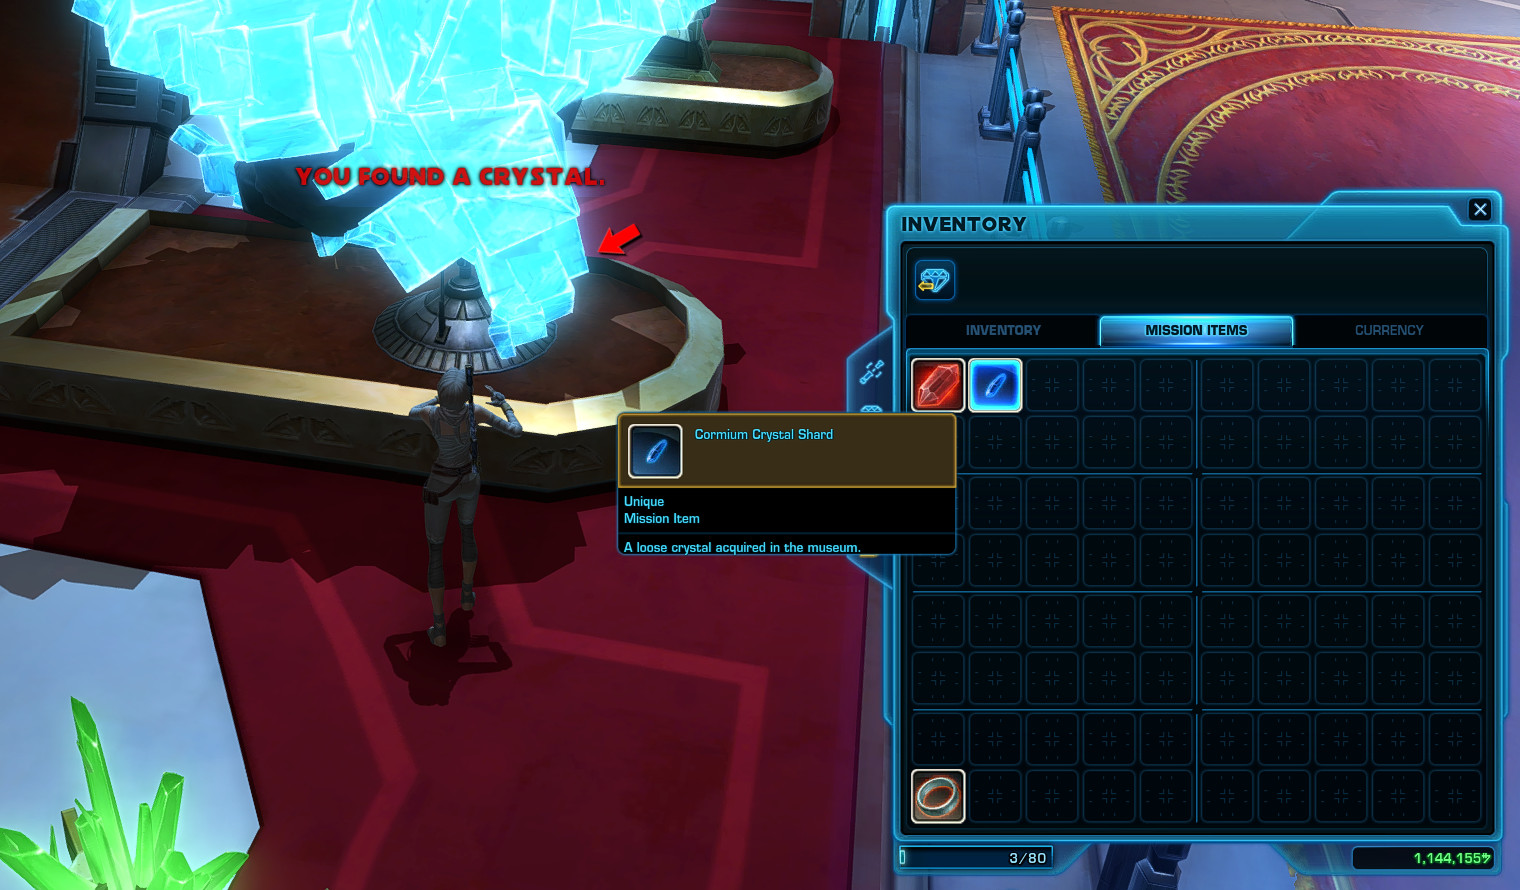
Follow the path behind the Museum to the end and open the door to the exhibition with the Cormium Crystal. This path does not show up on the map.
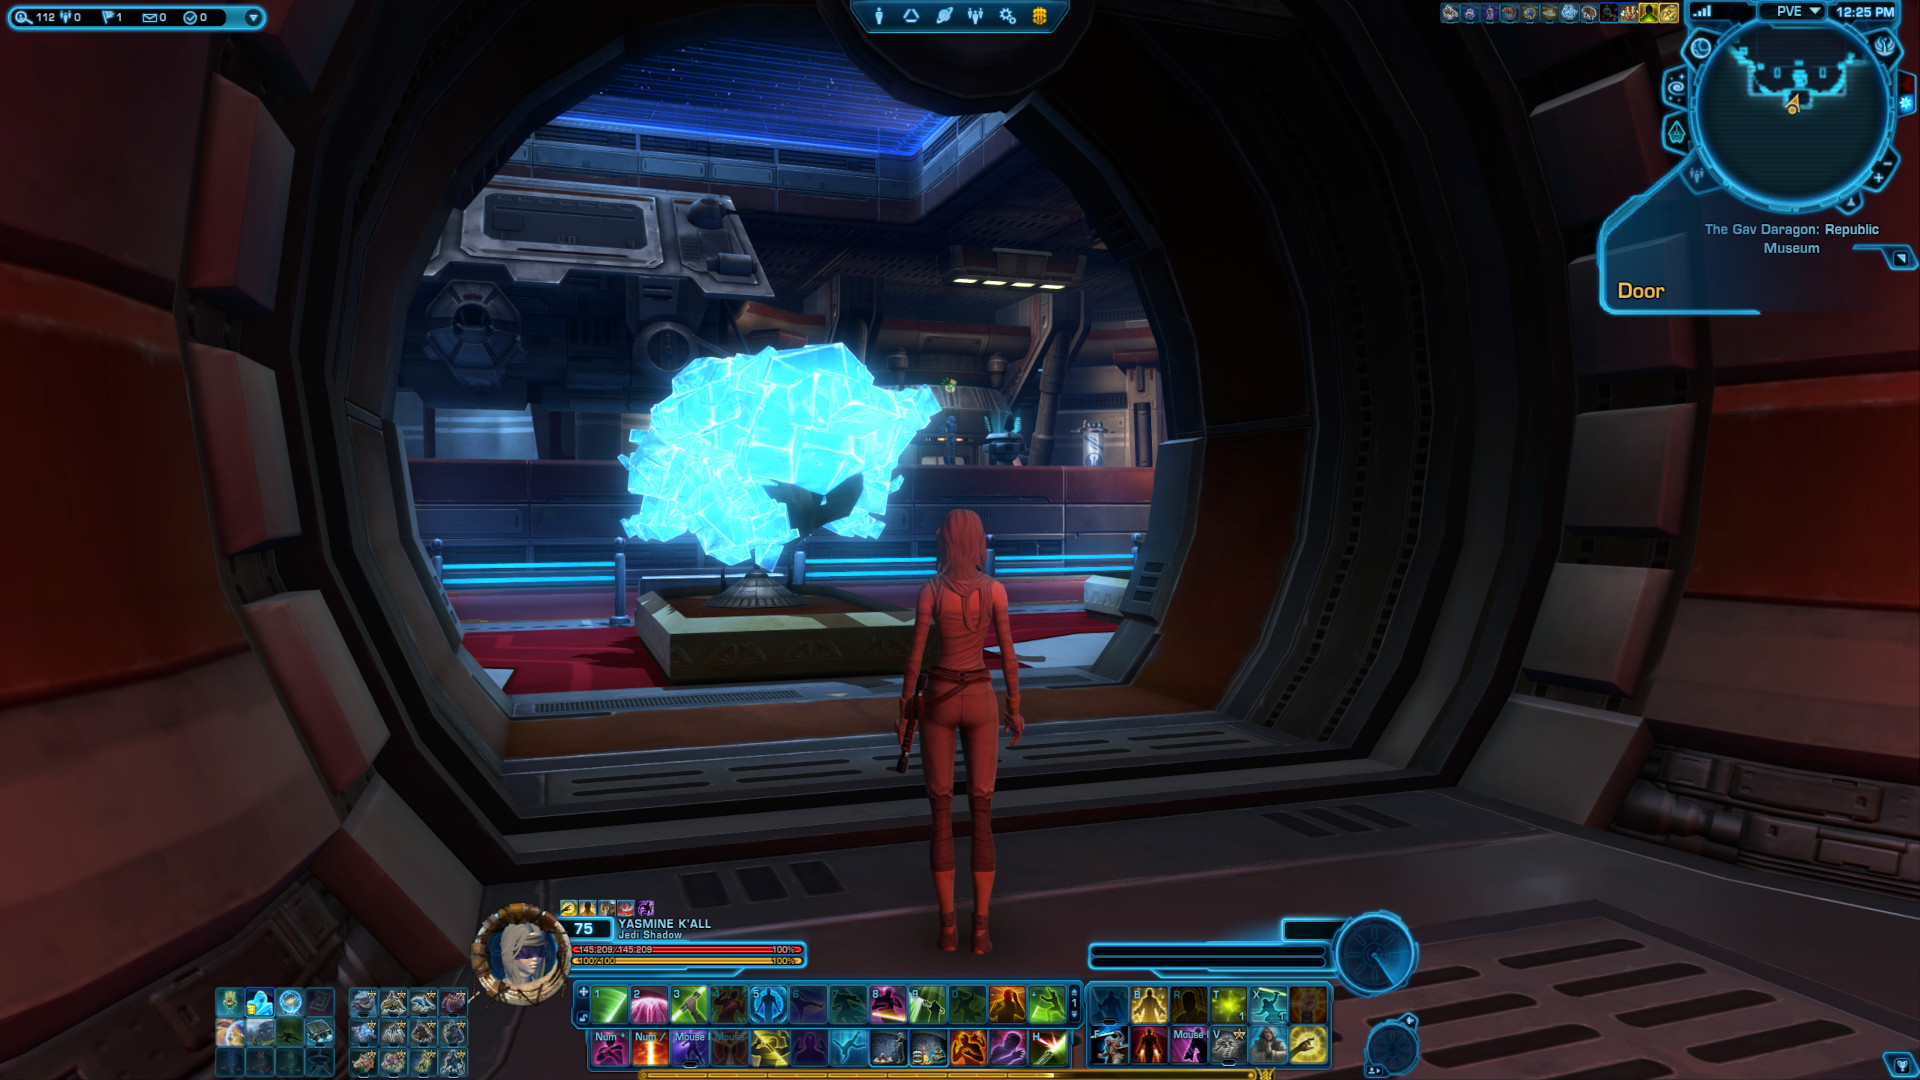
Click the front part of the Cormium Crystal. You will receive a Cormium Crystal Shard in your Mission Items inventory.
Note: This can only be picked up by someone who has never done it before.
Back in the main room, you now have to jump up onto the second podium with the statue on (right on the map).
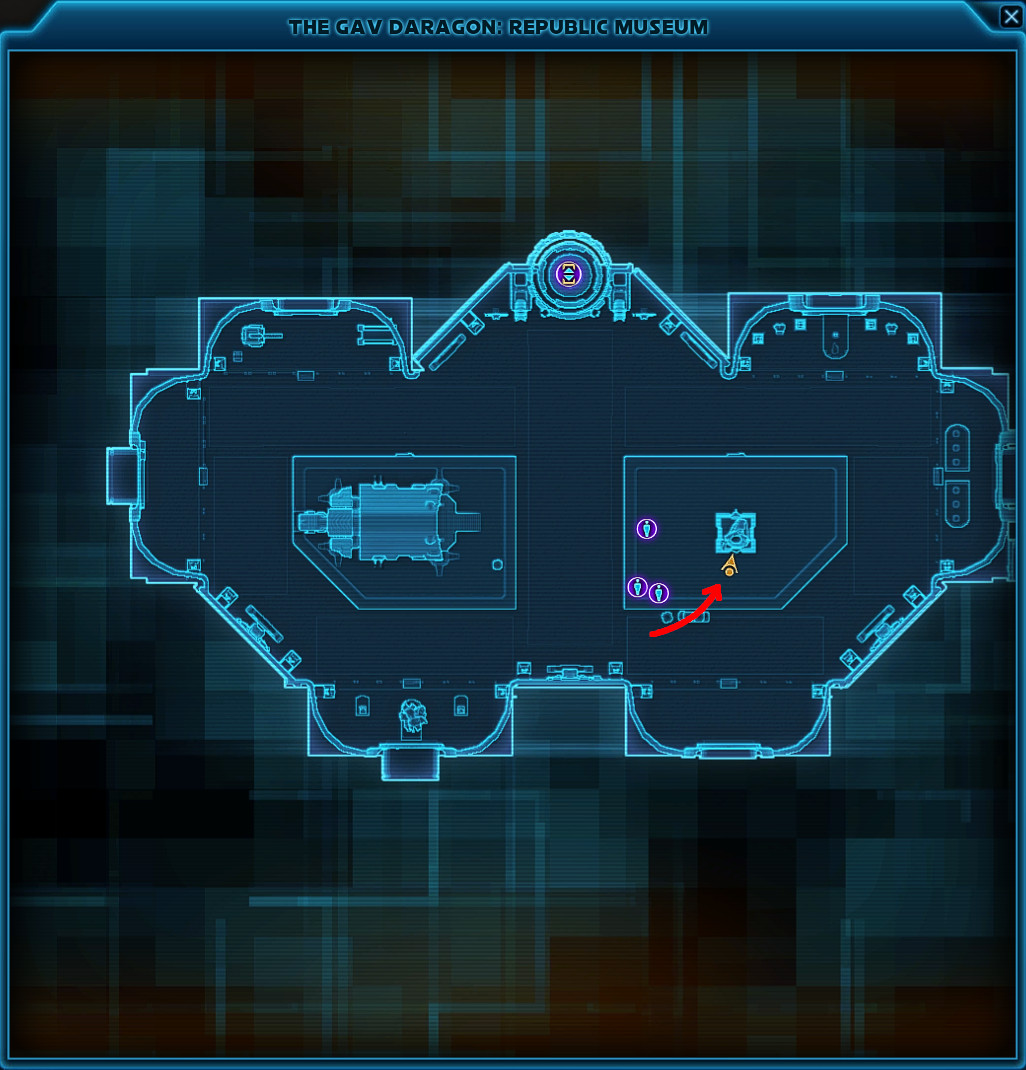
Interact with the clickable socket on the south side of the statue.
Note: This can only be done by the one who carries the Cormium Crystal.
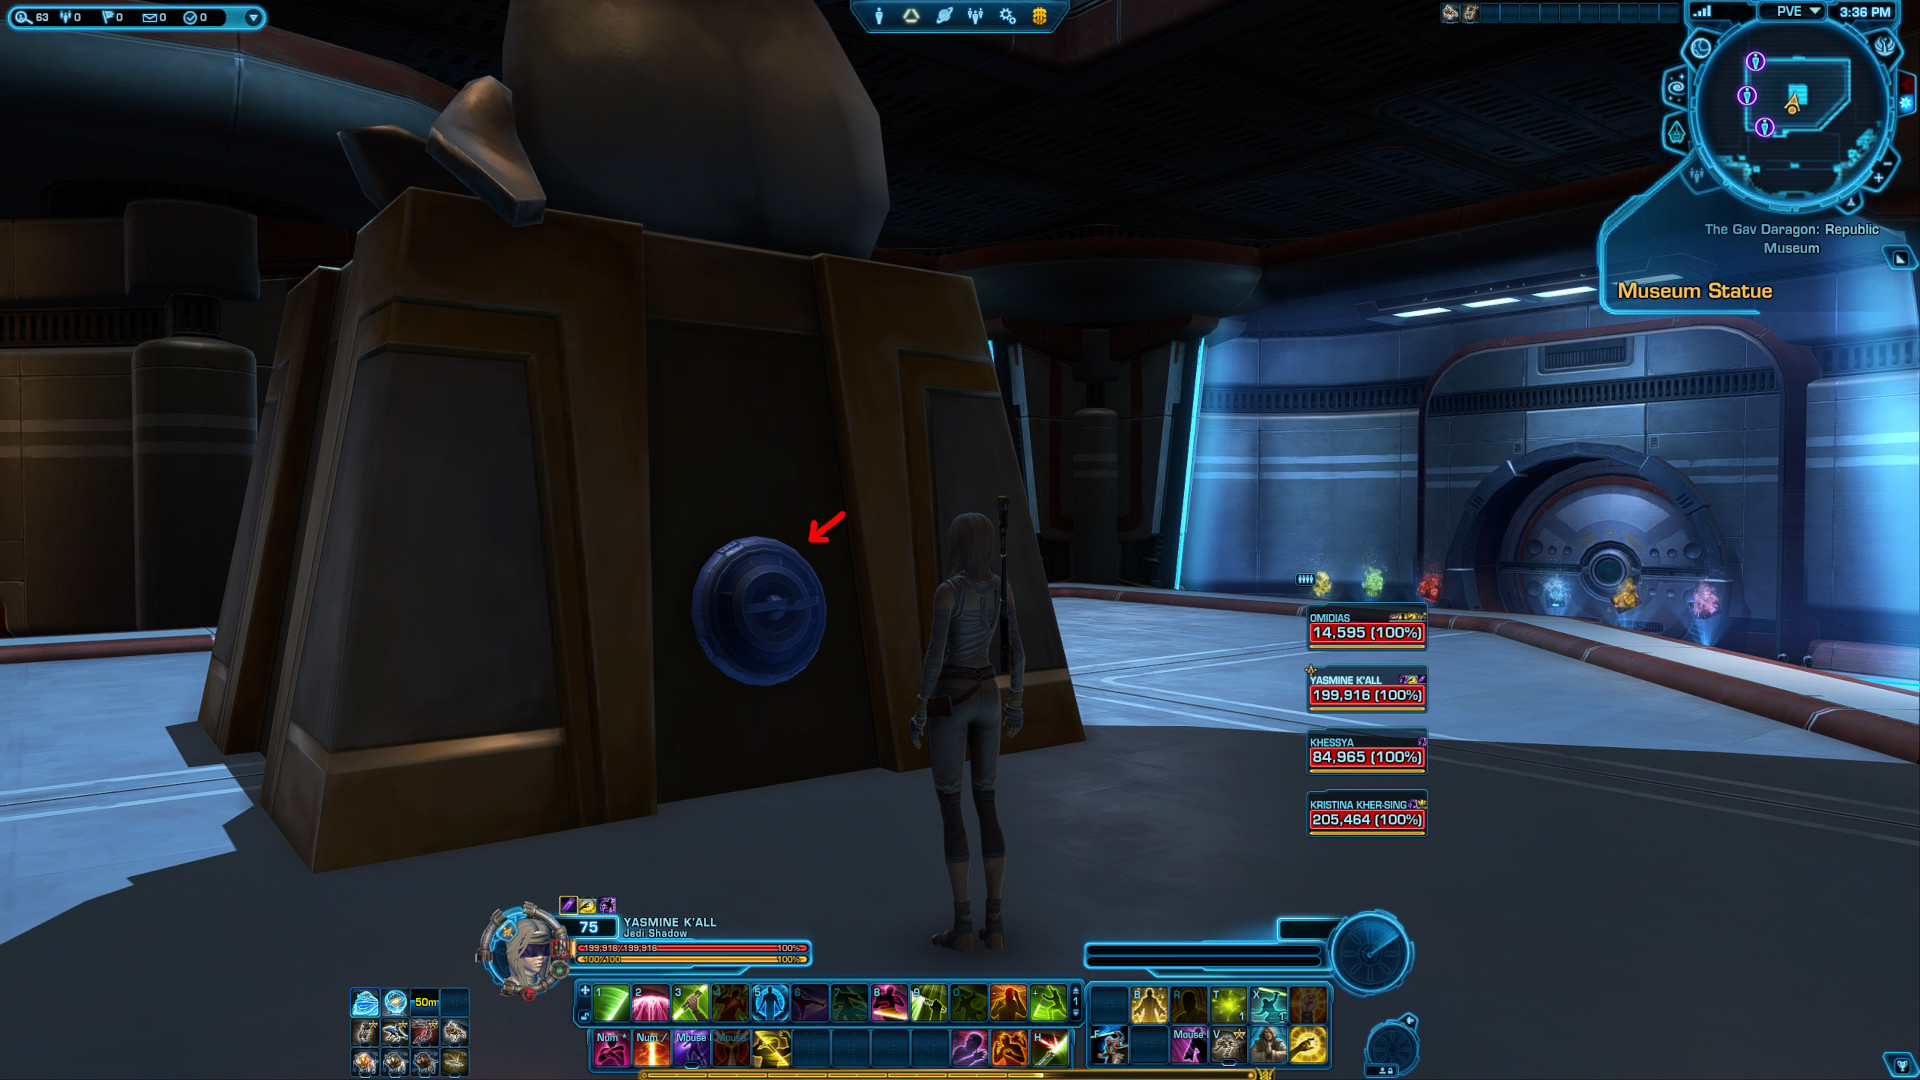
Move to the left side of the statue and click the small panel. This will consume your Cormium Crystal Shard.
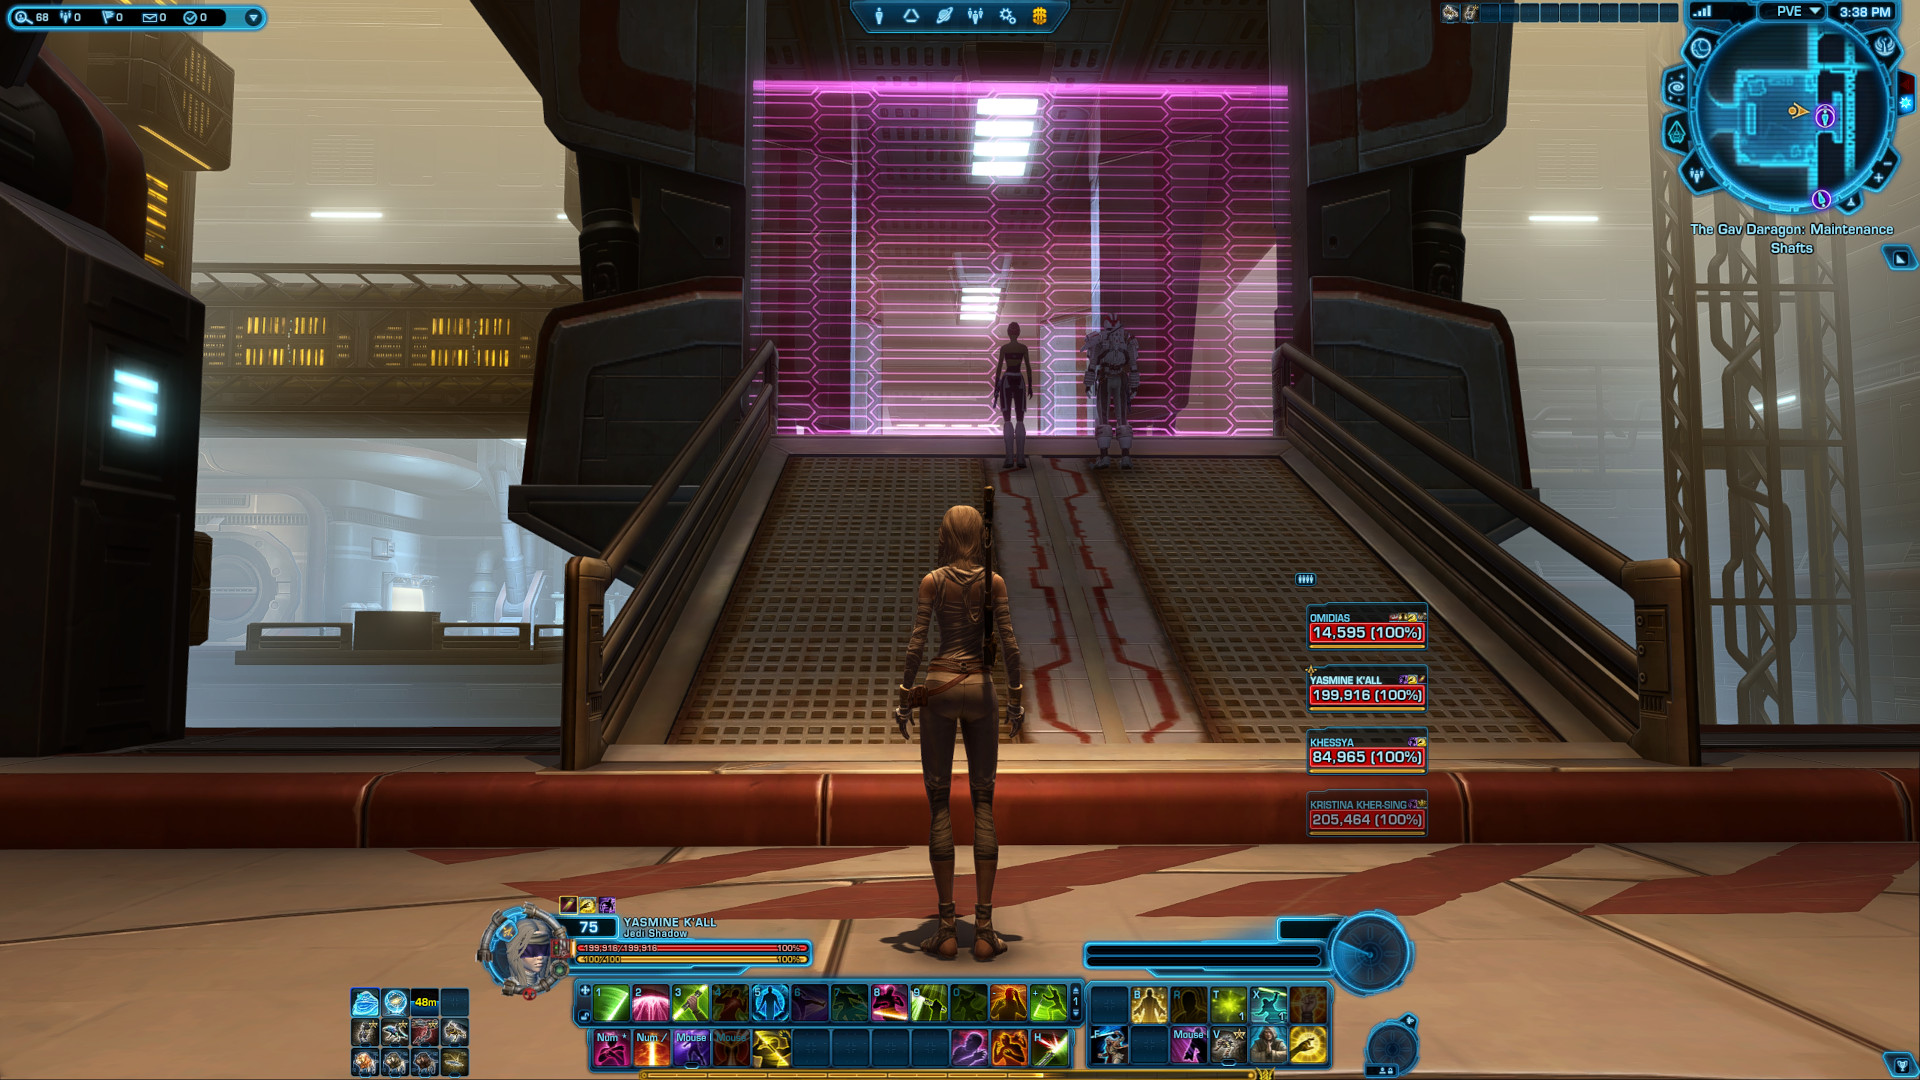
This will lower the Force Field behind the statue (to your right) which will lead to the Gav Daragon Maintenance Shaft.
Note: There is a button on the right side as you pass the Force Field that will lower the Force Field again, in case someone dies and needs access back into this area again.
Inside the maintenance shaft, you have to work together as a team to get across the light-bridge. You have to be at least 4 players here, but the more you are the quicker it goes.
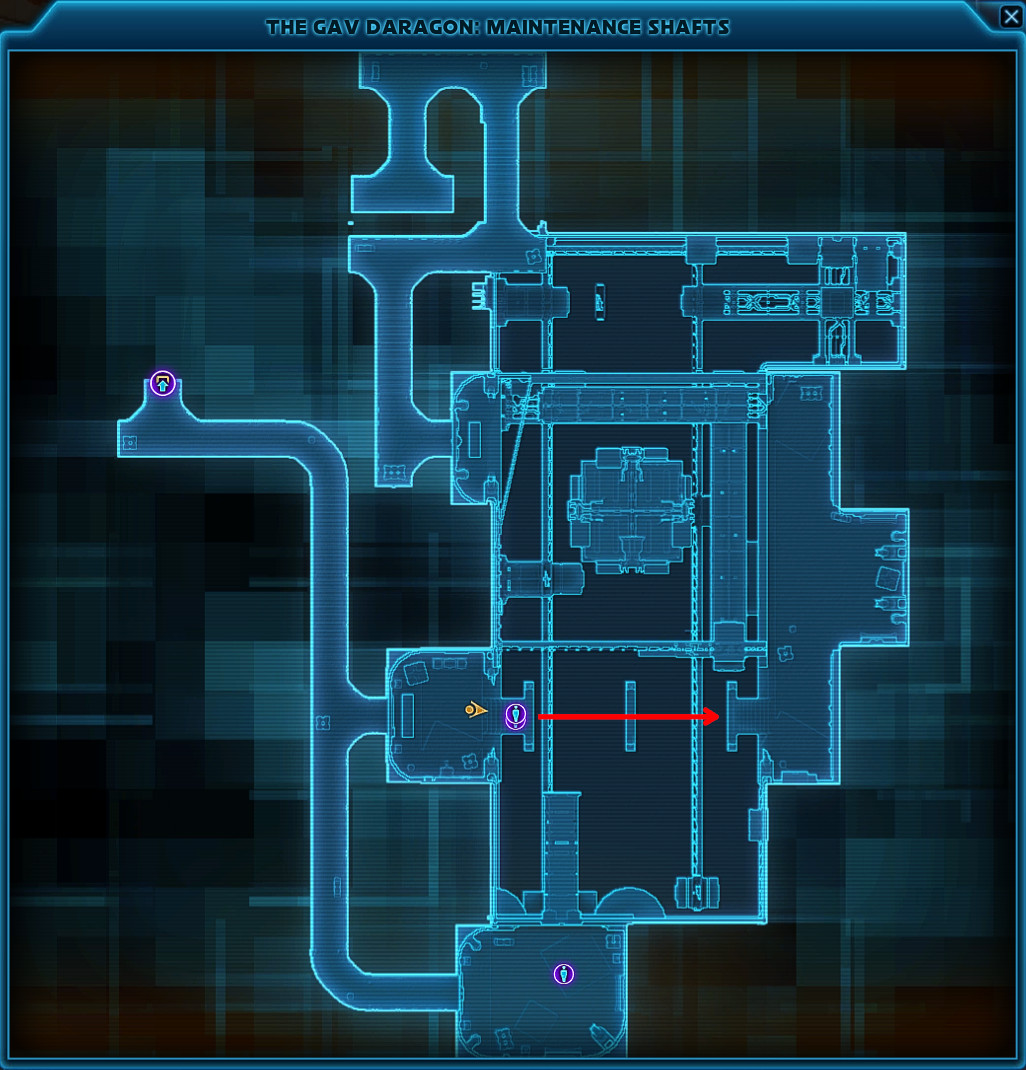
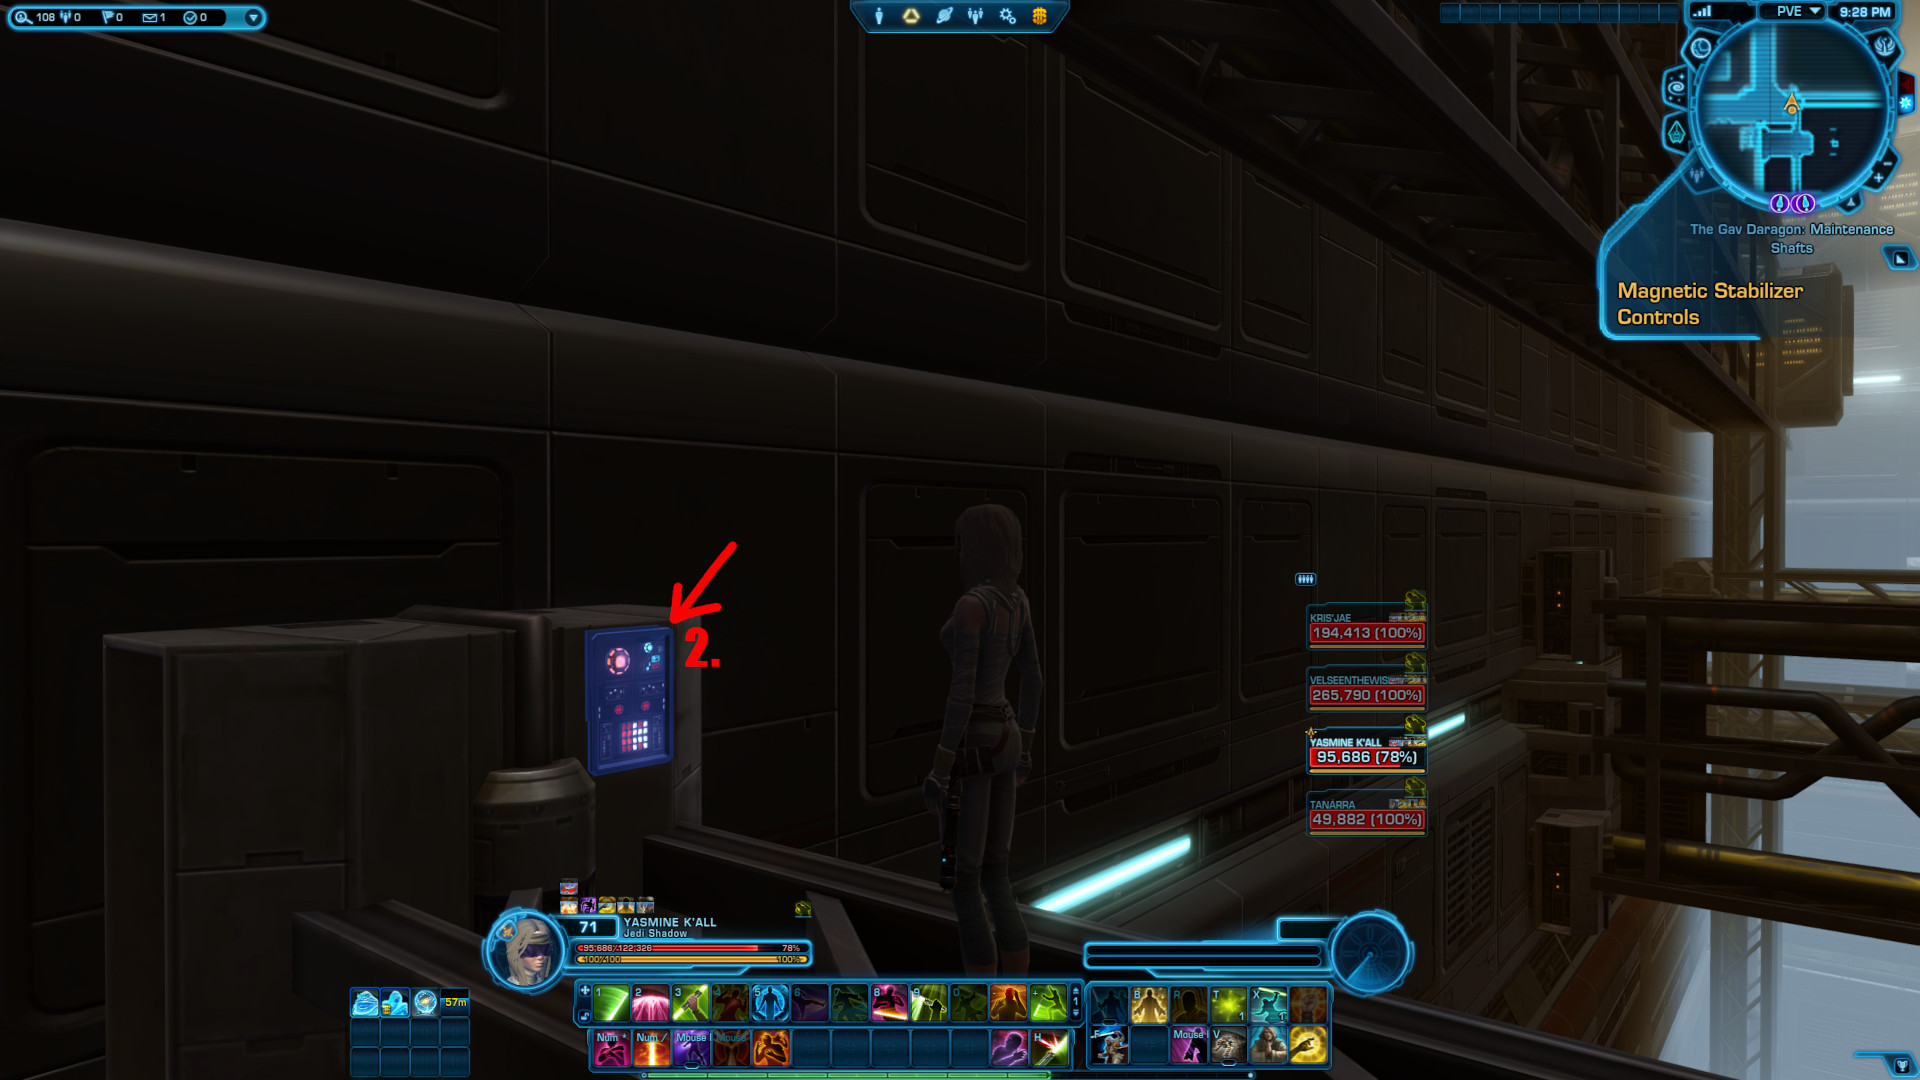
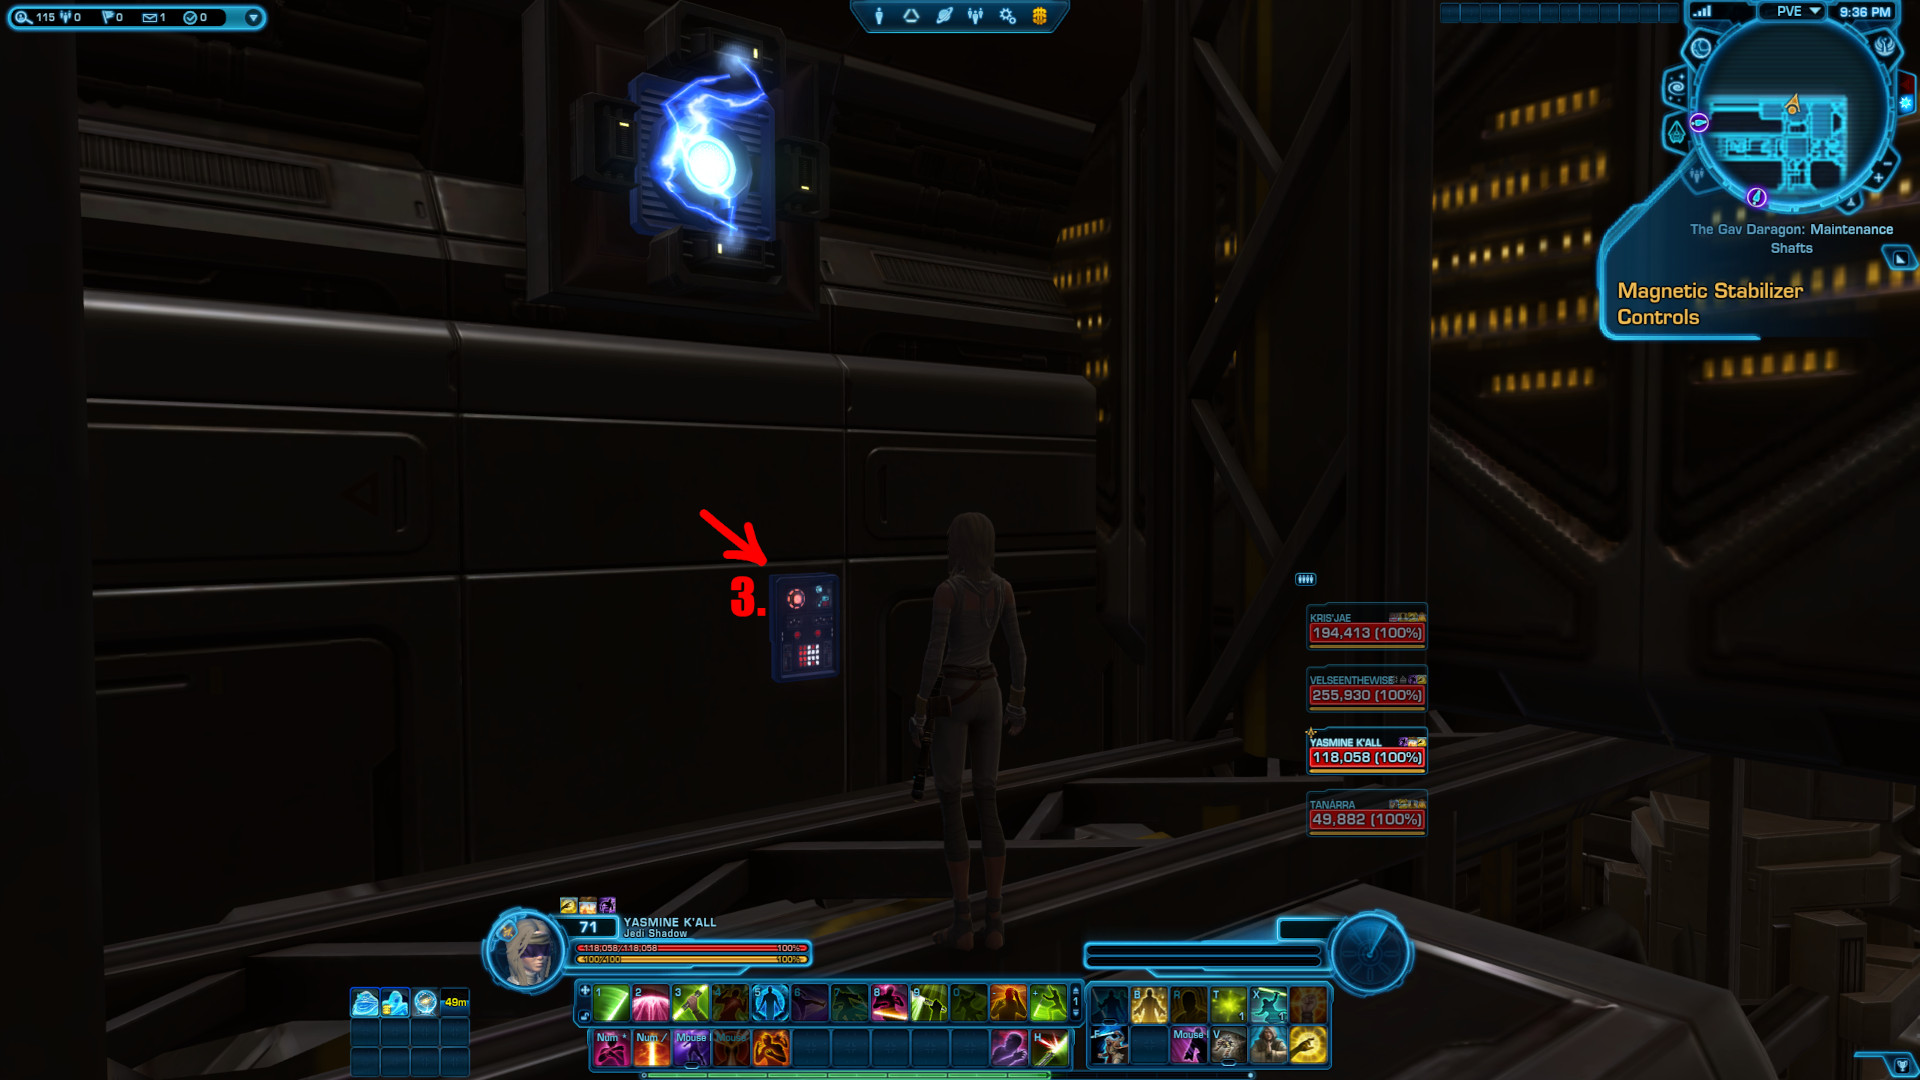
Three players will go to the room to the south where you have to click 3 different consoles at the same time marked with 1., 2. and 3., while one player (or the rest of the group) stays at the bridge.
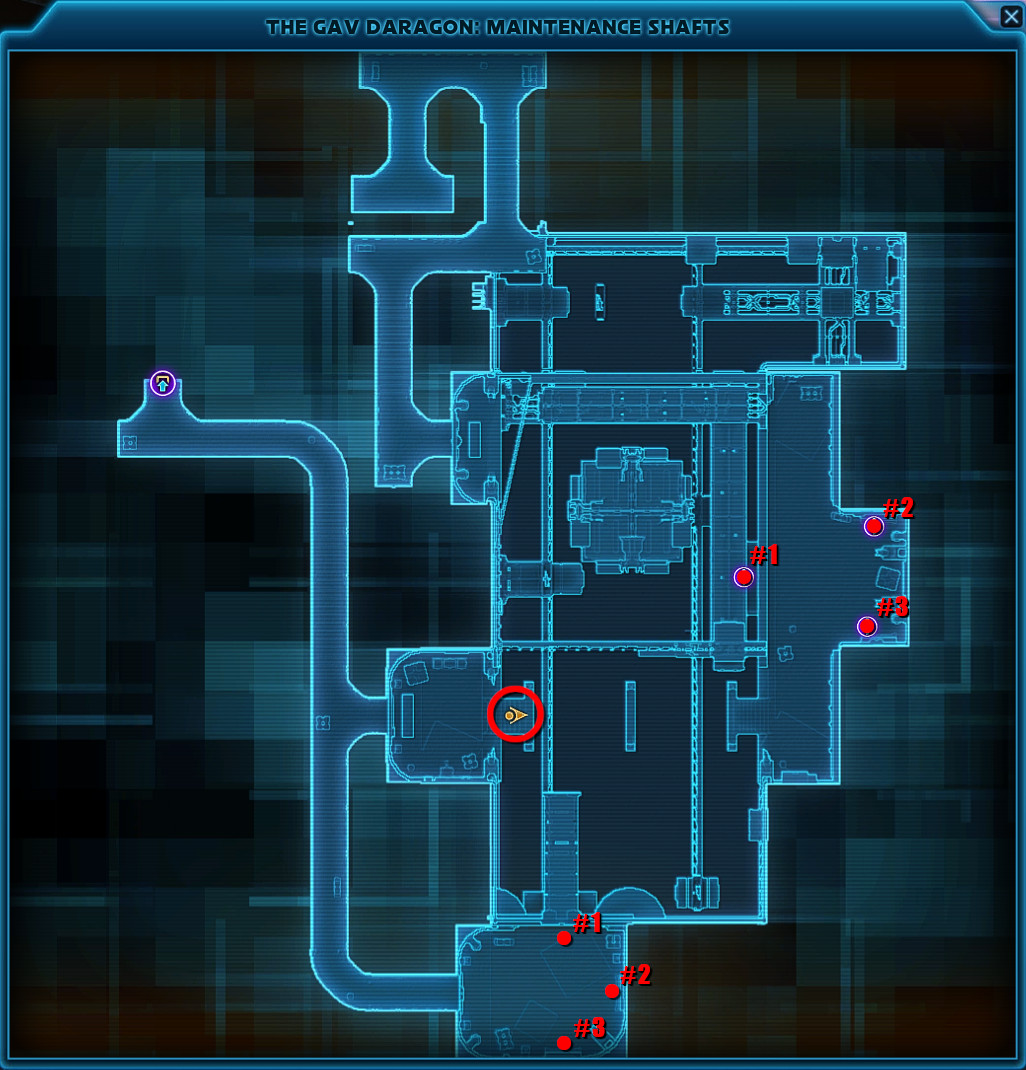
The player(s) staying at the bridge has a few seconds to run across, while one of the three players at the consoles will move to the bridge.
Once the single player crosses the bridge, they will take the spot at the console mirrored on that side to that of the player who now has moved to the bridge awaiting to pass. Continue this until all players are one the other side of the bridge.
If you are 6+ players, you can ignore this, since the three players or more that has already moved across, can unlock the bridge for the remaining players.
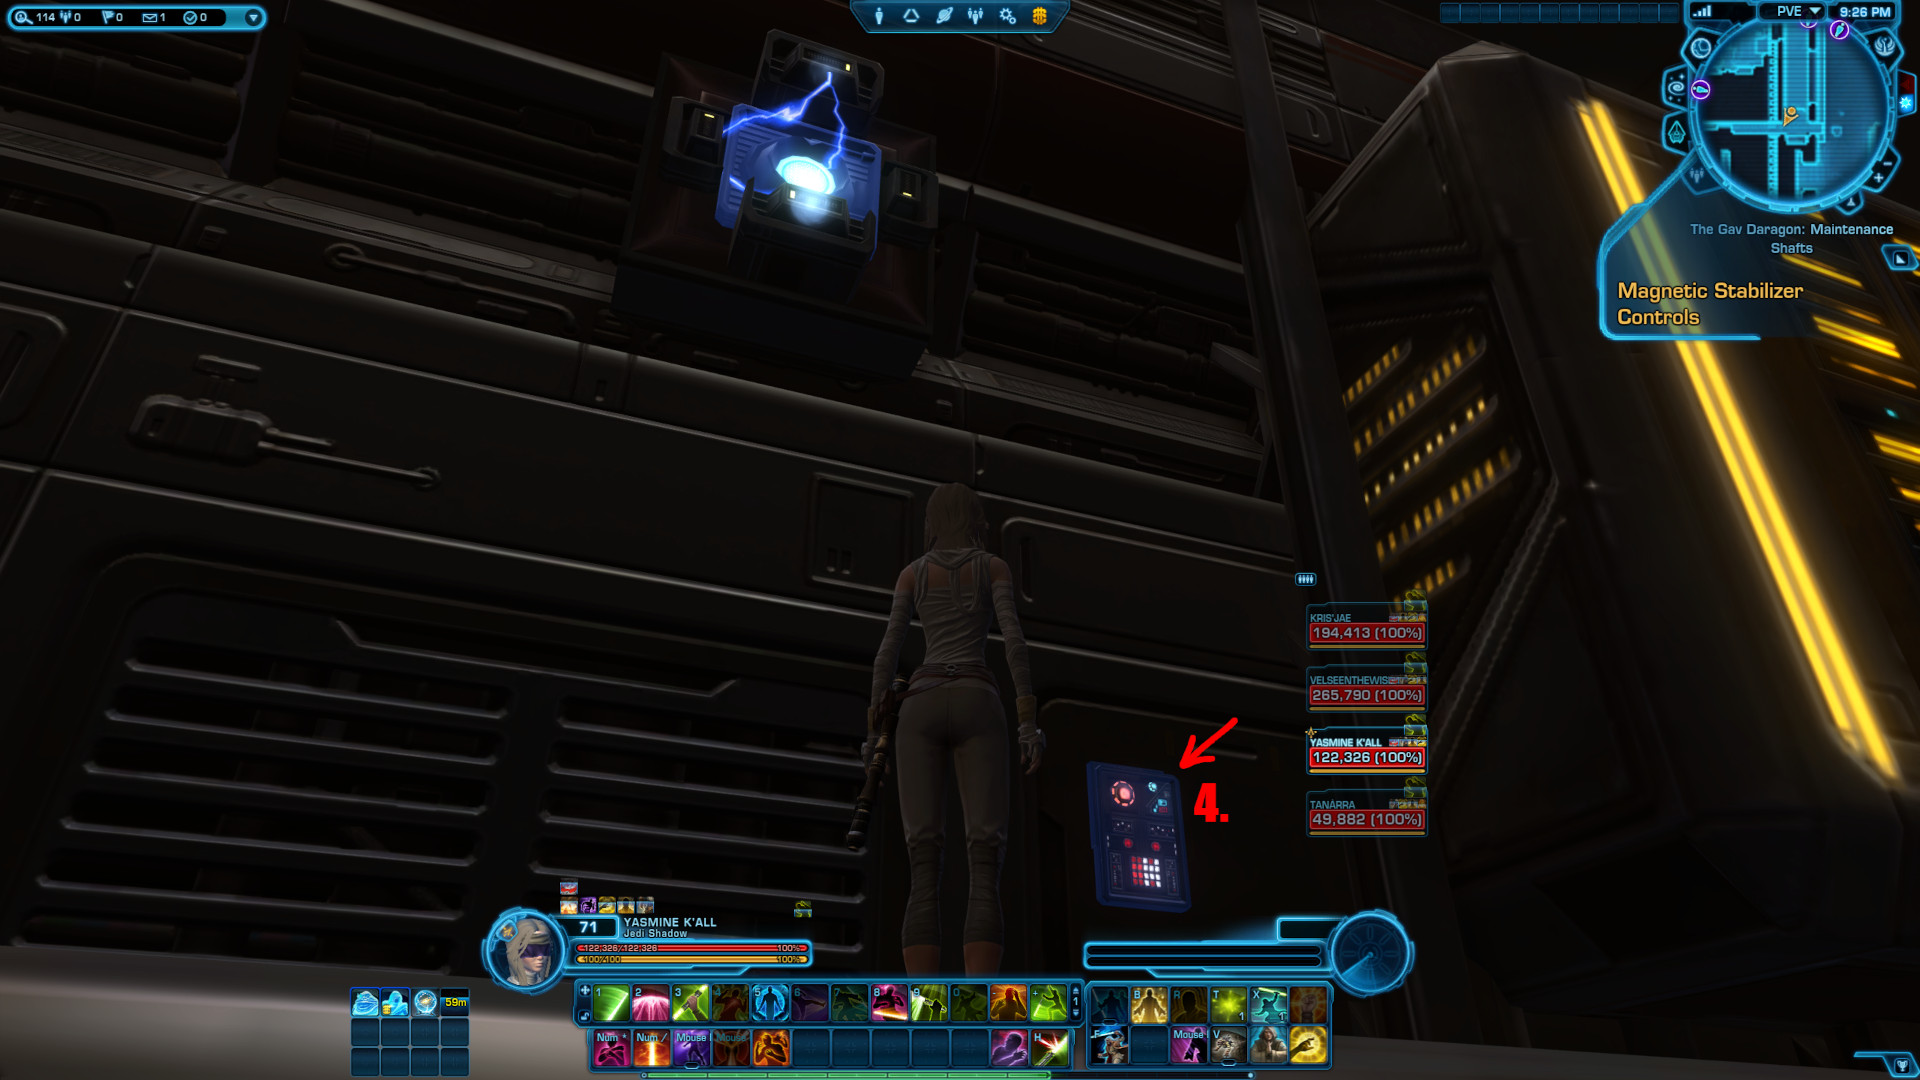
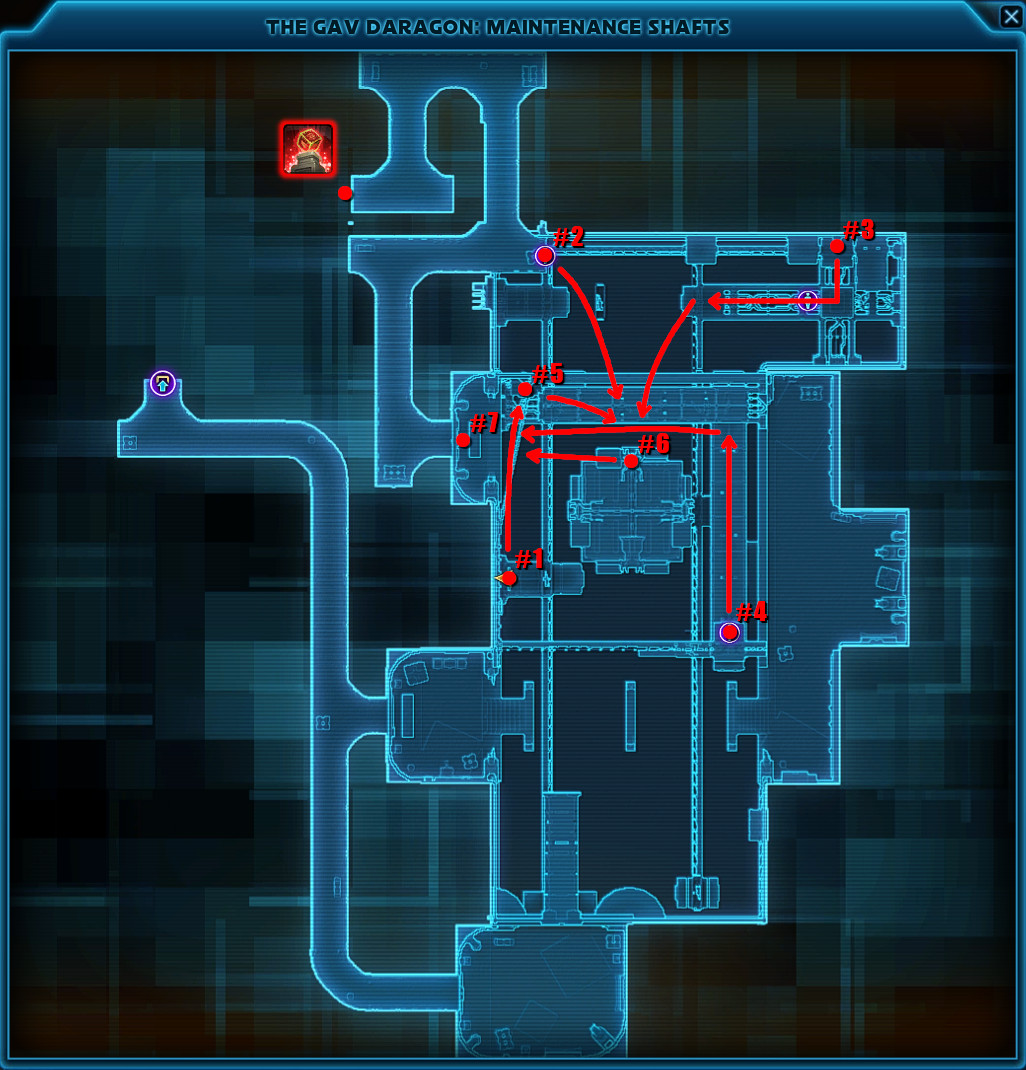
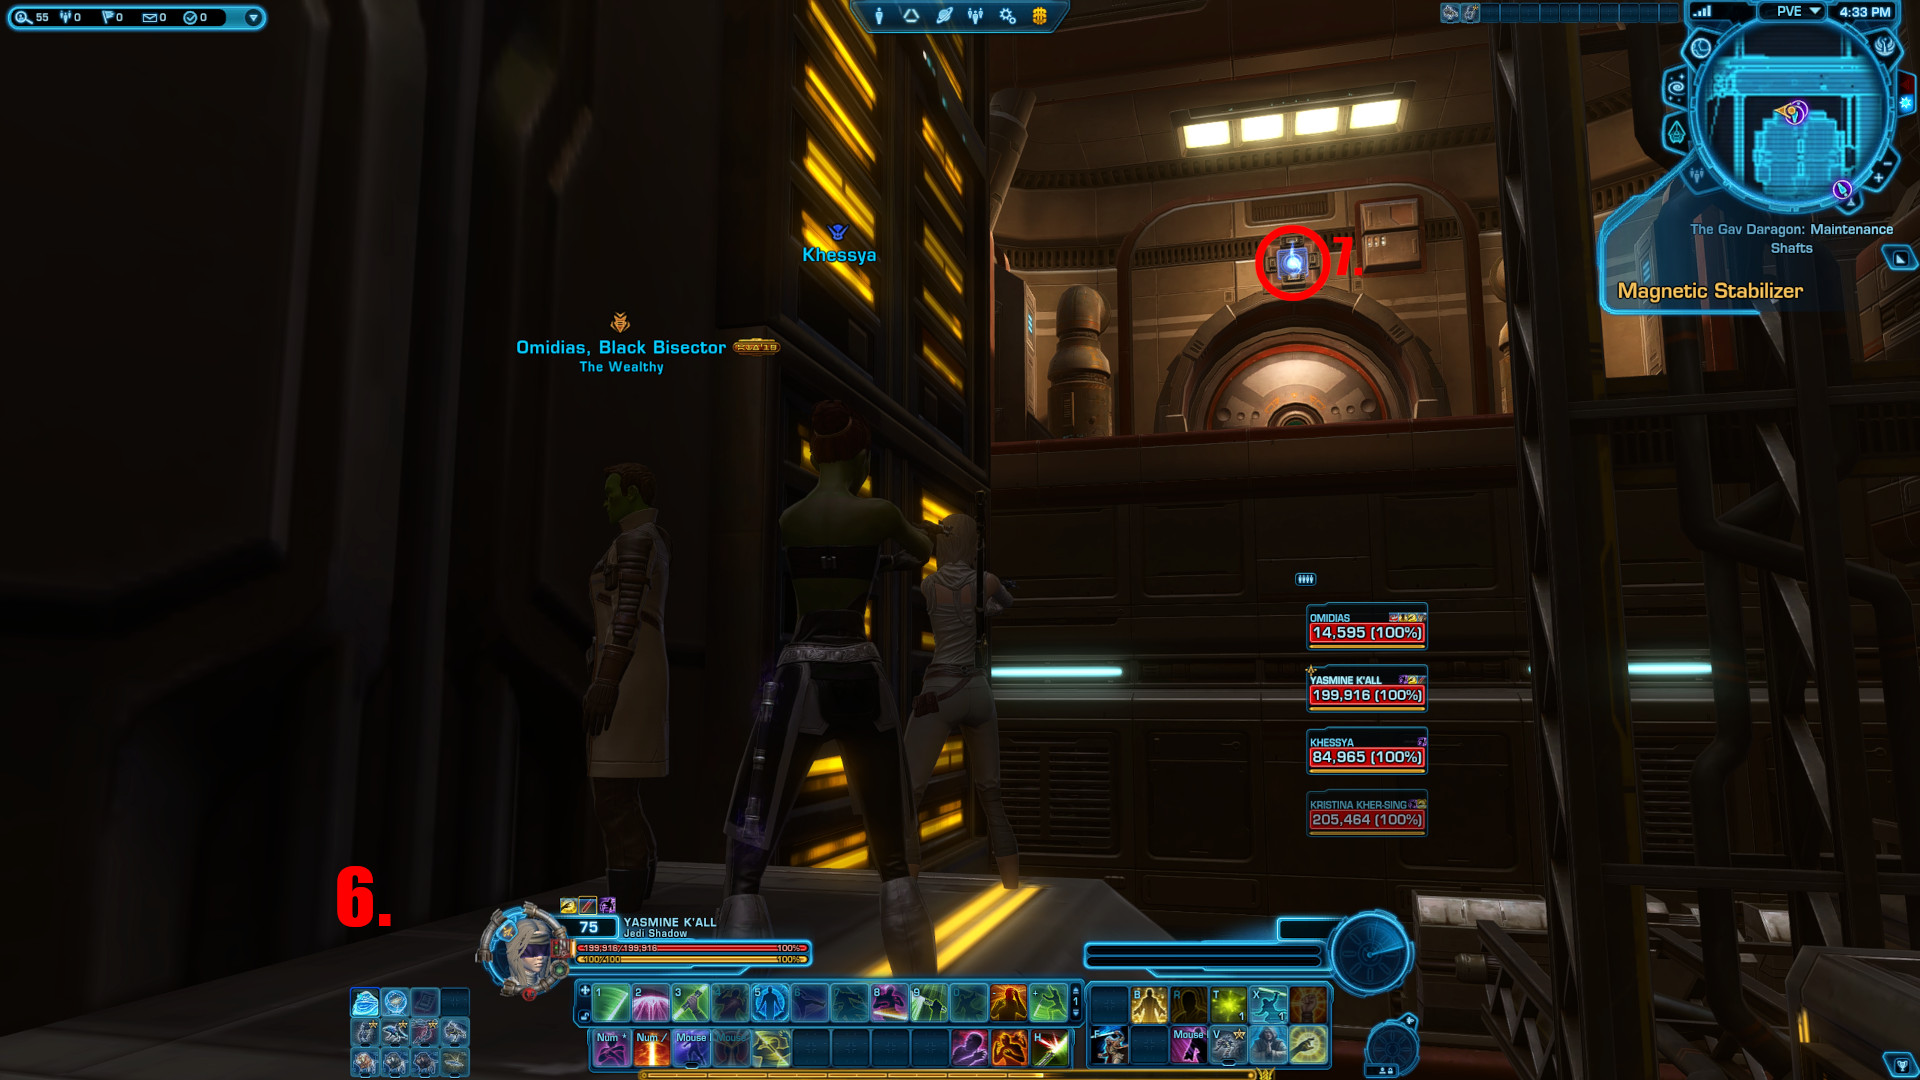
That was the easy part. Take very strong note of the positions on the map, because as soon as everyone is in position and ready to go, you will have approximately 30 seconds to reach the final position, marked with 1., 2., 3., 4., 5., 6. and 7. and I recommend everyone stay up on the main platform, until it's their turn to go to their position.
This guide was performed with 4 players.

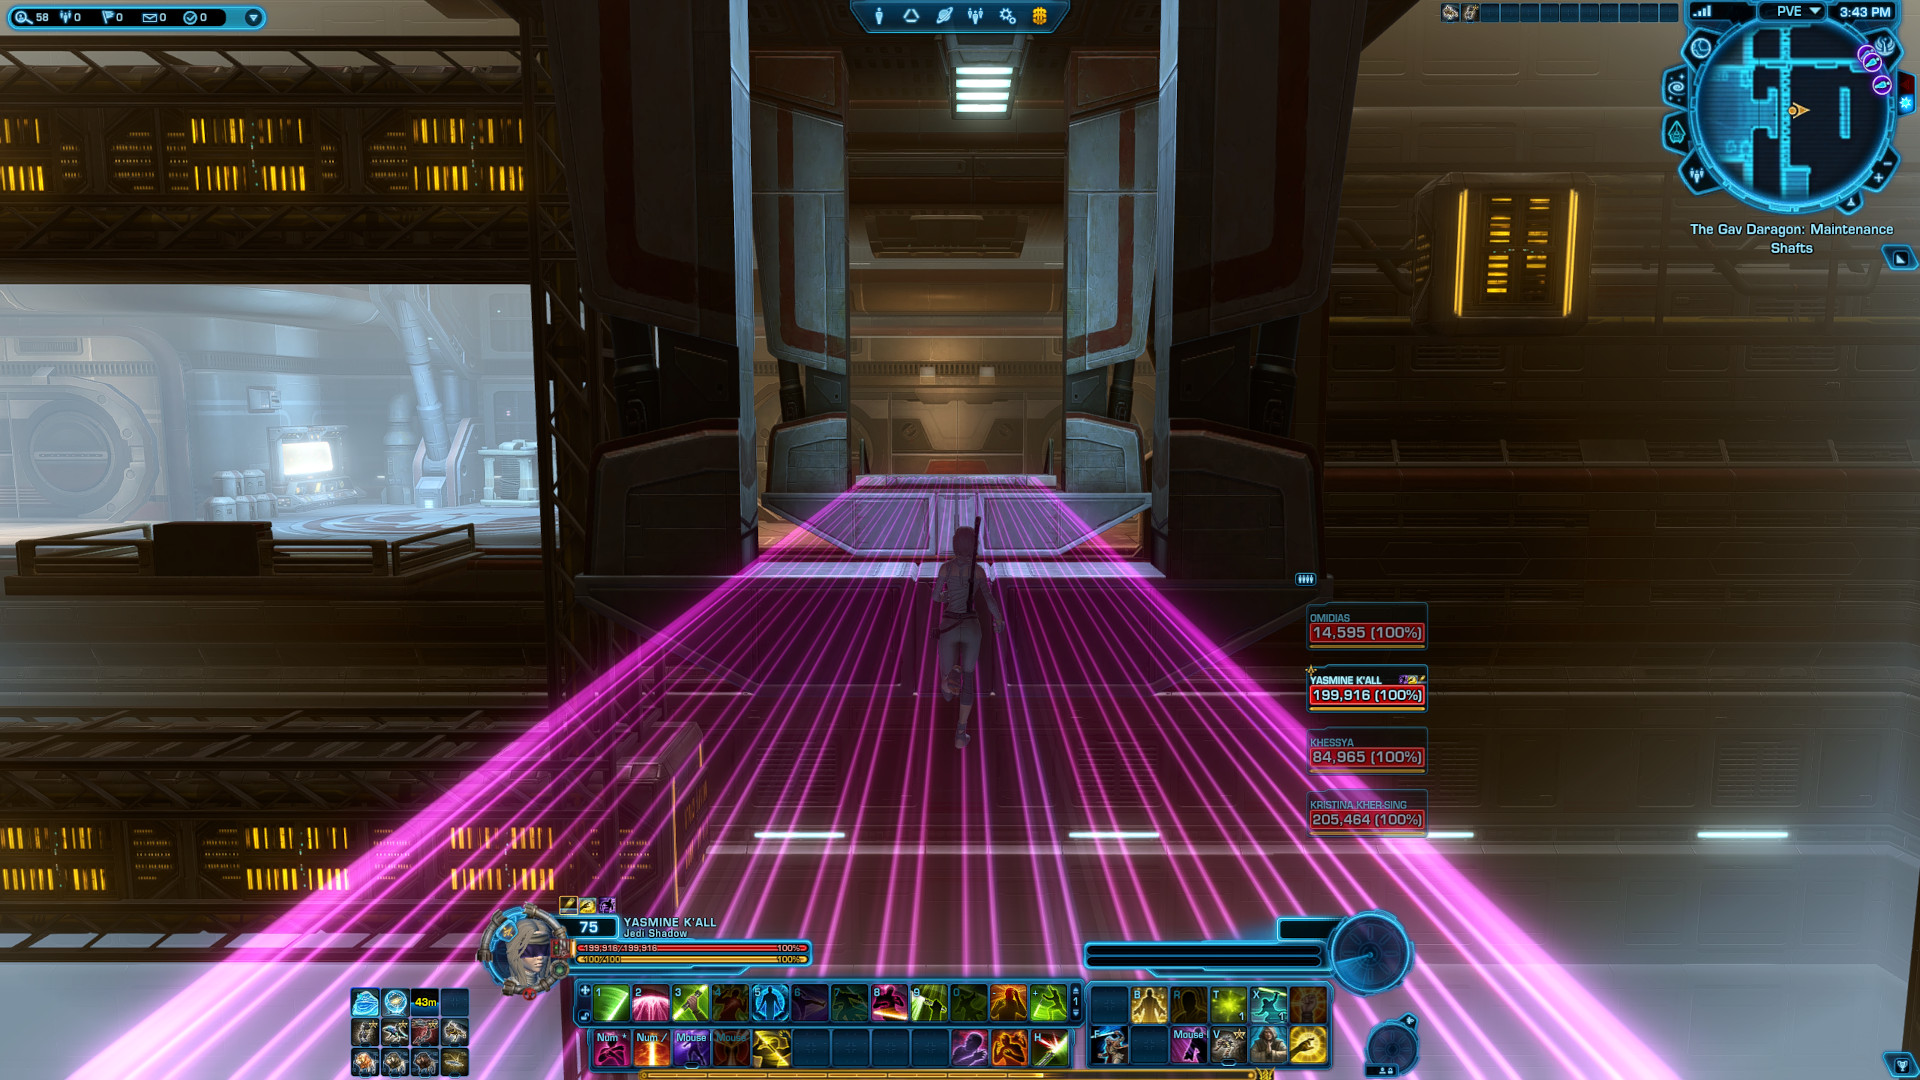
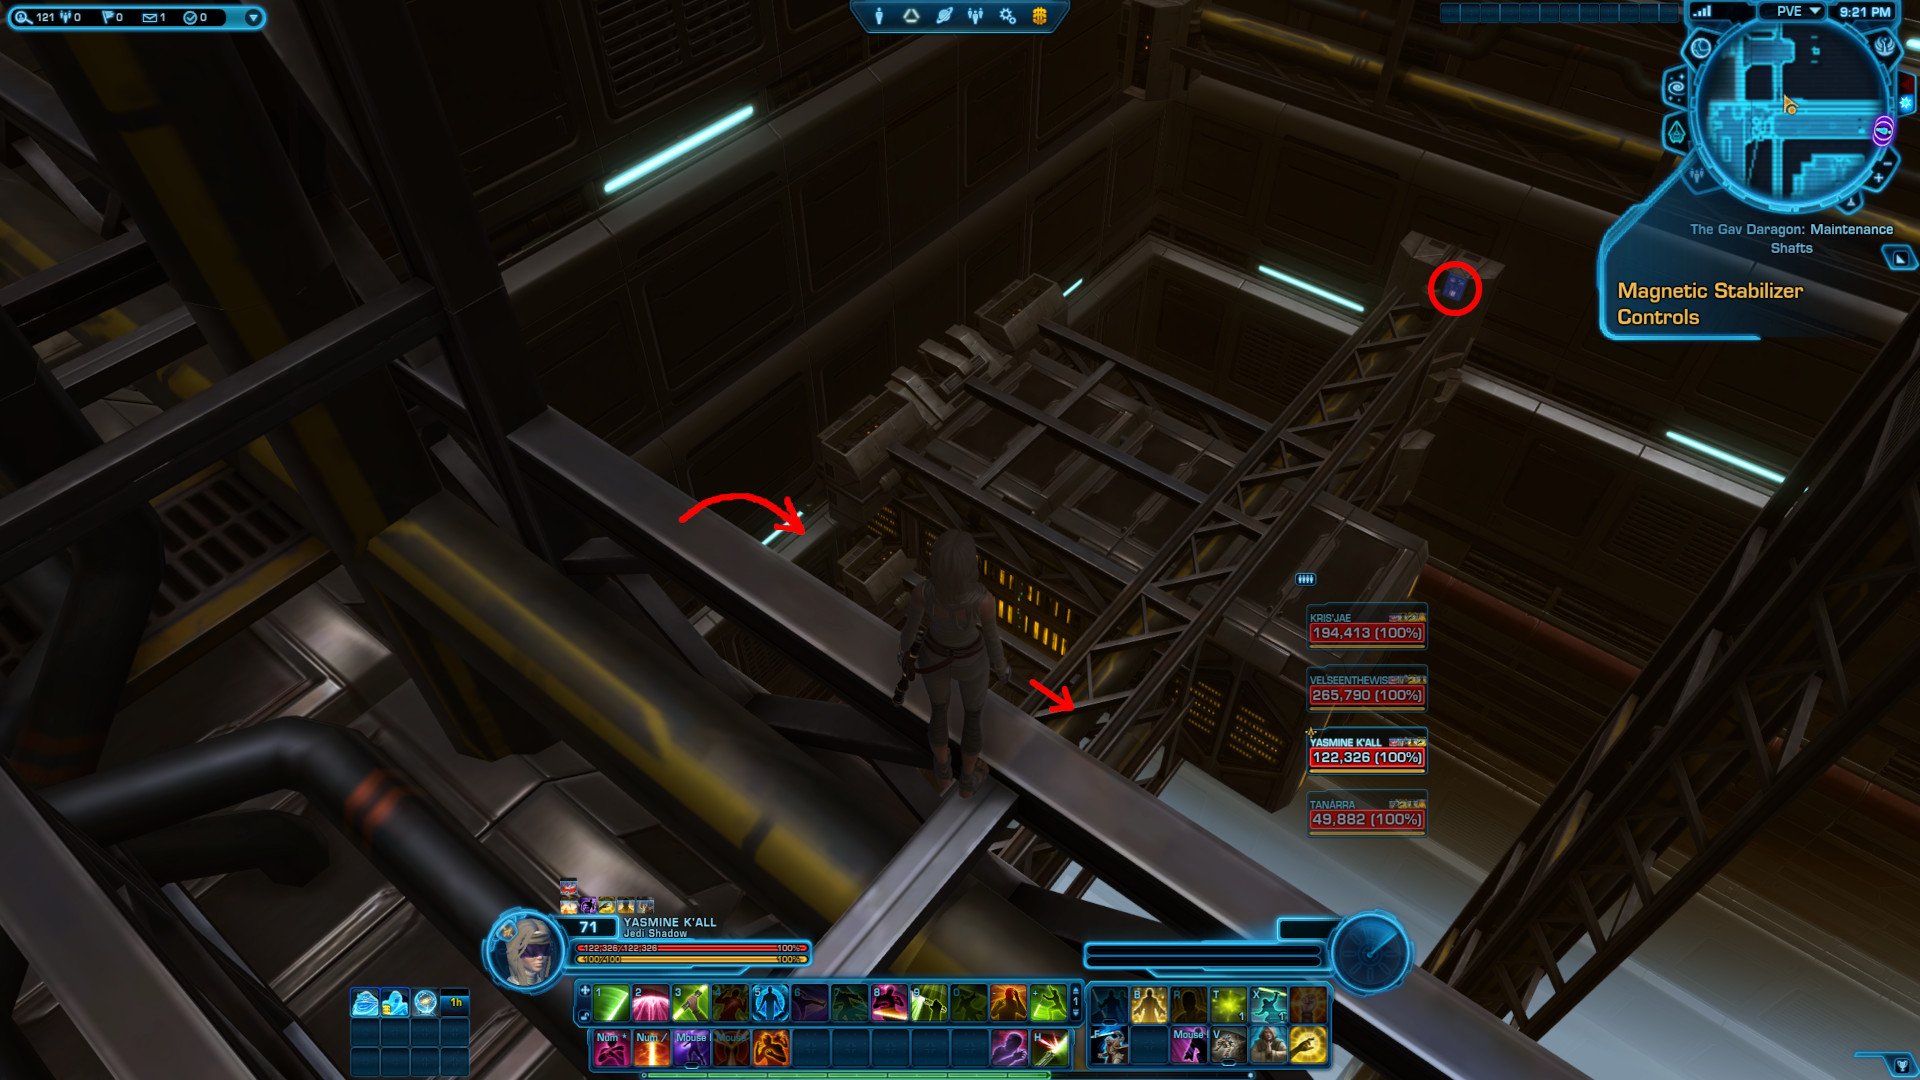
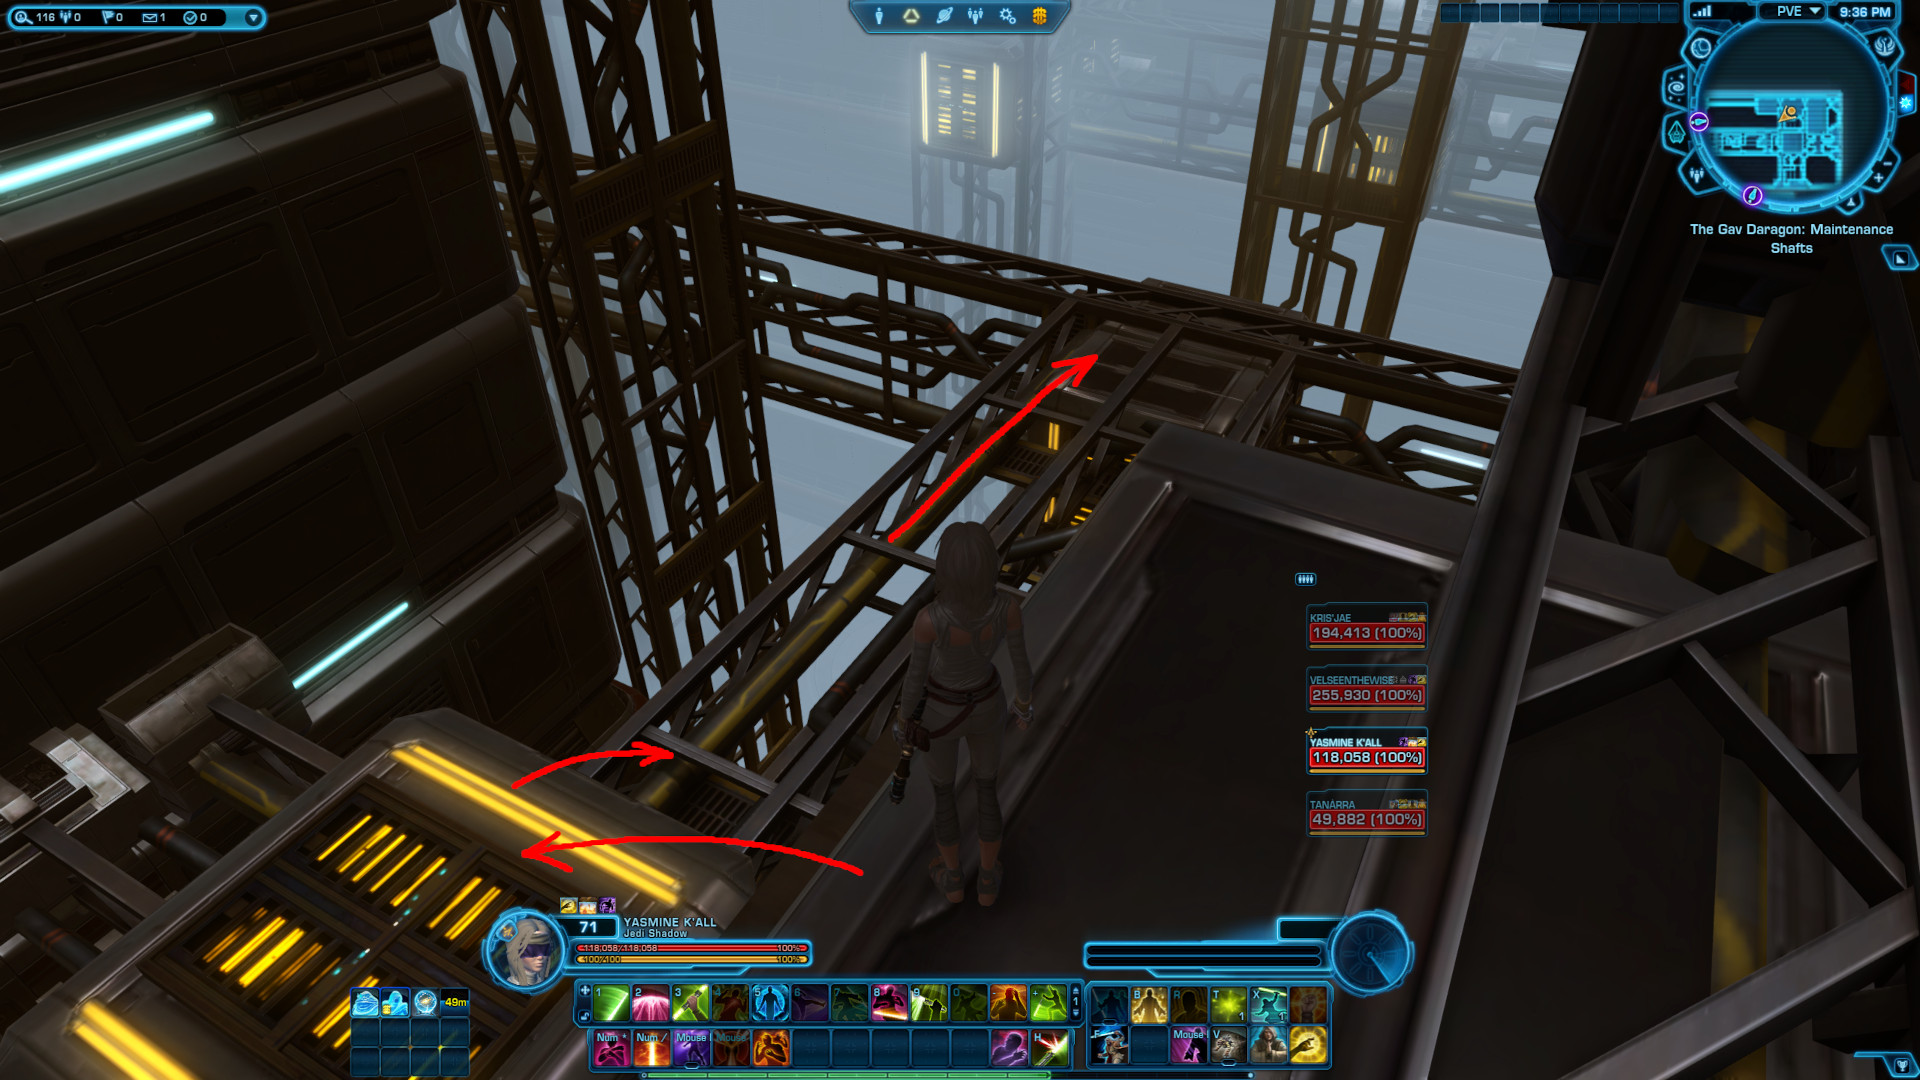
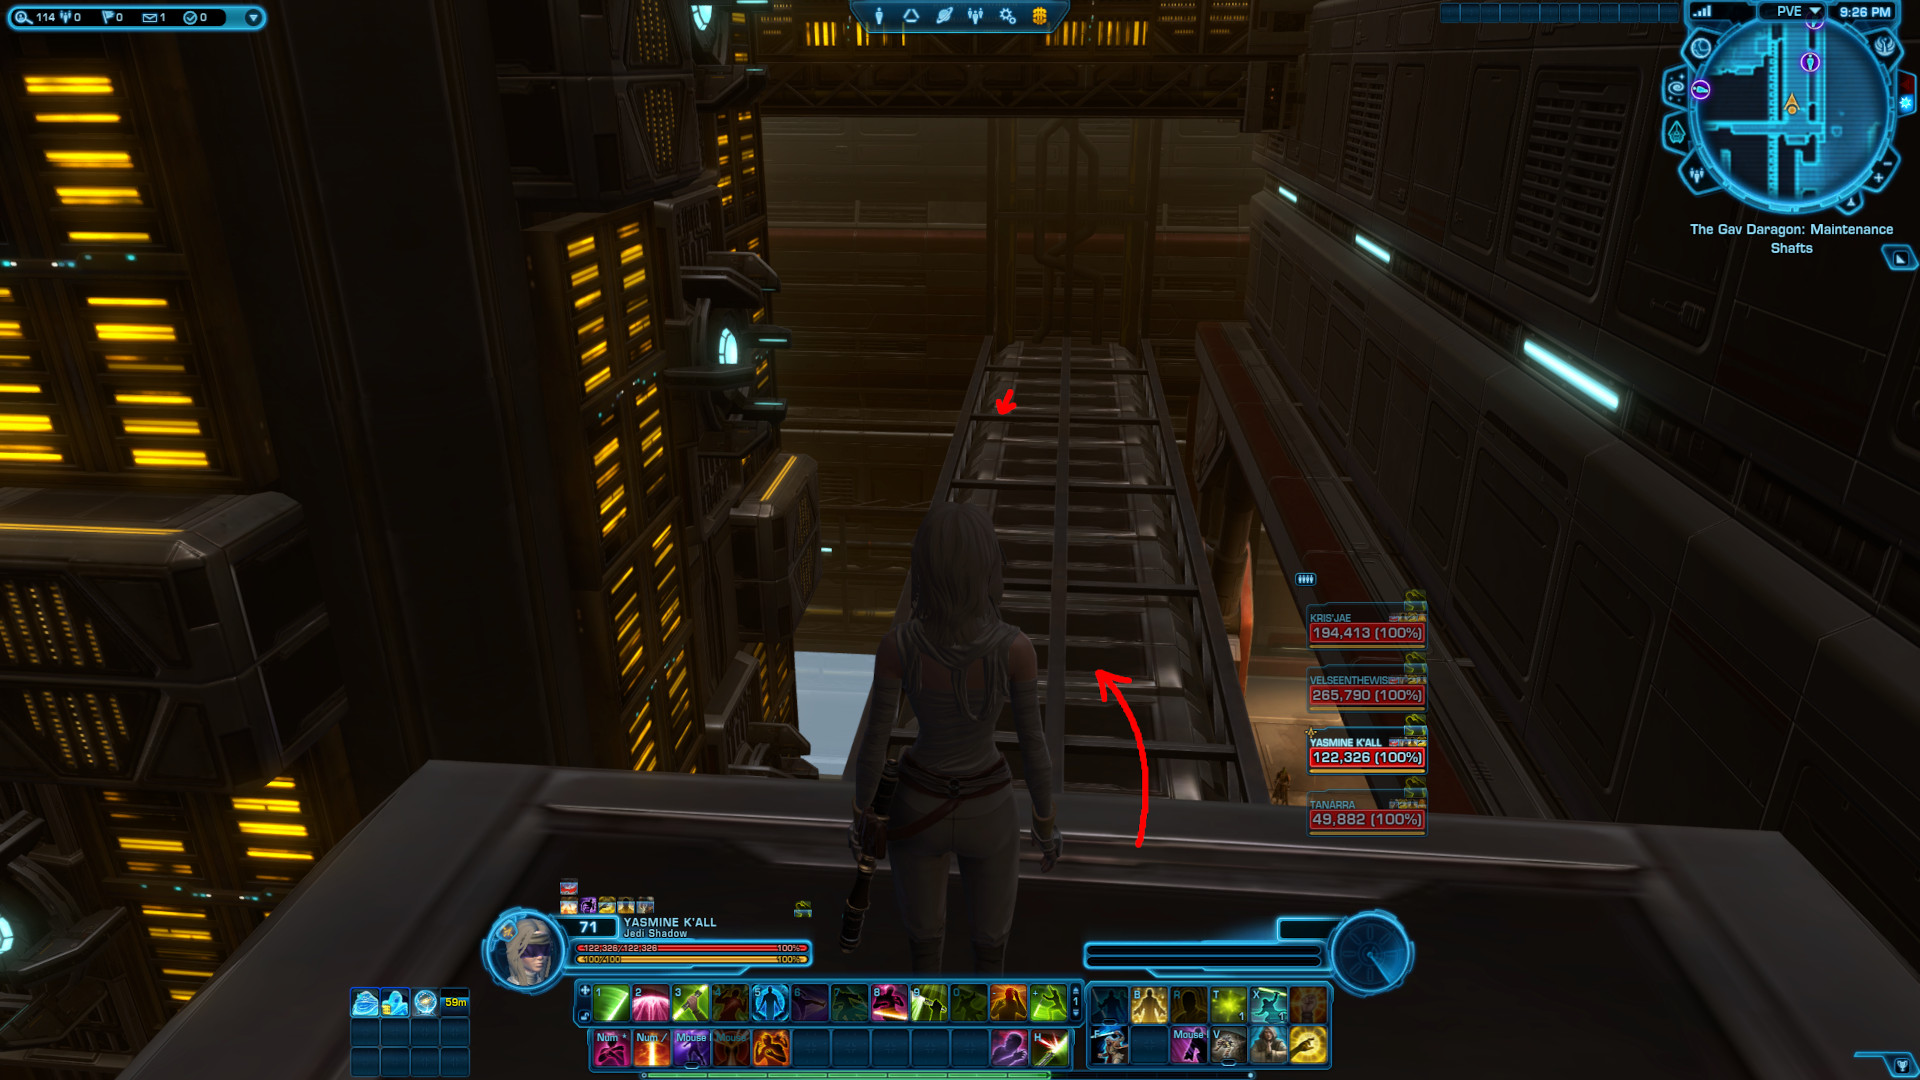
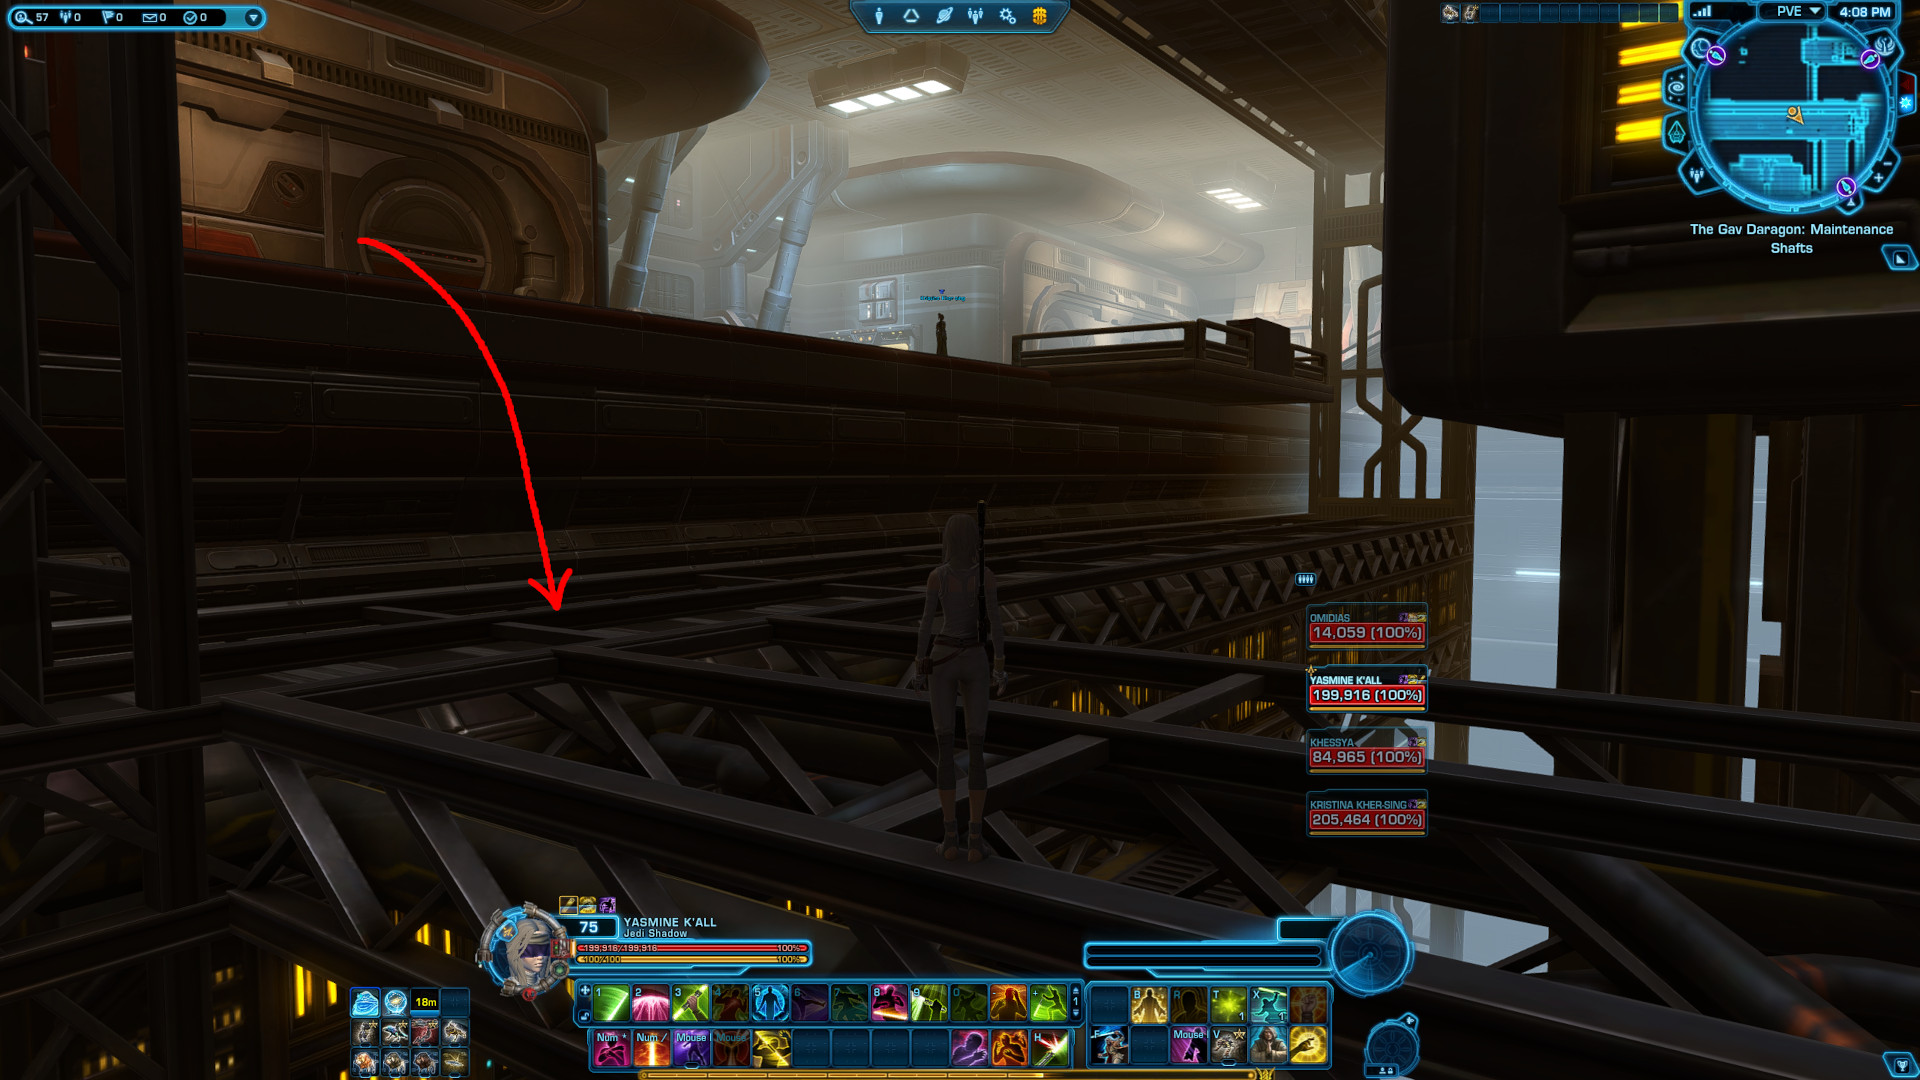
Player #1 will go to position 1. When you get to this beam below, simply angle yourself towards it and walk off, don't jump. Stay on the right side with the pipe below. There is a risk of falling through the gaps on the left side.
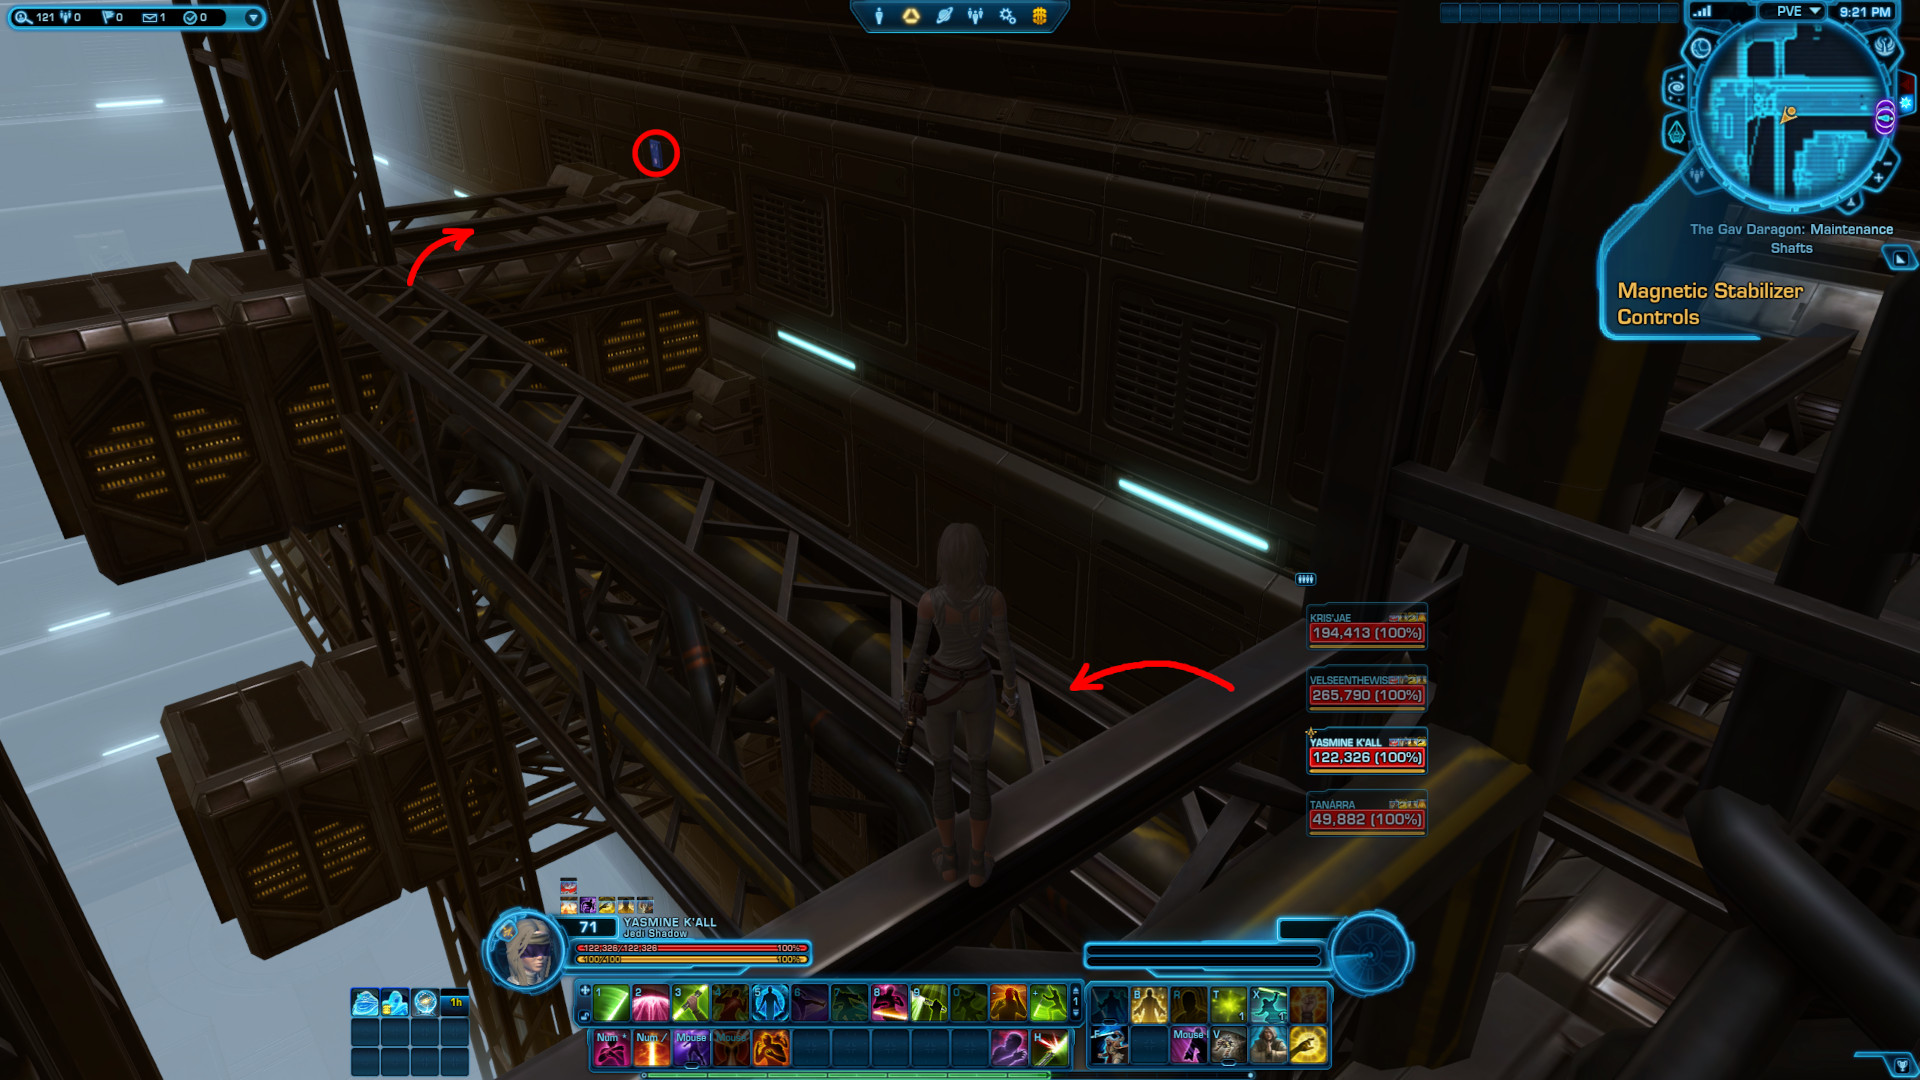
Player #1 will also be in charge of position 5. that can be reached from position 1.
From position 5. you can easily reach position 6. when the time comes.
Player #2 will go to position 2. I recommend the same approach as on position 1. of angling yourself towards the beam below and walk off. If you jump, you will jump too far.
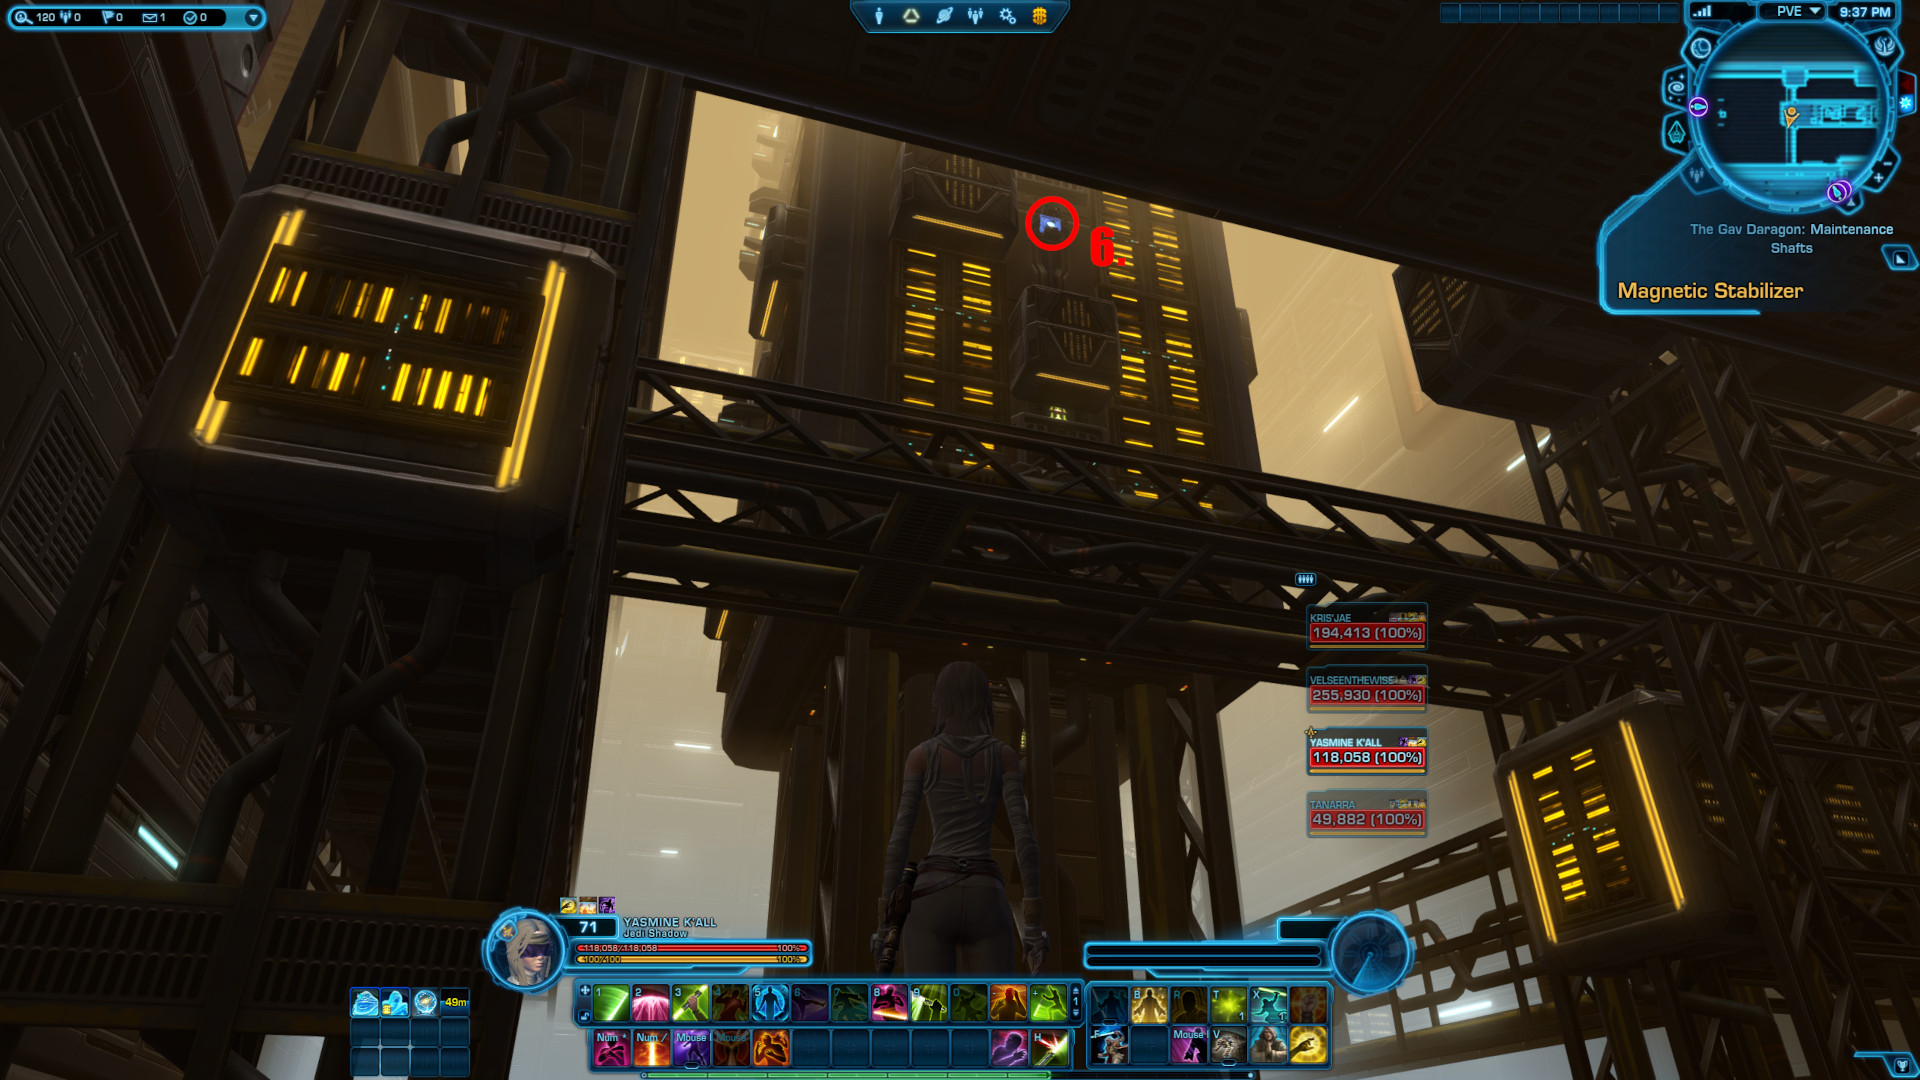
Be sure to orientate yourself to position 6. which will be behind you and up.
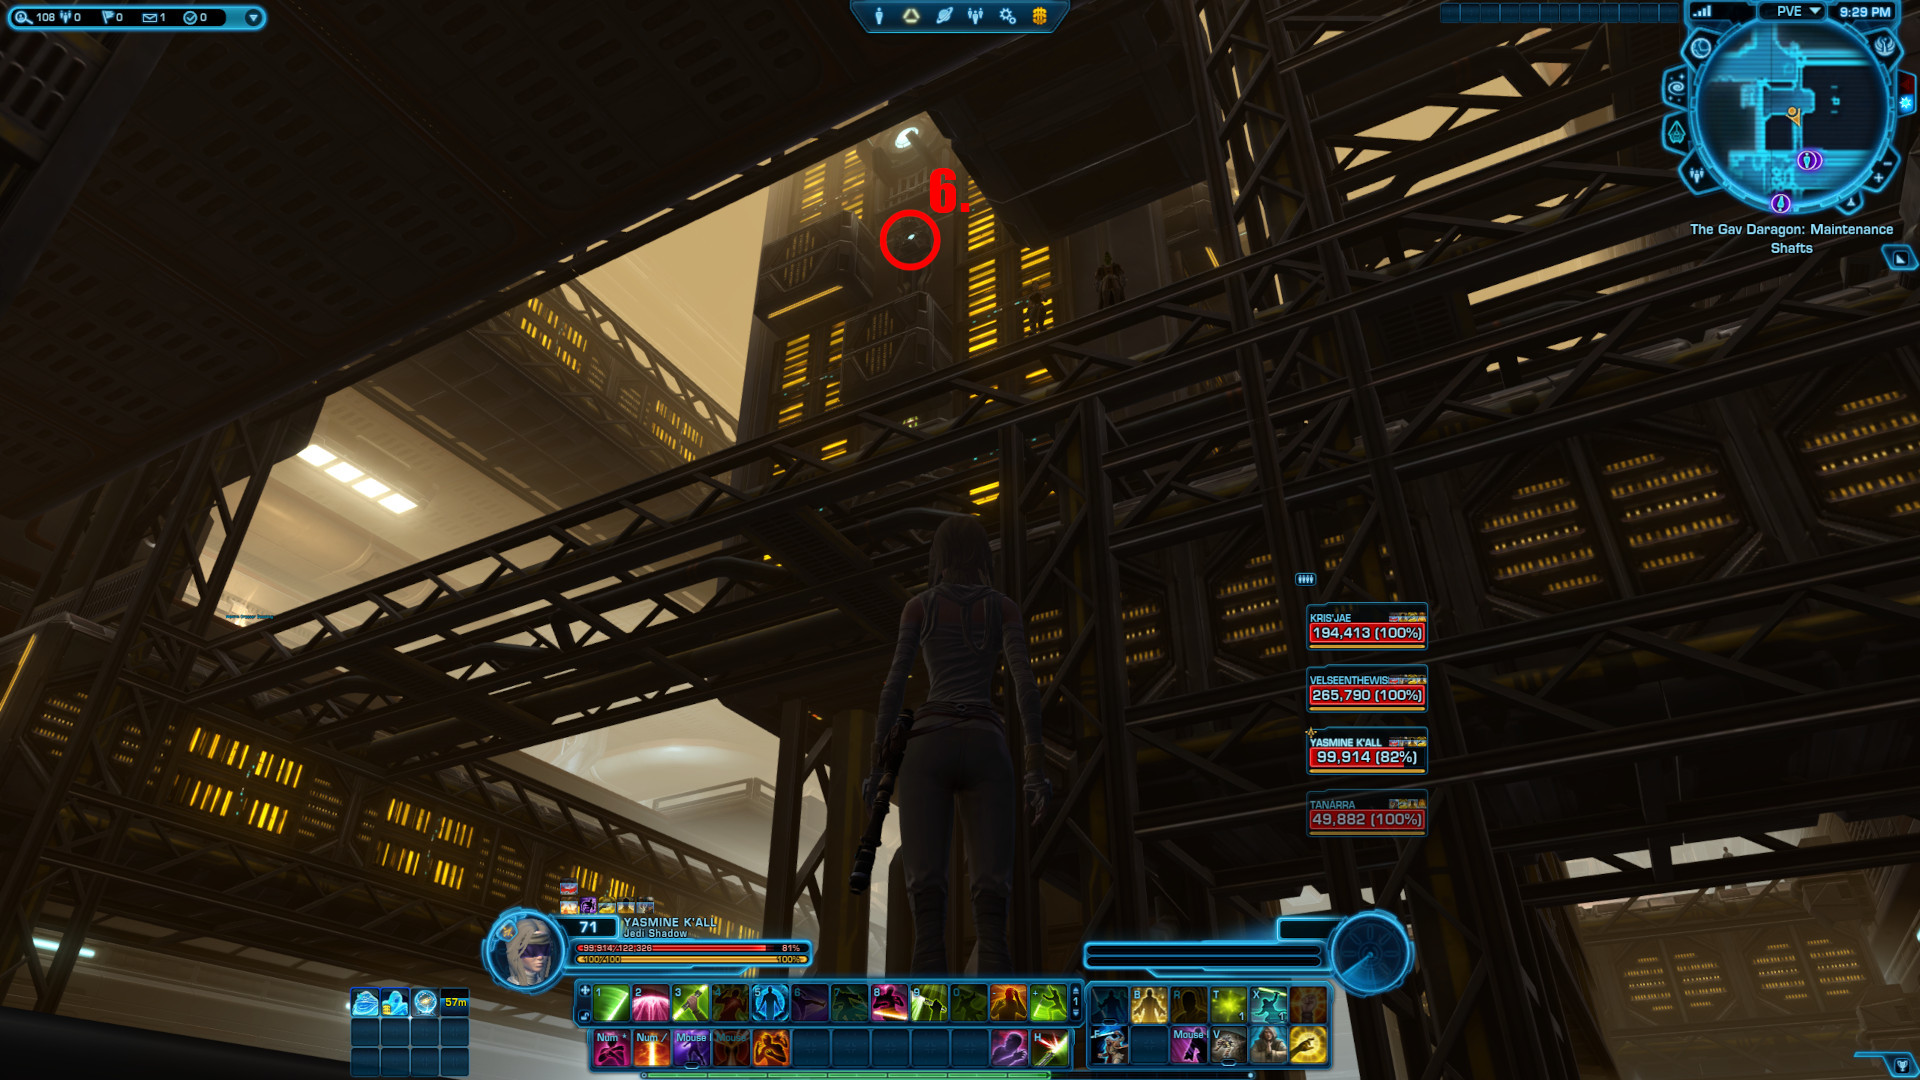
Player #3 will go to position 3. This position can be reached from the first beam you jump down on from the main platform.
Also orientate yourself to the location of position 6. which will also be behind you. Player #3 has to get down from position 3. though to be able to reach position 6.
Player #4 has the easiest job by staying on the main platform where they can see position 4.
From position 4. orientate yourself to where you need to go when the time comes. Turn around, jump down and run to the end of the large top beam until you can see position 7. to your left.
Player #1 will click their terminal to activate the Magnetic Stabilizer for Player #4 to get to position 4., while Player #2 will click their terminal to activate the Magnetic Stabilizer for Player #3 to get to position 4.
I recommend everyone start by simply getting to your position first and wait for the Control Panels to be ready again before you go for the click sequence.
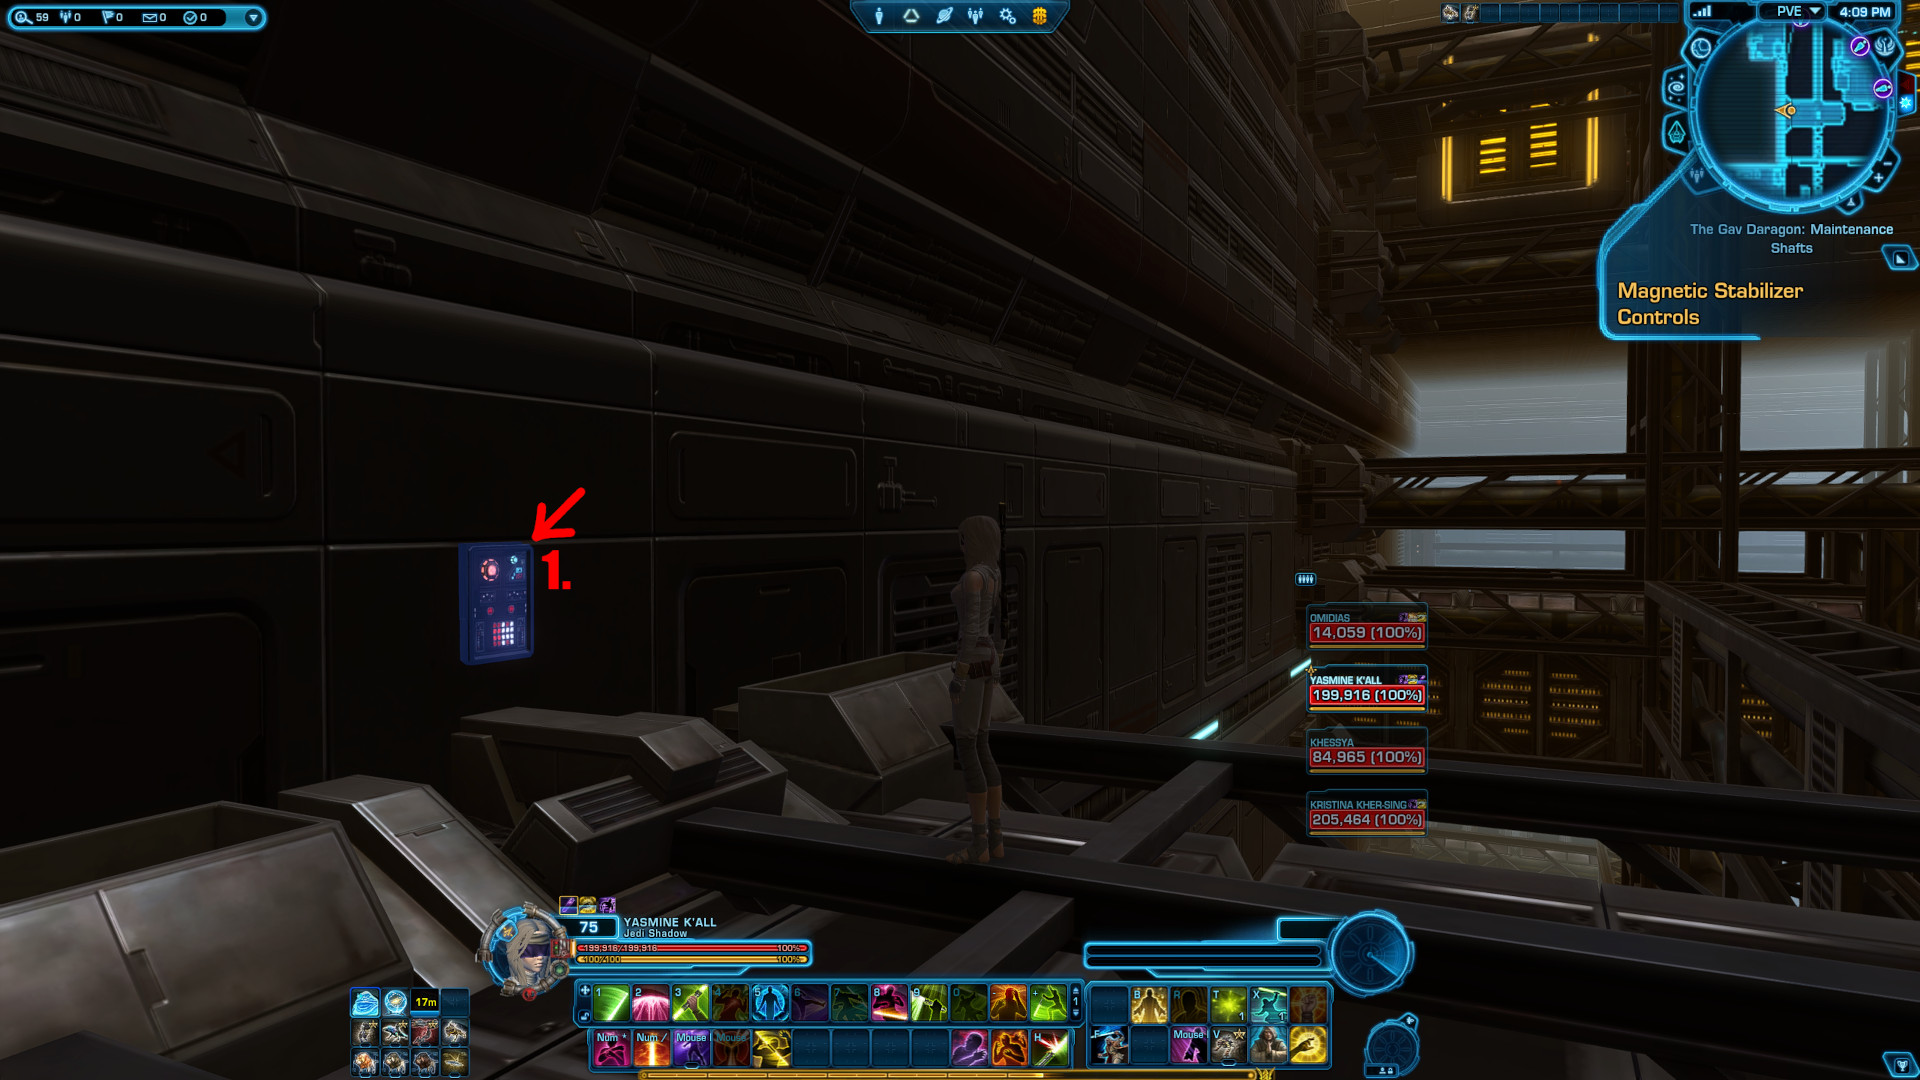
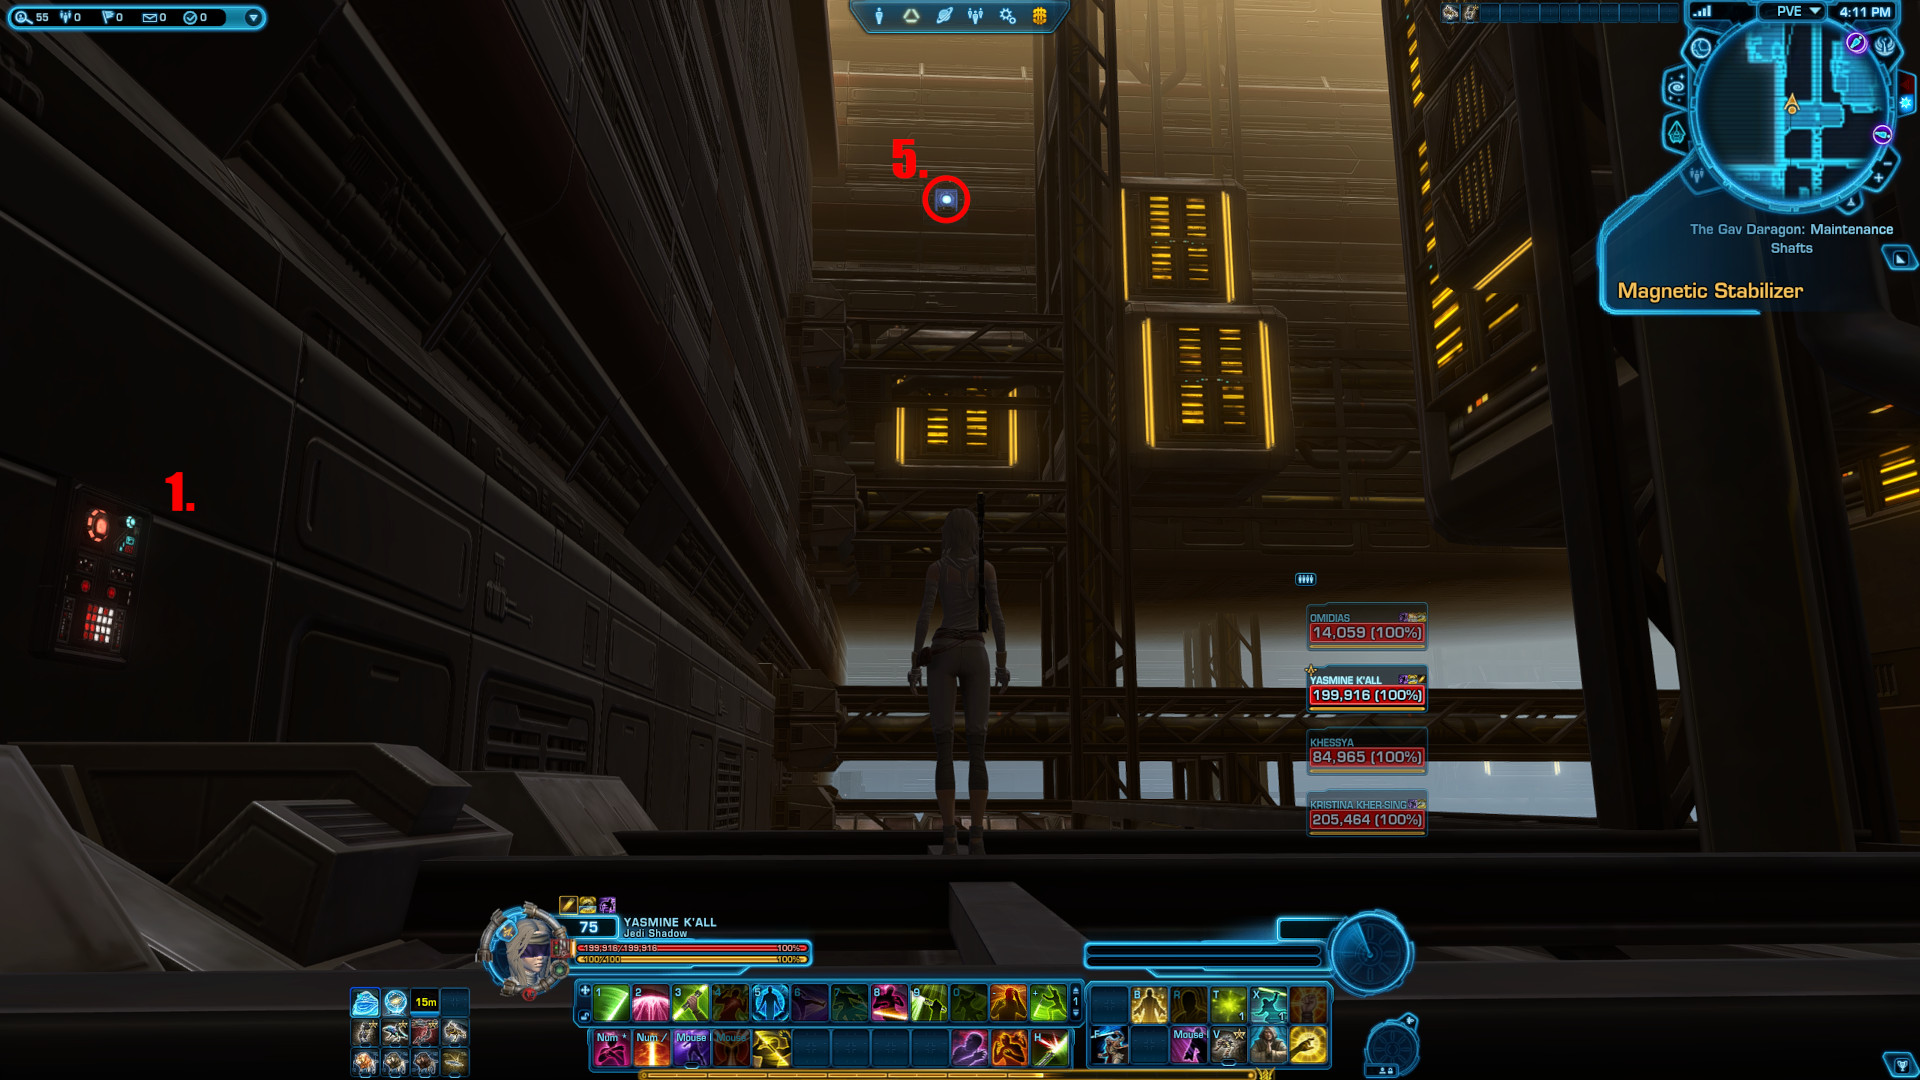
Player #1 will click 1. and face position 5. to be ready.
Player #2 will click 2. and turn to face position 6. to be ready.
Player #3 will click 3. and move down to the pipes on the right to get closer to position 6. to be ready.
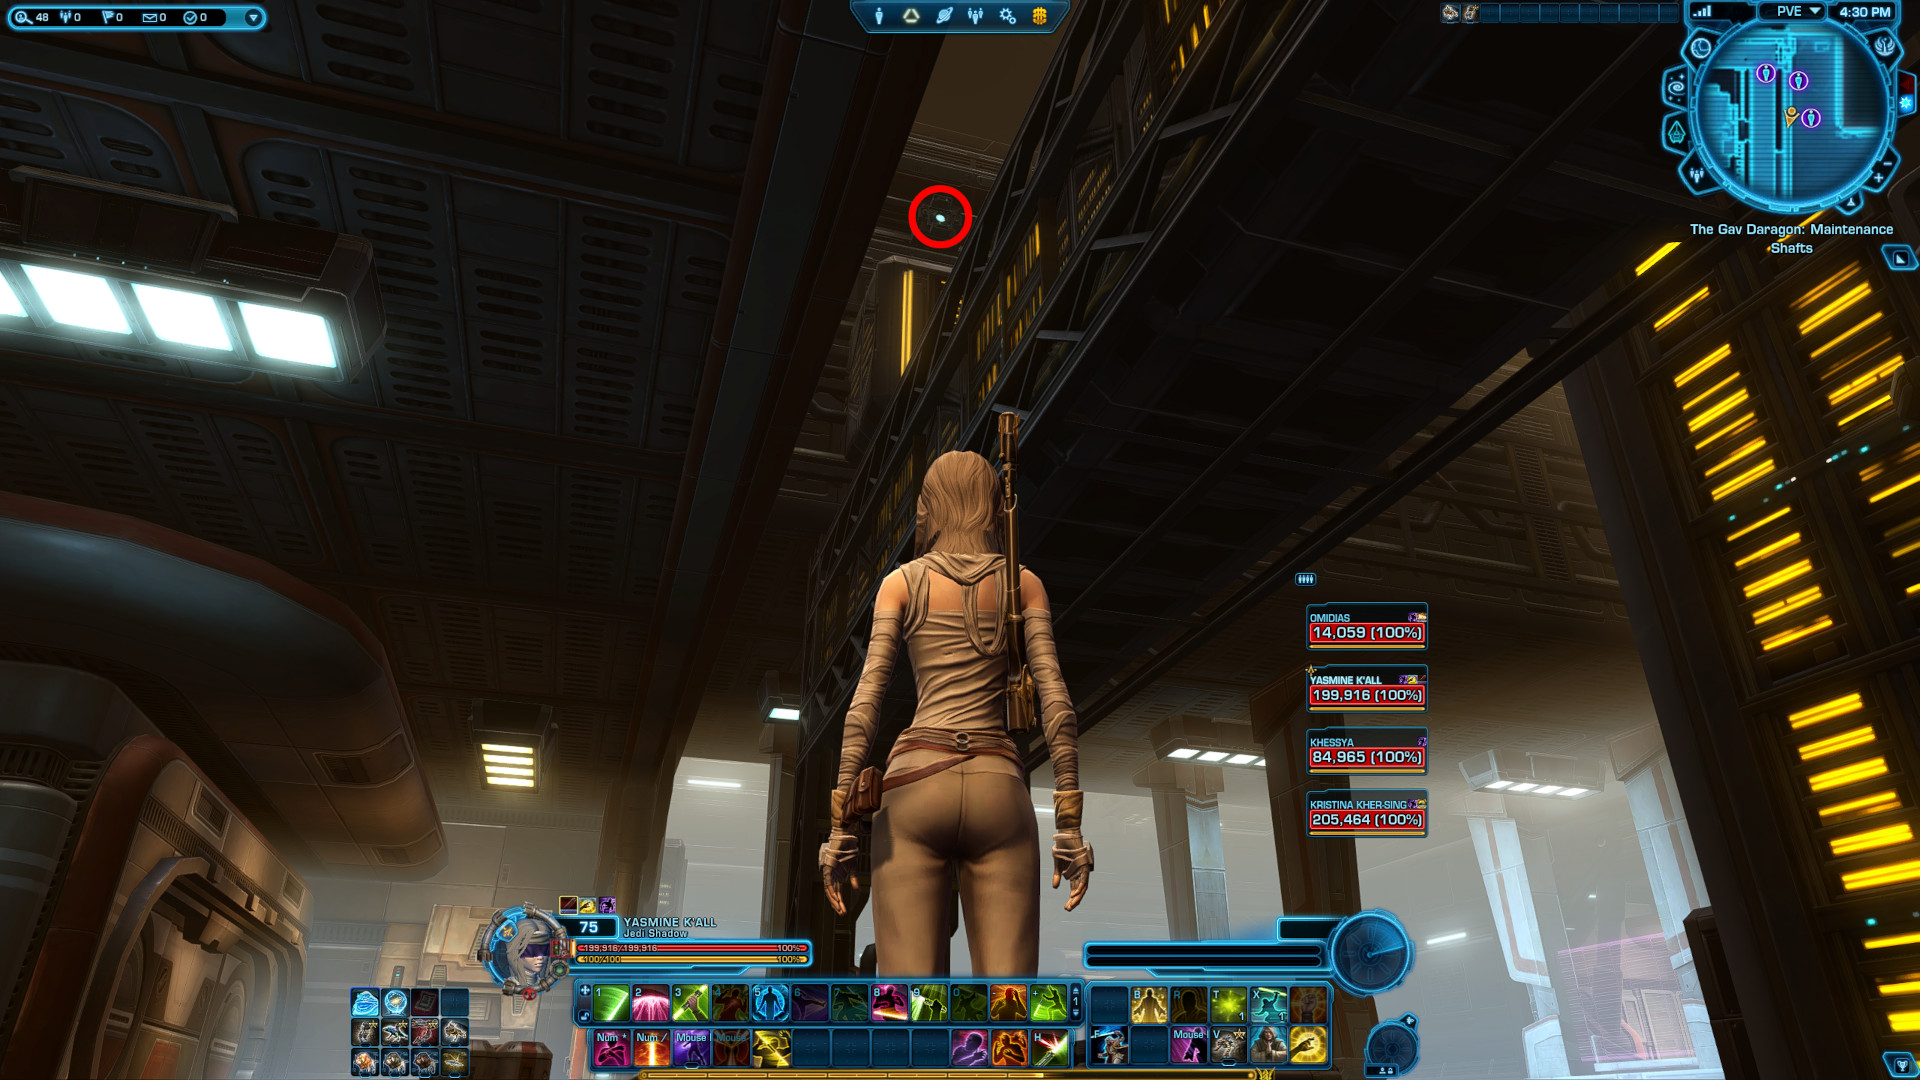
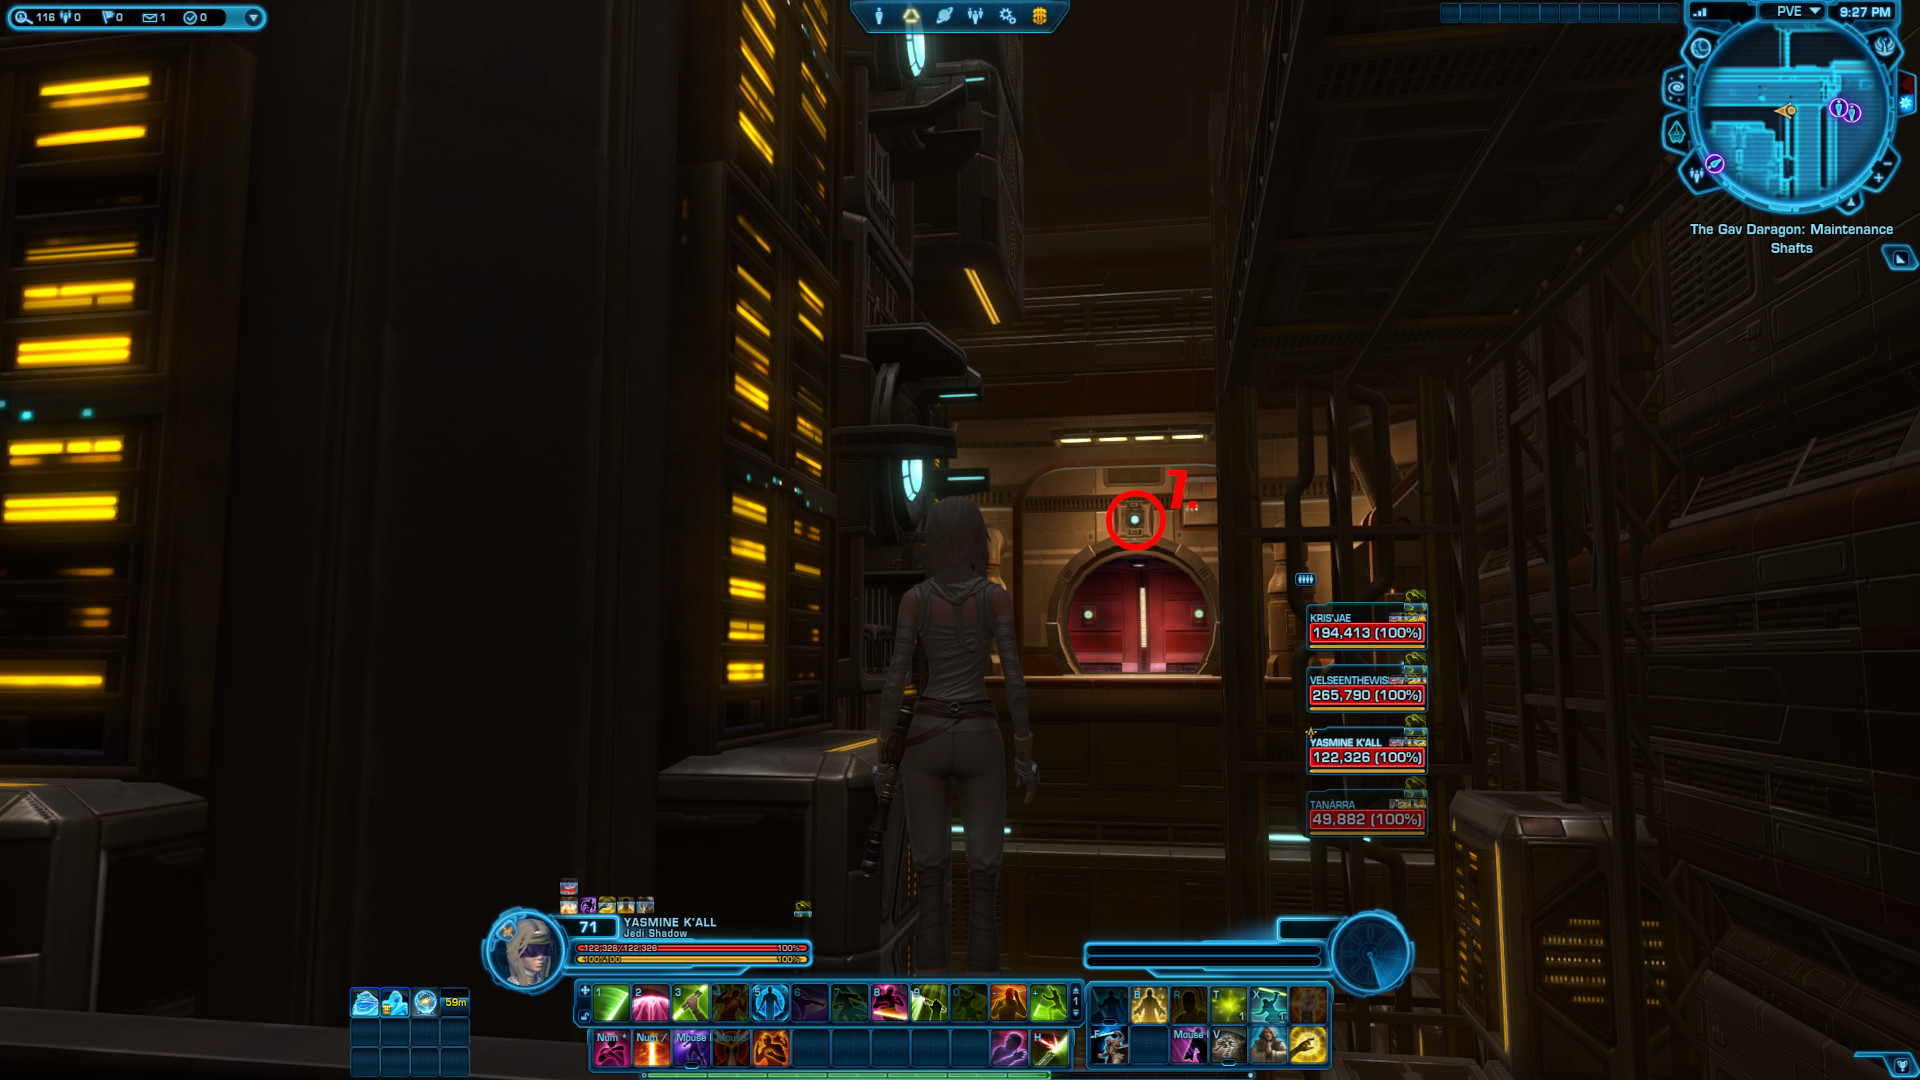
Player #4 will click 4. then jump down behind them and reach the other end to be able to reach position 7. which is above the door.
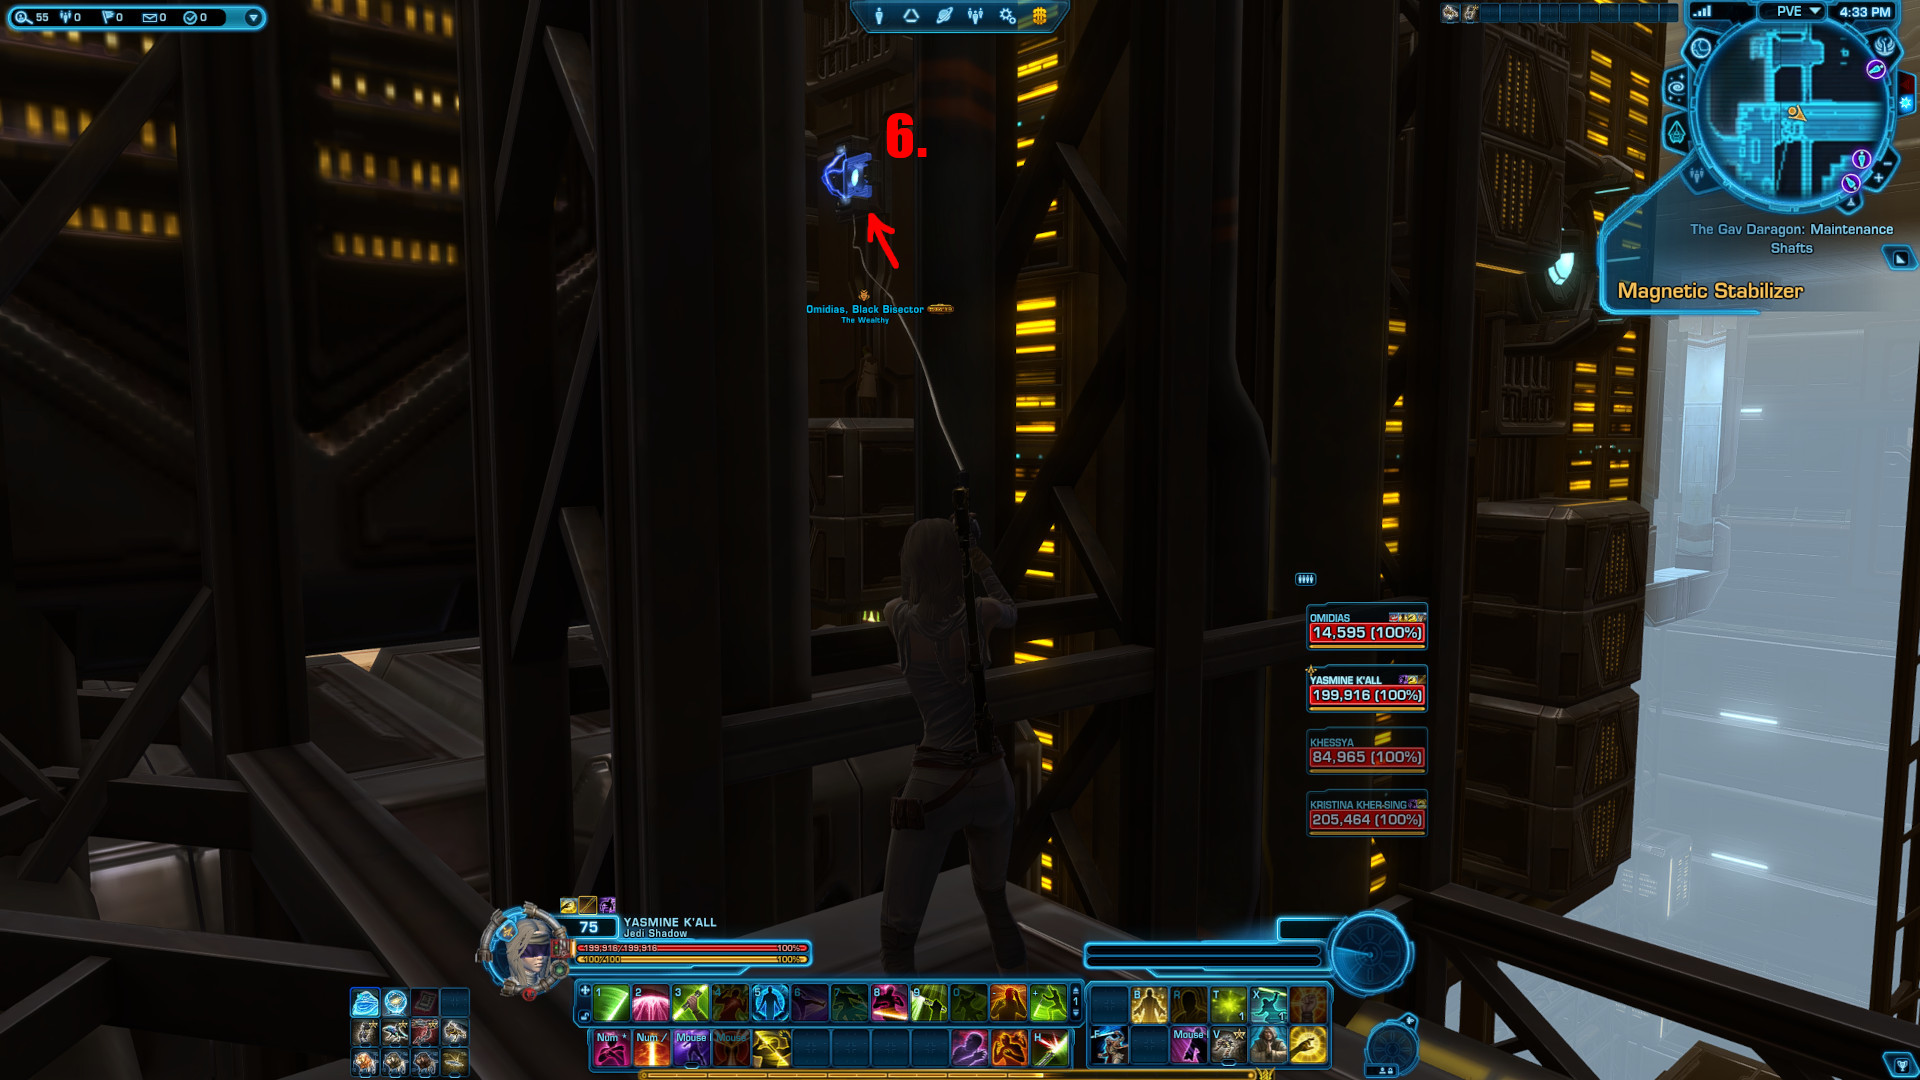
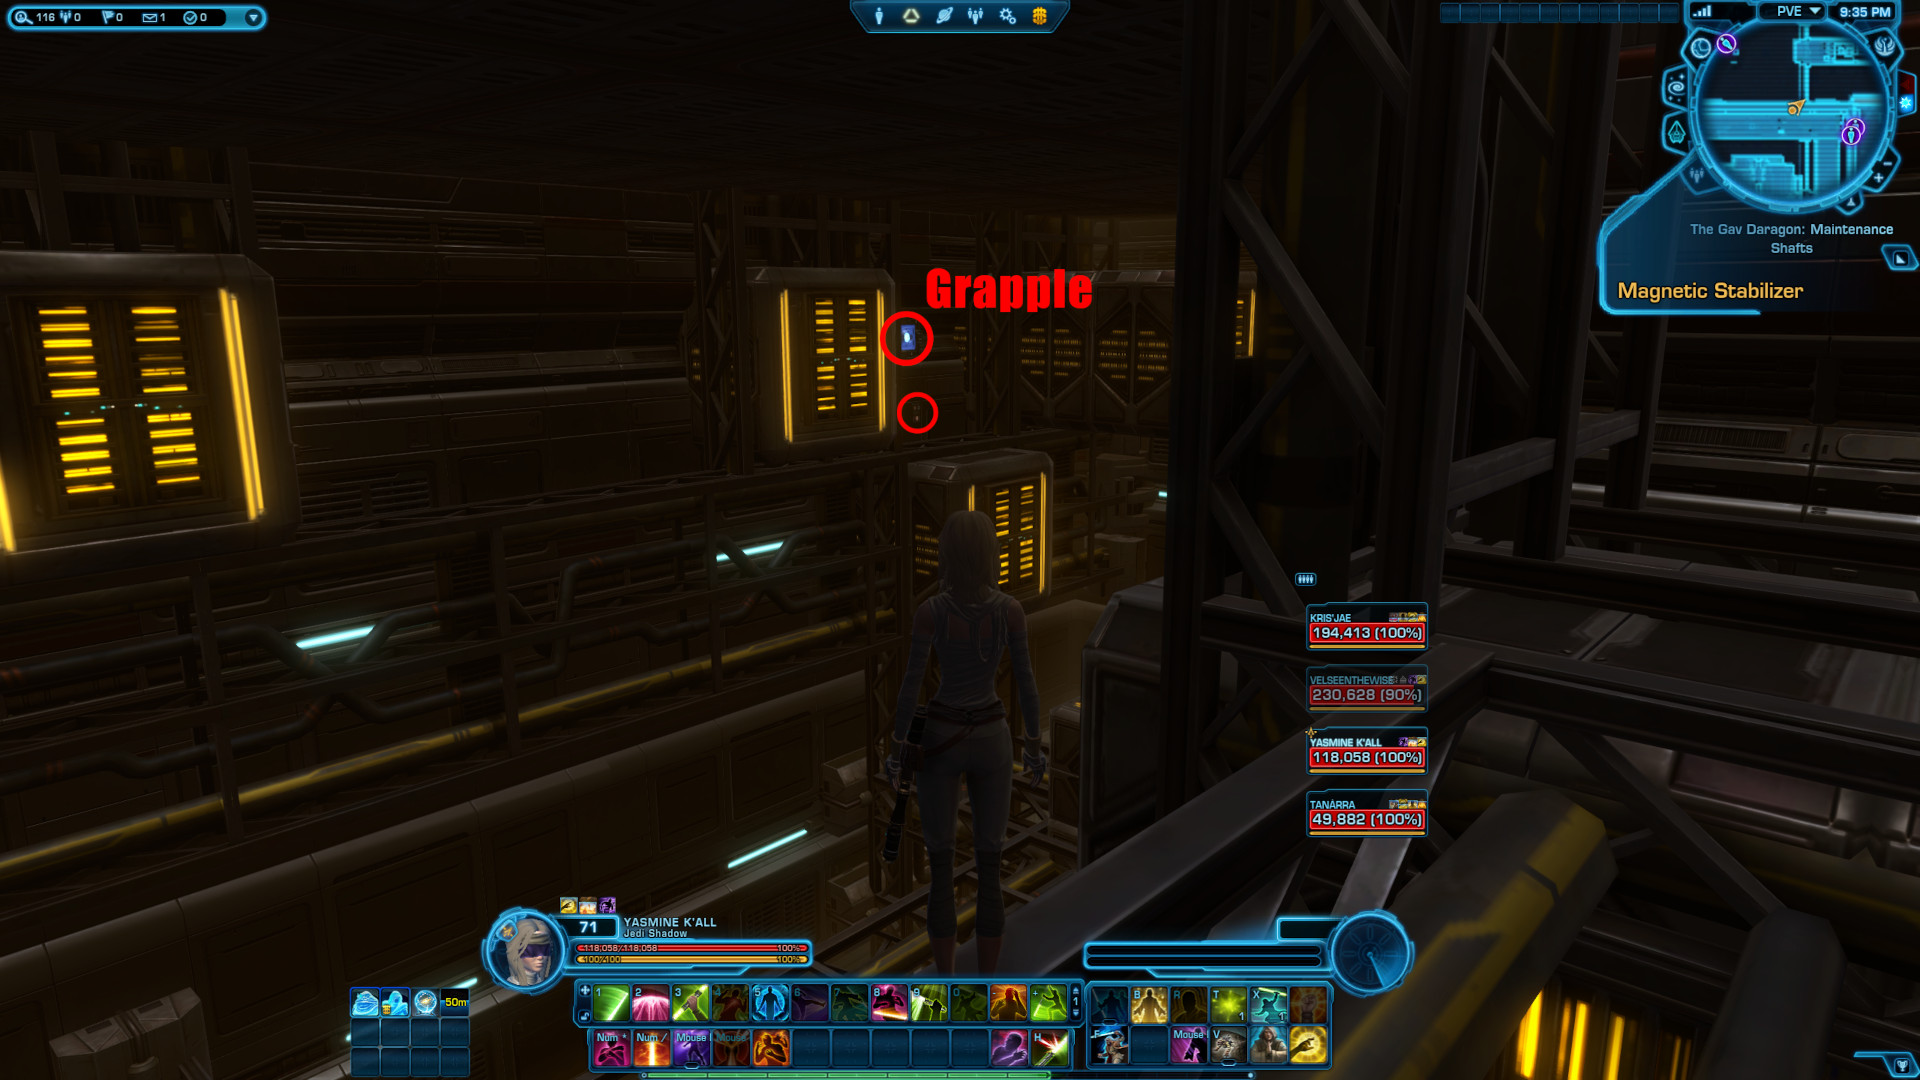
Player #1 will click the Magnetic Stabilizer and grapple to position 5. and click the final Control Panel that will activate all of the Magnetic Stabilizers.
Players #1-3 grapple to position 6., then onto position 7., while Player #4 will go directly to position 7.
If there are any additional players along, they should jump down to the pipes below to get closer to position 7. and then simply grapple to the Magnetic Stabilizer above the door as soon as it is available.
Now just run to the end of the corridor, where you will get the most awesome Datacron cutscene!
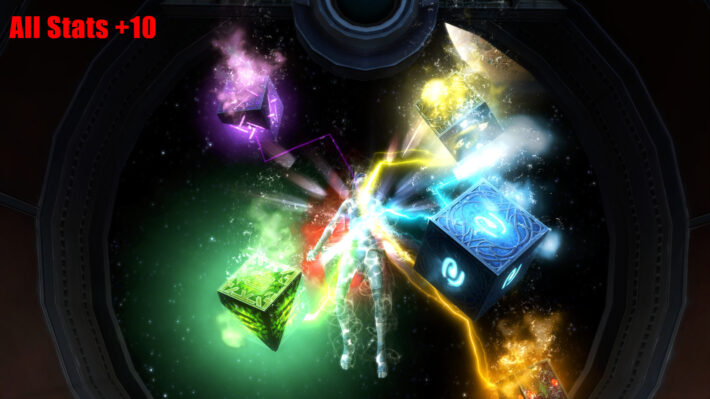
This will grant you All Stats +10 to your permanent stats.
As soon as you log to the Imperial Side, you will automatically be granted the achievement for the Imperial Fleet Datacron.